

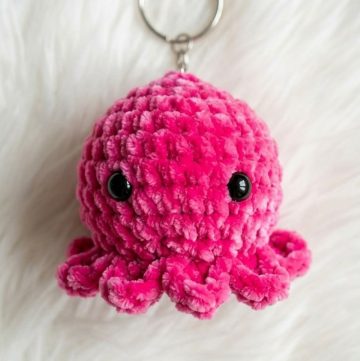
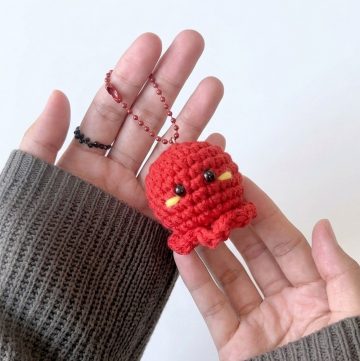
Brighten your day with this Free Crochet Octopus Amigurumi Pattern, an easy way to crochet a cute, personalized gift or home décor piece.
Add a playful touch to your crochet projects with this charming little octopus pattern that brings personality to handmade creations. This adorable pattern makes for the perfect keepsake, gift, or decorative accent, whether it’s for a child’s bedroom, a desk accessory, or part of an amigurumi collection. Featuring a unique combination of soft tentacles and a cheerful expression, it’s both visually appealing and practical in its flexibility to customize colors, size, and style.
Free Crochet Octopus Amigurumi Pattern Ideas for Your Collection

The simplicity of the steps ensures that even beginners can confidently tackle this project while developing essential crochet skills such as increases, decreases, and working with magic rings. Beyond its practicality, crocheting this pattern can be a wonderfully calming experience, promoting focus and creativity as you build each element of the octopus.
From self-taught crocheters to seasoned makers, this pattern invites everyone to experiment with textures and designs. The octopus amigurumi pattern has undeniable charm, serving as a delightful handmade gift for loved ones or a personalized addition to your creative portfolio. Whether displayed on a shelf, gifted to a friend, or part of imaginative play, this tiny pattern will spark joy and admiration wherever it finds a home.

Special Features:
- Unique Accessory: Includes crocheted headphones for a fun and modern touch.
- Beginner-Friendly: A simple pattern that introduces amigurumi basics like increases, decreases, stitching in back loops, and magic rings.
- Versatile: Can be customized with different yarn colors, eyes, or embellishments.
Difficulty Level:
Beginner to Intermediate
The tutorial employs basic techniques like single crochet, increases, and decreases, making it accessible to beginners while providing a slightly advanced challenge with the headphones and tentacles.
Step-by-Step Detailed Pattern
Materials Needed:
- Yarn: Cotton or acrylic yarn (Red color for the octopus and pink for headphone).
- Hook: Recommended size for your yarn (e.g., 3.0mm to 4.0mm).
- Toy stuffing/polyfill.
- 2 safety eyes or black embroidery thread for the eyes.
- Scissors.
- Yarn needle for sewing parts together.
- Hot glue (optional for attaching headphones).
Body
Step 1: Row 1 (Magic Ring)
- Create a magic ring and work 6 single crochets (SC) into the ring.
- Pull the yarn tightly to close the circle.
- Slip stitch (SS) into the first stitch to close the round.
Total Stitches: 6
Step 2: Row 2 (Increase Round)
- Chain 1 (CH1).
- Work 2 SC into each stitch around (this is an increase).
- SS into the first stitch.
Total Stitches: 12
3: Row 3
- CH1.
- Follow this pattern:
- 1 SC into the first stitch,
- 2 SC into the next stitch (increase).
- Repeat for 6 times.
- SS to close.
Total Stitches: 18

4: Row 4
- CH1.
- Follow this pattern:
- 1 SC into each of the next 2 stitches,
- 2 SC into the next stitch (increase).
- Repeat for 6 times.
- SS to close.
Total Stitches: 24
5: Row 5
- CH1.
- Follow this pattern:
- 1 SC into each of the next 3 stitches,
- 2 SC into the next stitch (increase).
- Repeat for 6 times.
- SS to close.
Total Stitches: 30
6: Rows 6–10 (No Increase)
- CH1.
- For each row, work 1 SC into each stitch for a total of 30 SC per row.
- SS to close each round.
7: Row 11 (Decrease Round)
- CH1.
- Follow this pattern:
- 1 SC into each of the next 3 stitches,
- Decrease: Insert hook into the front loop of the next 2 stitches, yarn over, pull through the first 2 loops, yarn over and pull through the final 2 loops (SC decrease).
- Repeat for 6 times.
- SS to close.
Total Stitches: 24
8: Row 12
- CH1. Crocheting in back loops only (BLO):
- 1 SC into each of the next 2 stitches,
- Decrease in BLO.
- Repeat for 6 times.
- At this stage, start stuffing the body with polyfill.
- SS to close.
Total Stitches: 18
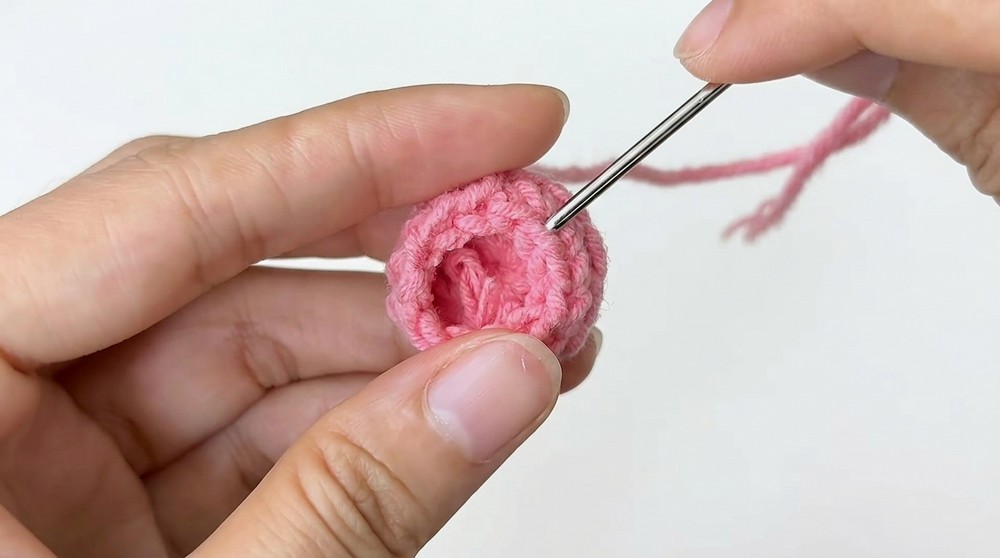
9: Row 13 (Final Row)
- CH1. Work through both loops now:
- 1 SC into the next stitch,
- Decrease in the next stitch.
- Repeat for 6 times.
- Fasten off, leaving a long tail.
- Sew the opening closed using the tail and a needle.

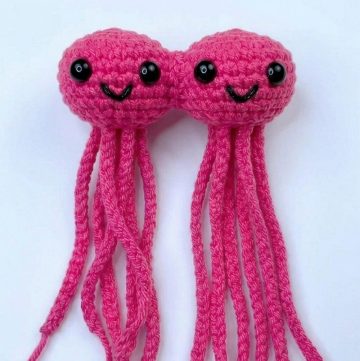
Tentacles
Step 1:
- Insert the hook into the front loops (BLO left behind in Row 12).
- Follow the pattern for each tentacle:
- CH3.
- Work 3 double crochets (DC) into the next stitch.
- Slip stitch into the next stitch to anchor the tentacle.
Repeat this pattern 12 times to create 12 tentacles.
Finishing the Tentacles:
- After completing all 12 tentacles, cut the yarn and weave in the ends.
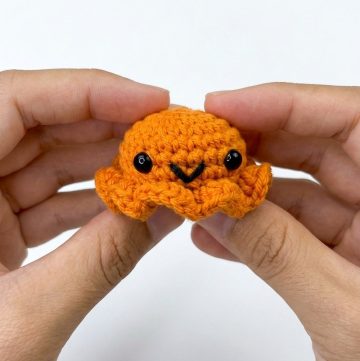
Face Details (Eyes & Mouth)
- Attach Safety Eyes securely on Row 7, leaving about 5 stitches between them.
Alternatively, you can embroider eyes for a softer look. - For the mouth, embroider a small smile on Row 8 using black thread or yarn.
Headphones
Step 1: Ear Pieces
- Magic ring: Work 12 half double crochets (HDC) into the ring.
- Pull tight and slip stitch to close.
- Work 2 additional rows by stitching 1 SC into each stitch in BLO.
- Make 2 identical pieces.
Step 2: Connecting Band
- CH12.
- Work 1 SC into each chain.
- Fasten off and sew or glue the band to both ear pieces.
Final Assembly
- Attach the headphones securely to the octopus’s head with hot glue or by sewing.
- Position them slightly above the eyes for a cute look.

Conclusion
You’ve just finished crocheting an adorable Octopus Amigurumi with Headphones! This fun and modern pattern is perfect for gifting, collecting, or adding charm to your workspace. With its unique details like tentacles and headphones, it’s bound to bring smiles to anyone who sees it.
Tips:
- Use a smaller hook size than recommended for your yarn to achieve a tighter stitch and prevent stuffing from showing.
- Mix and match colors for a personalized look.
- For a neat finish, weave in all ends carefully to avoid any loose threads.
Remarks:
This pattern combines simplicity and creativity for a unique handmade masterpiece. Have fun experimenting with colors and accessories to make your octopus truly one of a kind!
Leave a Reply