

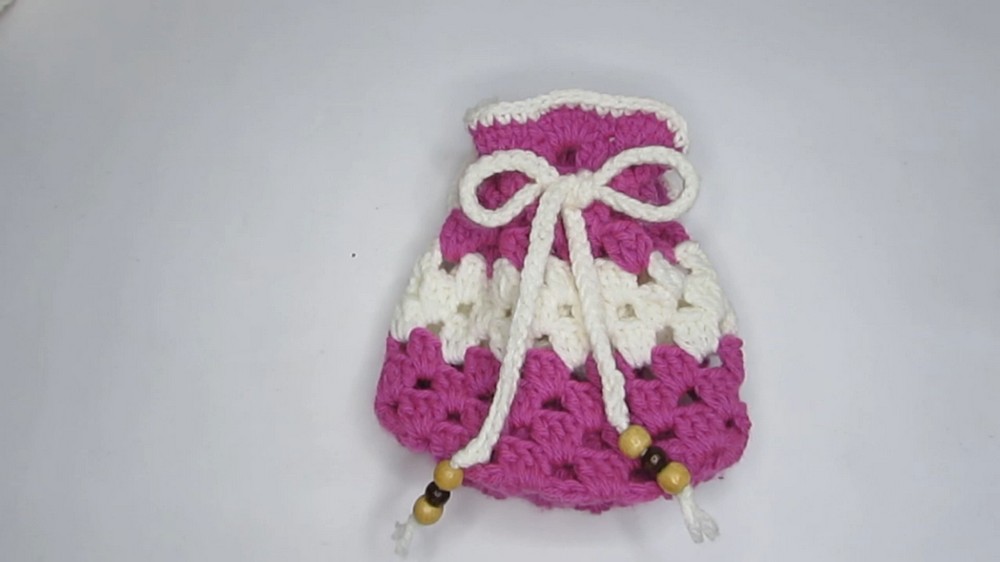
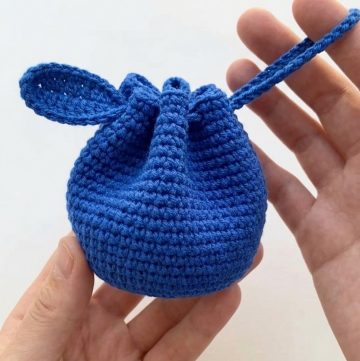
Effortlessly whip up a crochet drawstring pouch pattern that adds playful flair while safely tucking away coins trinkets or little surprises.
The best thing you can make with your own hands is a small, soft bag that keeps your special things safe. With easy steps and colorful yarn, anyone can learn to do this, even if it’s your first time. When you use a crochet drawstring pouch pattern, you can create a bag that closes tightly by just pulling the string. You can choose your favorite colors and add little shapes or designs to make each bag unique.
Luxe Crochet Drawstring Pouch Pattern with Elegant Details
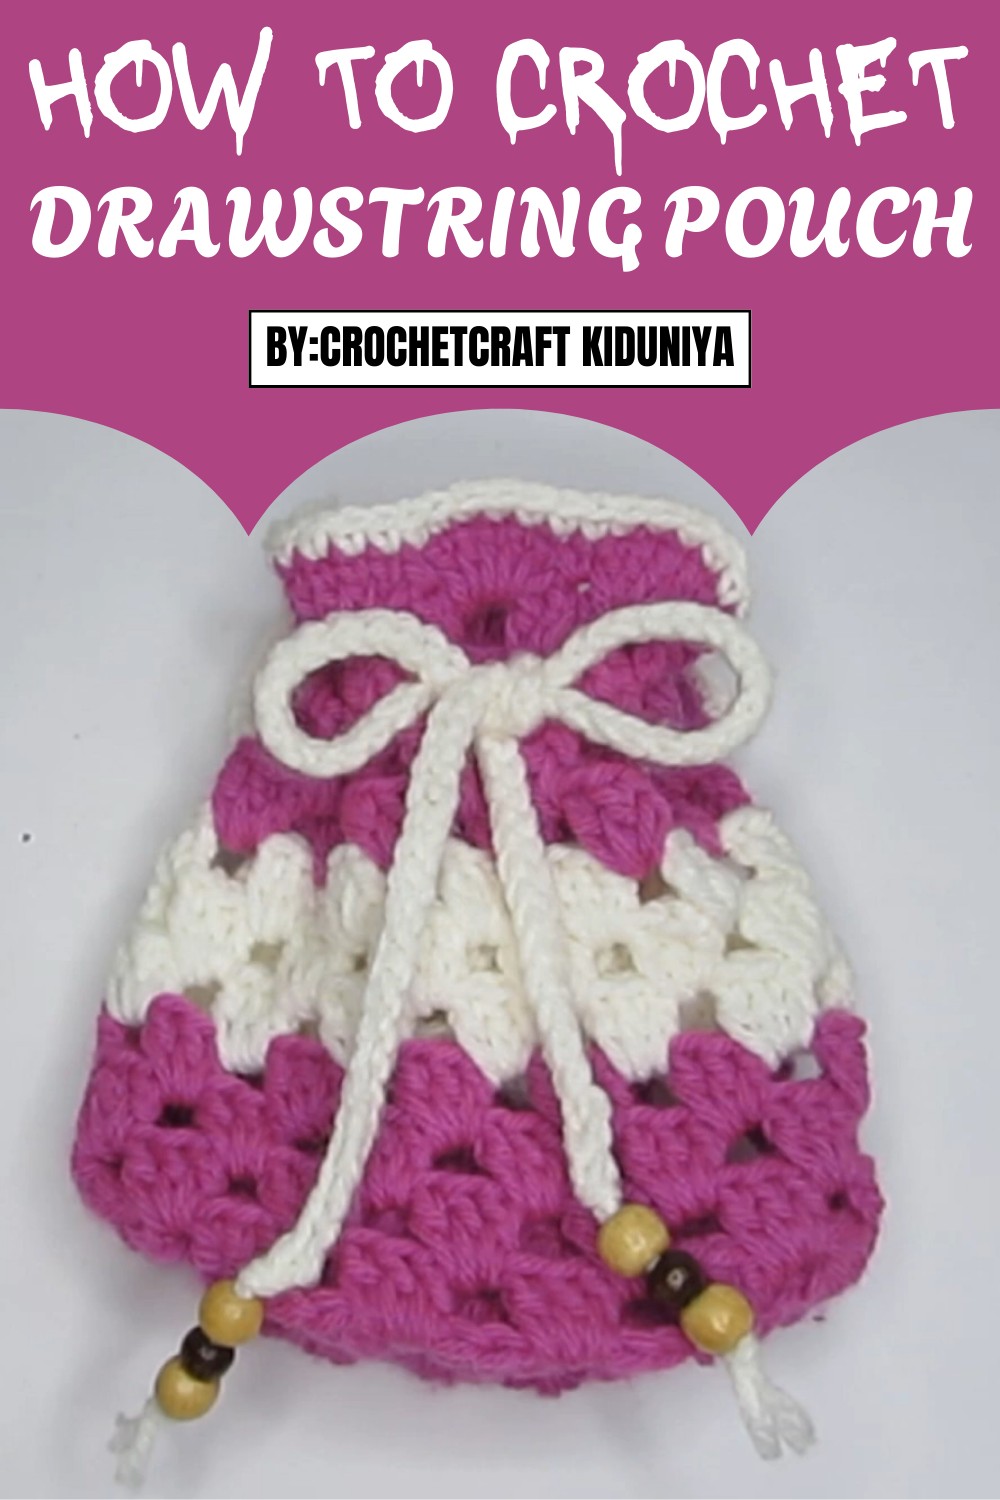
People love using this pouch for coins, keys, beads, and even giving gifts. This little bag is easy to make and very useful for everyday life. When you give it to someone, it shows your care and makes them smile. Try making your own pouch—you will see how simple, fun, and beautiful it is.
Materials
- Yarn: Light worsted weight cotton yarn (you may use acrylic cotton blend for more durability; color(s) of your choice)
- Crochet Hook: 5mm (H-8) crochet hook
- Notions (optional):
- Tapestry needle (for weaving in ends)
- Decorative button, beads, or ribbon for embellishment or closure
Key Abbreviations
| Abbreviation | Meaning |
|---|---|
| ch | chain |
| sl st | slip stitch |
| sc | single crochet |
| hdc | half double crochet |
| dc | double crochet |
| st(s) | stitch(es) |
| rep | repeat |
| rnd | round |
| inc | increase (2 sts in 1 st) |
| dec | decrease (sc 2 sts together) |
| FO | fasten off |
Notes & Special Instructions
- Pattern is written in US crochet terminology.
- The pattern is for a small pouch. You may increase the number of foundation chains/rounds for a larger pouch.
- The pouch is worked in the round unless otherwise specified.
- Color can be changed at the start of any round to create stripes or color-block effects.
- Gauge is not critical for this project.
Pattern
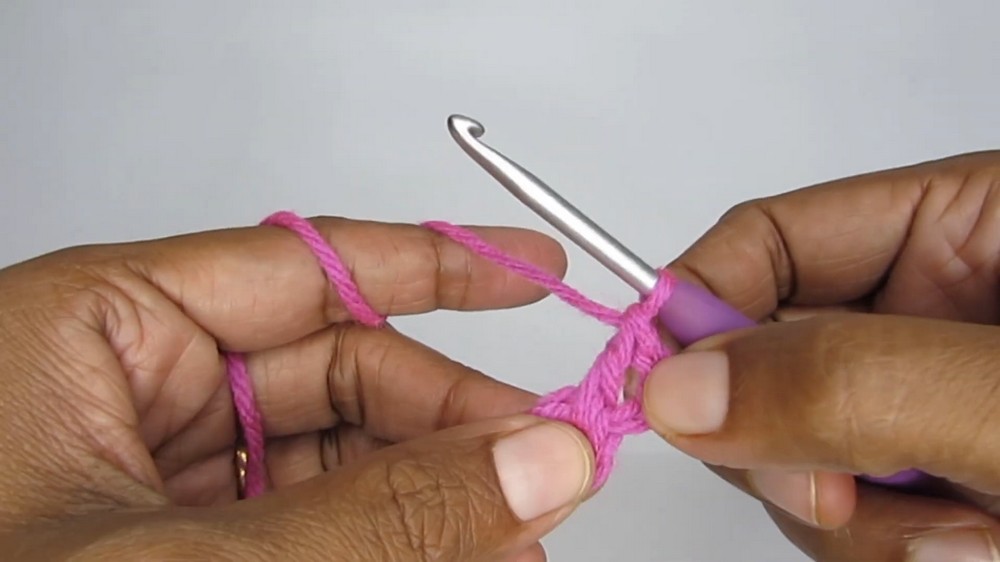
Step 1: Foundation
- Ch 26 (Or desired width of pouch; must be a number fitting your phone or object plus 1 for turning).
- Rnd 1: Sc in 2nd ch from hook and in next 24 chs (till end), 3 sc in last ch (this makes a rounded corner). Working along other side of the foundation chain, sc in next 24 chs, 2 sc in first ch; sl st to first sc to join. (54 sts total)This forms an oval base.
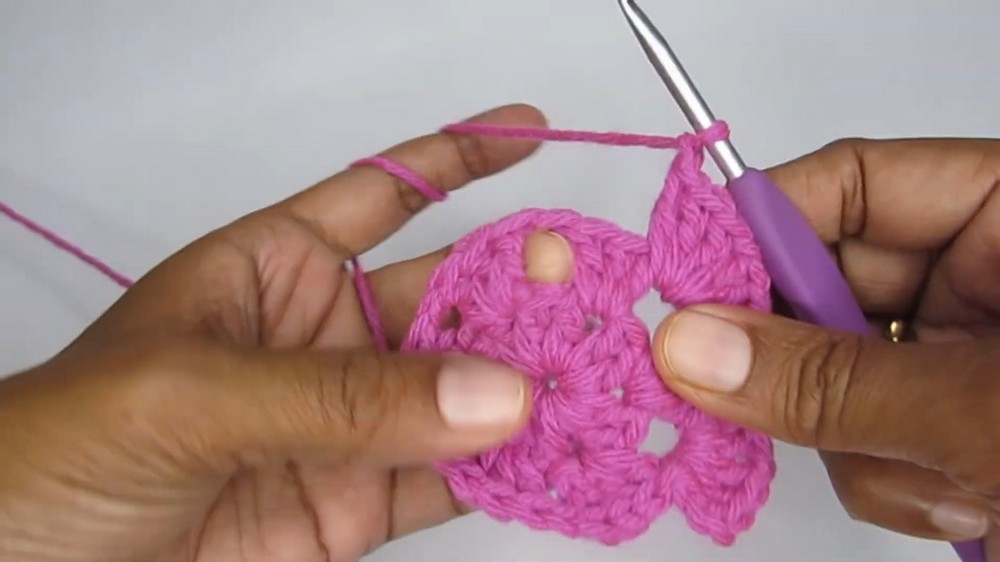
Step 2: Sides
- Rnd 2: Ch 1, sc in same st, sc in next 24 sts, inc 3 sc in corner, sc in 24 sts, inc 2 sc in end; sl st to join. (60 sts)
- Rnd 3: Ch 1, sc in each st around; sl st. (60 sts)
- Rnd 4-10 (or to desired height): Rep Rnd 3. Optionally, you may switch to hdc or dc for a lacier pouch, or alternate colors every couple rounds.Check the height; for a small pouch about 10 rounds is perfect.
Step 3: Border and Finishing
- Last Rnd (Border): (optional scalloped edge) Ch 1, skip 1 st, 5 dc in next st, skip 1 st, sl st in next st; rep * to * around, sl st to join.
- Fasten off, weave in all ends.
Step 4: Closure (Optional)
- If desired, sew a button on one side and create a ch loop with yarn on the opposite side for closure.
- Alternatively, weave a ribbon through stitches near the top to act as a drawstring.
Conclusion
Your crochet pouch is complete! You’ve learned to work an oval base, build up smooth sides in the round, add a decorative border, and finish with a closure of your choice. Use this pouch for storing small items, earphones, small cosmetics, or as a cute gift bag.
Pattern Correction & Tip
- Correction: If your pouch tilts or loses shape, ensure you’re increasing correctly at the corners and sides. Adjust stitch count as needed.
- Tip: For a stronger pouch, use two strands of yarn held together or use a slightly tighter tension. Blocking with a steam iron will help your pouch keep its shape.


Leave a Reply