

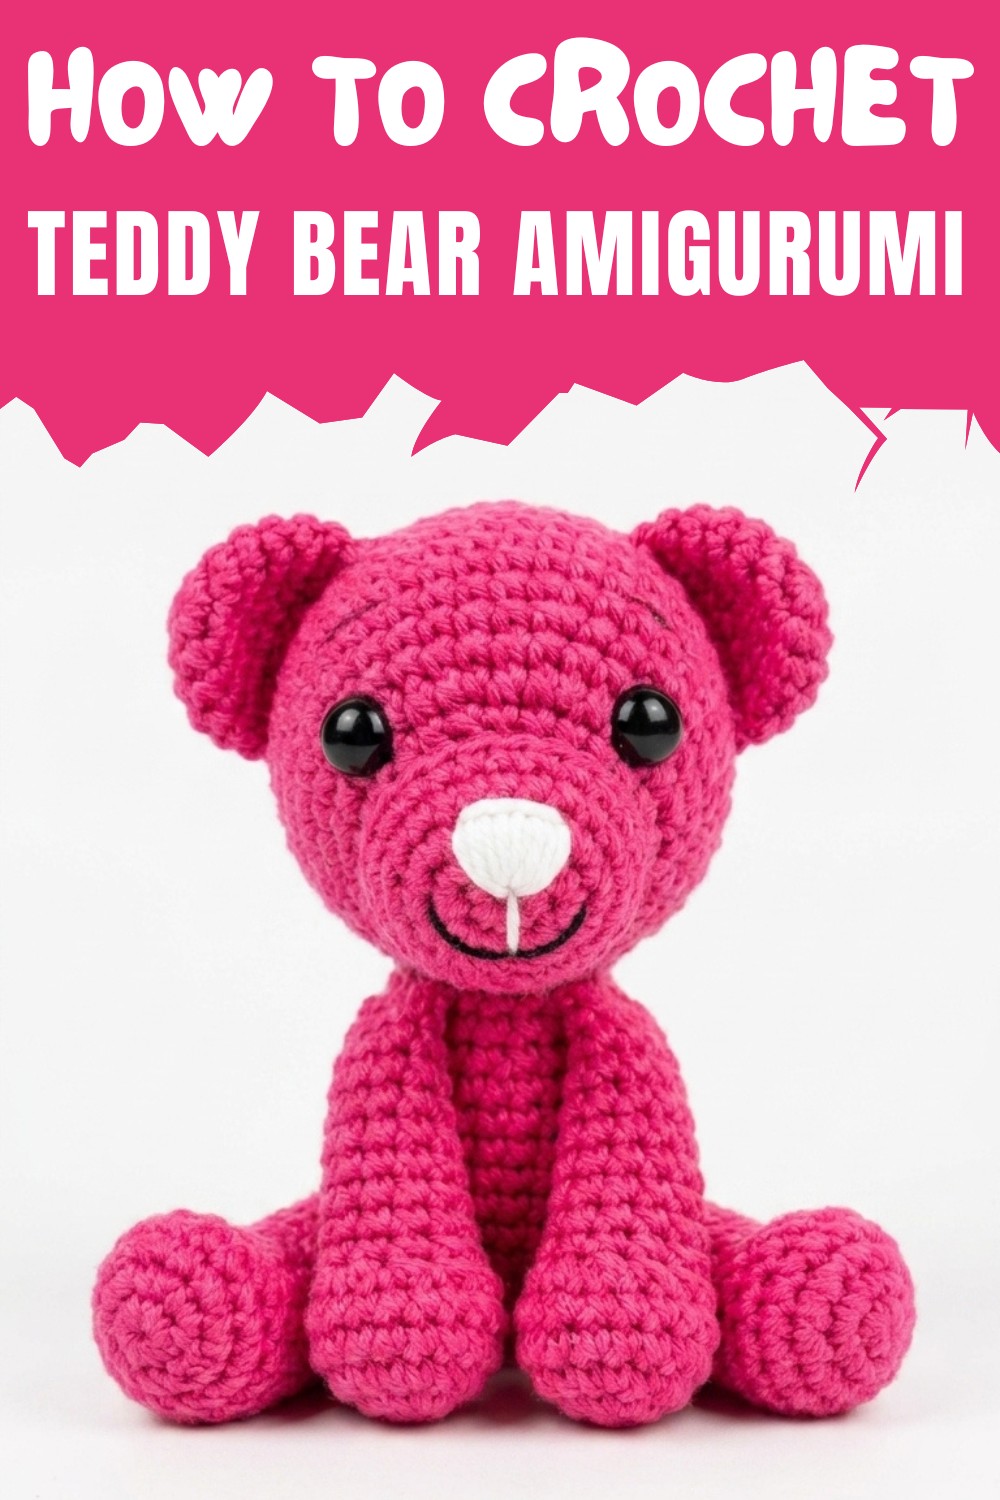
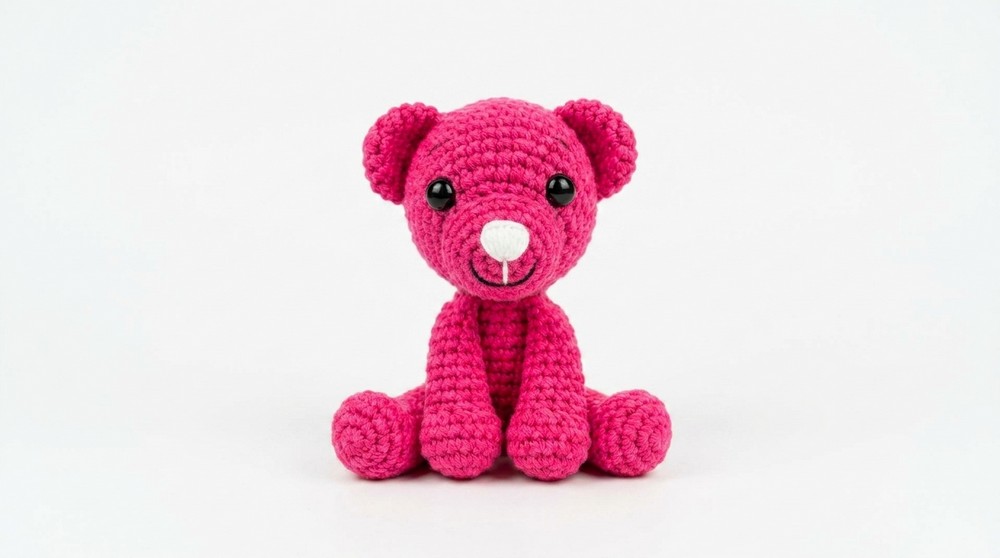
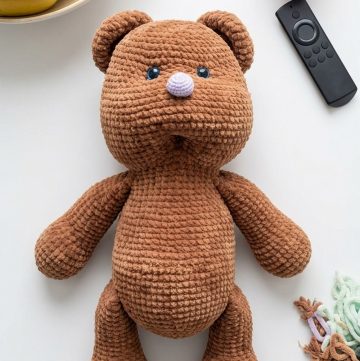
Follow this Free Crochet Teddy Bear Amigurumi Pattern to stitch a charming teddy bear, perfect for gifting, cuddling, or brightening up your personal space.
Nothing is cuter than a soft, handmade teddy bear that’s full of love and charm. Using a Free Crochet Teddy Bear Amigurumi Pattern, you can easily crochet a cuddly companion that’s perfect as a gift, keepsake, or decoration. The pattern produces an adorable teddy bear with round ears, chubby limbs, and a cozy texture, making it look irresistibly huggable. Whether you want to surprise a child, add a sentimental touch to someone’s day, or create a delightful centerpiece for your crafts, this teddy bear is ideal for all occasions.
Handmade Crochet Teddy Bear Amigurumi: Easy Pattern
The process is simple to follow, with basic stitches and clear steps even beginners can enjoy. You can also customize your teddy bear with different yarn colors, ribbons, or accessories to match your style or theme. Its timeless design and soft appearance ensure it’s a treasured item for years to come.
Handmade creations like this bring warmth and thoughtfulness that store-bought toys can’t replicate. With this pattern, you’ll not only create something beautiful but also experience the joy of making a heartfelt gift.
Crochet Playful Puppy Pattern
Materials Needed
- Yarn:
- Light pink 2mm yarn for the body and head.
- Optional: A contrasting color for details like ears or nose, if desired.
- Hook:
- 2mm crochet hook.
- Stuffing:
- Siliconized cotton or polyfiber stuffing for the body, legs, and head.
- Safety Eyes:
- 8mm round eyes.
- Other Tools:
- Tapestry needle for sewing pieces together.
- Scissors for cutting yarn.
Skill Level
- Intermediate to Advanced: Requires familiarity with working in the round, increasing, decreasing, and sewing amigurumi pieces together.
Key Abbreviations (US Crochet Terminology)
- ch: Chain
- sc: Single crochet
- inc: Increase (2 sc in the same stitch)
- dec: Decrease (single crochet decrease over 2 stitches)
- slst: Slip stitch
- R: Round
- st(s): Stitch(es)
Special Notes
- General Instructions:
All parts are worked in continuous rounds unless otherwise specified. Use a stitch marker to keep track of the beginning of the round. - Tension Control:
Crochet tightly to prevent stuffing from showing through the stitches. - Assembly:
All pieces will be sewn together after crocheting. Position neatly to ensure proper balance.
Step-by-Step Pattern
Body
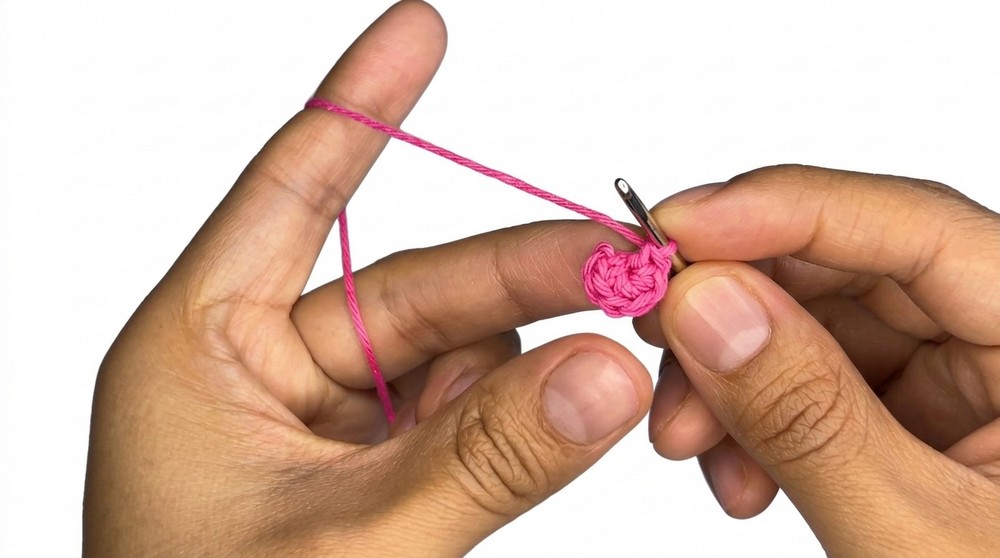
Round 1:
- Make a magic ring and inside, crochet 6 sc.
- Close the ring tightly, and finish the round with a slst to the first st.
- Total: 6 sts.
Round 2:
- Ch 1, and work 1 inc in each stitch around.
- Total: 12 sts.
Round 3:
- Ch 1, crochet (1 sc, 1 inc) around.
- Total: 18 sts.
Round 4:
- Ch 1, crochet (2 sc, 1 inc) around.
- Total: 24 sts.
Round 5:
- Ch 1, crochet (3 sc, 1 inc) around.
- Total: 30 sts.
Rounds 6–7:
- Ch 1, crochet 1 sc in each st around.
- Total: 30 sts per round.
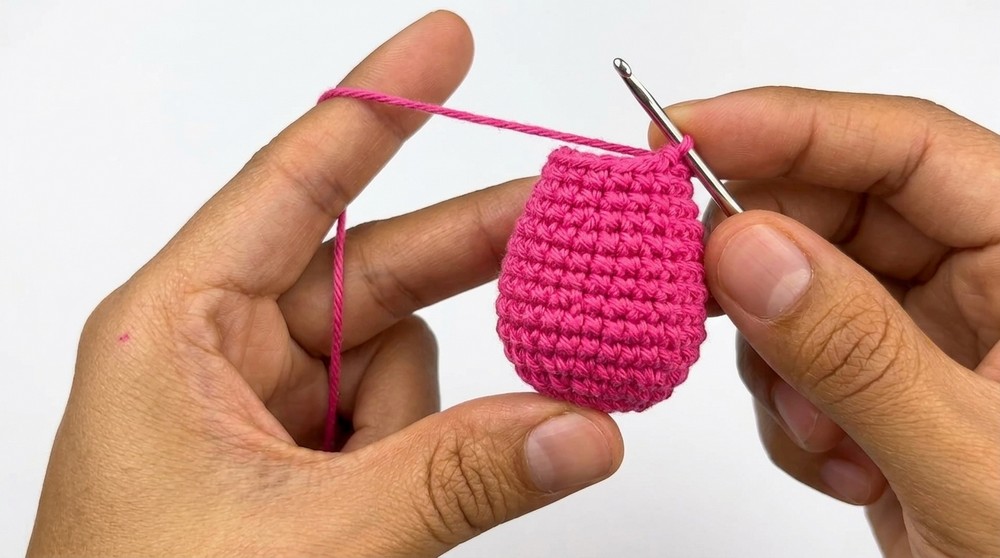
Round 8:
- Ch 1, crochet (1 dec, 3 sc) around.
- Total: 24 sts.
Rounds 9–11:
- Crochet 1 sc in each st around for these rounds.
- Total: 24 sts per round.
Round 12:
- Ch 1, crochet (1 dec, 2 sc) around.
- Total: 18 sts.
Rounds 13–14:
- Crochet 1 sc in each st around.
- Total: 18 sts per round.
Round 15:
- Crochet (1 sc, 1 dec) around.
- Total: 12 sts.
Round 16:
- Crochet 1 sc in each st around, maintaining 12 sts.
- Stuff the body firmly with siliconized cotton.
Head
Round 1:
- Make a magic ring, crochet 6 sc inside it, and join with a slst.
- Total: 6 sts.
Round 2:
- Ch 1, increase in every st (6 inc).
- Total: 12 sts.
Round 3:
- Crochet (1 sc, 1 inc) around.
- Total: 18 sts.
Round 4:
- Crochet (2 sc, 1 inc) around.
- Total: 24 sts.
Round 5:
- Crochet (3 sc, 1 inc) around.
- Total: 30 sts.
Rounds 6–13:
- Crochet 1 sc in each st around, maintaining 30 sts.
- Insert the safety eyes between R7 and R8:
- Place them 9 sts apart.
Round 14:
- Crochet (4 sc, 1 dec) around.
- Total: 24 sts.
Round 15:
- Crochet (3 sc, 1 dec) around.
- Total: 18 sts.
Round 16:
- Crochet (2 sc, 1 dec) around.
- Total: 12 sts.
Round 17:
- Crochet (1 sc, 1 dec) around.
- Total: 6 sts.
- Stuff the head firmly and close the opening.
Front Legs (Make 2)
Round 1:
- Make a magic ring, crochet 6 sc inside it, and join with a slst.
Round 2:
- Crochet 6 inc (2 sc in each st).
- Total: 12 sts.
Round 3:
- Crochet (1 sc, 1 inc) around.
- Total: 18 sts.
Rounds 4–12:
- Crochet 1 sc in each st around, maintaining 18 sts.
- Stuff lightly and close the top.
Back Legs (Make 2)
Rounds 1–3:
- Follow the same instructions as the front legs to build up to 18 sts.
Round 4:
- Crochet (2 sc, 1 dec) around.
- Total: 12 sts.
Rounds 5–14:
- Crochet 1 sc in each st around, maintaining 12 sts.
- Stuff lightly and leave the top open for sewing.
Ears (Make 2)
Round 1:
- Make a magic ring, crochet 6 sc inside it, and join with a slst.
Round 2:
- Crochet (1 sc, 1 inc) around.
- Total: 9 sts.
Rounds 3–5:
- Crochet 1 sc in each st around, maintaining 9 sts.
Tail
Round 1:
- Make a magic ring, crochet 5 sc inside it, and join with a slst.
Rounds 2–3:
- Crochet 1 sc in each st around.
Round 4:
- Crochet (4 sc, 1 inc).
- Total: 6 sts.
Rounds 5–10:
- Crochet 1 sc in each st around, maintaining 6 sts.
Assembly Instructions
- Head and Body:
- Sew the head onto the neck portion of the body.
- Legs:
- Attach the front legs to the upper part of the body at an angle.
- Attach the back legs slightly lower.
- Ears:
- Fold slightly at the base and sew onto the sides of the head.
- Tail:
- Attach the tail to the back center of the body.
- Nose (Optional):
- Crochet a small oval or circle using a magic ring and sew it to the middle of the face.

Conclusion
Your playful puppy amigurumi is now complete! This adorable project makes a perfect handmade toy or display item. Experiment with different colors and customize your puppy with additional accessories like a collar or a bow.
Pattern Corrections
- Ensure the number of stitches matches at the end of each round for consistency.
- Use stitch markers to avoid losing track of the first stitch in rounds.
Tips
- Keep yarn tension tight to create a neat and dense fabric.
- Use safety eyes that are securely fastened to prevent detached pieces.
- Adjust stuffing levels to prevent overstuffing while maintaining the intended shape.
Leave a Reply