

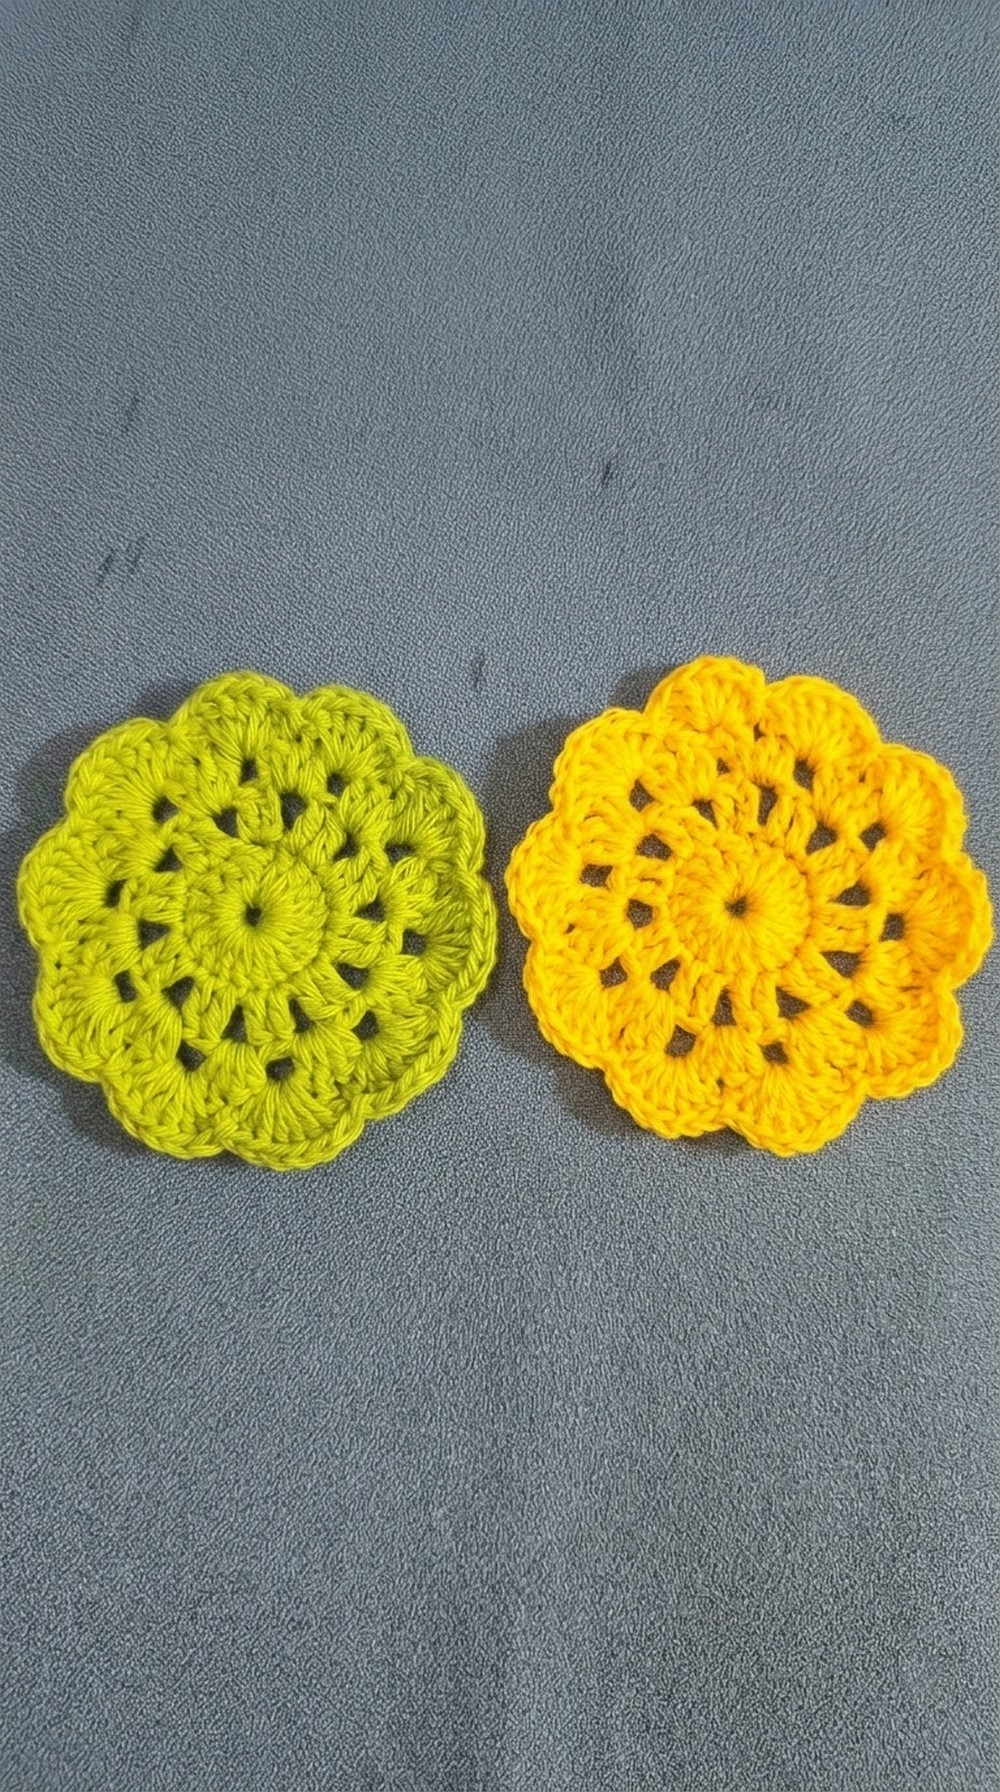
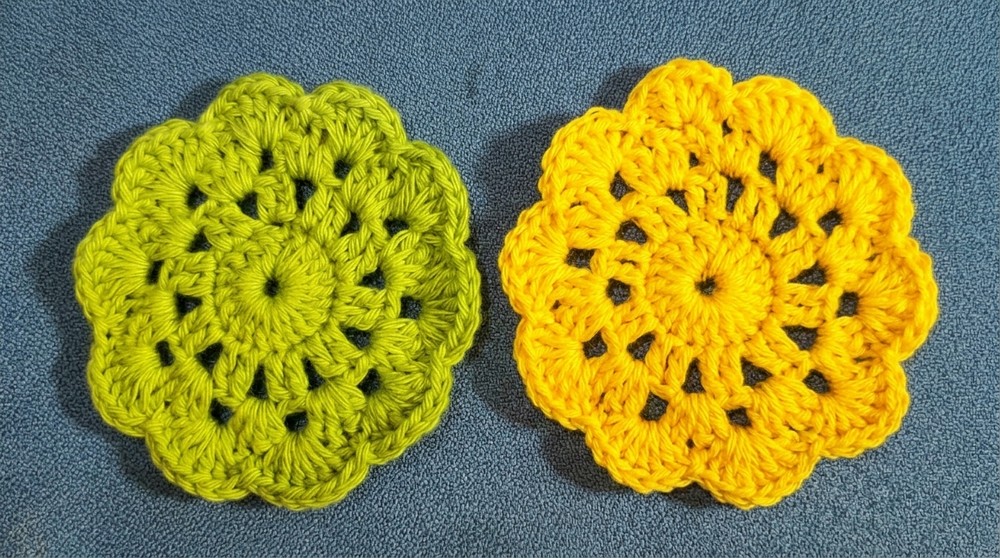
Beautiful Crochet Flower Coaster Pattern for Home Decor
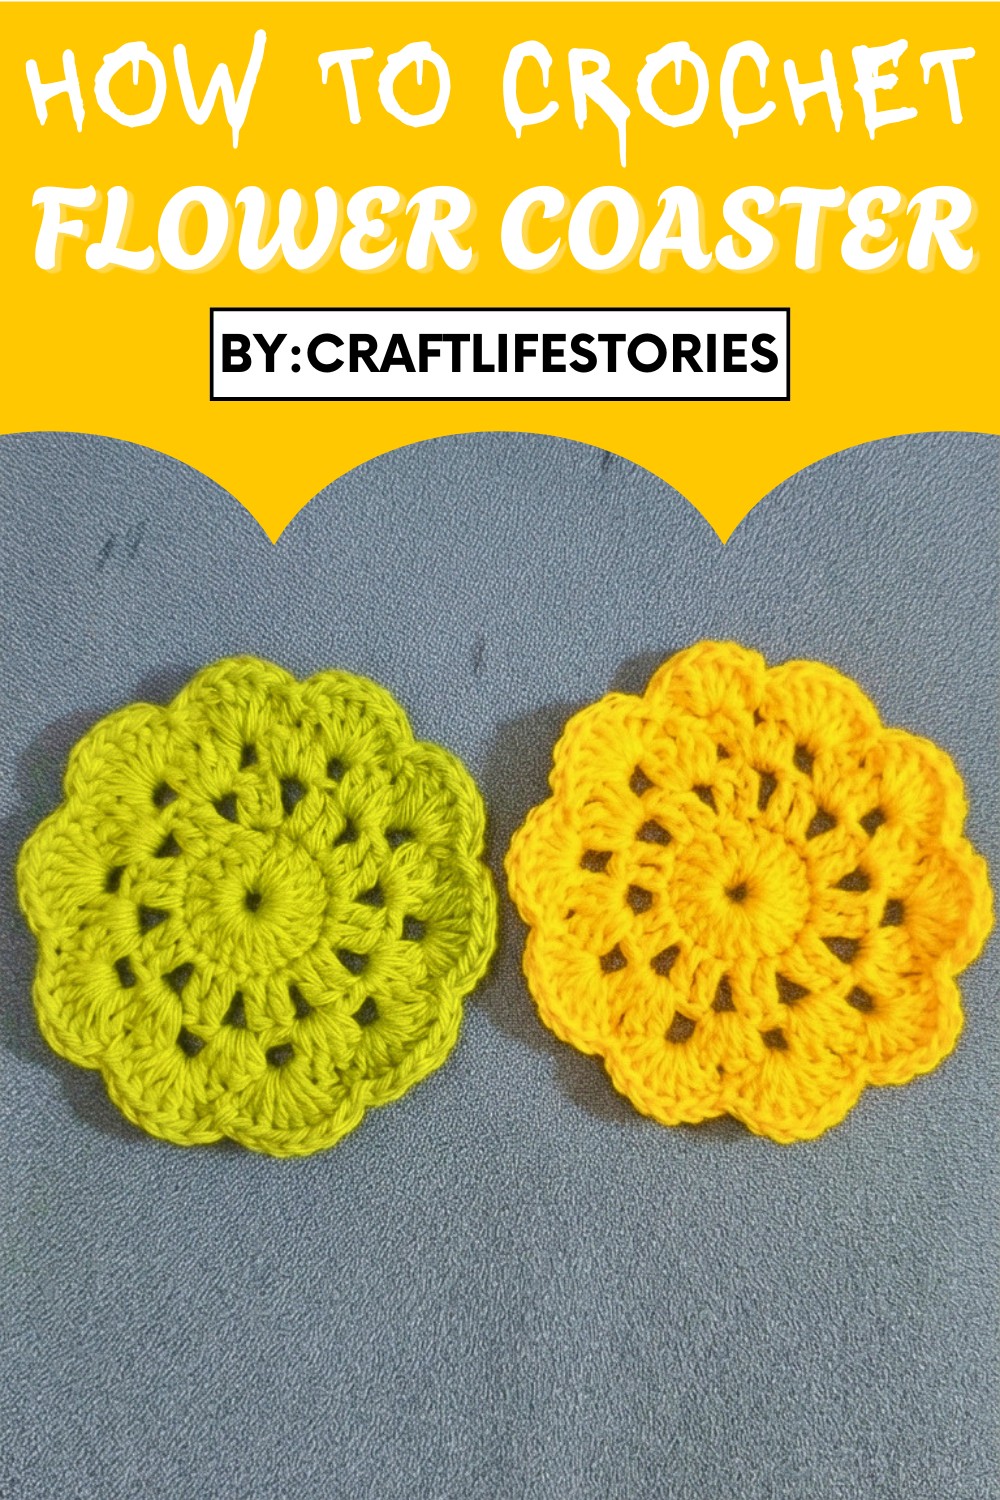
It requires minimal time and materials, making it an ideal project for those looking to crochet something both beautiful and functional. Beyond its practical use, a flower coaster works as a thoughtful gift, especially when packaged with matching items. Add a hint of color to coffee tables, or use one as a base for candles or small vases.
With a neutral tone, it blends seamlessly into any décor, while brighter shades bring cheer. This little creation is more than just a coaster; it’s a multipurpose piece of art that adds beauty and warmth, one petal at a time. A quick-to-make treasure with endless possibilities to brighten your home, it’s a small effort with big impact.
Special Features
- No Magic Ring – starts with chains joined in a circle
- Beginner‑friendly – only basic stitches are used
- Flat & pretty – works great as a coaster or decorative motif
- Quick project – ideal for practice or small gifts
Difficulty Level: Beginner
Materials
- Cotton yarn (suggested: medium weight for good absorption)
- Matching crochet hook (size recommended on your yarn label)
- Scissors
- Yarn needle for weaving in ends
Stitch Key (US Terms)
- ch – chain
- sl st – slip stitch
- dc – double crochet
Pattern Instructions – Step by Step
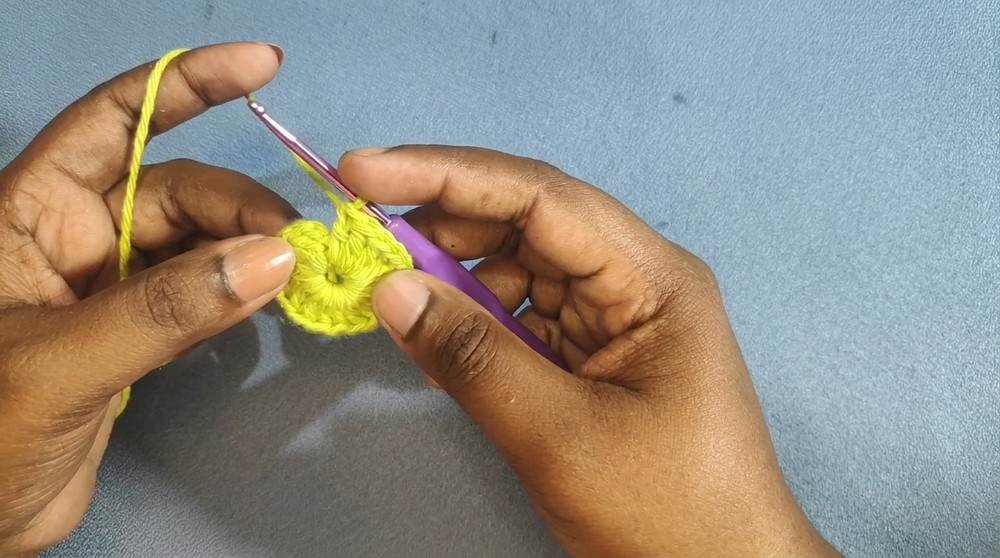
Round 1 – Center Circle
- Make a slip knot.
- Ch 6.
- Join with a sl st into the first ch to form a ring.
- Ch 3 (counts as your first dc).
- Work 19 dc into the center of the ring.
- With the starting ch‑3 counted as 1 dc, you will have 20 dc total.
- Join with a sl st to the top of the ch‑3.
- Round 1 complete: 20 dc
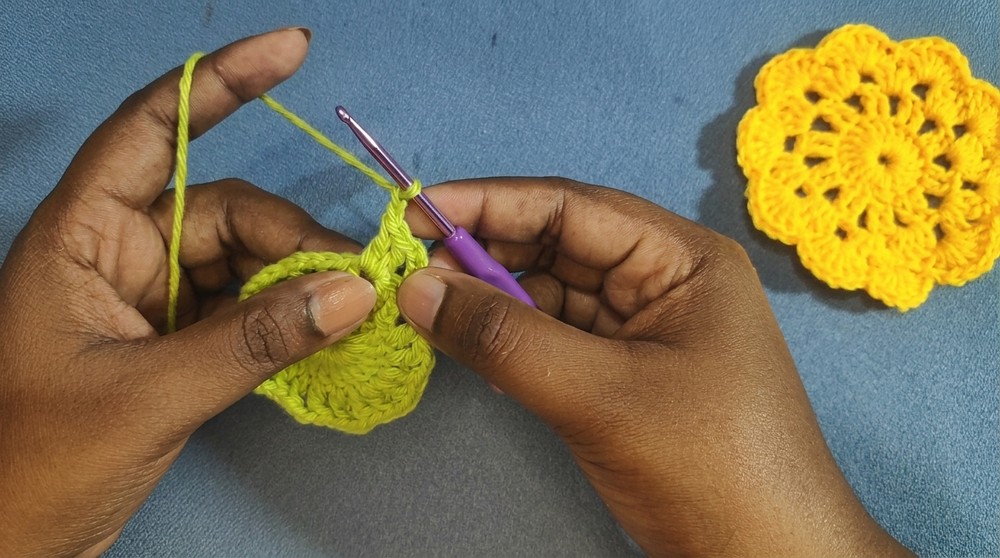
Round 2 – Setting Up the Flower Segments
- Ch 3 (counts as 1 dc in this round).
- In the same stitch: work 1 dc (now you have 2 dc in that stitch).
- Ch 2.
- In the next stitch, work 1 dc.
- In the following stitch, work 1 dc again (so you have 2 dc in two consecutive stitches).
- Ch 2.
- Repeat this pattern around:
- 2 dc (1 dc in each of the next 2 sts), ch 2
No stitches are skipped; work into every stitch.
- When you reach the end, join with a sl st into the top of the initial ch‑3.
You now have a round of pairs of dc with ch‑2 spaces between them. These ch‑2 spaces are where the “V” shapes and petals will grow.
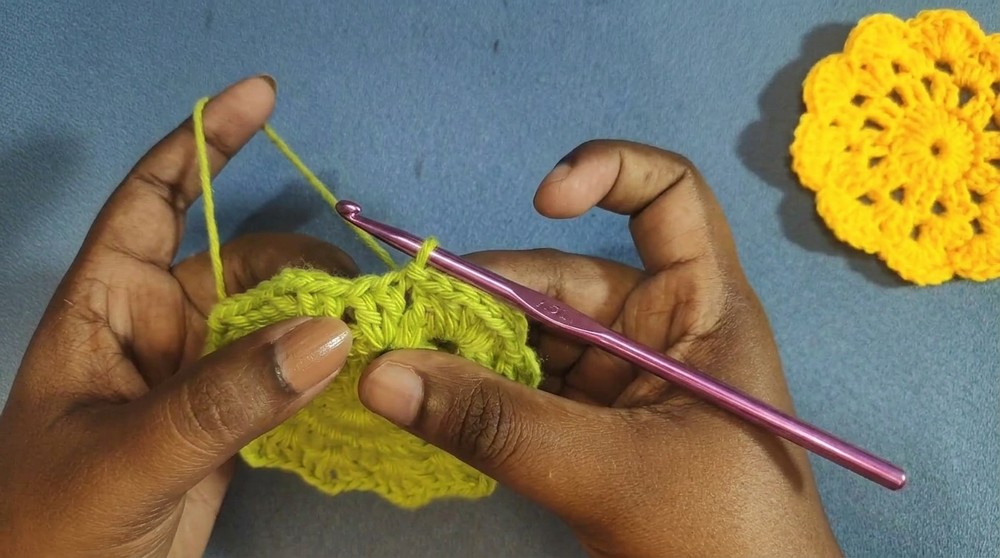
Round 3 – Forming V-Shapes
- Ch 3 (counts as 1 dc).
- Work into the first ch‑2 space:
- 1 dc, ch 2, 2 dc in the same space.
- This forms a V‑shaped group: (2 dc, ch 2, 2 dc).
- In the next ch‑2 space, work:
- 2 dc, ch 2, 2 dc.
- Repeat (2 dc, ch 2, 2 dc) in each ch‑2 space around.
On the very last space:
5. Work 2 dc, ch 2, 1 dc into the last ch‑2 space, then use the initial ch‑3 as the “second dc” of the last group.
- Join with a sl st into the top of the starting ch‑3.
Round 3 is now complete, and you can see clear V‑shaped segments forming around the coaster.
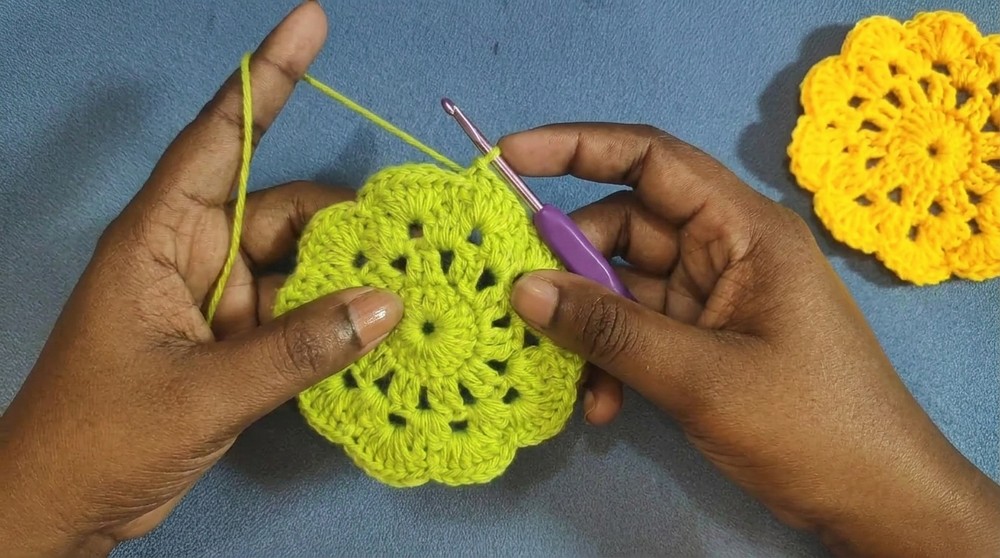
Round 4 – Petal Round (Last Round)
This round shapes the flower petals.
- Ch 3 to start the round.
- Make 1 sl st into the first ch‑2 space (between the V‑shapes) to position your yarn.
- In the next ch‑2 space, work 6 dc – this forms one petal.
- In the following ch‑2 space, work 1 sl st to anchor the petal.
- In the next ch‑2 space, again work 6 dc.
- In the next ch‑2 space, work 1 sl st.
Continue this pattern around:
- 6 dc in one ch‑2 space (petal)
- 1 sl st in the next ch‑2 space
For the very last petal:
- In the final ch‑2 space, work 5 dc only.
- The starting ch‑3 of this round is counted as the 6th dc of this final petal.
- Join with a sl st to the top of that starting ch‑3 to close the round.
- Ch 1, cut the yarn, leaving a small tail, and pull through to fasten off.
Finishing
- Thread the yarn tail onto a yarn needle.
- Weave in the tail neatly on the back side of the coaster, going through nearby stitches so it is secure and not visible from the front.
- Trim any excess yarn.
Your Flower Coaster is now complete!
Tutor’s Suggestions
- Ideal for beginners: no magic ring, very repetitive rounds, and only dc, ch, and sl st.
- Use cotton yarn for better absorption if using as a coaster under cups or glasses.
- Keep your tension even so the coaster lies flat and doesn’t ripple or curl.
Uses
- As a mug or cup coaster
- As a decorative motif under candles or small vases
- Joined together as a table runner or garland
- Cute gift sets (a bundle of coasters tied with ribbon)
Tip
For petals that look neat and uniform, block your coaster lightly: dampen it, pin the petals into shape on a flat surface (like a foam board or towel), and let it dry completely. This helps the flower hold its shape and sit perfectly flat on your table.


Leave a Reply