

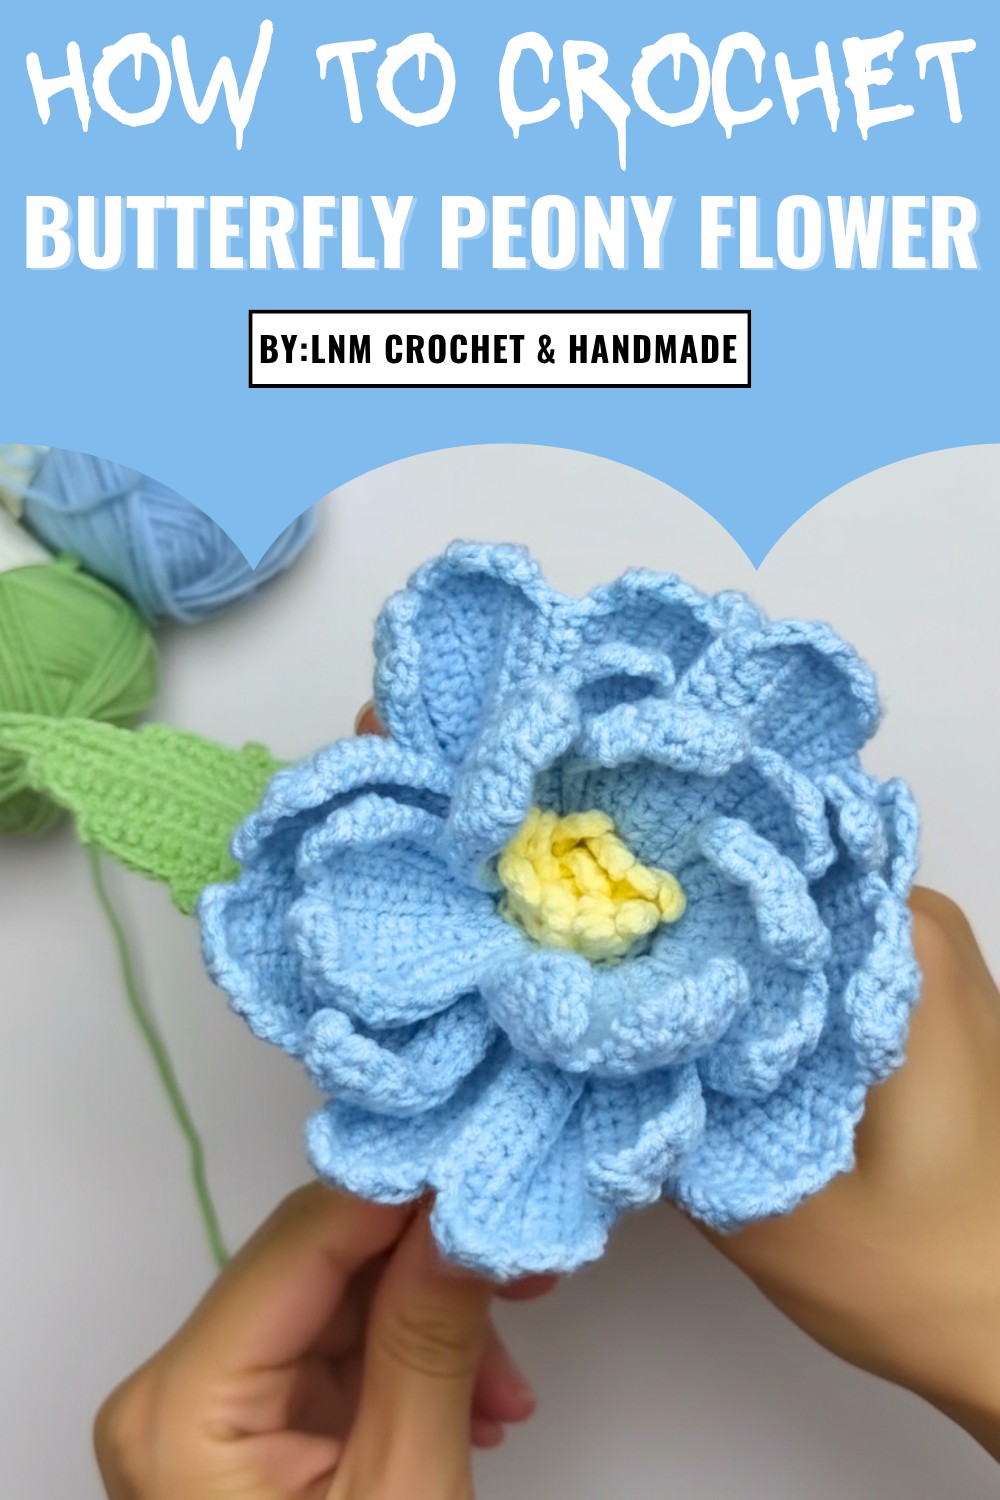
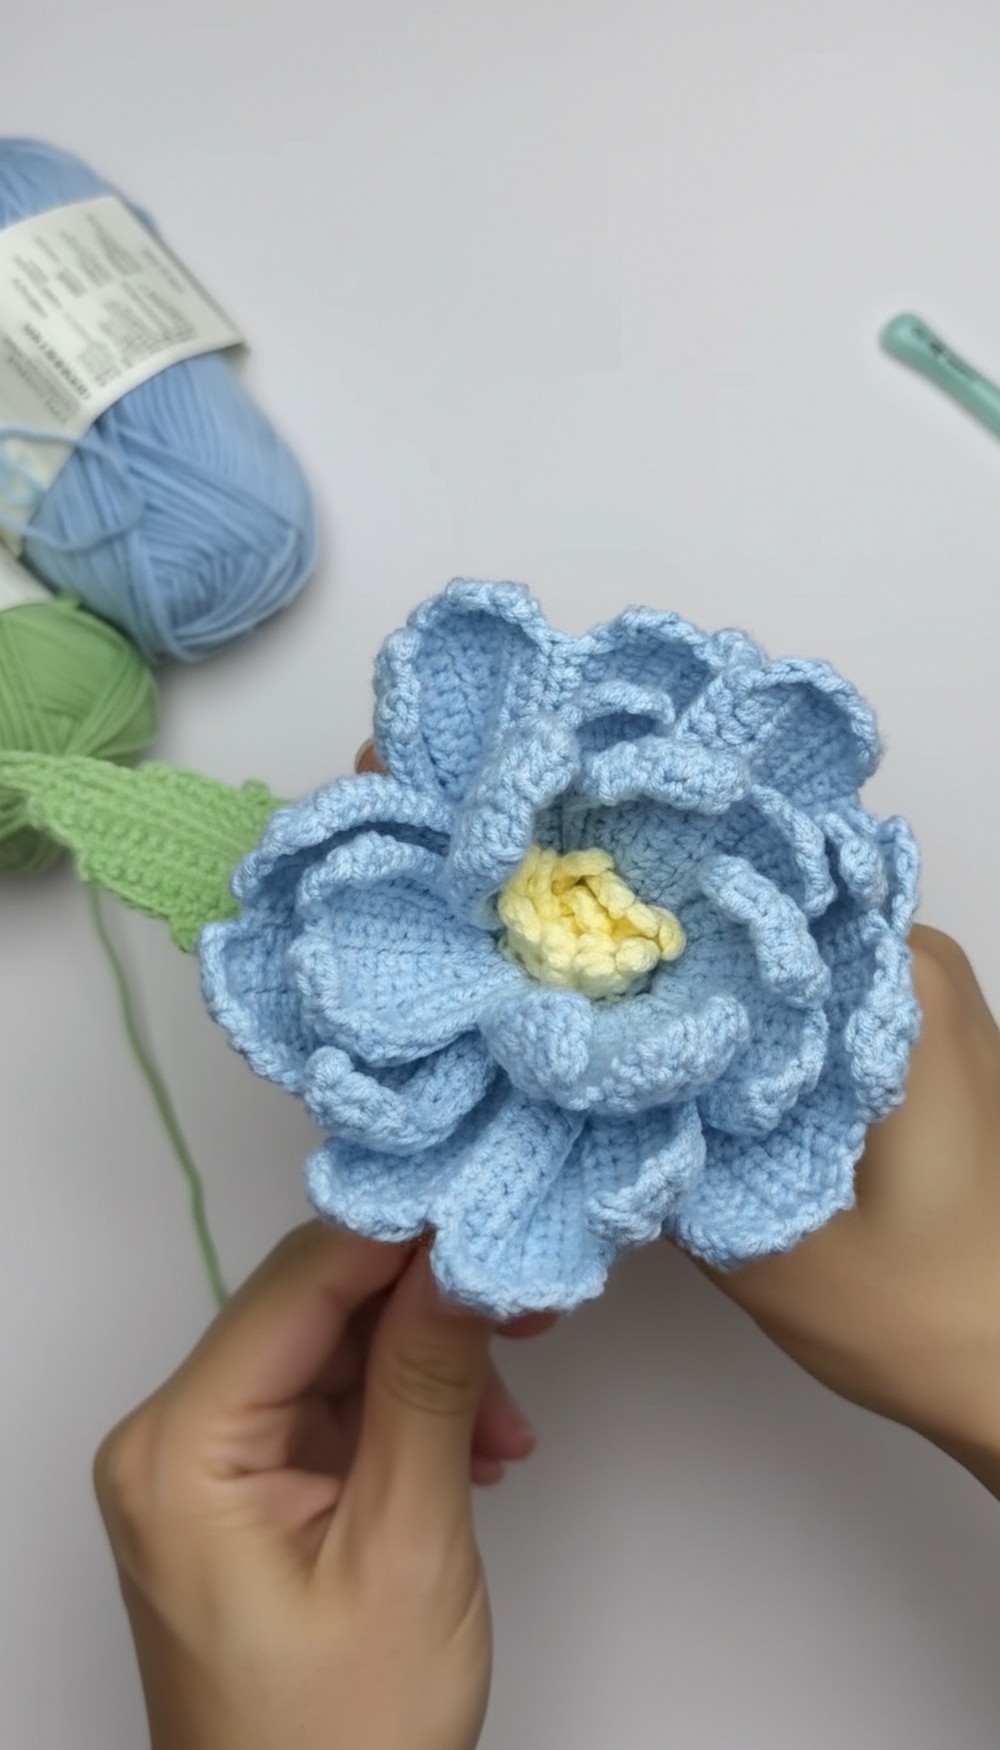
Step-by-Step Guide to Crochet Butterfly Peony Flower Pattern
The versatility of this project means it’s suitable for crocheters looking to hone their skills or challenge themselves with intricate petal shaping. With the option to use your favorite color palettes, you can make this piece complement any aesthetic, whether you're decorating a cozy reading nook or designing standout centerpieces for special occasions. Its structural wire base also ensures that it keeps its shape beautifully when displayed.
Beyond its decorative appeal, the process of crocheting this pattern provides a therapeutic experience, combining focus with creativity. Whether adorning a wreath, brightening up dull corners, or adding to a bouquet, this butterfly peony flower promises to be a standout piece that blends artistry and function seamlessly.
Skill Level:
Intermediate to Advanced – While the stitches are simple (single crochets, half double crochets, slip stitches), this pattern requires paying close attention to detail, tracking rows, and working with intricate shaping techniques.
Special Features:
- Realistic Appeal: Wide petals with wavy edges give the flower a butterfly-like, organic feel.
- All-in-One Construction: Pistil, petals, sepals, and leaves are connected seamlessly.
- Customizable Colors: Choose any combinations of yarn to achieve vibrant or subtle tones.
- Durable Core: The use of stem wire adds strength, making it ideal for bouquets or standalone decorative pieces.
Materials Needed:
- Yarn: Cotton 4-ply yarn (colors as per your choice).
- Pistil: Yellow.
- Petals: Blue (or any color).
- Leaves and Sepals: Green.
- Crochet Hook: 2.5 mm hook.
- Stem Wire: Approximately 40 cm for the leaf and flower stalk.
- Scissors.
- Tapestry Needle: For sewing and weaving in ends.
- Stitch Markers: To track rows and petals.
Step-by-Step Instructions
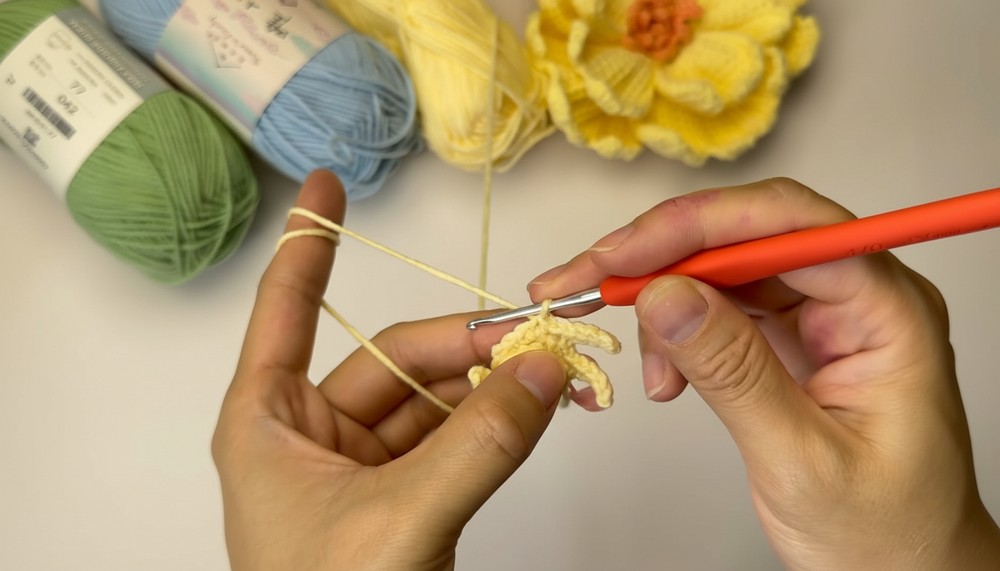
Chapter 1: Pistil
- Start with Yellow Yarn:
- Create a magic ring, make 1 chain (not counted as a stitch).
- Work 5 single crochets (SC) into the magic ring. Pull the yarn to close the loop.
- Row 2:
- Chain 1, then work 5 single crochet increases (SC in each stitch twice) to make 10 stitches in total.
- Row 3:
- Work into the front loops only:
- Chain 4, slip stitch into the 2nd chain and the next two chains.
- Slip stitch into the same loop, then slip stitch into the next front loop.
- Repeat this pattern for 7 pistils of the layer.
- Work into the front loops only:
- Row 4:
- Work into the back loops only: Alternate between 1 single crochet (SC) and 1 single crochet increase. End with 15 stitches in total.
- Row 5:
- Chain 5, work 4 slip stitches, skip one loop, and repeat to form 7 pistils in the second layer.
- Fasten off the yarn.
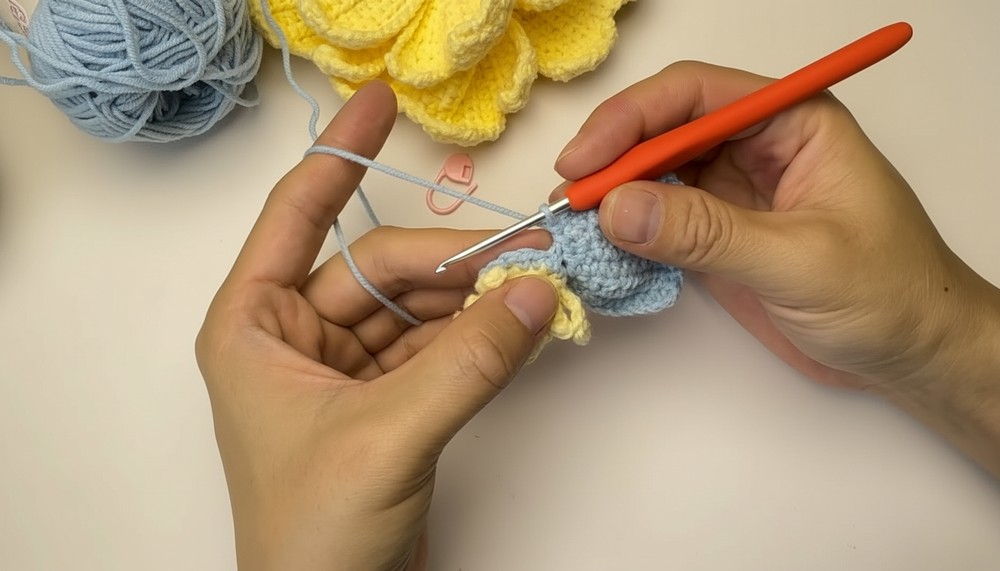
2: First Layer of Petals
- Attach Petal Yarn to the Marked Loop:
- Chain 1 (not counted) and work 15 single crochets across the back loops.
- Row 1 of the Petal:
- Chain 11, starting from the 2nd chain, work 8 half-double crochets (HDC) followed by 2 single crochets (SC).
- Slip stitch into the second base stitch.
- Rows 2–9:
- Odd Rows: Start with 1 chain, turn, and work HDC across.
- Even Rows: Work 2 SC at the start and end of the petal.
- Keep adding rows while tapering at corners to achieve a cushiony petal shape.
- Complete 5 Petals: Each petal works over 3 base stitches. Use stitch markers to carefully align stitches.
3: Second Layer of Petals
- Base Preparation:
- Attach the yarn to the back loops of the first layer. Work 2 SCs followed by 1 SC increase into the base, repeating 5 times for a total of 20 stitches.
- Start Each Petal (15 Rows per Petal):
- Begin by chaining 13 and working 10 HDCs and 2 SCs.
- Continue shaping the petal with increases and decreases over the remaining rows, adding detail to its texture.
- Finish All 5 Petals:
- Each petal occupies 4 base stitches. Use markers to track rows and prevent misalignment.
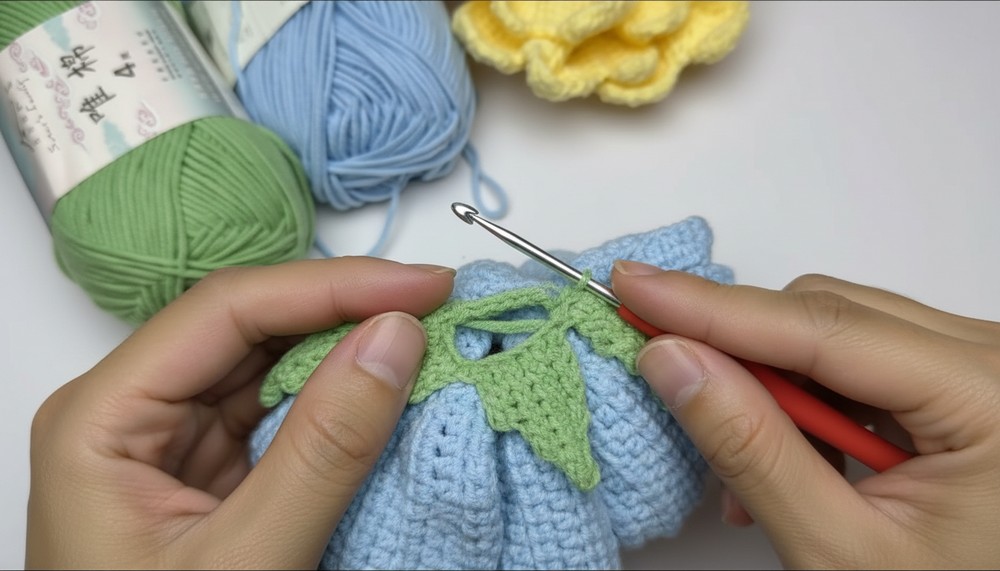
4: Sepals
- Form the Base Row:
- Attach green yarn to the first back loop of the flower base. Work 1 SC followed by 1 SC increase for a total of 30 stitches.
- Shape the Sepals:
- For each sepal, work rows into 6 stitches of the base:
- Chain 5, work unfinished SCs and slip stitches along vertical bars.
- Turn and decrease rows gradually using SCs.
- Complete 5 sepals in total and secure the yarn.
- For each sepal, work rows into 6 stitches of the base:
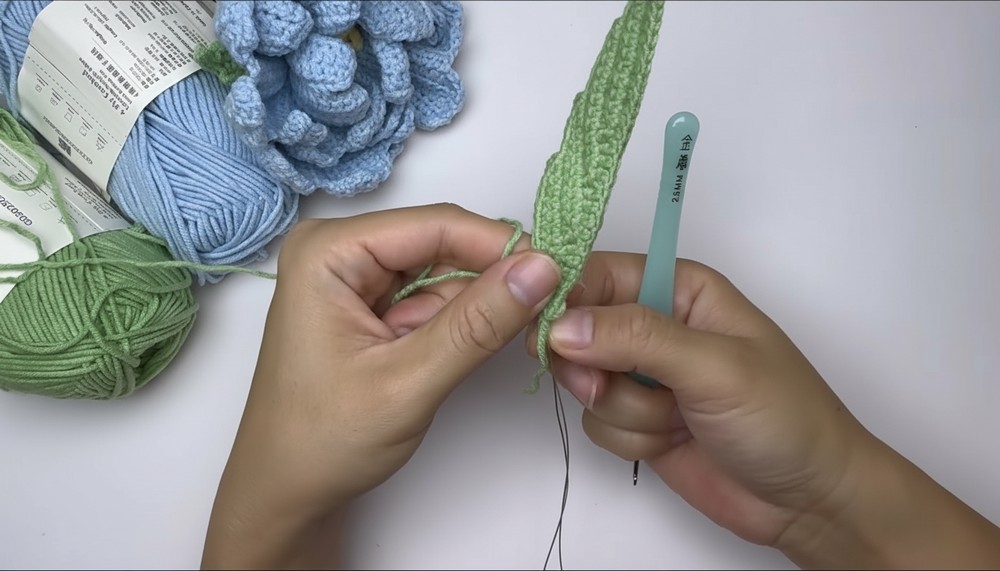
5: Leaves
- Foundation Chain with Wire:
- Start with a 29-chain foundation. Insert the wire along the chain and chain 2 more to secure.
- Leaf Body:
- Work 17 SCs, wrapping the yarn around the wire for durability across the horizontal chain.
- Turn and shape each "leaf row" with combinations of SCs and HDCs on both sides of the chain.
- Complete the Leaf:
- Gradually taper and define the edges by decreasing stitches on further rows.
- Wrap the remaining yarn around the wire base to finish and secure it.

Conclusion:
This Butterfly Peony Flower Crochet Pattern offers a stunning, detailed design. Whether used as a decorative centerpiece, part of a bouquet, or a thoughtful crochet gift, it’s sure to captivate. Its intricate petals and realistic sepals make it a rewarding project for intermediate and advanced crocheters.
Tip from the Tutor:
Use stitch markers throughout the pattern to track rows and base stitches, as the construction can get intricate, especially around petal layers. A rubber band can help secure the bulky flower as you work, preventing unnecessary strain.


Leave a Reply