

Find a stress-free and beginner-friendly design with this Free Crochet Stingray Pattern that creates a cute sea companion in no time.
Turn ordinary yarn into an adorable sea-inspired creation that’s perfect for beginners and advanced crocheters alike. This stingray pattern is an easy-to-follow design that results in a plush, squishy stingray perfect for kids’ toys, ocean-themed décor, or thoughtful handmade gifts. With minimal sewing required, it’s the ideal project for those who prefer fast and stress-free crochet! Featuring a realistic yet charming shape, this pattern is customizable—you can experiment with different yarn weights and colors to match your personal style or décor needs.
Simple and Elegant Crochet Stingray Pattern You'll Adore

Lightweight, portable, and quick to complete, it’s a fantastic project for relaxing crochet sessions, whether you're unwinding on a lazy afternoon or preparing adorable handmade products for markets. Adding small details, like safety eyes or stitched smiles, turns it into a personalized treasure that everyone will love.
Not only is this stingray fun to make, but its simple pattern also helps improve fundamental crochet techniques, such as increases and single stitches, making it a great skill booster for beginners. Whether for home décor, gifts, or cuddly toys, this charming stingray pattern offers endless possibilities, making your crochet time even more rewarding and enjoyable.

Materials Needed
- Super Bulky Yarn: Two colors (e.g., blue for the body and white for the belly).
- 7mm Crochet Hook: Slightly smaller than recommended for bulky yarn to achieve tight stitches suitable for amigurumi.
- 10mm Safety Eyes: For the stingray’s adorable face.
- Stuffing Material: Polyfill fiberfill or yarn scraps for plushness.
- Scissors: To cut yarn.
- Yarn Needle: For securing loose ends.
Step-by-Step Instructions
1. Make the Body (Front and Back):
- Start with Blue Yarn for the top side.
- Begin with a slip knot and insert your hook.
- Chain 4: 1, 2, 3, 4.
- Row 1:
- Skip the first chain and work into the second chain.
- Single Crochet (sc) into the second chain. Insert hook, pull up a loop, then yarn over and pull through both loops on the hook.
- In the next chain, make 2 Single Crochets (Increase).
- Single Crochet into the last chain.
- Total stitches = 4 stitches for this row.
- Row 2:
- Chain 1 and turn your work. Work 2 Single Crochets (Increase) into each stitch across.
- Total stitches = 8 stitches for this row.
- Row 3 (Pattern Instructions Begin):
- Chain 1, turn your work. Begin with 2 Single Crochets (Increase) in the first stitch, then work 1 Single Crochet into each stitch until the last stitch, and end with another increase.
- Total stitches = 10 stitches after this row.
- Repeat the Pattern:
Follow these steps for several rows:- Start with an increase.
- Single crochet into each stitch across, ending with an increase.
- Stitch count increases by 2 in each row: 12, 14, 16, 18, etc.
- Final Row for the Top Half:
- Once you reach 18 stitches, work one row of single crochet (sc) across with no increases.
- Fasten off.

2. Create the Head Section:
- Divide the final row into three sections of 6 stitches each.
- Count six stitches, insert hook into the 7th stitch, and attach yarn.
- Work 6 Single Crochets back and forth for several rows to form the head.
- Do not cut the yarn—set this piece aside.
3. Make the Belly (Bottom Half):
- Repeat the top-half steps using white yarn (or your preferred color).
- Complete the lower section in the same way, including the same stitch counts and head division.
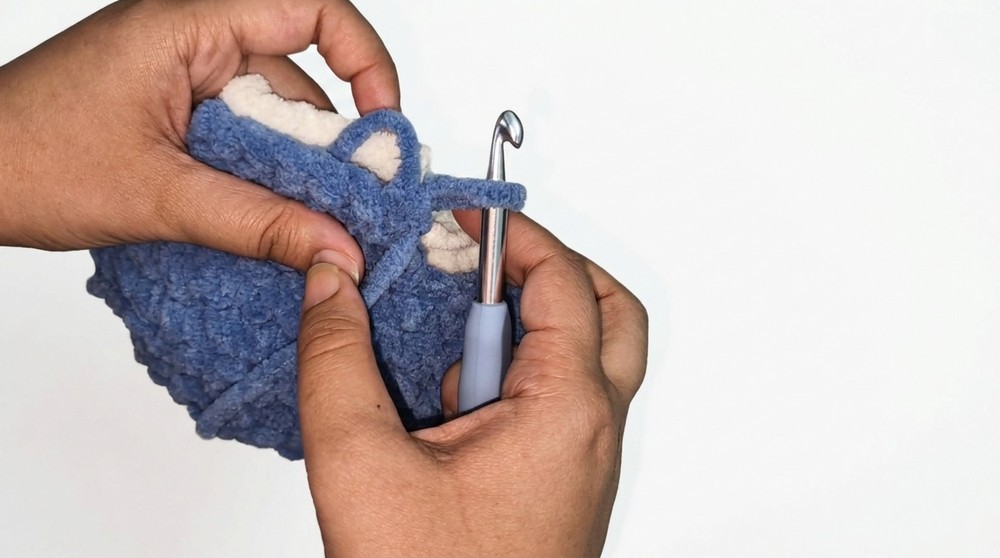
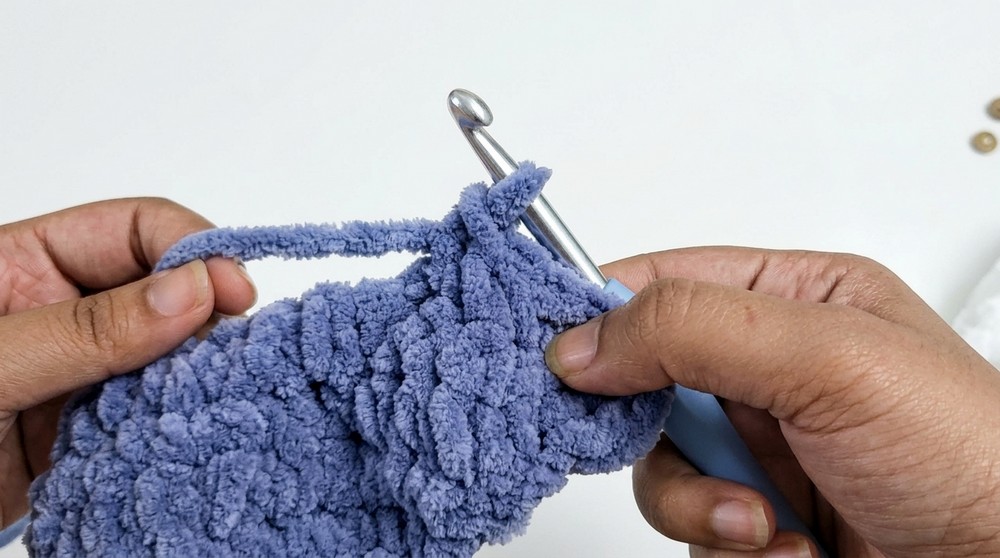
4. Attaching the Pieces:
- Align the top and bottom halves carefully.
- Insert your hook through corresponding stitches on both pieces.
- Single Crochet around the edges to join the two halves
- Before closing the entire stingray, leave a small pocket open for stuffing.
5. Add Stuffing:
- Push in fiberfill material into the pocket. Flatten slightly for a traditional stingray look.
- Complete the remaining stitches to close the design.
6. Insert Safety Eyes:
- Attach the safety eyes to the top portion of the stingray. Position them in the section formed by the first rows of the head.
- Secure the safety backs without piercing through the bottom half.
7. Add the Tail:
- Reattach blue yarn at the edge of the body and chain 8.
- Skip the first chain, then single crochet across the remaining 7 chains.
- Attach the tail back to the body with a slip stitch.
- Fasten off and weave in the ends.

Special Features
- No-Sew Design: Little to no sewing is involved, making this ideal for crocheters who prefer easy finishing touches.
- Plush and Squishy Texture: The super bulky yarn creates a cuddly, soft stingray perfect for kids or as a decorative piece.
- Quick Assembly: This beginner-friendly project works up quickly, even with minimal experience.
Level of Difficulty
Beginner-Friendly: Great for crocheters new to amigurumi or those working with bulky yarn for the first time. Though techniques like slip knots, single crochet, and increases are used, they are explained thoroughly, making it easy to follow.
Suggestions from the Tutor
- Stitch Markers: Useful for identifying stitches in super bulky yarn or keeping track of rows.
- Yarn Scraps for Stuffing: An eco-friendly option if you don’t have fiberfill.
- Experiment with Colors: Mix and match vibrant shades for a personalized touch.
Uses
- Home Decor: Perfect for coastal or underwater-themed spaces.
- Kids’ Toys: Safe and cuddly plush buddy for children.
- Market Sales: Quick production makes this ideal for craft stalls.
- Gifts: Thoughtful handmade present for friends and family.
Pro Tip
When weaving the ends, ensure you match the yarn color (blue yarn through blue stitches, white yarn through white stitches) to maintain a clean look.
Conclusion
This crochet stingray pattern is perfect for beginner crocheters or anyone looking for a fast and low-maintenance project. With its minimal sewing, easy stitch repetition, and plushy design, this pattern is both fun to make and incredibly versatile. Whether for gifting, decorating, or selling, this adorable ocean-inspired pattern is sure to brighten anyone’s day.

Leave a Reply