

Pick up your crochet hook and start on the cozy path of making a Granny Square Willow & Motif. It's a classic project with a twist that stitches warmth into every loop and turn. Perfect for anyone who loves to give something made from the heart, this pattern is as enjoyable for beginners as it is for seasoned enthusiasts.
Crochet Granny Square Willow & Motif

Materials Needed:
- Cotton yarn
- 2.5 mm crochet hook (You can adjust the yarn and hook size according to your preference)
Pattern Overview:
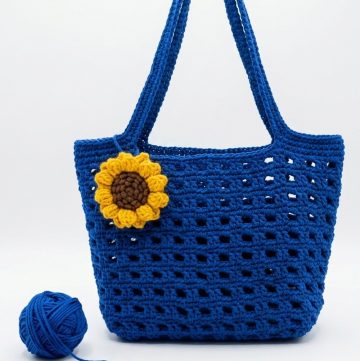
- This pattern is to craft a decorative granny square that can be used for various projects like blankets, bags, and more. The terms used are in US crochet terminology.
Starting the Granny Square
Starting Loop:
- Make a slip knot, then chain 4. Join with a slip stitch in the first chain to form a ring.

Round 1:
- Chain 3 (This counts as your first double crochet).
- Work 15 double crochets into the center ring. With the initial chain 3, you should have a total of 16 double crochets.
- Join with a slip stitch to the top of the beginning chain 3.
In Round 2:
- Chain 4 (Counts as a double crochet and chain 1).
- Double crochet into the next stitch. Chain 1.
- Continue to double crochet and then chain 1 in each stitch around.
- Join to the third chain of the starting chain 4 with a slip stitch.

Round 3:
- Chain 3 (Counts as the first double crochet).
- Work two double crochets into the first chain-1 space.
- Double crochet in the next stitch.
- Continue two double crochets in the chain-1 space and one double crochet in the next stitch all the way around.
- Join with a slip stitch to the top of the beginning chain 3.
Round 4 (Creating Corners):
- Chain 1, then do a single crochet in the same space.
- Chain 5, skip two spaces, single crochet in the next space to form your first corner.
- Chain 2, skip two spaces, and single crochet in the next space.
- Alternate chain 5 for corners and chain 2 for sides, making sure to skip the appropriate spaces and single crochet to secure them.
- Join with a slip stitch to the initial single crochet.

For Round 5 (Shaping Edges):
- Slip stitch to the chain-5 space, chain 3 (first double crochet), then work 4 more double crochets in this space (5 in total).
- Chain 2, work another 5 double crochets in the same space.
- Single crochet in the next chain-2 space. Continue the pattern as established (5 double crochets, chain 2, 5 double crochets in corner spaces; single crochet in chain-2 side spaces).
Round 6 (Lace Effect):
- Skip to the chain-2 space for starting, slip stitch to position.
- Chain 1, single crochet in the same space, chain 3, single crochet again in the same space.
- Work chain 5, double crochet in the single crochet space between 5-double-crochet groups (from the previous round), followed by chain-3, single crochet in the middle double crochet of the 5-double-crochet group.
- Repeat the process, adjusting chains to create the lace effect, ending the round with a slip stitch in the initial single crochet.

Round 7 (Final Round):
- Chain 3 for the first double crochet, work 2 more double crochets, chain 2, then 3 more double crochets in the same space (creating a corner).
- Work five double crochets in the chain-5 spaces and three double crochets in the chain-3 spaces, continuing the established pattern.
- Complete the round by repeating the pattern for each side and corner.
- Finish off with a slip stitch in the top of the beginning chain 3. Cut the yarn and secure.

Final Steps:
- After completing the granny square, don't forget to block your project to achieve neat edges and a professional look.
- This transcription should guide you in creating a beautiful granny square as shown in the video. Happy crocheting!


Leave a Reply