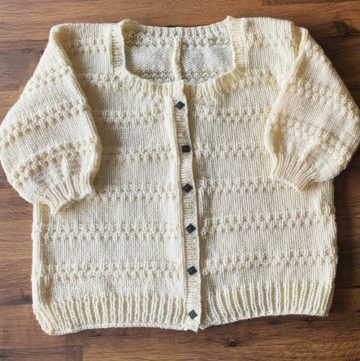
Stay cozy and get your knitting needles ready for a warm fall sweater with sleeves that feels like a hug on a chilly day. You'll love the satisfaction of stitching together your own fashion piece, perfect for pumpkin-spiced outings or leaf-crunching adventures. This knitting project is a fun way to spend evenings and the result is a sweater you'll be proud to show off or gift to someone special as the leaves start to turn.
Knit Fall Sweater

Materials Needed:
- 3.5 millimeters knitting needles
- Yarn of your choice
- Stitch holder
Pattern Instructions:
- Cast on 89 stitches using your preferred method. (Check out a casting on tutorial on the channel for guidance.)
- Row 1: Start with a knit stitch through the back loop (check out the specific tutorial for this stitch on the channel if needed), then a regular purl stitch. Continue this knit-purl pattern to the end of the row.

Transition to the Sweater Design:
- After the set-up row, proceed to a normal knit stitch followed by a purl stitch through the back loop. Repeat these two stitches to the end of the row.
- Begin the actual sweater design (a pattern image was shown), following the upcoming sequence for creating panels C, A, and B.
Panel C (Cable Pattern):

Do four purl stitches.
Work on Panel C with four stitches using a stitch holder.
- Transfer two stitches to the stitch holder and place them in front of your work.
- Knit the next two stitches.
- Take the stitches from the stitch holder, put them back onto your needle, and knit them.
- Purl two stitches.
Panel A (Twist Pattern):
- Row 1: Take two of your stitches, place them onto the stitch holder, and hold them in front of your work. Knit two stitches.
- Place the stitches from the stitch holder back onto your needle and knit these two stitches plus the next two stitches.
- Repeat Panel A Row 1.

Panel B:
- Purl three stitches.
- Take one stitch and place it on the back of your work, then knit the next two stitches.
- Take the stitch from behind the work and purl it.
- Knit one stitch.
- Take two stitches, place them in front of the work, and purl the next stitch.
- Place those two stitches back onto the needle and knit them, followed by three purl stitches.
Working the Wrong Side (Inside of the Sleeve):
- Knit all the knit stitches and purl all the purl stitches. Essentially, perform the stitches as they appear (knit the knits and purl the purls) when you return to the right side for row number three.

Continuing the Pattern:
- Repeat the pattern for Panels A, B, and C according to the initial design image provided earlier in the video.
- For Panel A, once you complete the fourth row, you restart from row one. The same method applies to Panel B, which has a pattern of 18 rows before restarting.
Important Notes:
- On the right side, you will occasionally need to knit two stitches together, and on the wrong side, you will perform the reverse with purl stitches.
- The video tutorial apparently covers other details like additional rows and how to perform specific stitches, so it might be wise to refer to those for further clarification.
https://youtu.be/QCIotiIP-bc
Finishing the Sleeve:
Repeat this pattern until the sleeve reaches the desired length. As instructed, you will need to make two sleeves. Subsequent videos will address how to knit the front and back parts of the sweater and how to assemble them together.


Leave a Reply