

This knit pumpkin amigurumi is absolutely charming! It's wonderfully crafted, reflecting great skill and creativity. The cute design makes it perfect for adding a touch of warmth and whimsy to any room. Whether displayed as a delightful fall decoration or given as a thoughtful handmade gift, this adorable pumpkin brings a smile to everyone who sees it. Its cozy look is sure to make it a favorite seasonal accessory!
How To Knit A Pumpkin For Beginners
Materials Required:
- Yarn of your choice (colors and weight can vary depending on desired pumpkin size)
- Circular knitting needles (size advised in the pattern below)
- Strong, spun scrap yarn for cinching
- Tapestry needle
- Bead with a hole large enough for the tapestry needle
- Stuffing material (poly stuffing, fabric scraps, etc.)
- Optional: Stick or preferred material for the pumpkin stem
Pattern:
Yarn & Needle Size:
- For a small/medium pumpkin, use 3 strands of yarn held together, which could be equivalent to worsted/bulky weight. Adjust yarn weight for larger or smaller sizes.
- Circular knitting needles (U.S. Size 9/5.5mm suggested). Adjust needle size as per your yarn choice.
Gauge:
- Aim for a slightly tight gauge to ensure that stuffing does not poke through knit stitches.
Instructions:
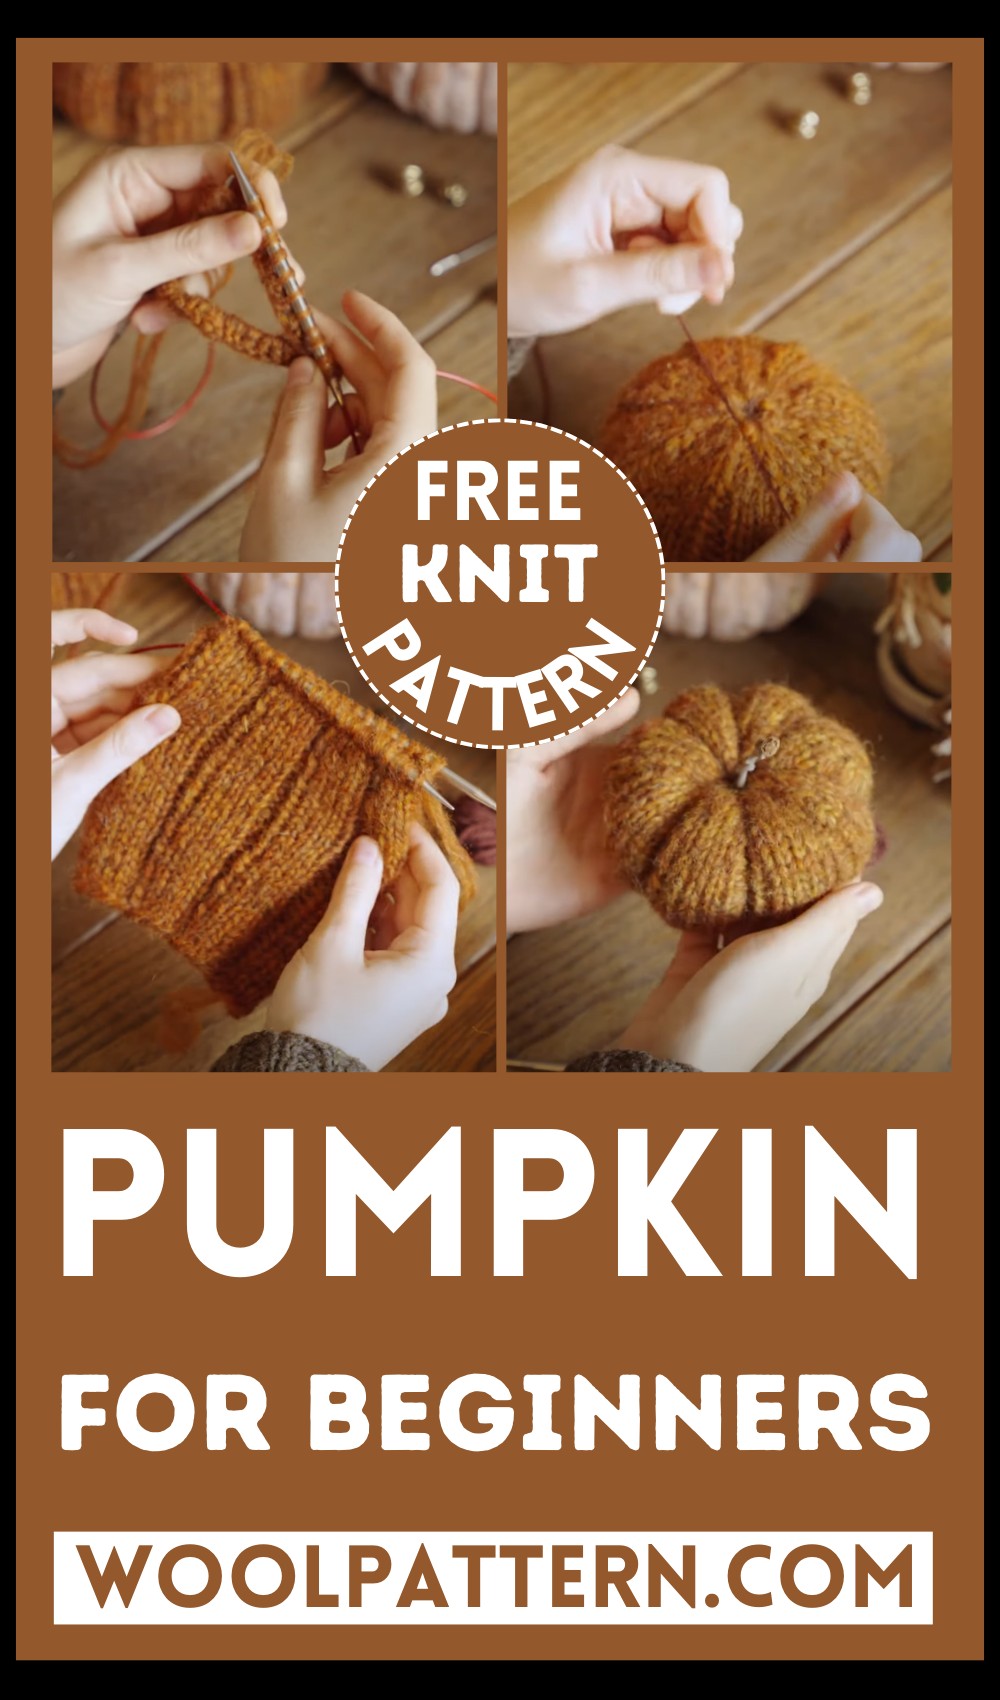
Cast On: Use the long-tail cast-on method or your preferred method to cast on stitches. For a medium-sized pumpkin, cast on 40 stitches. Adjust numbers based on the desired sections and size.
Joining in Round: After casting on, join stitches to work in the round, being careful not to twist your stitches.
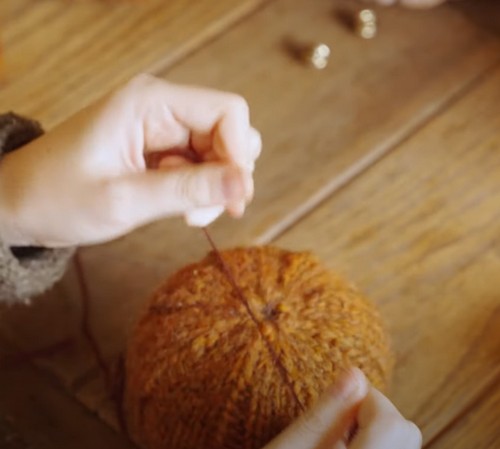
Pattern Repeat: Decide on the width of each section. For instance, for a 5-stitch repeat, you may knit four stitches and purl one stitch as the pattern repeat.

Body: Continue in the established pattern until the pumpkin reaches the desired height. The piece should be slightly taller than when it’s width is measured as a square.
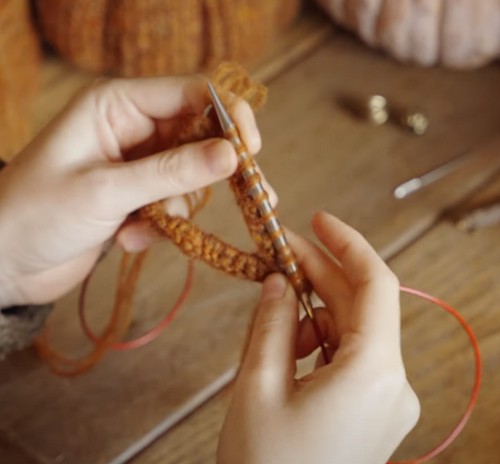
Closing the Top: Thread a piece of strong scrap yarn through all live stitches with a tapestry needle. Pull tight to close and secure with a knot.
Stuffing: Floof the stuffing material and fill your pumpkin. The stuffing should be firm but not overpacked to prevent distortion or the filling from showing through stitches.
Closing the Bottom: Run the tapestry needle through the cast-on edge, skipping every other stitch to cinch the bottom. Knot securely with scrap yarn.
Creating Ridges: Take more strong scrap yarn and a tapestry needle. From the top center, bring the yarn down through each purl stitch section, pull tightly to form divots, and return to the top. Continue around all the sections.
Securing the Shape:
- Attach the bead to the end of scrap yarn at the bottom to keep tension.
- Bring both ends of the yarn to the top, knot tightly, and hide ends inside the pumpkin.
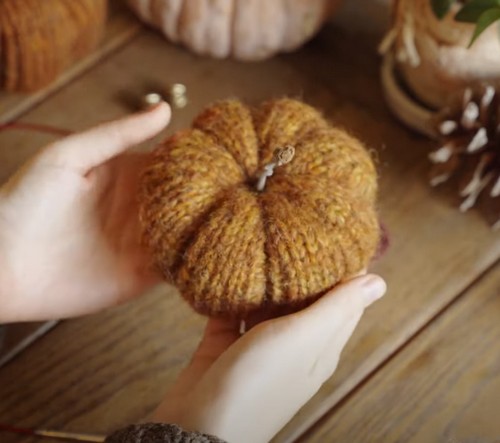
Stem: Insert a small stick or your choice of stem material through the top center.
Finishing:
Trim all excess yarn and ensure all ends are woven in. Your knit pumpkin amigurumi is complete!
Enjoy making pumpkins in different sizes, colors, and variations by adjusting the number of stitches and the width of the sections. Fill your home with a patch of hand-knitted squash or share them as festive gifts!


Leave a Reply