

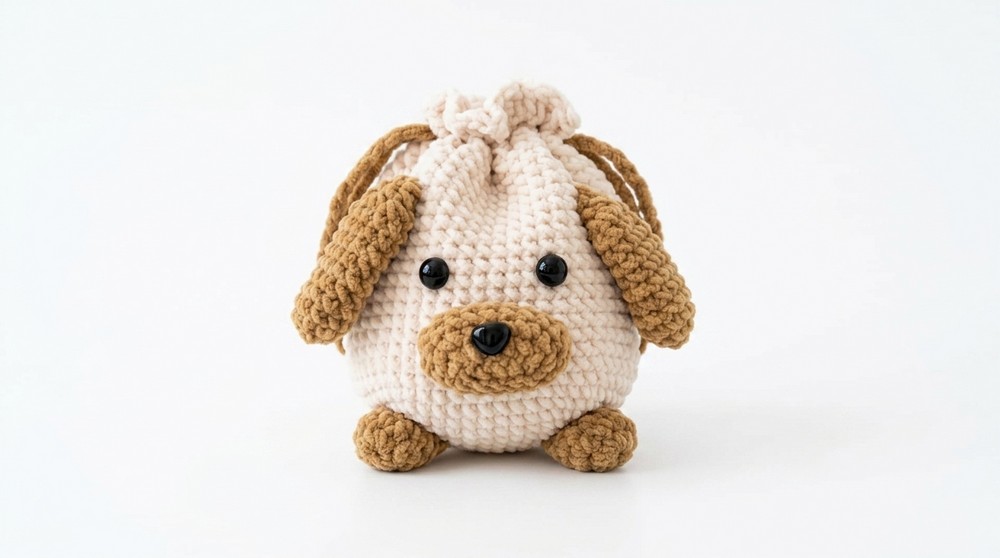
Learn the charm of handmade accessories with a Free Crochet Dog Drawstring Bag Pattern that's simple, customizable, and functional.
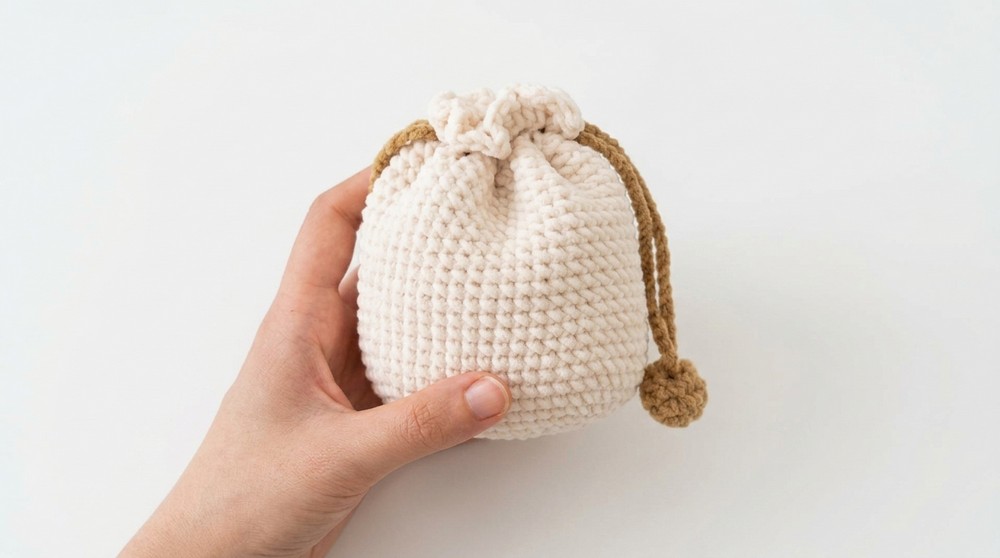
From practical functionality to undeniable cuteness, this crochet pattern offers a delightful way to combine style with utility. Designed to resemble an adorable dog, this bag pattern is perfect for storing small essentials like toys, makeup, stationery, or crochet supplies. Its drawstring closure ensures contents are secure, making it both convenient and charming. The pattern uses straightforward techniques such as single crochet, increases, and decreases, making it ideal for advanced beginners ready to hone their skills on a fun and rewarding project.
Unique Easy-to-Follow Crochet Dog Drawstring Bag Pattern
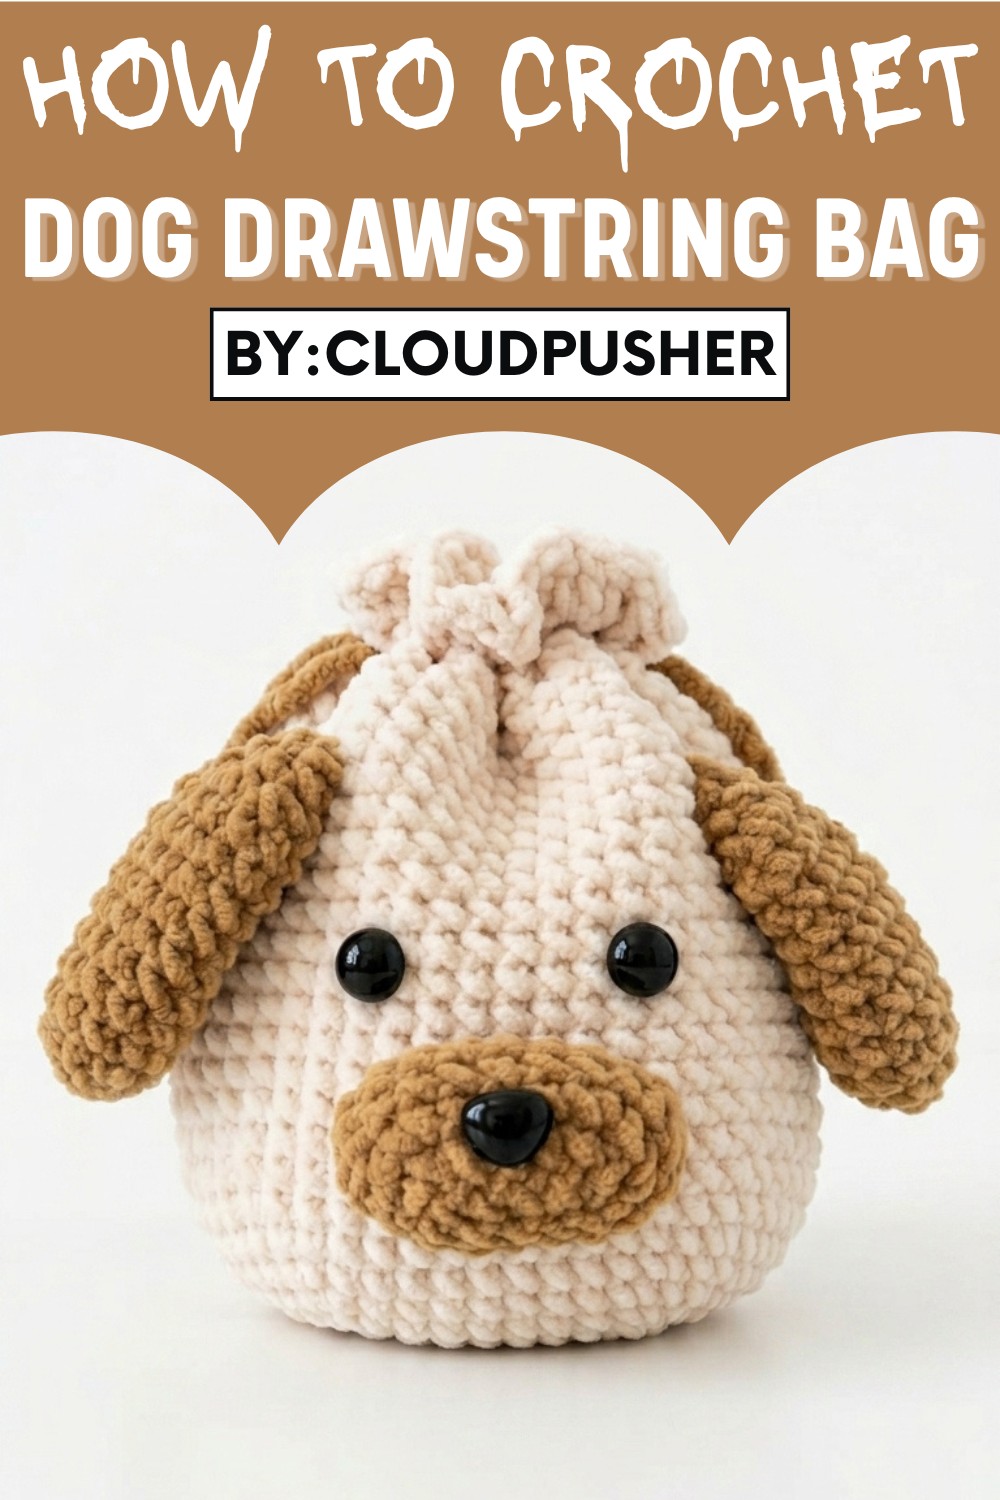
One of the standout features is the ability to personalize it to choose yarn colors to match your favorite dog breed or add creative touches like textured detailing. The muzzle and floppy ears make this pattern particularly unique, turning a simple storage item into something playful and heartwarming.
Whether you're making it for kids, gifting it to a dog lover, or adding it to your own collection of handmade accessories, this pattern is as versatile as it is enjoyable to crochet. With clear instructions and fun details, the finished product is sure to bring smiles and compliments wherever you take it.
23456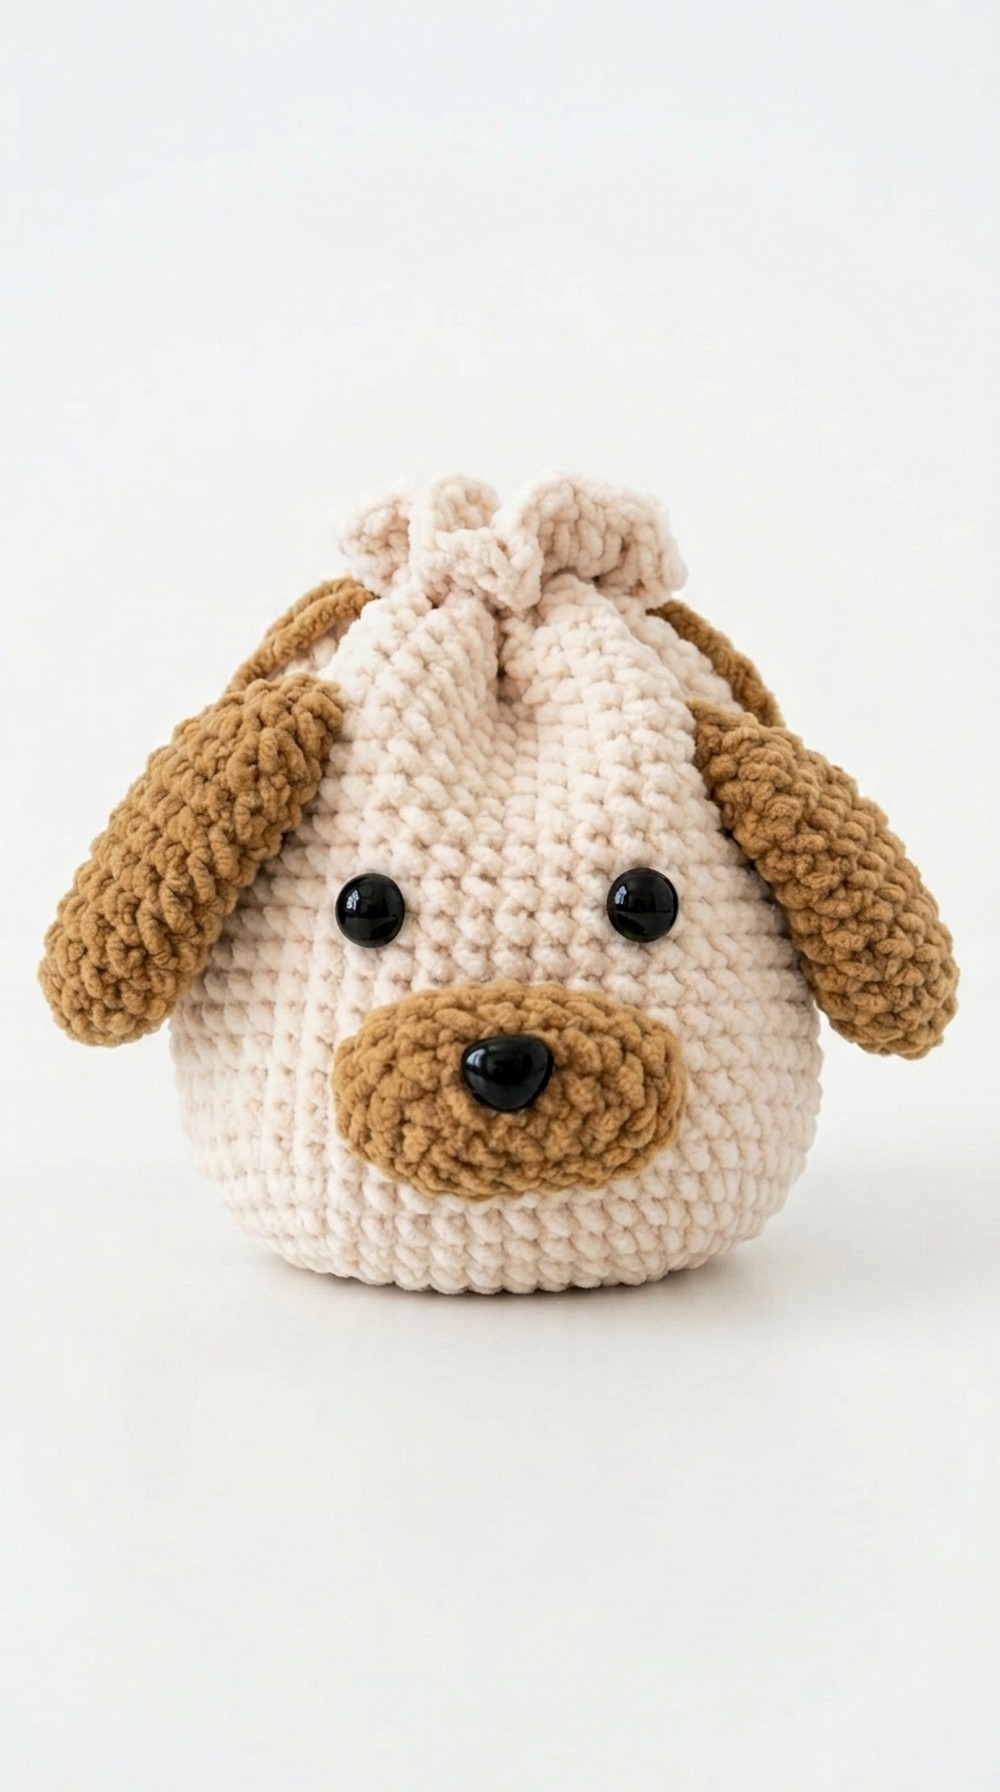
Special Features
- Adorable dog design with a detailed muzzle and ears.
- Functional drawstring closure to keep items secure.
- Easy customization—choose your favorite colors or yarn types!
Pattern Instructions
Materials Needed
- Channel Yarn (or your preferred yarn in green and accent colors)
- 3.5 mm crochet hook
- Polyfill or leftover yarn for stuffing
- Scissors and yarn needle
- Eyes or buttons for decoration
Step 1: Bag Body
- Start with the Base
- Make a slip knot and chain 9.
- Round 1:
- Start in the second chain from the hook. Make 1 single crochet (sc).
- Work 6 more sc stitches along the chain (7 sc total).
- In the last chain, make 3 sc in the same stitch to turn the corner.
- Work 1 sc into each of the 6 stitches along the bottom of the chain, then 2 sc in the last stitch.
- Join with a slip stitch (sl st) to the first sc. You should have 18 stitches at the end of this round.
- Rounding the Edges
- Round 2:
- Chain 1 (doesn't count as a stitch).
- Work 2 sc in the first stitch, then 1 sc in each of the next 6 stitches.
- Work 2 sc into each of the next 3 stitches (increasing section).
- Continue with 6 sc, then finish with 2 sc in each of the last 2 stitches.
- Join with a slip stitch. You should have 24 stitches.
- Round 2:
- Expanding the Base
- Continue crocheting for Rounds 3–6 as follows:
- Round 3: 1 sc, 1 increase (repeat pattern), and follow the base structure.
- Round 4: Mix increases with single crochet to shape the bag (up to 50 stitches).
- Rounds 5–6: Continue adding increases evenly until you’re happy with the base size.
- Continue crocheting for Rounds 3–6 as follows:
2: Building the Bag Walls
- Forming the Walls
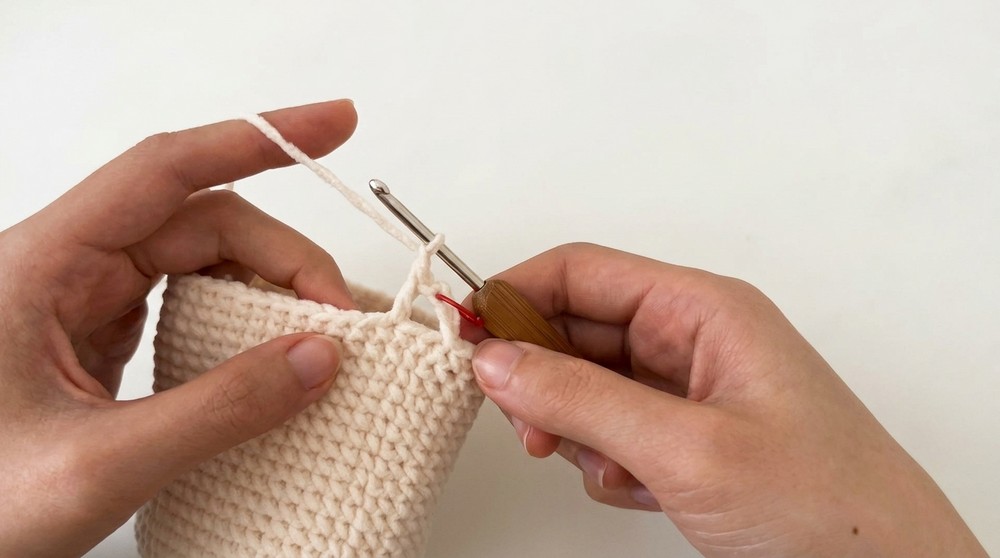
- Rounds 7–25: Work 1 sc in each stitch around without increasing. Stop when you reach the desired height.
- For the decorative edge:
- Chain 3 (counts as 1 double crochet), then skip 1 stitch, chain 1, and double crochet into the next stitch. Repeat around.
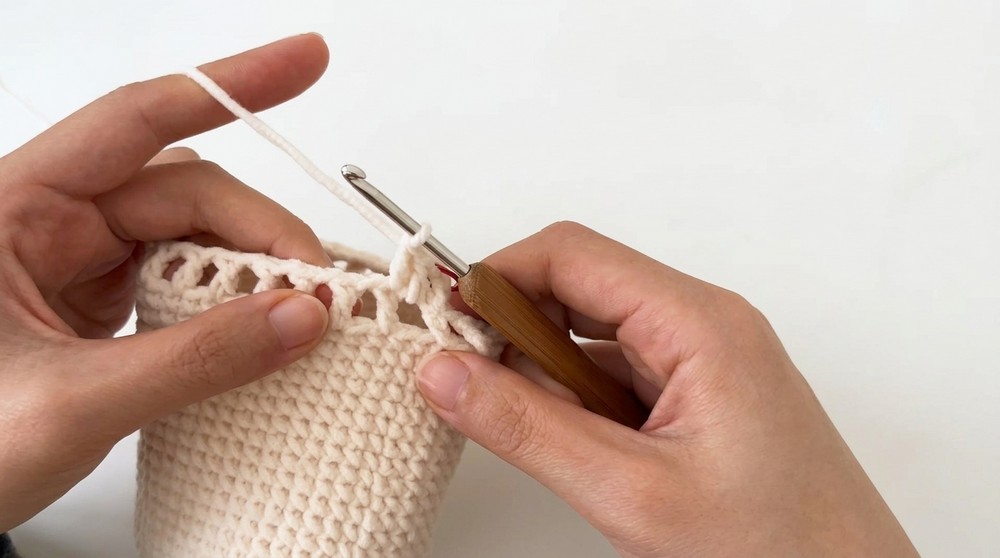
- Final Wall Round
- For the last round, make 1 double crochet in each chain space and stitch around for uniformity.
3: Making the Drawstrings
- Create Each Drawstring
- Start with a magic ring.
- Round 1: Chain 1, make 5 sc into the ring. Pull the tail to tighten.
- Round 2: Chain 1, work 2 sc into each stitch (10 stitches).
- Continue for Rounds 3–4 with 1 sc in each stitch.
- Chain 80 to form the drawstring length. Cut the yarn and secure.
- Thread the Drawstrings
- Thread the finished drawstrings through the gaps in the second round from the top of the bag. Secure the ends in place.
4: Adding Decorations
- Muzzle
- Start the Muzzle Base: Chain 6.
- Work 1 sc in each of the first 4 chains.
- Make 3 sc in the last chain to turn the corner and continue on the other side with 1 sc in each stitch.
- Finish with an increase in the last stitch.
- Rounds 2–6: Work evenly in rounds, incorporating increases to shape the muzzle.
- Add stuffing (like polyfill or leftover yarn) before sewing it to the bag.
- Start the Muzzle Base: Chain 6.
- Ears
- Start with a magic ring and make 5 sc.
- Round 2: Work 2 sc into each stitch (10 stitches).
- Continue for several rounds with 1 sc in each stitch to shape the ear.
- Decrease in the final rounds to taper the ear and finish with a round of 5 sc.
- Cut the yarn, leaving a tail for sewing.
- Attach Features
- Sew the ears and muzzle onto the bag. Position them evenly. Add eyes or buttons as finishing details.
Suggestions & Uses
Skill Level: Advanced Beginner
- This project is great for gifting or storing small items like toys, makeup, or craft supplies.
- Choose other yarn colors to personalize your dog bag.
Tip:
For an even sturdier structure, use a tighter tension while crocheting or add a fabric lining inside the bag.
Conclusion
Congratulations on completing this adorable Crochet Dog Drawstring Bag! With its functional pattern and cute appearance, it is sure to be a hit.

Leave a Reply