

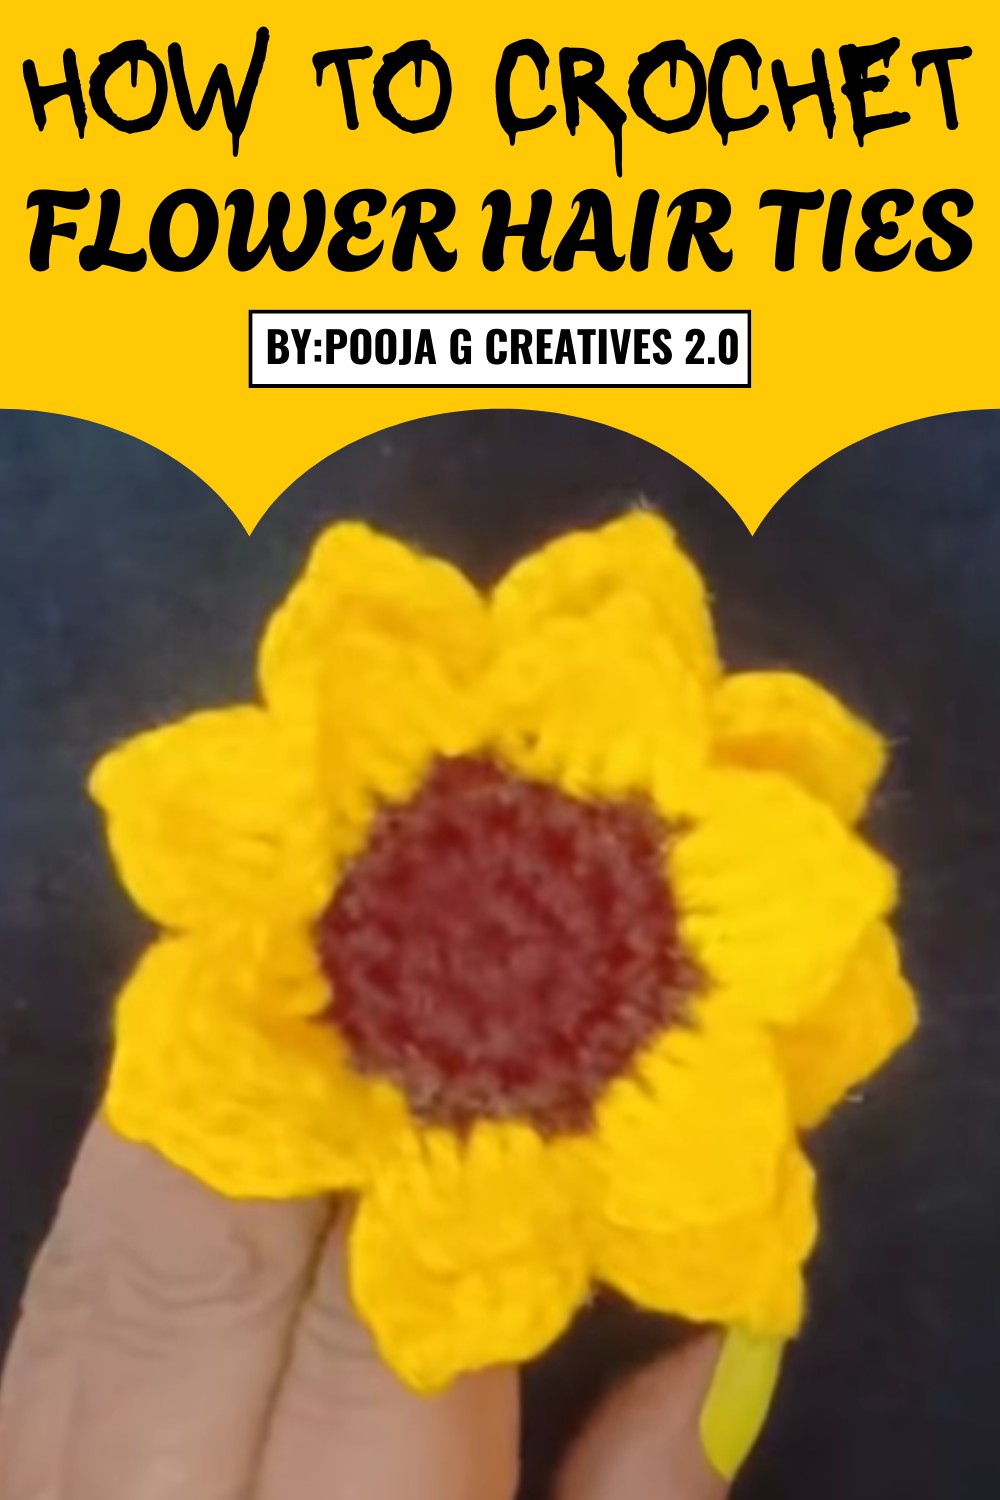
Spruce up hairstyles through crochet flower hair ties pattern for colorful and cute accessories that add a bright and fun touch to every look.
Not every hair accessory feels special or brings joy to your look. But with a creative design like the crochet flower hair tie pattern, you can transform plain hair into something beautiful and bright. This soft, colorful flower is gentle and feels good to wear every day, making a simple hairstyle look wonderful. Whether you are going to a party, enjoying a festival, or just spending time with family, this hair tie adds a touch of charm and brings smiles.
Lovable Crochet Flower Hair Ties Pattern Perfect for Girls and Teens
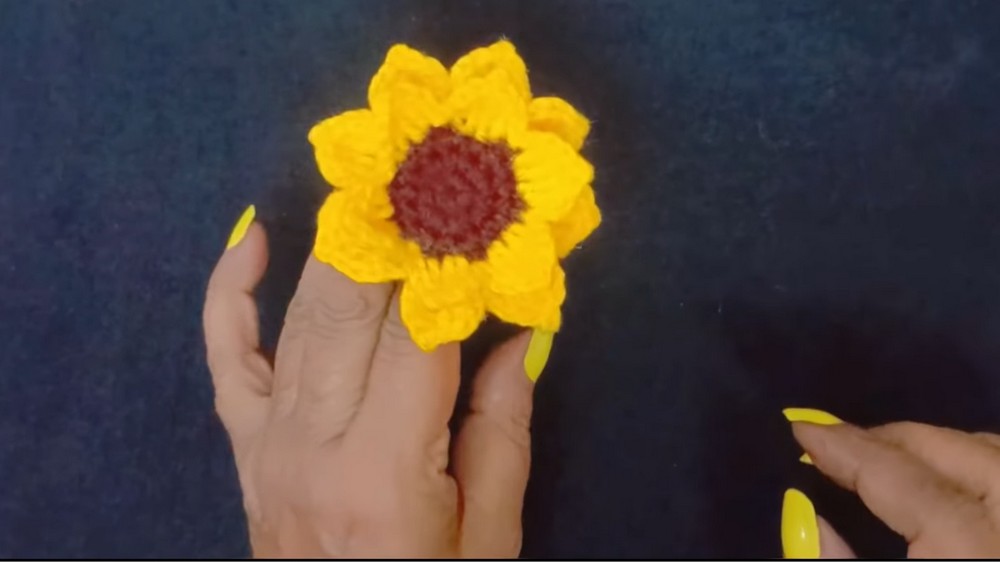
You can pick your favorite color or match it with your dress, making each hair tie unique just for you. Handmade with love, this pattern is easy to follow, and anyone can enjoy creating it. It also makes a thoughtful gift for a friend or child. If you want your hair to look happy and lovely without much effort, this pattern is a perfect choice to share and enjoy.
Materials Needed
- Yarn: Two contrasting colors of #3 (DK/light worsted weight) or #4 (worsted weight) acrylic or cotton yarn
- Color A: Flower center
- Color B: Flower petals
- Crochet Hook: 2.5 mm (or size suitable for yarn; adjust for desired finished size)
- Hair Elastic/Rubber Band: 1 basic hair tie
- Scissors
- Tapestry Needle: For sewing and weaving ends
- Optional: Candle (for sealing loose fibers on rubber band for a neater finish; for professionals)
Abbreviations (US Terms)
| Abbreviation | Meaning |
|---|---|
| MR | Magic Ring |
| ch | Chain |
| sc | Single Crochet |
| sl st | Slip Stitch |
| BLO | Back Loop Only |
| FLO | Front Loop Only |
| dc | Double Crochet |
| tr | Triple Crochet |
| st(s) | Stitch(es) |
| rep | Repeat |
Special Notes
- This pattern uses basic crochet stitches and is suitable for beginners.
- Use a stitch marker if desired to mark rounds.
- Work tightly when attaching to the elastic for durability.
- Pattern is written with two layers for a fuller flower. You may choose any color combination.
- Candle sealing loose fiber ends is optional; recommended for professional finish.
Pattern Instructions
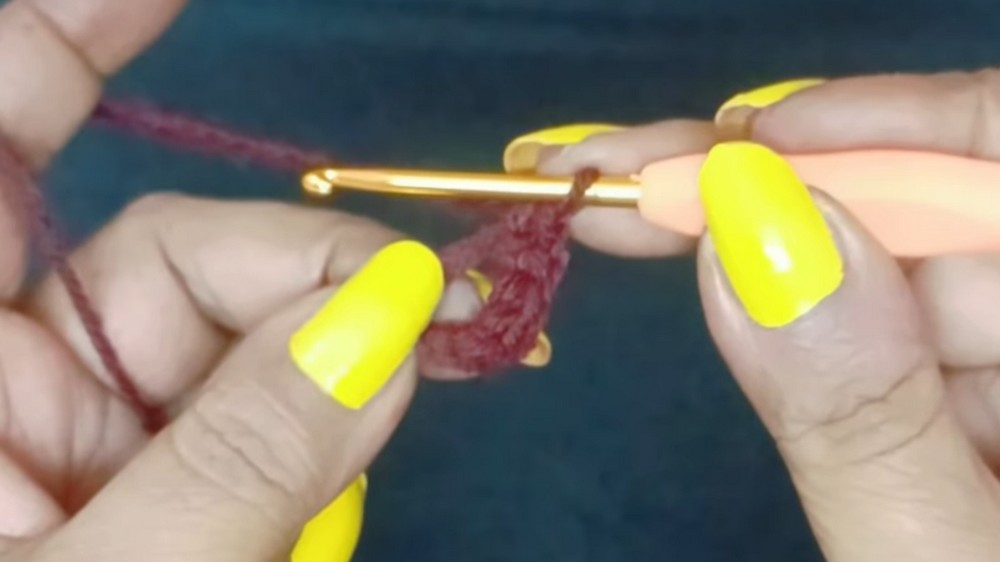
FIRST LAYER: CENTER BASE CIRCLE
With Flower Center Color (Color A):
- MR, ch 1, 6 sc into MR. (6 sts)
- Pull the ring tight. Sl st into first sc to join round.
- Ch 1. 2 sc in each st around. (12 sts)
- Sl st in first sc to join.
- Ch 1. [sc in next st, 2 sc in next st] around. (18 sts)
- Sl st in first sc to join.
- Ch 1. Working in BLO:
- sc in each st around, with 2 sc in every third st
- (sc in next 2 sts, 2 sc in next st) rep around
- (24 sts)
- Sl st in first sc to join. Fasten off and weave in ends.
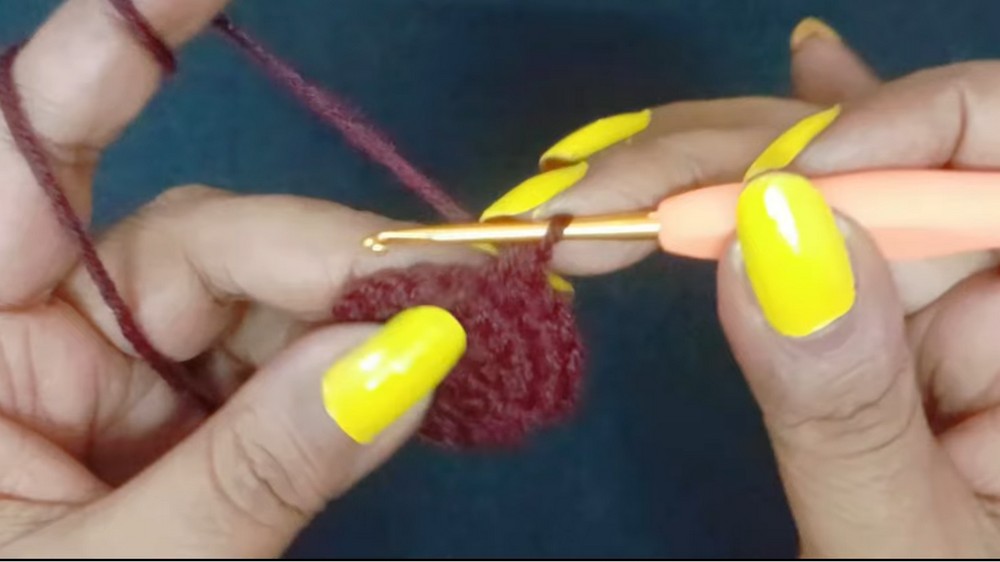
SECOND LAYER: CIRCLE (FOR ELASTIC ATTACHMENT)
With Flower Center Color (Color A):
- MR, ch 1, 6 sc into MR. (6 sts)
- Pull the ring tight. Sl st into first sc to join round.
- Ch 1. 2 sc in each st around. (12 sts)
- Sl st in first sc to join.
- Ch 1. [sc in next st, 2 sc in next st] around. Stop here (18 sts). DO NOT fasten off.
- Place elastic band inside circle and work the following round while crocheting over the band (hold it snugly):
- Ch 1. [sc in next st, 2 sc in next st] around, working over the elastic band (24 sts)
- Sl st in first sc to join. Fasten off and secure with a knot.
FLOWER ASSEMBLY
- Place the first circle over the second circle (with elastic) so both center holes align.
- Attach the two circles at the back with three knots to secure (as described in video).
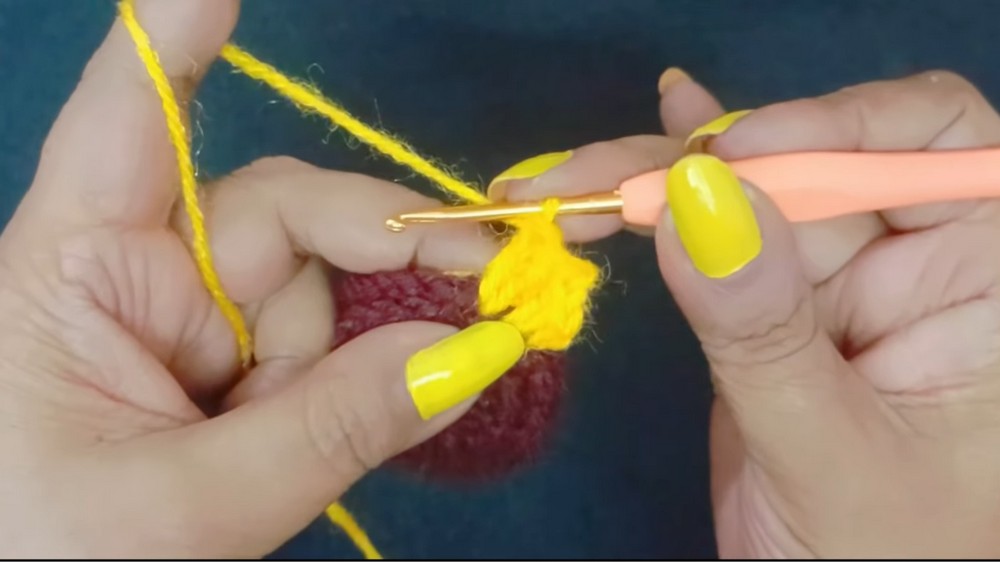
PETAL ROUND – BACK LAYER
Change to Flower Petal Color (Color B):
Working into BLO of Round 3 of the base circle (first layer):
- Attach yarn with slip knot to any BLO st.
- For each petal (repeat for each stitch around):
- Ch 2
- dc in same st
- tr in same st
- Ch 1, sl st in same st (picot for petal tip)
- tr in next st
- dc in next st
- Ch 2, sl st in next st
- Repeat sequence for all stitches around (should have 12 petals).
- Sl st to beginning point, fasten off, and weave end through back.
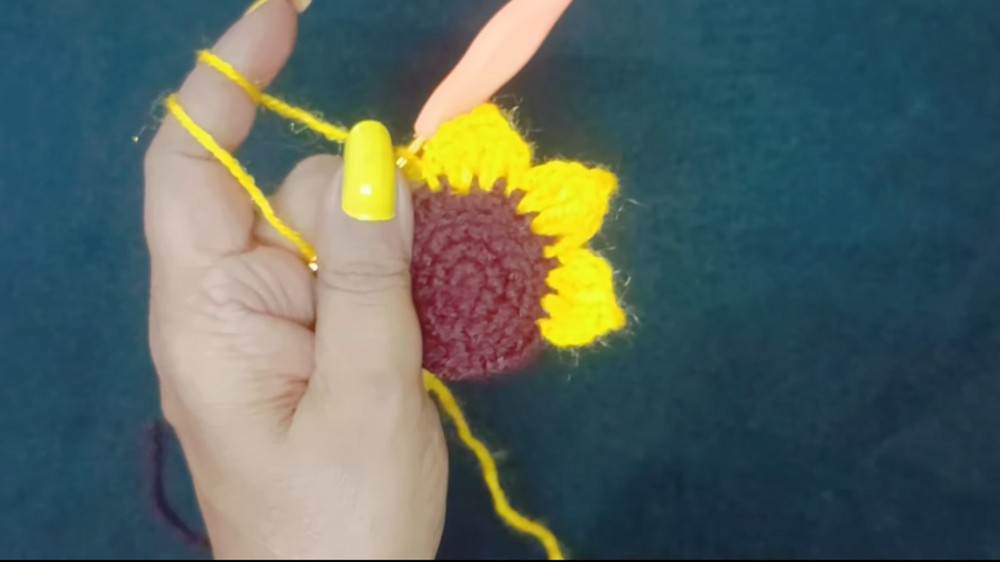
PETAL ROUND – FRONT LAYER
Working into FLO of Round 3 of the base circle (first layer):
- Attach yarn with slip knot to any FLO st.
- For each petal (repeat for each stitch around):
- Ch 2
- dc in same st
- tr in same st
- Ch 1, sl st in same st
- tr in next st
- dc in next st
- Ch 2, sl st in next st
- Repeat sequence for all stitches around (12 petals total).
- Sl st to beginning point, fasten off, and weave end through back.
Professional Finishing (Optional)
- Seal loose fibers on the rubber band with a candle for a clean, professional look.
- Gently pass elastic over the flame (do not burn!) to clean up fibers.
Conclusion
With this step-by-step pattern, you can easily crochet stylish double-layer flower hair bands suitable for personal use or business. The double layer petals and neat attachment to the elastic ensure the accessory holds its shape and looks professional. This project is quick (about 15–20 mins) and beginner-friendly, but following neatness tricks makes it ideal for craft sales.
Pattern Corrections & Tips
- Petal Formation: Ensure you consistently work petal stitches into the correct loops (BLO for back layer, FLO for front layer).
- Elastic Attachment: Crochet tightly over the band for durability.
- Finishing: For professional sale, always tidy up fiber ends and use candle to seal as shown.
- Tip: Use a contrasting color for petals for a sunflower effect; you may use more rounds for bigger flowers.


Leave a Reply