This Knitting Bunny for Beginners pattern is absolutely wonderful! It's clear, easy to follow, and perfect for anyone just getting into knitting. With simple steps and materials, it's impressive how you can create such an adorable bunny from just a square of knitted fabric.
Knitting Bunny For Beginners

This pattern not only teaches basic knitting and sewing techniques but also leaves plenty of room for creativity with different colors and embellishments. It's a fantastic project for knitters looking to make a cute, handmade gift or a delightful addition to their collection. Truly, this bunny pattern is a joy to make!
Materials Needed:
- Yarn
- Knitting needles
- Tapestry needle
- Stuffing material
- Scissors
- Dinner fork (for pom-pom)
- Optional: Tiny black beads, black buttons, or small toy eyes for details
Instructions:
Create the Base
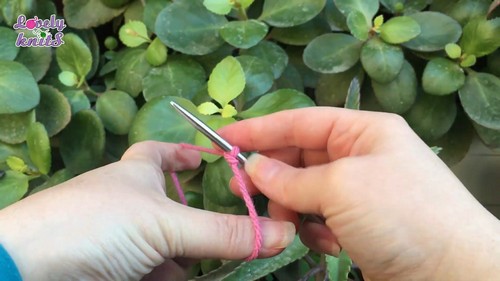
Start with a slip knot.
- Cast on 30 stitches (adjust the number of stitches based on the desired size).
- Knit all rows in garter stitch until you have a square piece. To check if it's square, match up the corners. If they align, your piece is square.
- Do not bind off. Leave a long yarn tail for later steps.
Forming the Bunny

Lay your square piece flat and then turn it upside down.
- Fold it in half both horizontally and vertically to form a triangle. This helps determine the top corner (which will become the bunny's head) and the two other corners.
- With a tapestry needle and a piece of yarn in a contrasting color, loosely stitch along the lines marking the three sides of the triangle.
- Place a small ball of stuffing in the center of the triangle, then pull the yarn to gather and form the bunny's head and ears. Secure the yarn tightly.
- Use additional stuffing to ensure the head is completely round and then stitch to tighten and shape the head.
Shaping the Body

Attach the two edges of the square's remaining part to form the bunny's body. Sew the edges together and stuff the body firmly.
For closing the bottom, loop the yarn through the stitches (like a drawstring), pull tight, and secure.
Adding the Tail
- Use a dinner fork to wrap yarn around, creating a thick bundle. Tie a knot at the center.
- Cut the loops on either side of the knot and trim until you have a smooth, tiny pom-pom.
- Sew the pom-pom to the bunny's body as the tail.

Adding Face Details
- For the eyes, make small stitches with dark yarn, use tiny black beads, buttons, or small toy eyes.
- For the nose, stitch with the dark yarn to form a simple nose.
- Secure all ends with an invisible knot and trim any excess yarn.
Feel free to customize your bunny with different yarn colors, sizes, and additional features such as a ribbon or knitted accessories for personal touches. Enjoy crafting your bunny!


Leave a Reply