

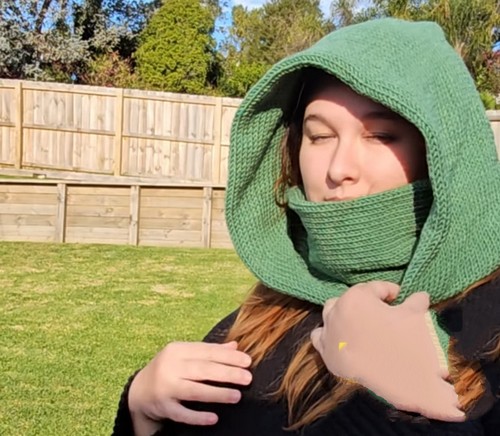
This cozy knit hooded cowl project is like knitting a warm hug that you can wear. With just a knitting loom, some yarn, and a bit of patience, you'll stitch together something you'll love to wrap around yourself. Imagine the soft yarn becoming a stylish hooded cowl that keeps you warm on chilly days.
Knit Hooded Cowl Pattern
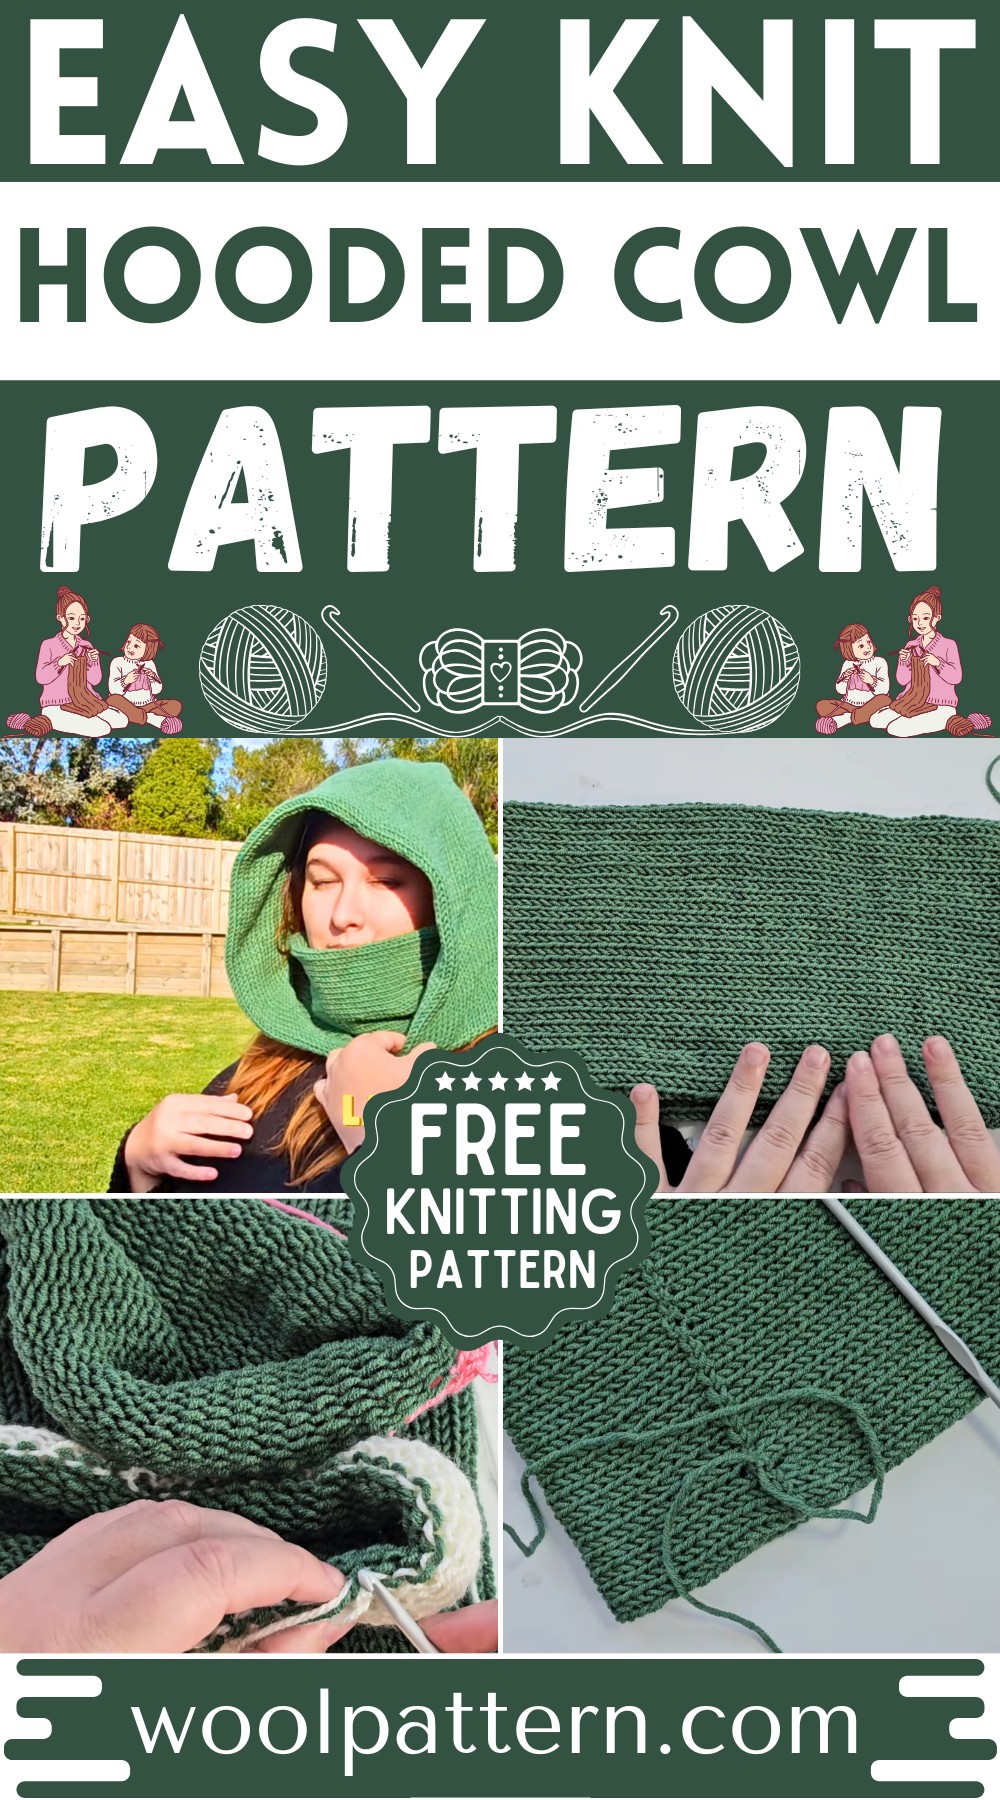
You'll follow a simple set of instructions that guide you through making tubes and connecting them to form the perfect winter accessory. Whether you're new to knitting or looking for an easy project, making this hooded cowl is a fun way to create something beautiful and functional. So grab your yarn and let's get started on this cozy adventure!
Materials Needed:
- Centra 48 pen or king-sized Addie
- A crochet hook (4.5 mm recommended)
- Darning Needle
- Yarn
- Waste yarn
Steps:
Knitting the Tubes:
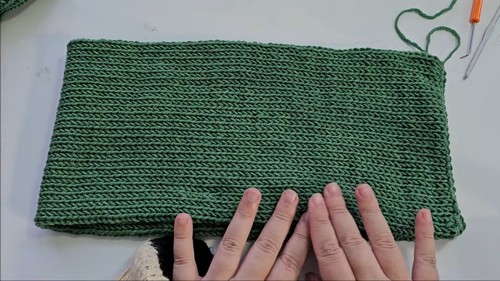
- For an adult size, knit two tubes, each 150 rows long.
- Use waste yarn on both ends of these tubes and seam the tubes closed after removing them from the loom.
- Knit another tube, 120 rows long, and keep the waste yarn on. This tube will be seamed at the edges to create a loop.
Connecting the Tubes:
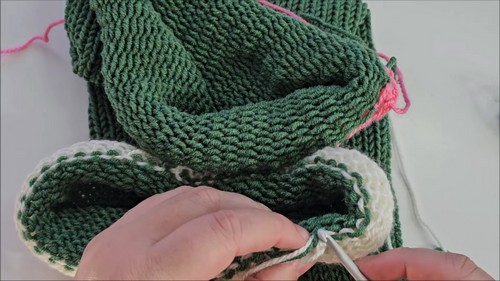
Using a crochet hook, find the first stitch on both ends on your waste yarn.
- Loop them together by inserting the hook into the first stitch of one end and then the first stitch on the other end.
- Pull the loop through and underneath the first loop, working around the project to connect both sides, forming a large, almost infinity scarf shape.
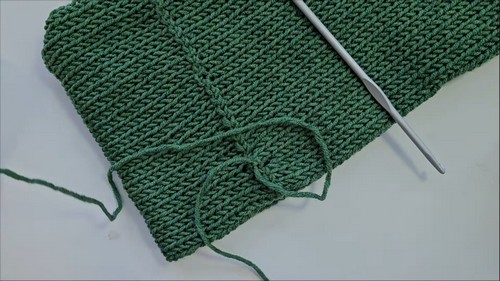
Fastening Off:
- Once you've looped around the entire piece, fasten off the ends and remove the waste yarn carefully.
- Optionally, tie a knot to secure everything and you can choose either to hide your ends now or at the end of the project.
Creating the Hood:
Using a darning needle and yarn, prepare to connect the 150-row pieces.
- Align them edge to edge (long sides together) and use a mattress stitch to join them. This involves inserting the needle through the middle of the "V" formed by the stitches, alternating sides and picking up two stitches each time.
Securing the Hood:
- Once you’ve stitched along the entire length, tie off the ends securely and hide them inside the tubes.
- Fold the base such that the knotted ends meet in the middle to form the back of the hood.
- Again, use the mattress stitch to seam up what will become the back of the hood.
Attaching the Mask:
- Prepare to attach the mask portion (likely the 120-row loop) to the hood, ensuring seam sides line up at the back.
- Start mattress stitching from the center out towards one side, secure, and trim. Then, do the same for the other side.
Finishing Touches:
- Make sure all loose ends are secured and hidden within the tubes to tidy up your project.


Leave a Reply