

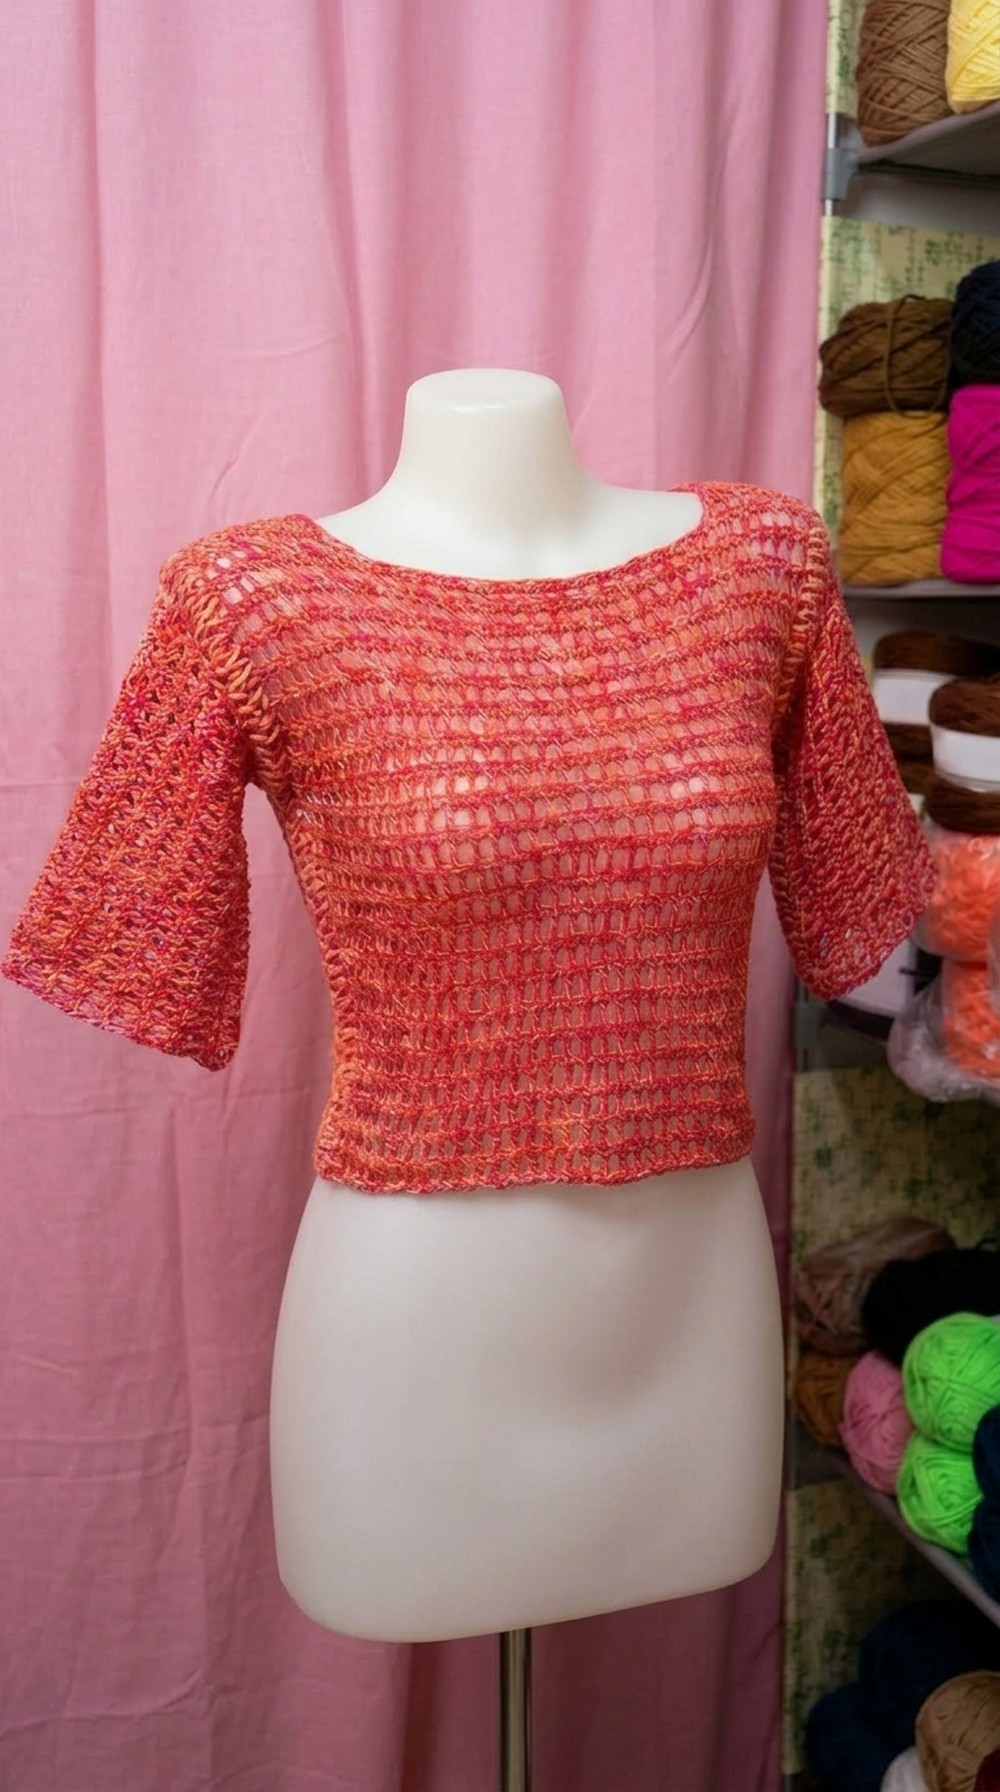
Upgrade your wardrobe with this Free Crochet Mesh Top Pattern that delivers a breezy, stylish top perfect for summer outings, layering, or gifting loved ones.
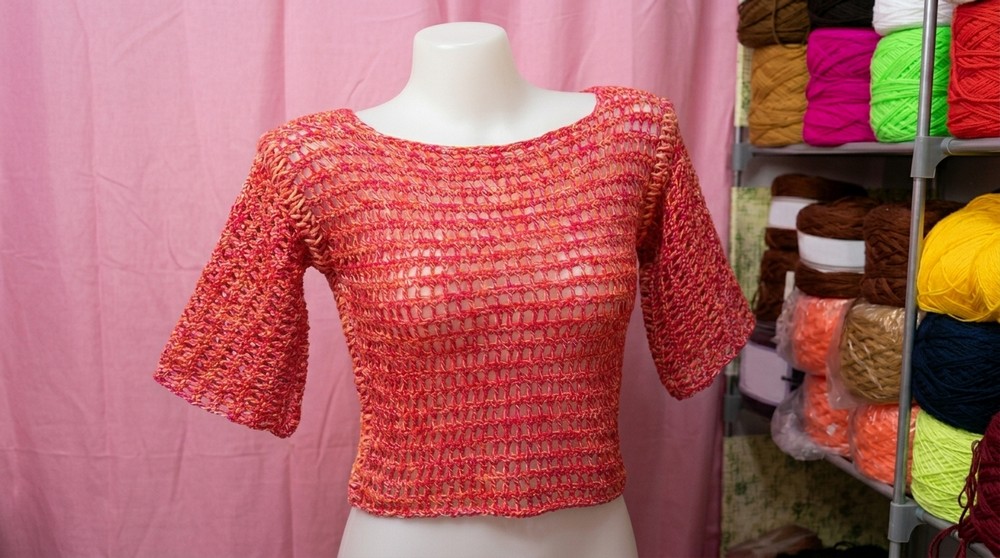
On a warm sunny day, wearing something light and breathable can make all the difference in comfort and style. The Free Crochet Mesh Top Pattern shows how to make a handmade top that feels airy, soft, and stylish. This mesh top usually has an open, airy design with simple crochet stitches that create a delicate and elegant look. Its loose fit makes it perfect for layering over a tank top, a dress, or even a swimsuit, making it useful for summer outings, beach trips, or casual strolls.
Chic Free Crochet Mesh Top Pattern to Upgrade Your Wardrobe
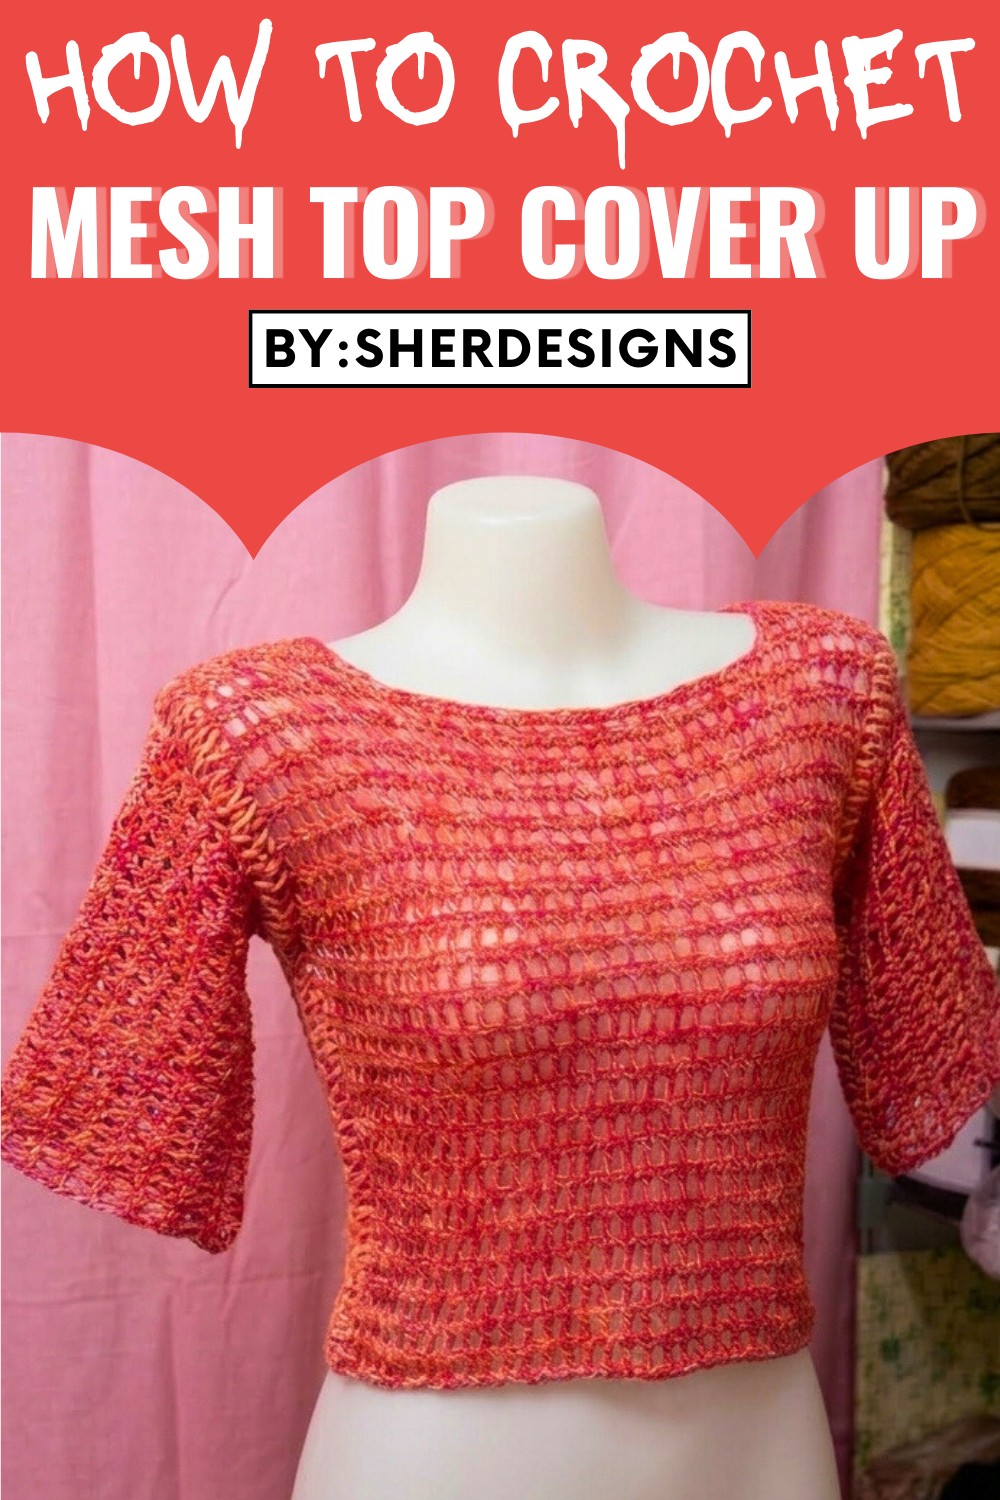
The soft yarn and neat crochet texture give it a comfortable feel while also adding a handmade charm that stands out. The pattern follows clear and easy steps, so even beginners can make it without difficulty. By choosing different yarn colors, the top can look vibrant, soft, or playful. In the end, this crochet mesh top is a lightweight, stylish, and charming handmade piece for warm days.
Crochet Smash Top Pattern
Finished Size
- Body: Fits waistline 24 inches and bustline 32 inches (referenced from the mannequin).
- Sleeves: 48 chains for sleeve foundation.
- The design can be easily customized for different sizes (refer to customization tips).
Materials Required
- Yarn
- Acrylic 4-ply yarn in your preferred color.
Example: Lightweight yarn with good drape.
- Acrylic 4-ply yarn in your preferred color.
- Crochet hook:
- 3.5 mm hook
- Supporting Tools:
- Stitch marker (to secure work as needed).
- Scissors.
- Tape measure (optional for size adjustments).
Gauge
Gauge is determined by working:
- Single crochet (sc) rows.
- 10 cm square = approximately 20 stitches x 24 rows.
(Test your gauge before beginning if you adjust hook size.)
- 10 cm square = approximately 20 stitches x 24 rows.
Pattern Instructions
Foundation Base
- Start with a slip knot.
- Chain 73 for the body’s foundation (adjust for size if needed).
- First row:
- Add 1 chain (turning chain).
- Work 73 single crochet stitches (sc) evenly across the chain foundation.
- Tip: Ensure not to pull too tightly on the yarn to avoid a rigid edge.
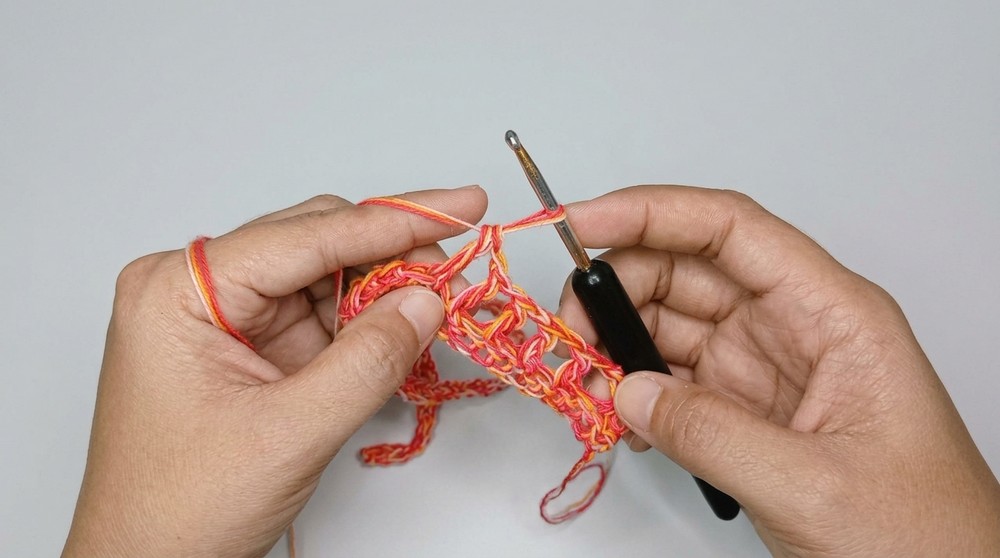
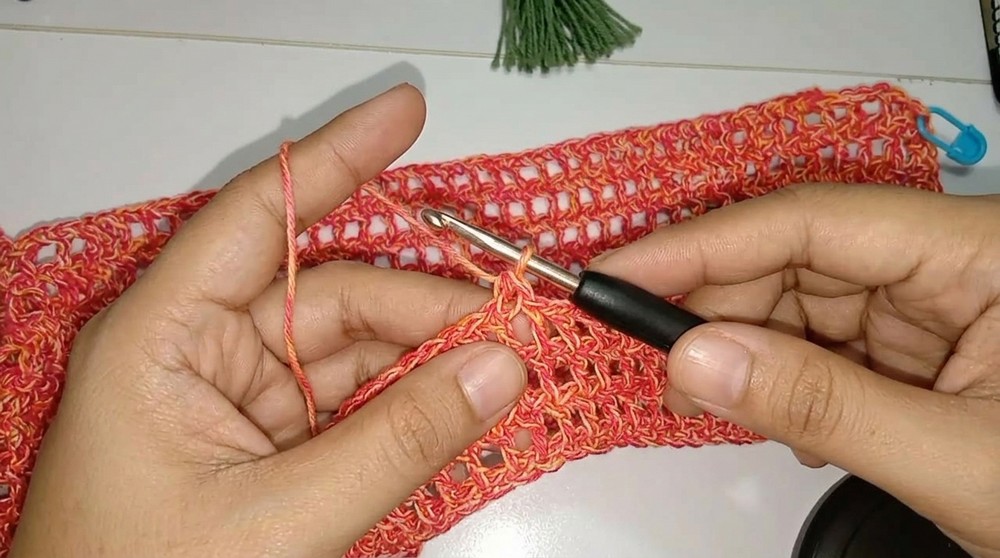
Mesh Stitch
- Second row (start mesh pattern):
- Chain 3 (as the turning chain; counts as the first double crochet).
- Turn work.
- Skip 1 stitch, make 1 double crochet (dc) in the next stitch.
- Chain 1 to form a space, then yarn over and skip the next stitch.
- Continue the sequence: dc, chain 1, skip 1 stitch until the end of the row.
- Third row:
- Chain 1, turn work.
- Single crochet (sc) across all stitches (including spaces).
- Total: 73 single crochet stitches.
- Repeat rows:
- Alternate between row 2 (mesh pattern) and row 3 (single crochet row) for the mesh top section.
- Work 29 rows, ensuring uniform mesh design.
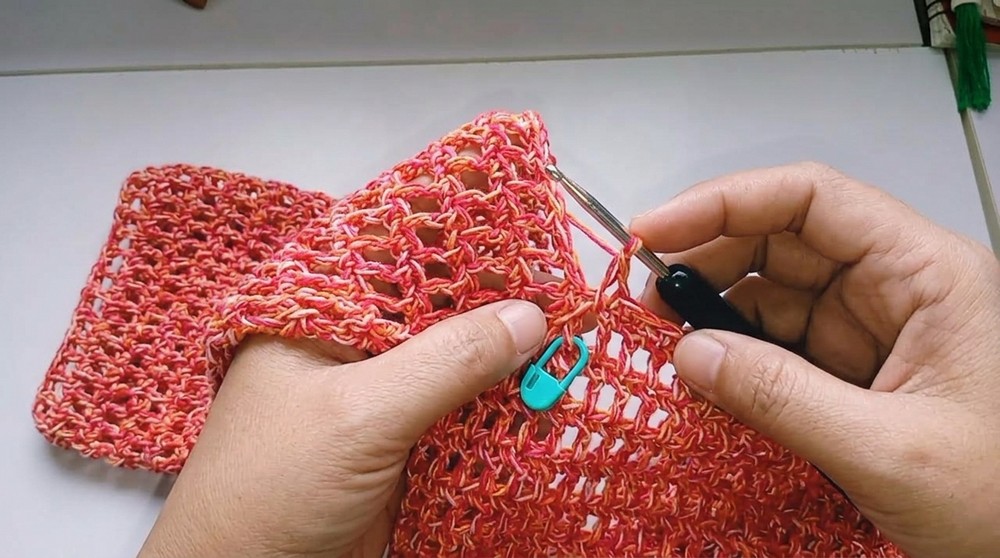
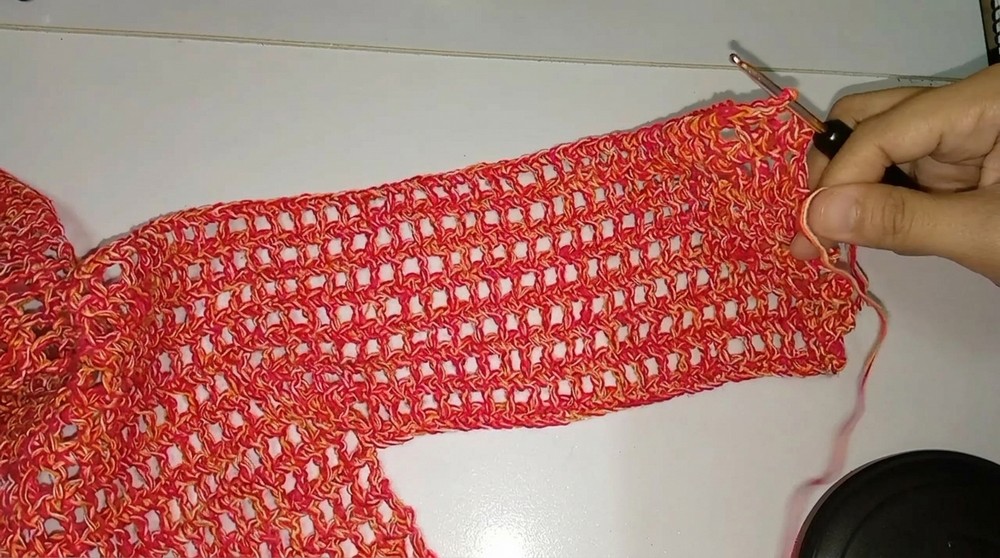
Sleeves
- Create sleeve foundation at row 29:
- Chain 48 after finishing the body row.
- Add 1 chain (starting chain for single crochet).
- Work 48 single crochet stitches into these chains for the first sleeve.
- Attach and secure the sleeve to the top edge using a stitch marker.
- Second Sleeve:
- Repeat the process on the opposite side, creating another 48 chains and 1 turning chain.
- Add 48 single crochet stitches to match the first sleeve.
- Continue stitching:
- Work mesh rows with alternating row 2 and row 3 patterns.
Finishing Mesh Rows
- At the end of the sleeves:
- Count the completed sections:
- Body mesh sections should have 14 meshes.
- Sleeve mesh sections should have 7 meshes each.
- Count the completed sections:
- Work double crochet rows:
- For mesh continuity, add double crochet rows (approximately 24 stitches for the body section).
Customization Ideas
- Size Adjustments:
- Increase or decrease the foundational chain for a customized fit:
- Bust and waist adjustments (+/- multiples of 4 stitches).
- Adjust sleeve foundation chains if longer or shorter sleeves are desired.
- Increase or decrease the foundational chain for a customized fit:
- Colors:
- Choose contrasting yarn for sleeves or borders to highlight the design.
- Edging Details:
- Add a picot border or scalloped edging around the sleeves and neck for extra elegance.
Tips for Smooth Crocheting
- Keep tension consistent: Loose stitches help maintain the mesh look.
- Use stitch markers: Secure each key section, especially at sleeve joins.
- Check alignment: Ensure body and sleeves align for symmetry.
- Block the top: Lightly block after completing to enhance the mesh effect.
Special Techniques
- Chain Foundation for Sleeves:
- Ensure chains are not too tight to avoid puckering at the sleeve edges.
- Mesh Pattern Precision:
- Skip stitches carefully when crocheting to maintain even spacing.
Final Assembly and Remarks
- Join Sleeves:
- Attach sleeves at an angle or flat as per your preferred style.
- Weave in Ends:
- Use a tapestry needle to neatly secure all loose ends.
- Block the Finished Top:
- Lightly block with a spray of water and stretch to shape (use pins if needed).
- Final Look:
- The finished smash top should have lightweight drape, elegant mesh detailing, and comfortable sleeves.
Conclusion
Congratulations on completing this chic smash top! This pattern is perfect for layering over outfits and can be adapted for colder or warmer months by choosing appropriate yarn. The alternating mesh design is aesthetically pleasing and functional, allowing plenty of customization for your style. Whether for your collection or as a handmade gift, this project showcases your creativity and skill.


Leave a Reply