

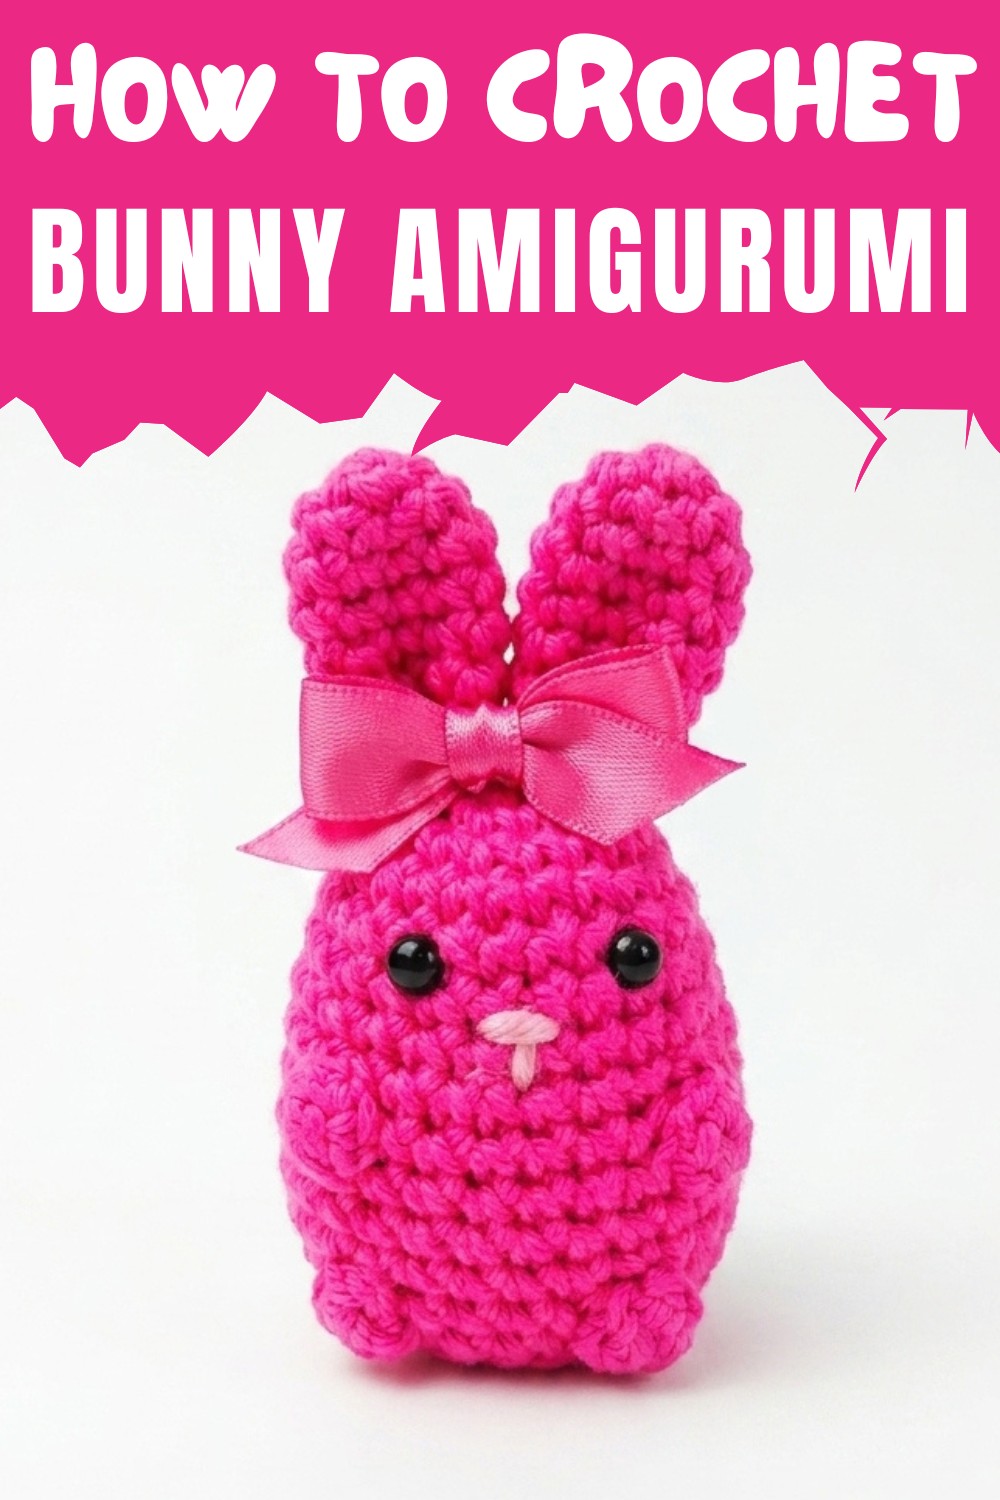
Dream up something special with this Free Crochet Bunny Amigurumi Pattern, guiding you to craft a cuddly bunny that’s perfect for any occasion.
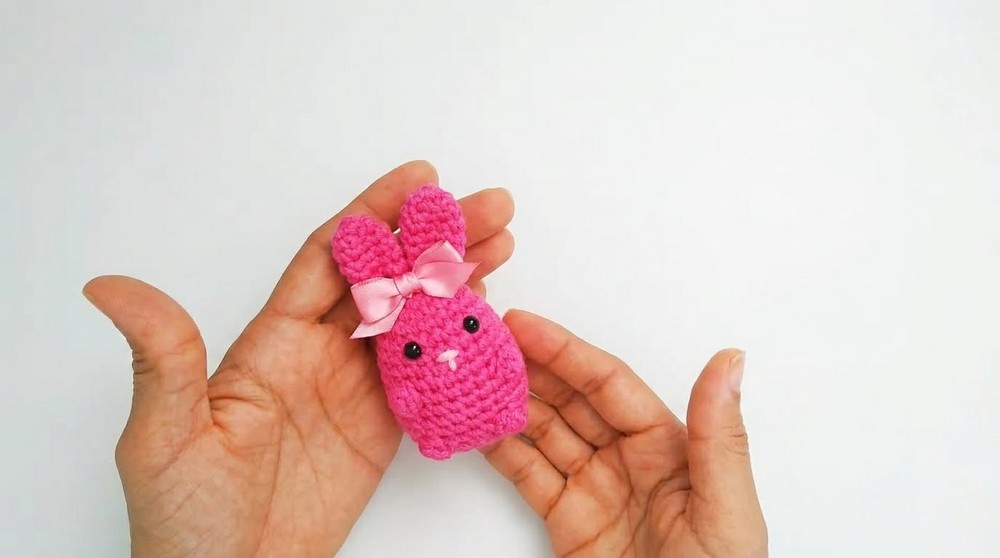
If you love creating cute and meaningful handmade projects, this little bunny project will steal your heart! The free crochet bunny amigurumi pattern is an easy and fun way to make a soft and adorable bunny toy that’s perfect for all ages. With its round body, floppy ears, and charming design, this bunny is not just a decoration but also a great gift for kids, friends, or even as a keepsake for special occasions like Easter or baby showers.
Unique Crochet Bunny Amigurumi Pattern for Gifting and Decorating
Its small size makes it quick to finish, and you can customize the colors to match your style or theme. Whether perched on a shelf or hugged by tiny hands, this bunny adds a cheerful touch wherever it goes. This pattern is beginner-friendly, using simple stitches that are explained step-by-step, so you’ll feel confident throughout the creation process.
You’ll love the joy it brings as each section comes together to form a lovable bunny. Grab your crochet hook and start bringing this delightful little creature to life it’s a project filled with charm, creativity, and endless possibilities.
Crochet Adorable Bunny Amigurumi
Skill Level:
Intermediate to Advanced
Finished Size:
Approximately 6–8 inches (15–20 cm) tall, depending on yarn tension and materials.
Materials Needed:
- Yarn:
- Main Body Color: Acrylic yarn in a pastel shade (e.g., light pink).
- Optional: Extra colors for embellishments.
- Crochet Hook: 3.0 mm
- Stuffing: Polyester fiberfill for a firm and plush finish.
- Thread for Embroidery:
- Brown thread for the eyes.
- Pink thread for the nose.
- Tools & Optional Embellishments:
- Scissors
- Tapestry needle (for sewing and embroidery).
- Stitch markers (to keep track of rounds).
- Optional: Mini bows, lace fabric, small flowers, or any decorations.
- Fork (for making a pompom tail).
- Blush and a small brush for adding a blush effect.
Key Abbreviations (US Terminology):
- Ch: Chain
- SC: Single Crochet
- HDC: Half Double Crochet
- DC: Double Crochet
- Sl St: Slip Stitch
- Inc: Increase (2 SC into the same stitch).
- Dec: Decrease (work 2 stitches together).
- MR: Magic Ring
Special Notes:
- Working in the Round:
The bunny body and ears are worked in continuous rounds without joining unless specified. Use a stitch marker to mark the beginning of each round. - Tension:
Maintain tight tension to prevent the stuffing from peeking through the stitches. - Assembly:
Securely sew all parts and hide loose ends for a polished look.
Pattern Instructions:
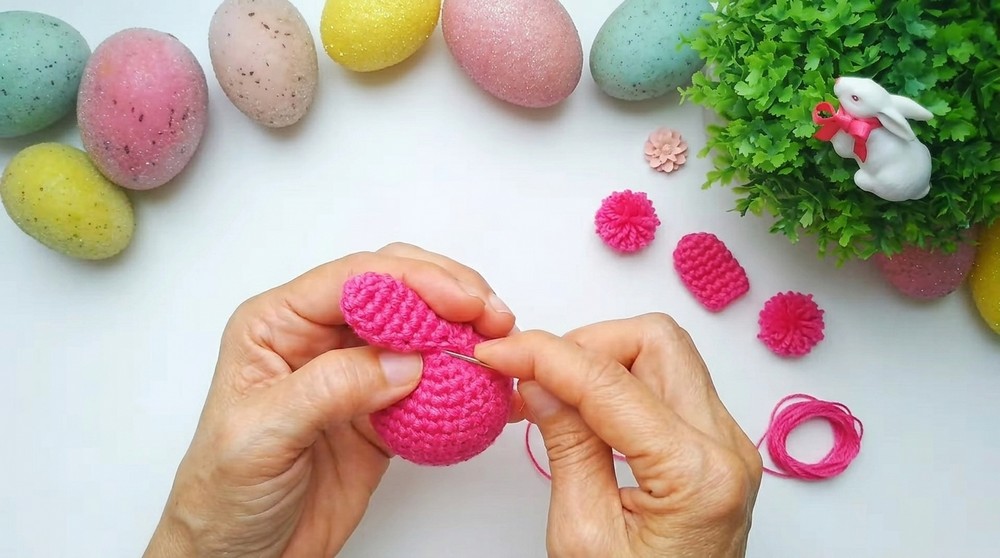
Bunny Body and Head (worked as one piece)
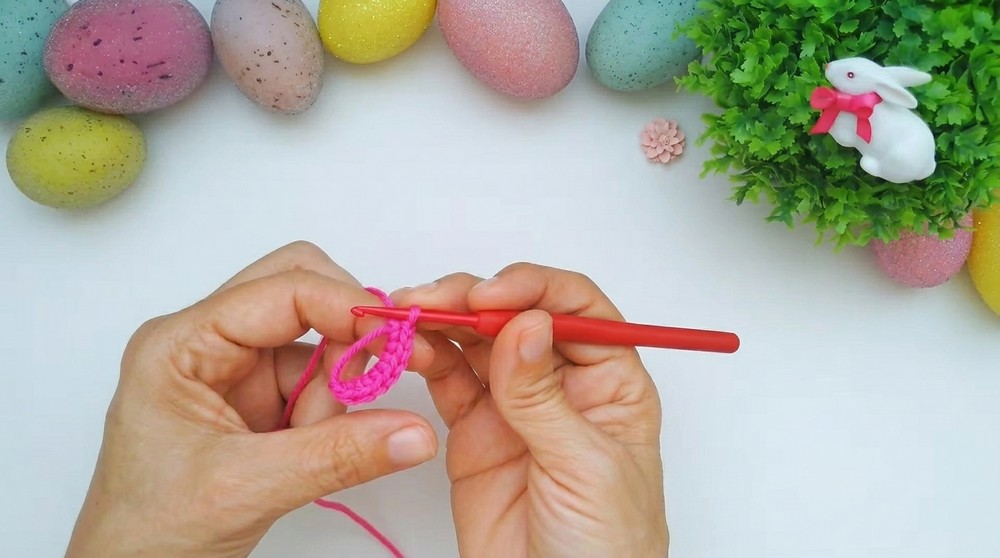
- Round 1:
- Start with a Magic Ring (MR) and secure it.
- Crochet 8 SC into the MR. (8 stitches)
- Round 2:
- Work 1 Inc in each stitch around. (16 stitches)
- Round 3:
- SC in the next 3 stitches, then Inc. Repeat this sequence 4 times. (20 stitches)
- Round 4:
- SC in each stitch around. (20 stitches)
- Round 5:
- SC in the next 4 stitches, then Inc. Repeat this sequence 4 times. (24 stitches)
- Rounds 6–7:
- SC in each stitch around. (24 stitches per round)
- Round 8:
- SC in the next 5 stitches, then Inc. Repeat this sequence 4 times. (28 stitches)
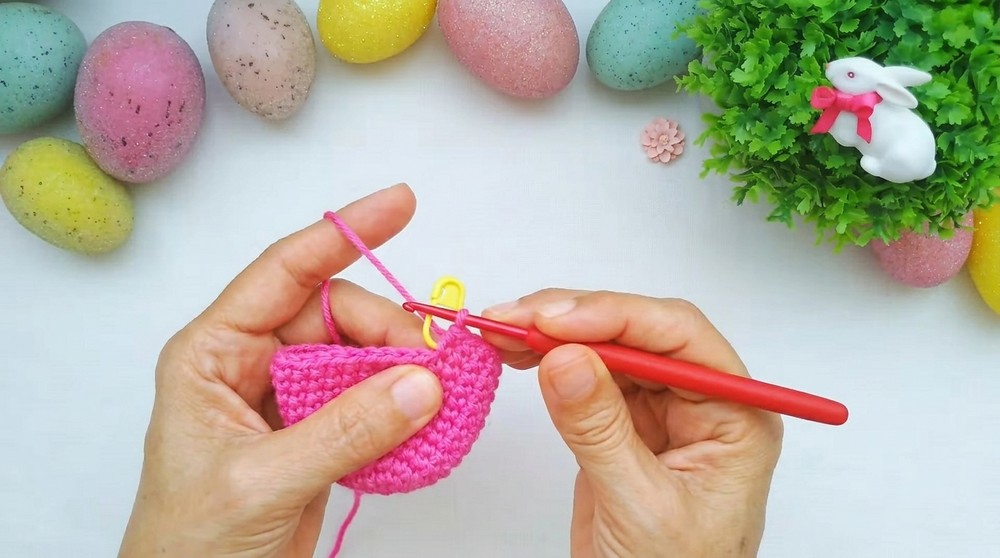
- Round 9 (Adding the Front Legs):
- SC in the next 10 stitches.
- To create the front leg:
- Work 4 DC into the next stitch, leaving each stitch unfinished. (Pull up a loop on each DC but do not complete them.)
- You will now have 5 loops on the hook. YO and pull through all loops.
- Chain 1 to secure the puff stitch.
- SC in the next 6 stitches.
- Make the second leg using the same puff stitch method in the next stitch.
- SC in the remaining 10 stitches. (28 stitches total)
- Rounds 10–12 (Belly Rounds):
- SC in each stitch around. (28 stitches per round)
- Take care not to crochet into the chain stitch that closes the front legs.
- Round 13 (Back Legs):
- SC in the next 11 stitches.
- Create a puff stitch (as described in Round 9) for the first back leg.
- SC in the next 4 stitches.
- Create a puff stitch for the second back leg.
- SC in the remaining 11 stitches. (28 stitches total)
- Round 14:
- SC in each stitch around. (28 stitches)
- Round 15 (Decreasing the Body):
- SC in the next 5 stitches, then Dec. Repeat this sequence 4 times. (24 stitches)
- Round 16:
- SC in each stitch around. (24 stitches)
- Round 17 (More Decreases):
- SC in the next stitch, then Dec. Repeat this sequence 8 times. (16 stitches)
- Round 18 (Final Decrease):
- Work 8 Dec to close the bottom of the bunny. (8 stitches)
- Fasten off and use a tapestry needle to thread through the last 8 stitches, tightening the hole. Hide the tail inside the body.
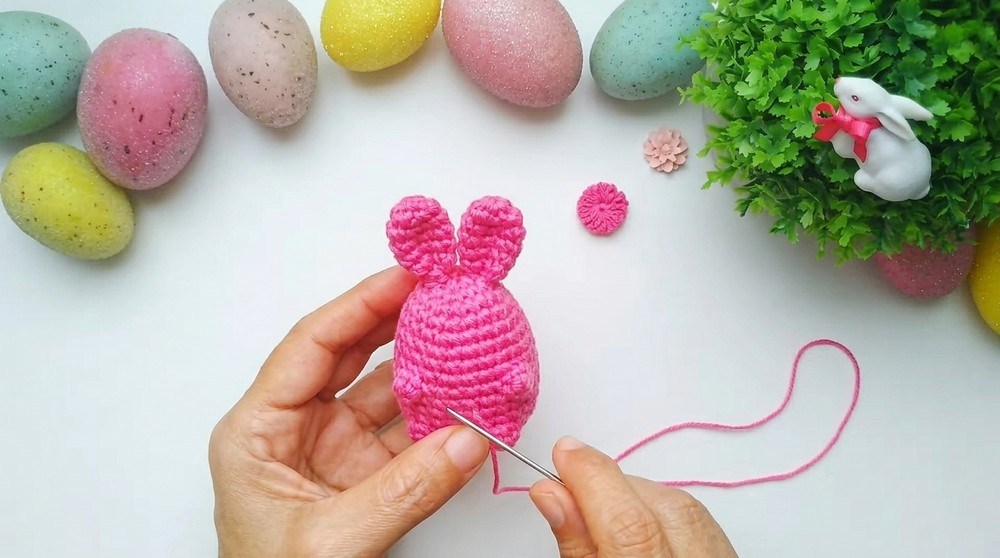
Ears (Make 2)
- Round 1:
- Start with a Magic Ring and secure it.
- Work 6 SC into the MR. (6 stitches)
- Round 2:
- SC in the next stitch, then Inc. Repeat this sequence 3 times. (9 stitches)
- Rounds 3–6:
- SC in each stitch around. (9 stitches per round)
- Fasten off:
- Leave a long tail for sewing.
- Fold the ear slightly at the base and sew onto the top of the bunny's head.
Tail (Pompom)
- Wrap the bunny's body color yarn around a small fork (approximately 8 loops).
- Slide the loops off the fork and tie a piece of yarn tightly around the center of the loops.
- Cut the loops open and fluff them to form a pompom.
- Trim the pompom to make it even.
- Sew the pompom securely to the back of the bunny.
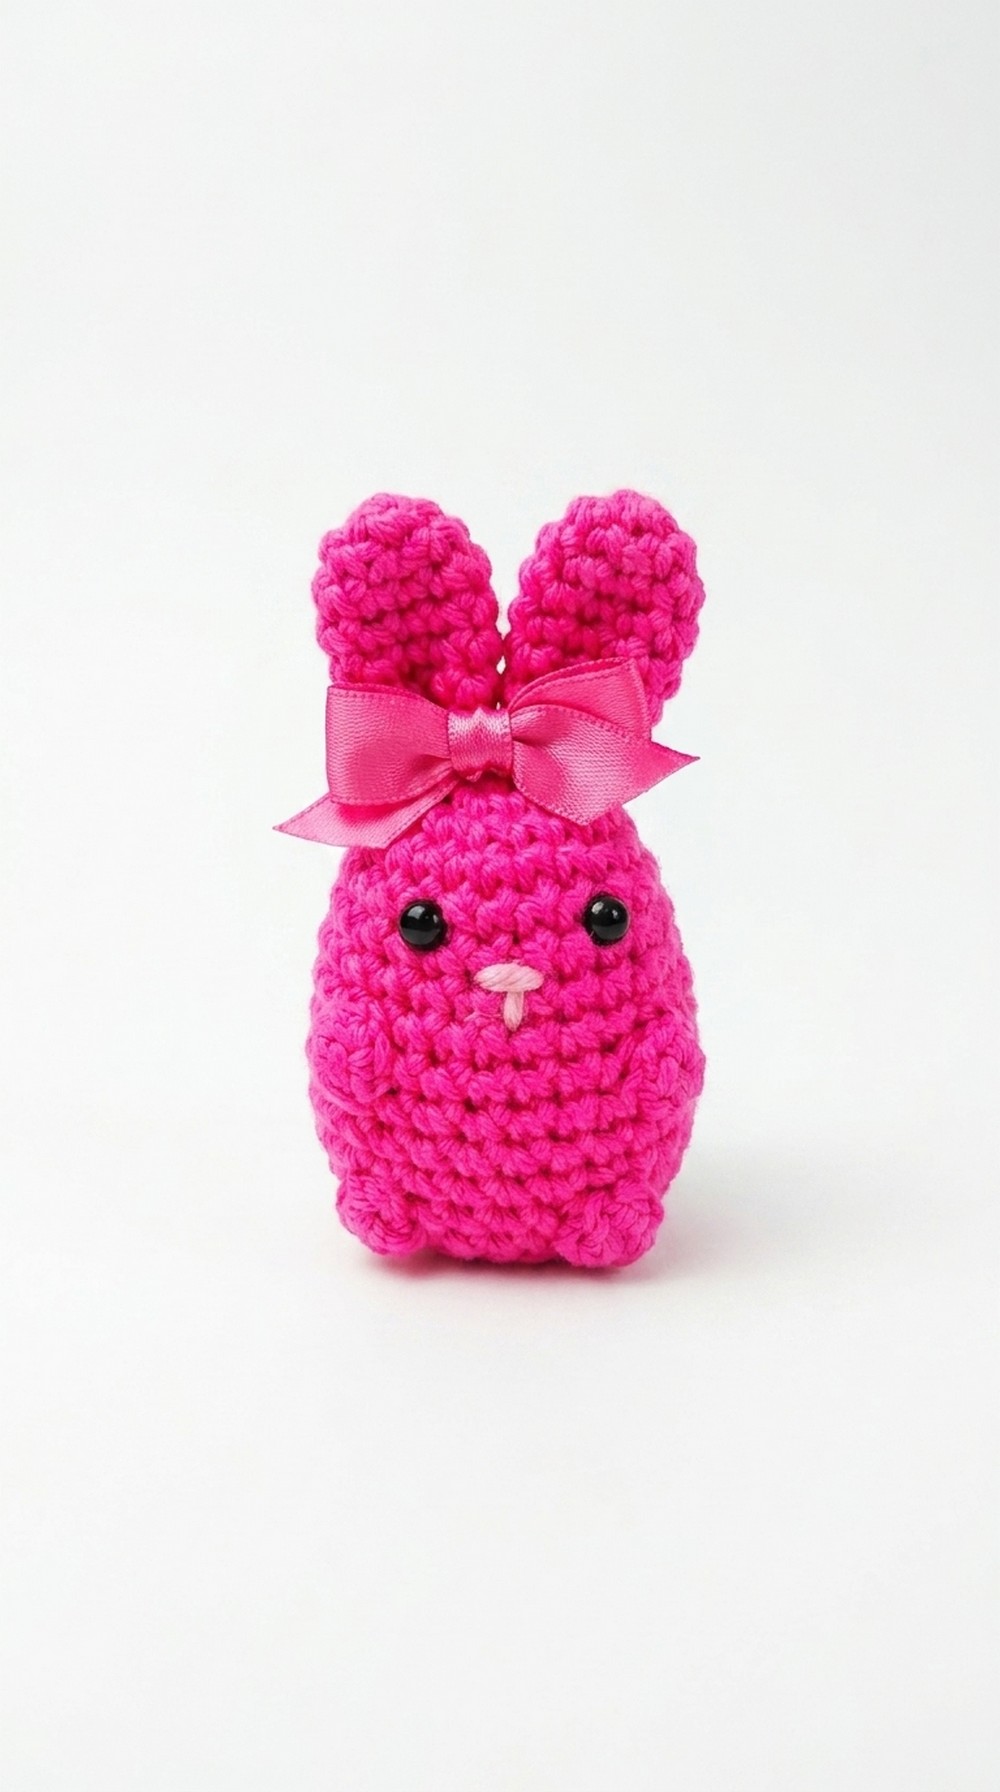
Face (Nose and Eyes)
- Nose:
- With pink embroidery thread, stitch a small nose just above the front legs. Create a small triangle shape and fill it in with a few stitches.
- Eyes:
- Use brown embroidery thread to sew simple oval eyes. Place them symmetrically above the nose. Add multiple strands for a more prominent look.
- Optional: Add a touch of blush to the cheeks using real blush and a small brush or soft yarn.
Optional Embellishments
- Sew or glue on a small bow or lace around the bunny's neck for added charm.
- Add tiny flowers or other decorations to enhance your bunny’s appearance.
Tips for Success:
- Use Stitch Markers: This is especially helpful when working in continuous rounds.
- Check Stitch Counts: Counting rows and stitches can prevent errors.
- Stuff Evenly: Ensure the body is firm but not overstretched. Adjust stuffing as needed before closing.
- Customization: Experiment with different yarn colors or add accessories like hats, scarves, or embroidered details for a unique touch.
Conclusion:
Congratulations! You’ve completed this adorable bunny amigurumi. This project combines creativity, attention to detail, and basic crochet techniques to create a delightful handmade gift or decoration. With options for personalization, you can turn this bunny into a unique treasure loved by all.
Leave a Reply