

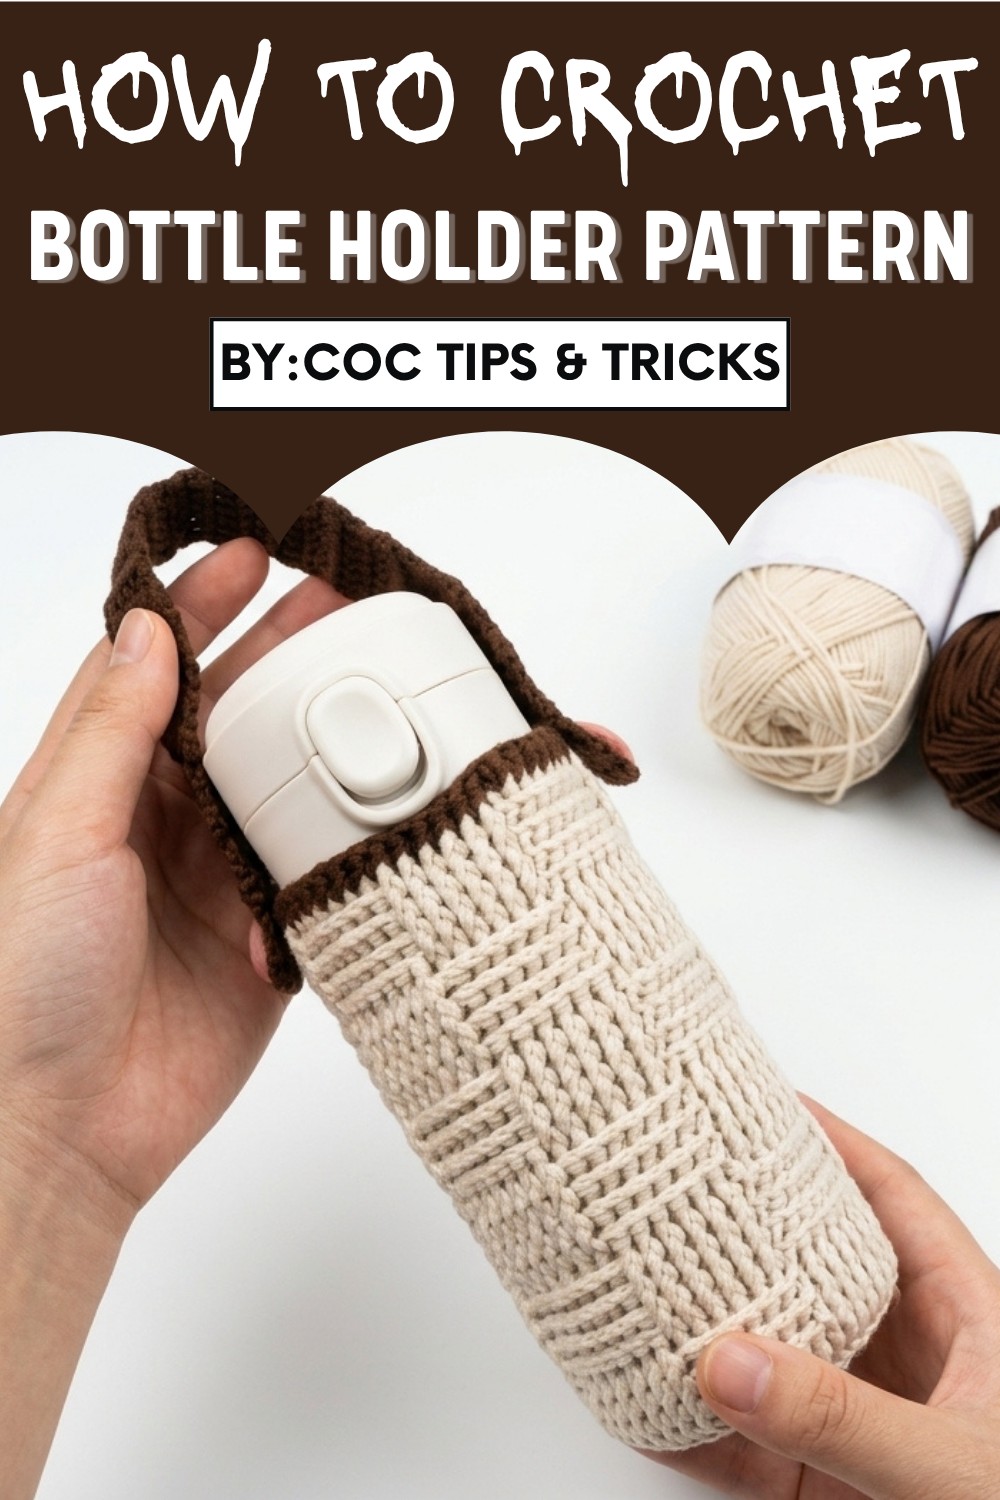
Carry your water with style using this Free Crochet Bottle Holder Pattern, perfect for functional, sustainable, and creative everyday use.
Keeping your water handy has never looked so stylish! This practical yet charming crochet project is designed to make hydration effortless while adding a personal touch to your daily routine. Featuring an elegant and sturdy design, this bottle holder pattern is perfect for active days, outdoor adventures, or simply carrying your favorite drink comfortably on the go. The pattern uses basic crochet techniques, making it beginner-friendly, while also challenging enough for experienced crocheters who want to play with textures and shapes.
Elegant Crochet Bottle Holder Pattern for Everyday Use
The holder's adjustable size ensures it can fit a variety of bottle shapes, and the durable strap keeps your hands free, making it ideal for hiking, walking, or commuting. Beyond its functionality, crocheting this pattern is an excellent way to reduce waste by minimizing plastic bags or disposable carriers. Choose colorful yarns to match your style or gift your handmade holder to someone special—it’s both thoughtful and practical.
This versatile accessory is a wonderful addition to your handmade collection, delivering convenience, sustainability, and creativity all in one project. Invest your time in this engaging task, and enjoy a reliable, beautiful bottle holder that makes staying hydrated a treat.

Project Details
- Skill Level: Beginner/Intermediate
- Features:
- Adjustable base to fit any cup size
- Checkerboard texture using front and back post double crochets
- Practical strap for easy handling
- Uses: Perfect for hot or cold cups, as a gift, or even as eco-friendly party accessories.
Supplies You'll Need
- 4-ply yarn in your choice of color
- 2.5 mm crochet hook
- Scissors
- Tapestry needle
Step-by-step Crochet Pattern
Base of the Cup Sleeve
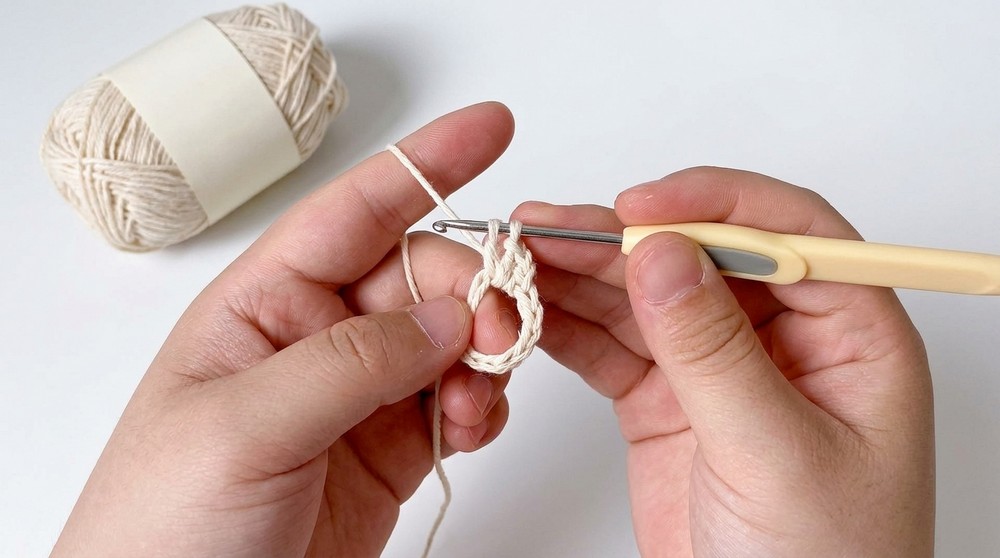
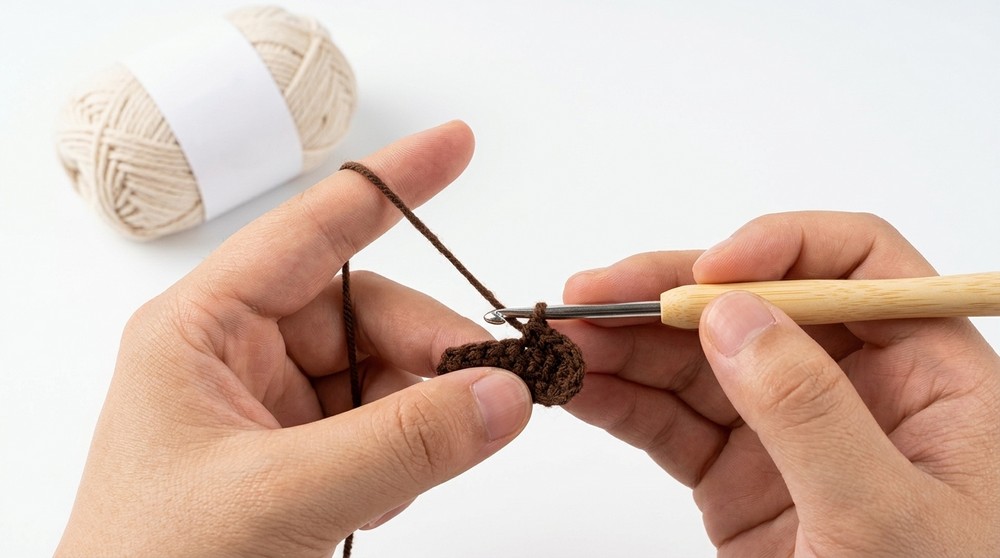
- Start with a Magic Ring.
- This forms the tight and adjustable center of the sleeve.
- Round 1:
- Crochet 12 double crochets (dc) inside the magic ring.
- Pull the ring tight and slip stitch (sl st) to the first stitch to close the round.
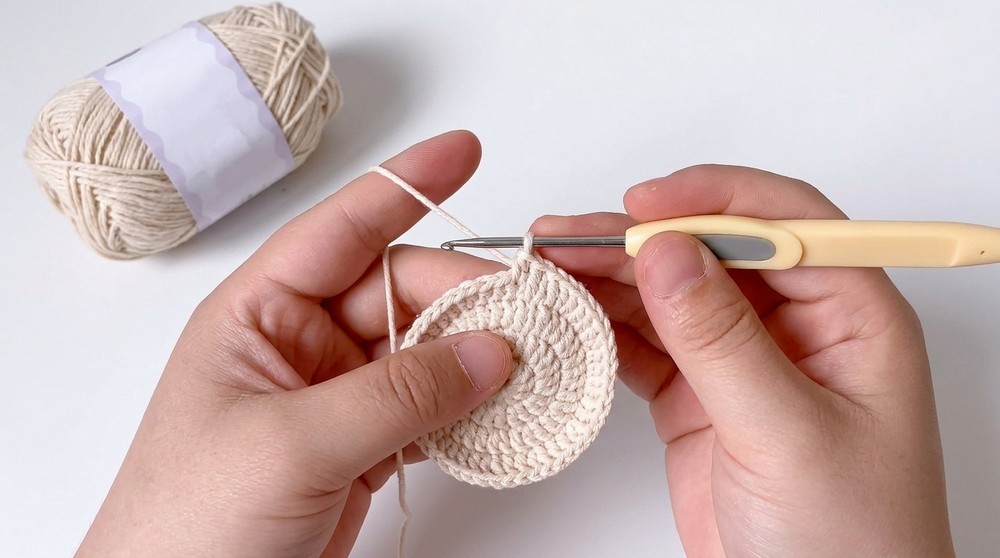
- Round 2:
- Work 1 increase in each double crochet from Round 1 (i.e., 2 dc in each dc).
- You should have 24 stitches by the end of this round.
- Round 3:
- Crochet 12 groups of double crochets, with 1 increase in each group. This creates a more defined expansion.
- Round 4:
- Continue expanding as needed by increasing in each 12 double crochet group until the diameter matches your cup’s bottom.
- Round 5:
- Crochet 1 round of double crochets in only the inner half loops of the stitches. This marks the transition from the base to the sleeve body.
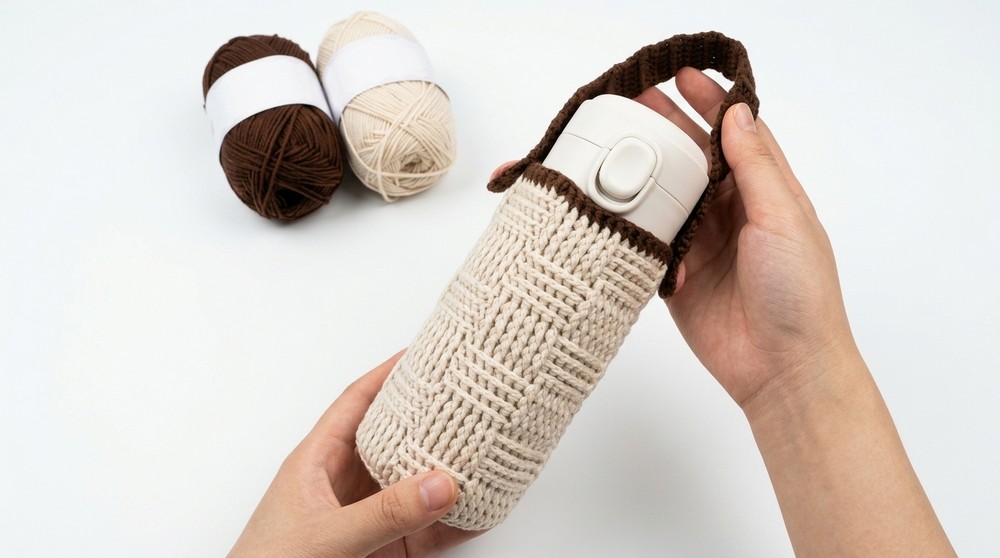
Checkerboard Pattern (Body of the Sleeve)
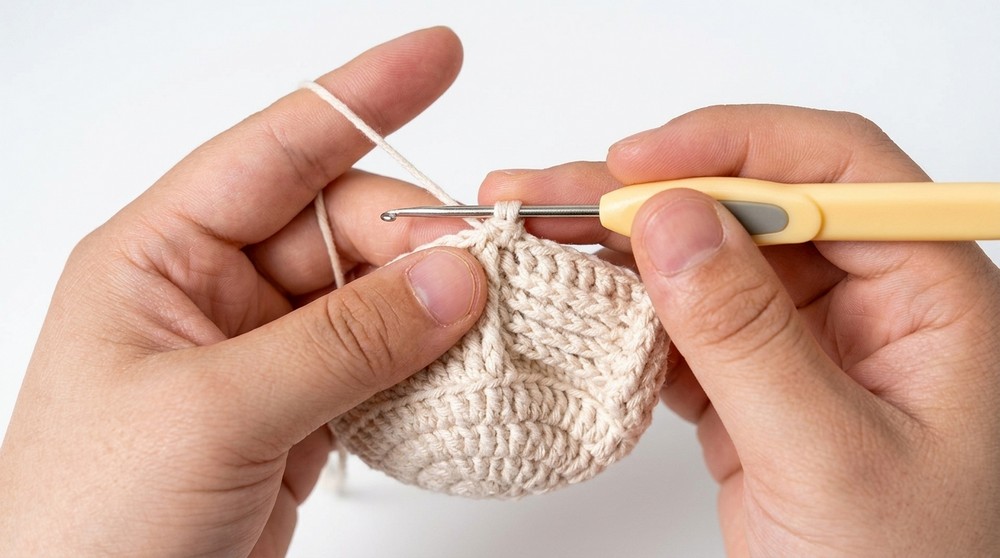
Round 6 (Start the Texture):
- Work 6 front post double crochets (fpdc) diagonally:
- Yarn over, insert your hook to the right of the next double crochet, and bring it out from the left.
- Complete a double crochet. Repeat 6 times.
- Next, crochet 6 back post double crochets (bpdc):
- Insert the hook from the back of the stitch from inside to the outside, then bring it out from the right side. Complete a double crochet.
Repeat the sequence of 6 fpdc and 6 bpdc around the entire sleeve. At the end of this round, you’ll notice the checkerboard begins to take shape.
Crochet Four Rounds:
- Continue crocheting in this pattern (6 fpdc, 6 bpdc) for 4 rounds total to build the texture.
Switch the Pattern:
- After completing 4 rounds, switch the stitch order:
- Start with 6 bpdc, followed by 6 fpdc in the next round.
- Continue alternating the pattern and crochet four more rows or until the sleeve reaches your desired height.
Finish the Cup Sleeve
- Final Round:
- Change to a contrasting yarn color if desired.
- Crochet one round of front post double crochets (fpdc) all the way around. This adds a clean and professional border.
Add a Strap
- Chain 9 stitches.
- From the 4th chain from the hook, crochet 6 dc across.
- Chain 2 and turn your work.
- Continue crocheting 6 dc in each row until the strap reaches the desired length for your sleeve.
- Attach the strap to the sleeve.
- Securely sew the ends of the strap to opposite sides of the sleeve to create a handle.
Special Features of the Pattern
- Customizable Fit: The expandable base allows you to adjust the pattern for any size cup, mug, or tumbler.
- Textured Checkerboard Design: Creates a beautiful 3D effect using post stitches.
- Functional and Stylish: Protects your hands from hot or cold cups while adding a chic, handcrafted touch.
Tutor's Suggestions
- Colorplay: Use two contrasting yarn colors for the base and body to make the checkerboard design really pop.
- Avoid Stretching: Don’t over-tighten your stitches while working post stitches, as it can make the sleeve less elastic.
- Practice Makes Perfect: If post stitches are new to you, practice on a swatch before starting the project.
Conclusion
Your crochet checkerboard-patterned cup sleeve is now complete! This handy and aesthetically pleasing sleeve is not only functional but also a great way to showcase your crochet skills. It’s a perfect gift for coffee or tea lovers and a stylish addition to your eco-friendly lifestyle. Whether you keep it for yourself or share it with loved ones, this pattern is sure to be a hit.
Bonus Tip!
Add a button to the strap for a more flexible fit, allowing you to adjust it for different cup shapes and sizes! This small detail makes the sleeve even more versatile and user-friendly.
Leave a Reply