

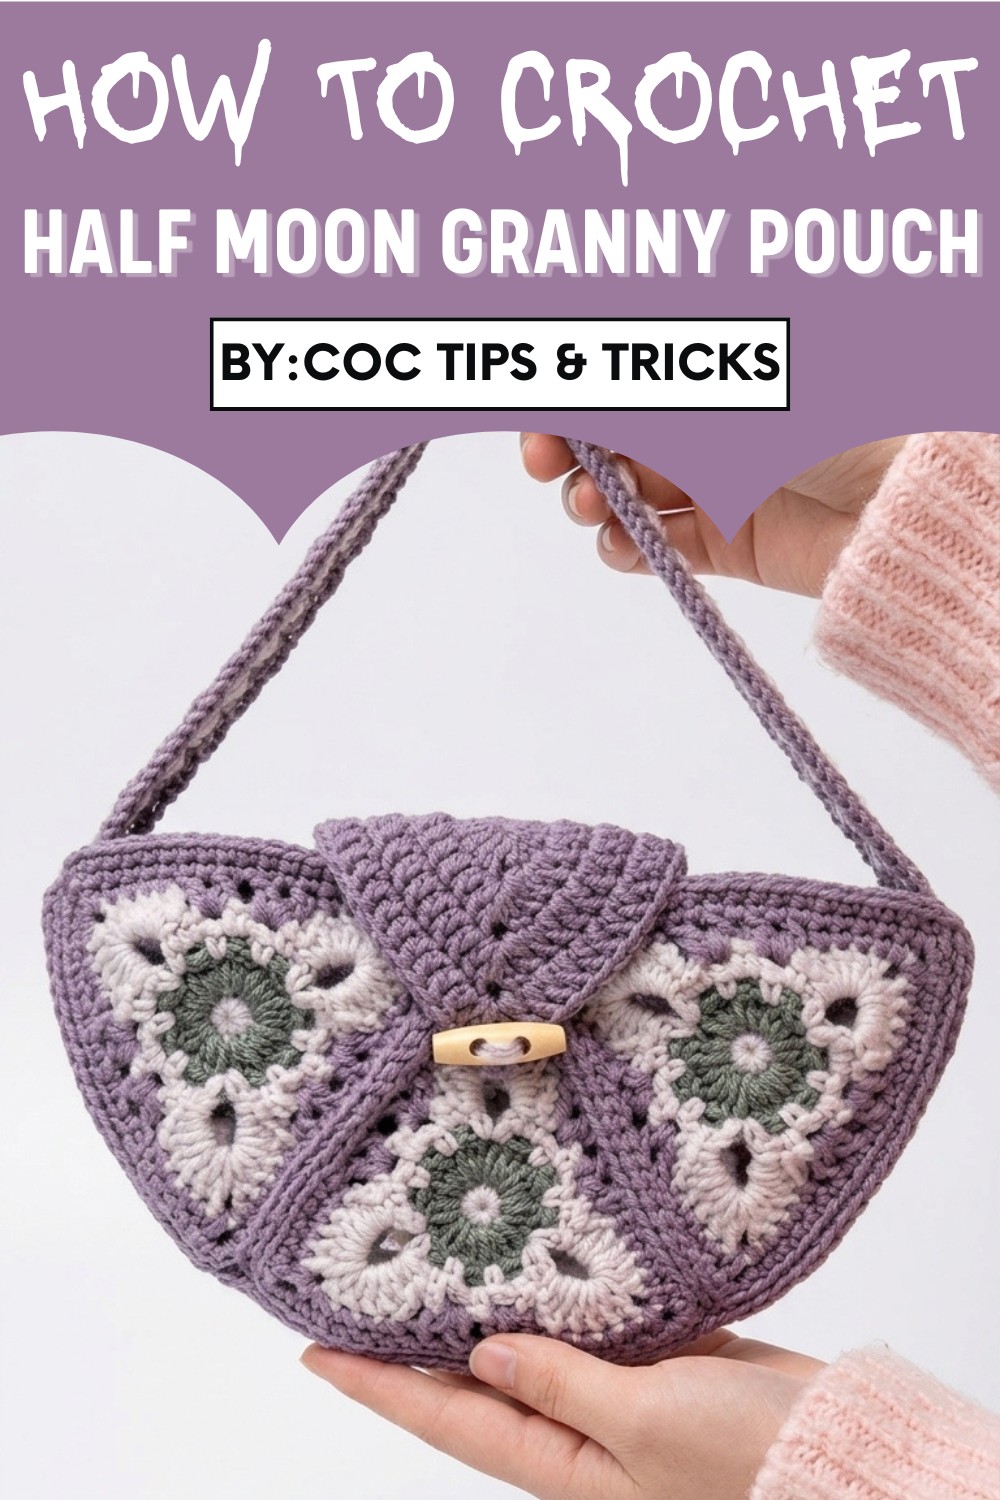
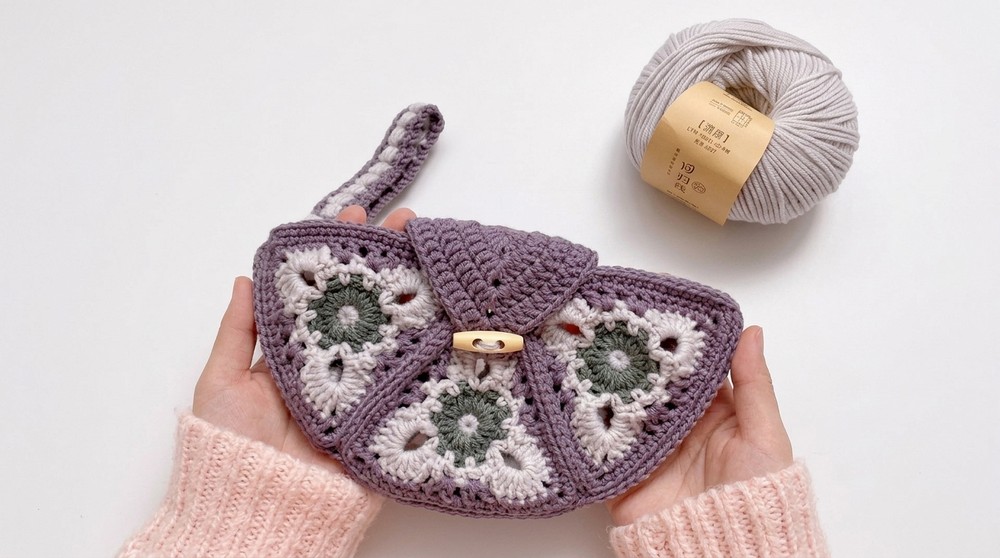
Simplify your crocheting with this Free Crochet Half Moon Granny Pouch Pattern, a perfect mix of style, charm, and practicality.
Stylish and practical, this vibrant crochet project combines convenience with creativity for crocheters of all skill levels. Designed to simplify carrying your everyday essentials, the Half Moon Granny Pouch pattern radiates charm with its unique shape and timeless pattern. This pattern is perfect for storing small treasures like makeup, keys, cards, or loose change, easily slipping into a handbag or pocket for on-the-go functionality. Made from granny squares, the pattern offers structure while maintaining a lightweight feel, making it ideal for frequent use.
Stylish Crochet Half Moon Granny Pouch Pattern for Everyday Essentials
Customizable with various colors and yarn choices, this pattern lets you personalize the look to match your preference, whether you prefer bold or pastel tones. The step-by-step pattern is beginner-friendly yet provides a satisfying challenge for experienced crocheters eager to explore more intricate stitches.
Plus, you’ll love how eco-friendly it is; by utilizing leftover yarn and reducing reliance on disposable options, this project is as sustainable as it is beautiful. Whether as a gift or personal accessory, the pouch pattern brings versatility and charm to your handmade collection.
Project Details
- Skill Level: Beginner to Intermediate
- Features:
- Floral flap design
- Six granny squares for structure
- Customizable size and color options
- Button for secure closure
- Uses: Perfect as a compact everyday bag or a thoughtful handmade gift.
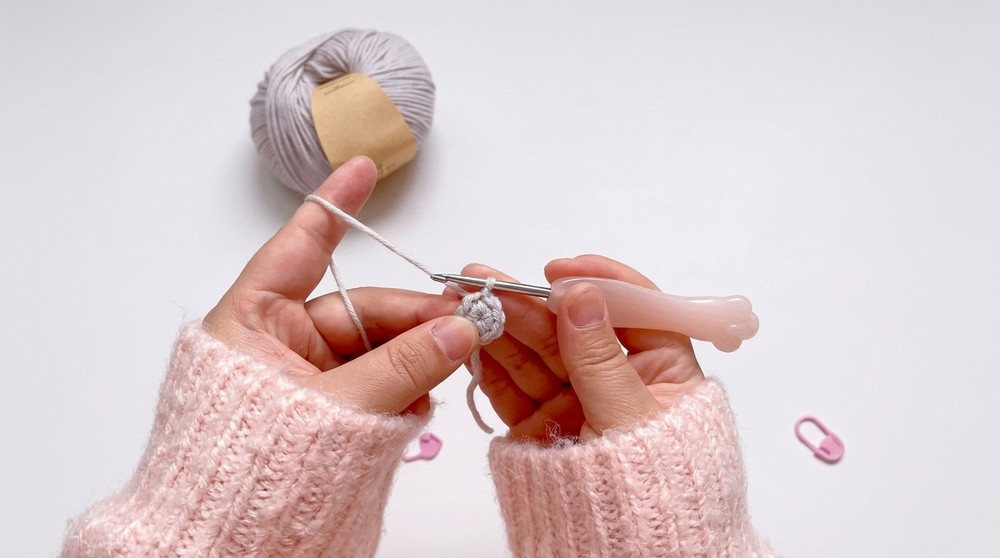
Supplies You'll Need
- Yarn: Your choice of color
- Hook: 3.5 mm crochet hook
- Scissors
- Tapestry needle
- Button (for closure)
Step-by-Step Crochet Pattern
1. Granny Square Base
Each granny square forms the body of the bag. You'll need six identical squares.
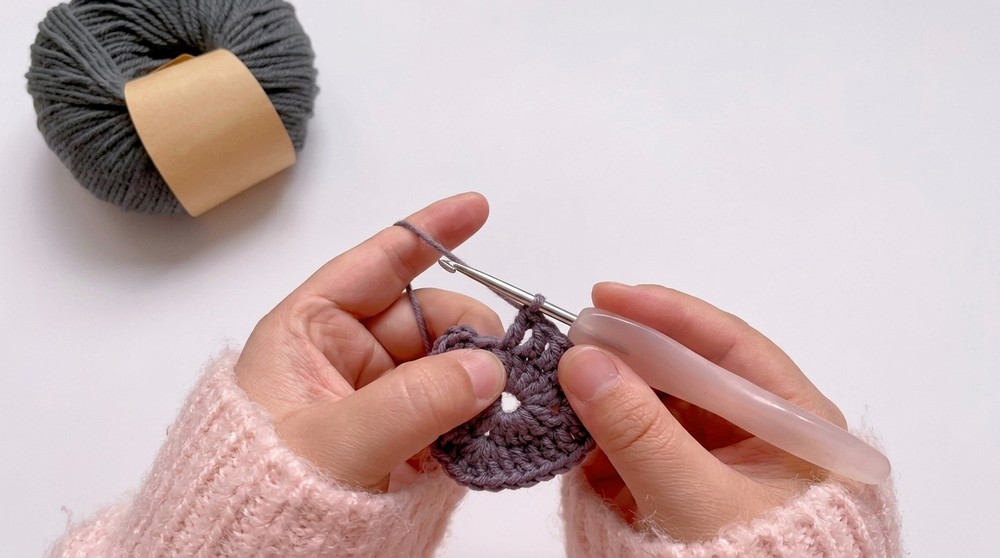
Step 1: Round One (Center of Flower)
- Start with a magic ring.
- Yarn over the hook and create a knot.
- Crochet 9 single crochets (sc) in the ring.
- Place a stitch marker in the first stitch for beginners.
- Tighten the ring and slip stitch (sl st) into the marked stitch.
- Cut the yarn and insert the hook from the back to pull the yarn through and secure.
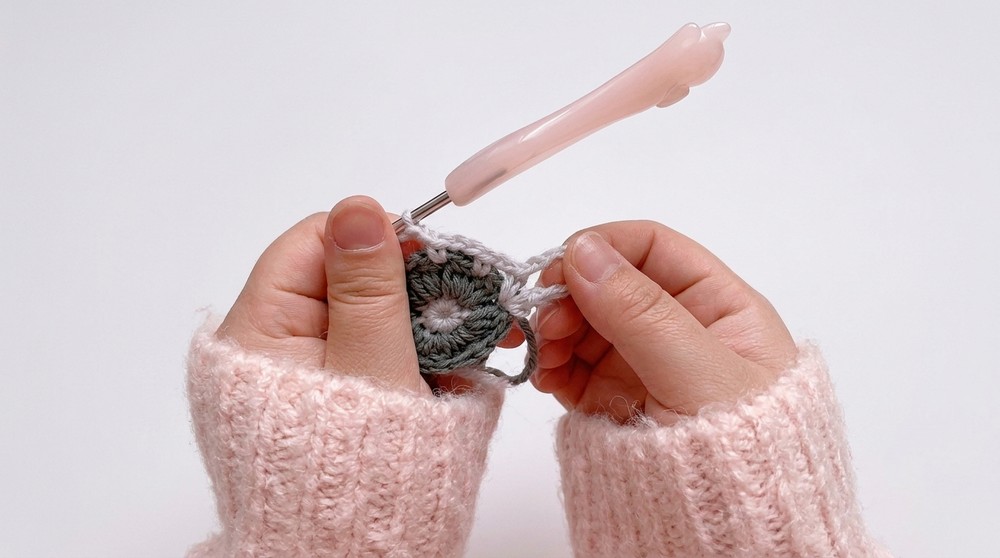
2: Round Two (Petals)
- Attach a new yarn color to the first stitch.
- Chain 2. This counts as one unfinished double crochet (dc).
- In the same stitch, make 2 more unfinished double crochets.
- Yarn over and pull through all loops.
- Chain 1. This completes one petal.
- Repeat this 3 unfinished double crochets + chain 1 pattern in each stitch around.
- Slip stitch to the first stitch to complete the round.
3: Round Three (Outer Layer)
- Attach yarn in any chain-1 space.
- Chain 1, then crochet 1 single crochet (sc) in the space.
- Chain 7, then crochet another single crochet into the same space.
- Chain 2, insert into the next chain space, and make 1 sc.
- Repeat chain 7 + sc pattern around the circle.
- Slip stitch into the first single crochet to finish.
4: Round Four (Petal Formation)
- Do not change yarn. Chain 1 and insert into the large chain-7 space.
- Crochet 1 sc, 1 half double crochet (hdc), and 5 double crochets (dc).
- Chain 2, then repeat with 5 dc, 1 hdc, and 1 sc in the same chain-7 space.
- In the smaller chain-2 spaces, crochet 1 sc then chain 3.
- Repeat the large petal and small chain-2 patterns around the circle.
- Cut the yarn and secure it.
5: Green Layer
- Using green yarn, insert into the second double crochet of the large petal.
- Pull yarn through and chain 1.
- Crochet 4 sc across the double crochets.
- In the center space, make 1 sc, chain 3, and another sc.
- Crochet 4 sc across the next set of double crochets.
- Work into the chain spaces: double crochet (dc), chain 1, dc, alternating through each space.
- Continue this pattern around the circle to finish this floral granny square.
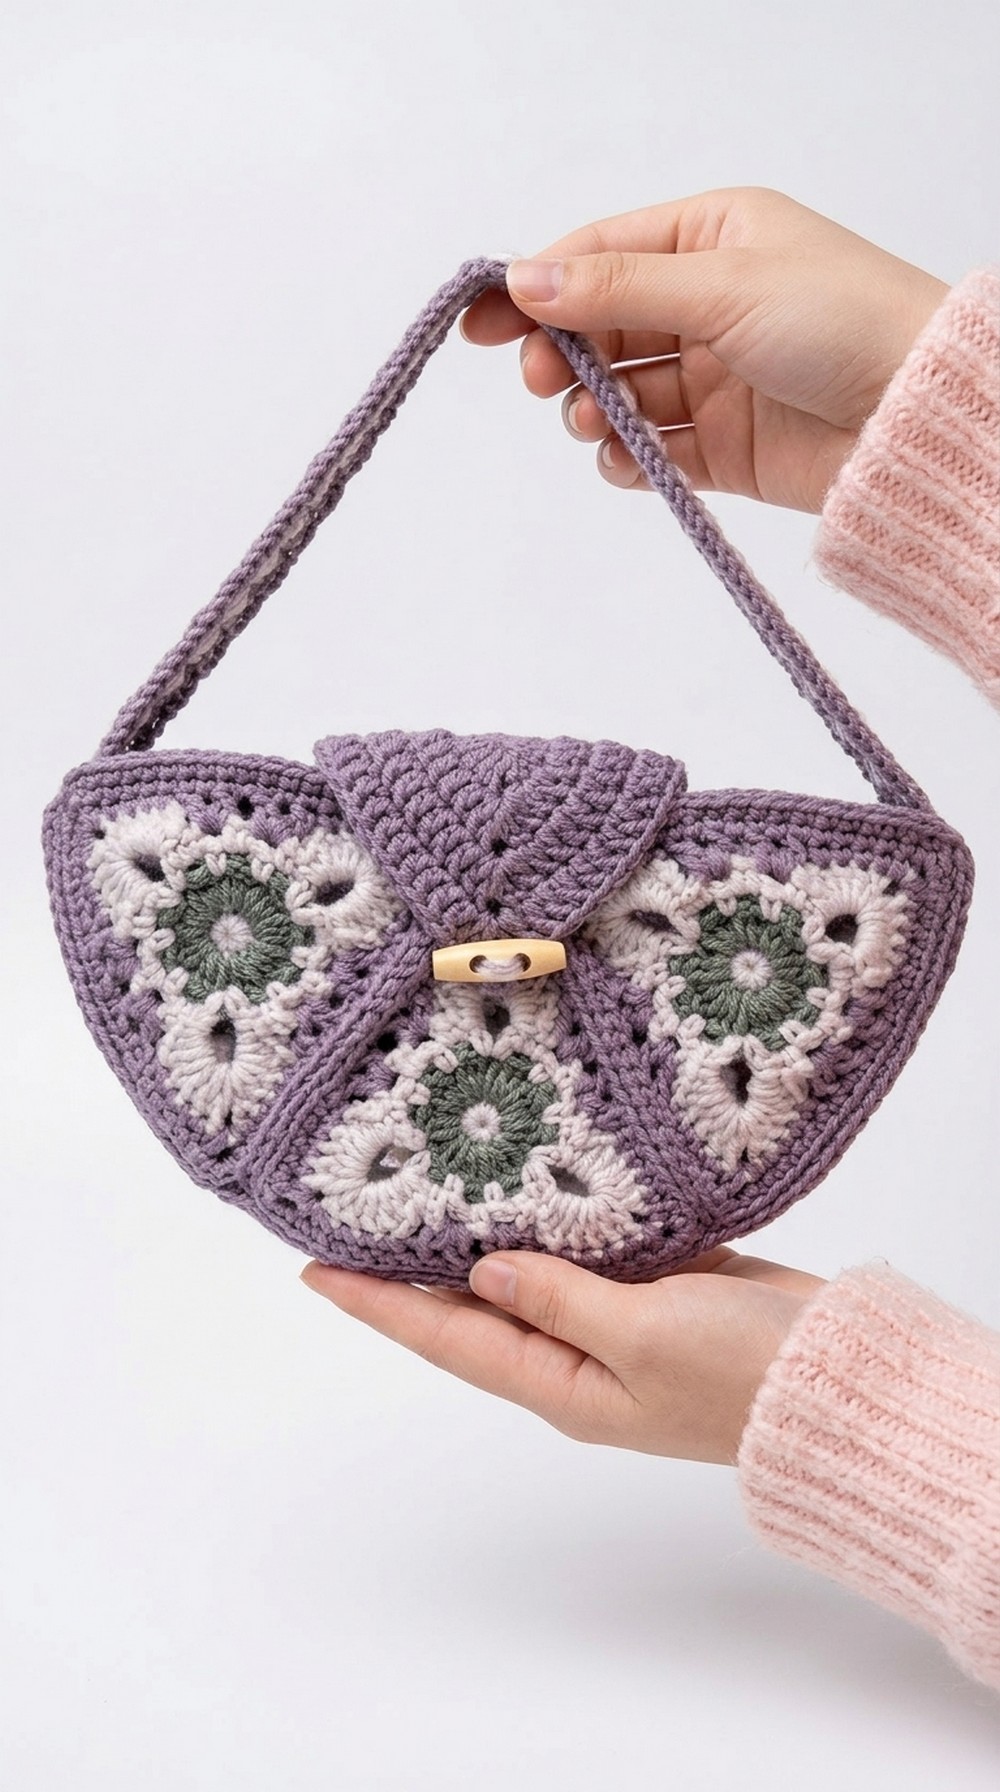
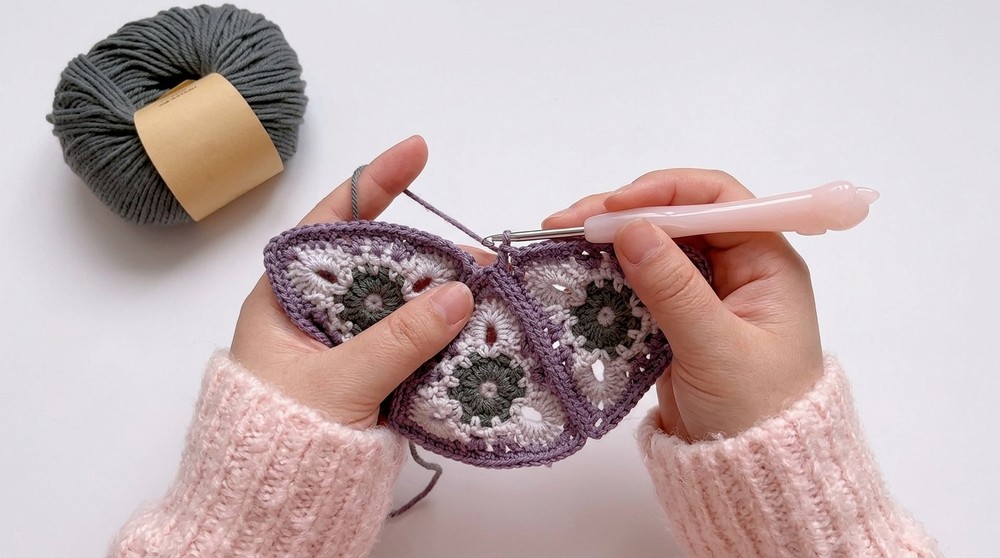
2. Assemble the Bag
- Crochet 6 floral granny squares using the above pattern.
- Join the squares into two panels using the whip stitch technique, working on the inner loops of the edges for neat seams.
- Place two panels back to back and crochet a round of single crochets along the bottom edge to combine them. Make sure stitches align properly for uniformity.
3. Flap and Button Loop
- Start with a magic ring for the flap piece.
- Crochet five double crochets followed by chain 1 in Round One. Repeat twice more for three sets.
- For subsequent rounds: crochet 2 double crochets, chain 1, and 2 double crochets in spaces, and 1 dc into stitches in between.
- Crochet 4 rounds in total, adjusting the size for your preference.
- Chain 5 to create the button loop. Slip stitch into the edge to secure.
4. Final Assembly
- Sew the floral flap piece onto the back panel at the top edge.
- Attach a button to the front panel, aligning it with the flap’s button loop.
Special Features
- Unique Design: The floral granny square base and flap piece elevate the style of this crochet bag.
- Beginner-Friendly: Simple stitches make this a great project for beginners wanting to explore patterns with structure.
- Versatile Usage: Use it as a handbag, pouch for small items, or even as a decorative gift bag.
Tutor's Suggestions
- Use contrasting colors for the flap and floral granny squares to make the design stand out.
- Ensure stitches align properly during assembly for neat seams.
- For extra durability, use cotton yarns that can handle usage and weight.
Conclusion
Your Lavender Crown Bag is complete! This gorgeous pouch pattern combines creativity with functionality in a charming, floral-inspired design. Whether you keep it for yourself or gift it to a loved one, this crochet bag pattern is both practical and an impressive handmade accessory.
Tip:
For a sturdier bag, consider adding a fabric lining to the back panels before assembly. This keeps the bag durable and prevents stretching over time.
Leave a Reply