

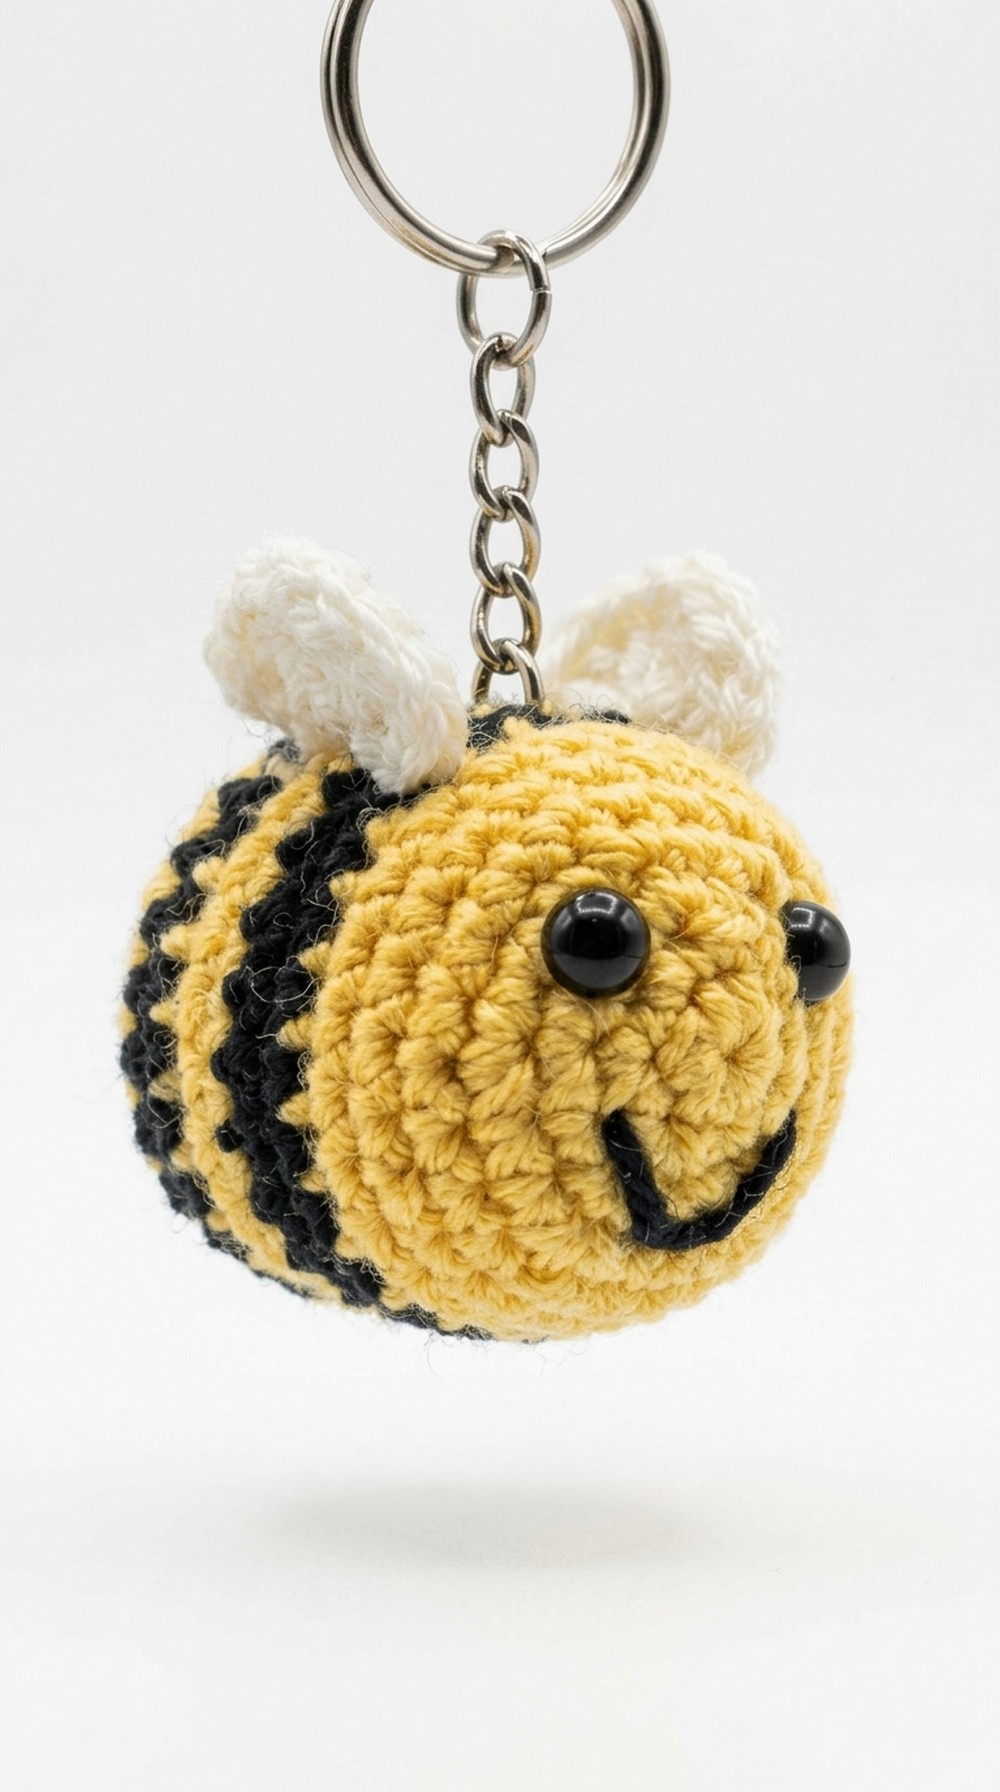
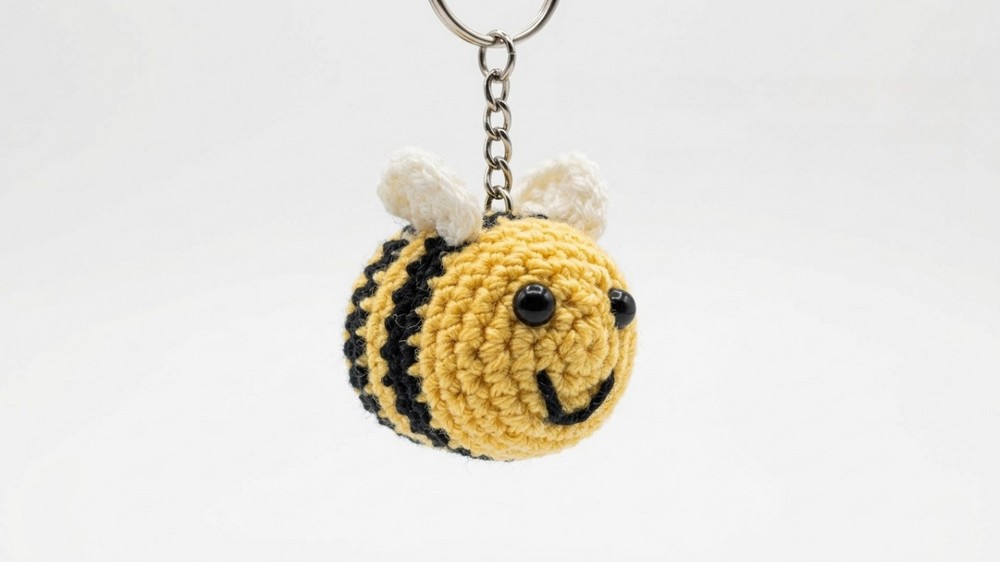
Unique Crochet Bumblebee Keychain to Brighten Your Day
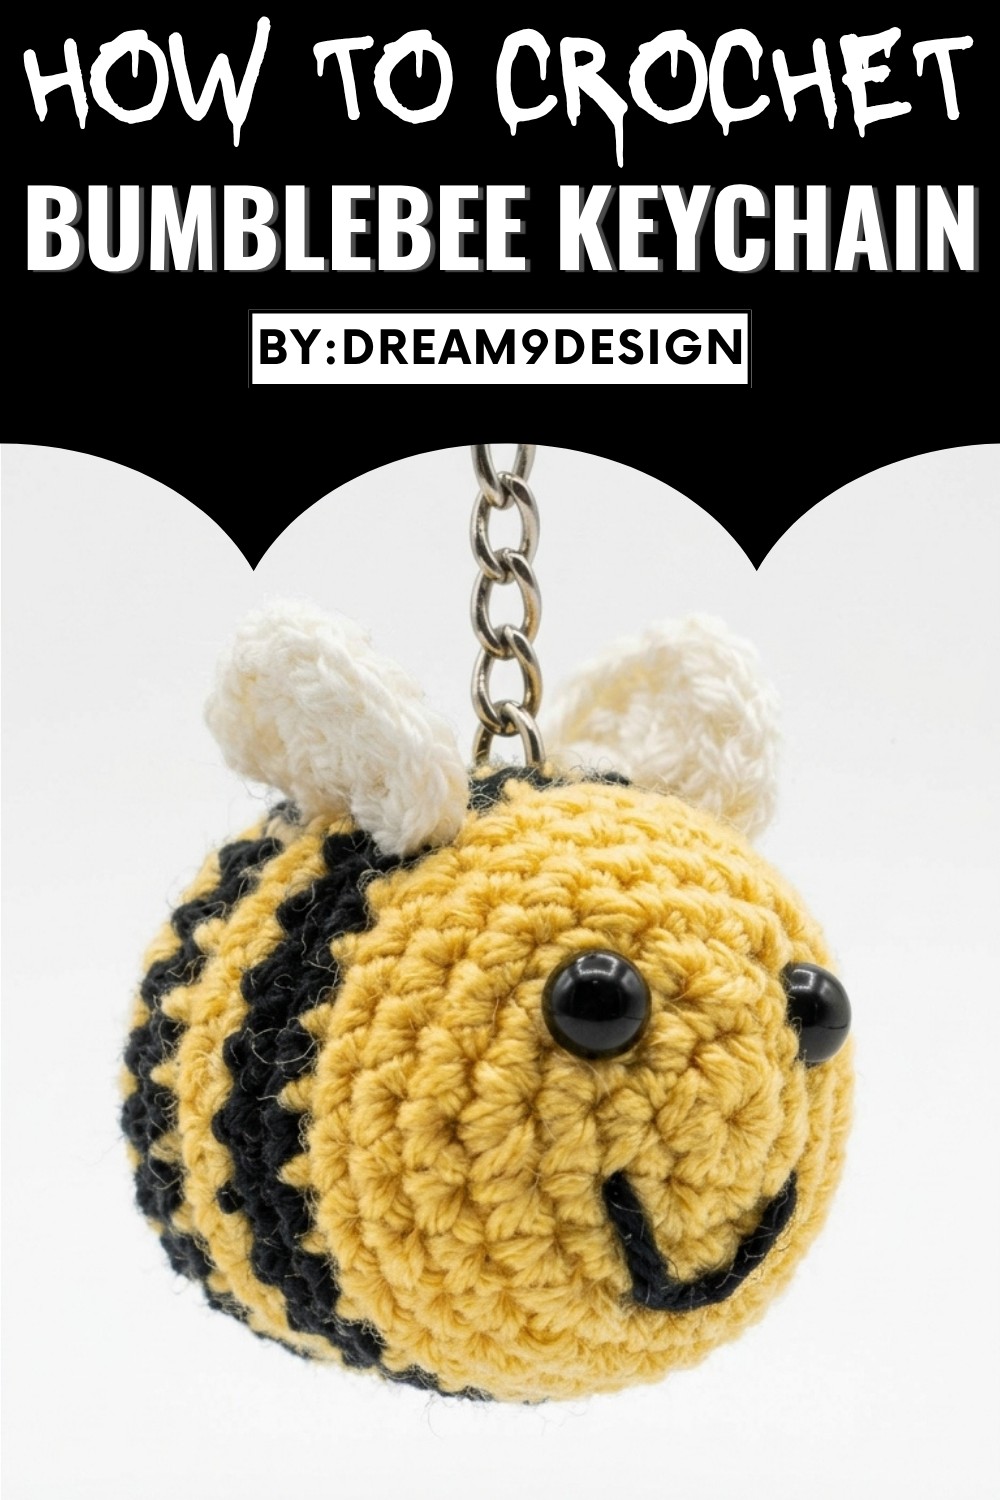
This pattern is beginner-friendly, using simple stitches like single crochet and half double crochet along with increases and decreases. It’s perfect for anyone wanting to learn basic techniques while making something creative and functional. The use of safety eyes and easy color changes ensures your bumblebee stands out while remaining durable over time. Plus, the addition of white wings and striped detailing allows for customization, so your bee can be as vibrant or unique as you like.
Ideal for gifting, personal use, or even decor, this cute accessory makes a thoughtful and practical choice. With just a few colorful yarns and simple tools, you can turn your creativity into a charming piece that’s equal parts functional and delightful. Perfect for spreading smiles.
Level of Difficulty
Designed for Beginners to Intermediate levels, the pattern mainly uses single crochet stitches, increases, and decreases, along with some basic assembly techniques. Beginners may need extra practice with changing yarn colors and stuffing the bee correctly.
Special Features
- Compact Design: Small and portable, this keychain is ideal for quick projects or gifting.
- Customizable Stripes: Choose your favorite colors—the bee doesn’t have to be yellow and black!
- Durability: Polyfill stuffing ensures a sturdy shape, while safety eyes add a professional finish.
- Multi-Purpose: Works as a keychain, charm for bags, or a cute desk decoration.
Materials Needed
- Yarn: Yellow, black, and white (4-weight yarn; e.g., Caron Simply Soft).
- Crochet Hook: Size 2.25 mm (B hook).
- Safety Eyes: 6 mm.
- Polyfill: For stuffing.
- Keychain: Metal keychain ring.
- Tapestry Needle: For sewing the wings and finishing touches.
- Stitch Marker: Optional but recommended for working rounds.
Pattern Instructions
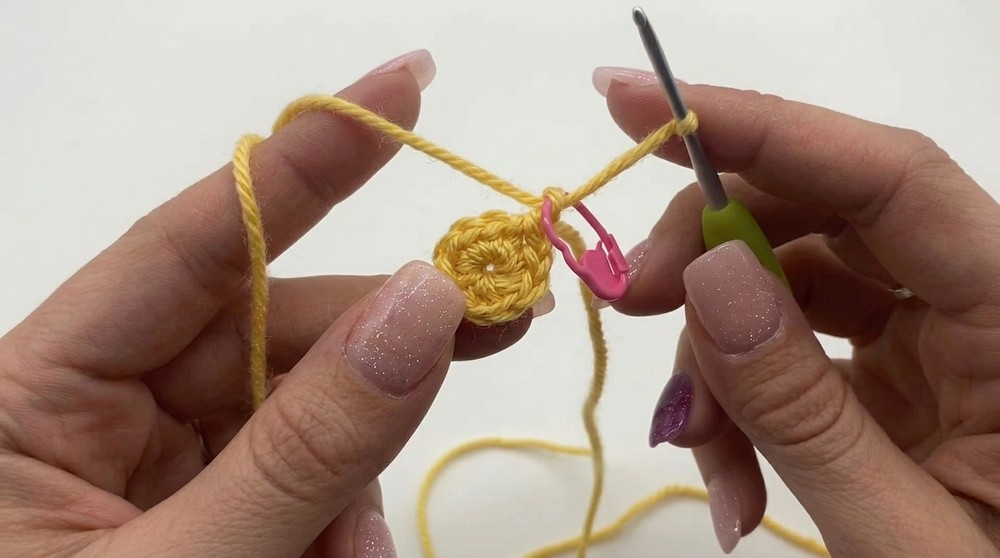
Step 1: Starting the Magic Ring
- Create a magic ring (magic loop). If unfamiliar, refer to a tutorial to learn this technique.
- Work 6 Single Crochets (SC) into the magic ring.
- Pull the ring tightly closed.
2: Increasing for the Base
- Into each stitch from the previous round, work 2 Single Crochets (SC) (increase in every stitch).
- Add a stitch marker to the first stitch to keep track while working in continuous rounds.
- At the end of this round, you should have 12 Single Crochets.
3: Continuing Increases
- In the next round:
- Work 1 SC in the first stitch.
- Work 2 SC in the second stitch (increase).
- Repeat this pattern (1 SC, then 2 SC) all the way around.
- At the end of the round, you’ll have 18 Single Crochets.
4: Final Increase Round
- For the next round:
- Work 1 SC into the first 2 stitches.
- Then 2 SC into the third stitch.
- Repeat the sequence (1 SC, 1 SC, 2 SC) around.
- Finish this round with 24 Single Crochets.
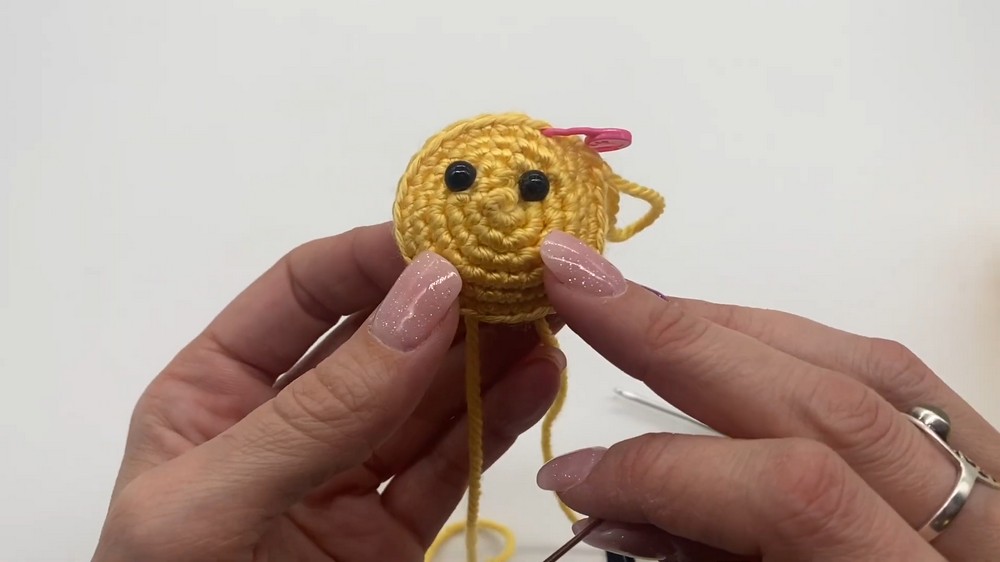
5: Working Without Increasing
- Crochet 2 rounds of 1 SC into each stitch.
- Place the safety eyes between the third and fourth rows. Ensure the eyes are positioned evenly and secure the backs properly.
- Stitch a smile with black yarn using a tapestry needle. Create a triangular-style smile:
- Insert yarn from the back, then stitch in a triangle shape under the eyes.
- Secure the yarn in the back of the bee tightly.
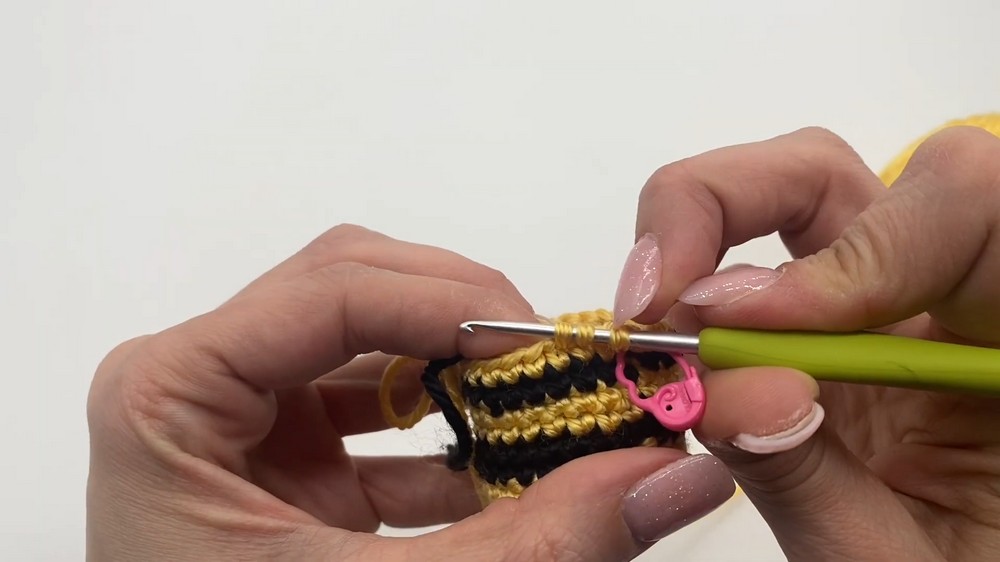
6: Adding Stripes
- Stop one stitch before the marker to change yarn color to black.
- To switch:
- Insert the hook and pull up the yellow loop but finish the stitch using black yarn. No need to cut the yellow yarn as it will be hidden inside.
- Work 2 rounds of black Single Crochets to form the first stripe.
- Switch back to yellow yarn (using the same color change technique):
- Work 2 single crochet rounds in yellow, then 1 round of black.
- Repeat the stripe pattern.
7: Decreasing and Stuffing
- When finishing the stripes, switch back to yellow yarn for the body.
- Begin decreasing:
- Work 1 SC in the first 2 stitches, then decrease over the next 2 stitches. Repeat this pattern (1 SC, 1 SC, decrease) around the round.
- Add polyfill stuffing as you decrease each subsequent row to close the bee. Continue decreasing tightly, ensuring the bee is stuffed evenly to maintain shape.
- Once fully decreased, use a tapestry needle to sew the hole closed securely.
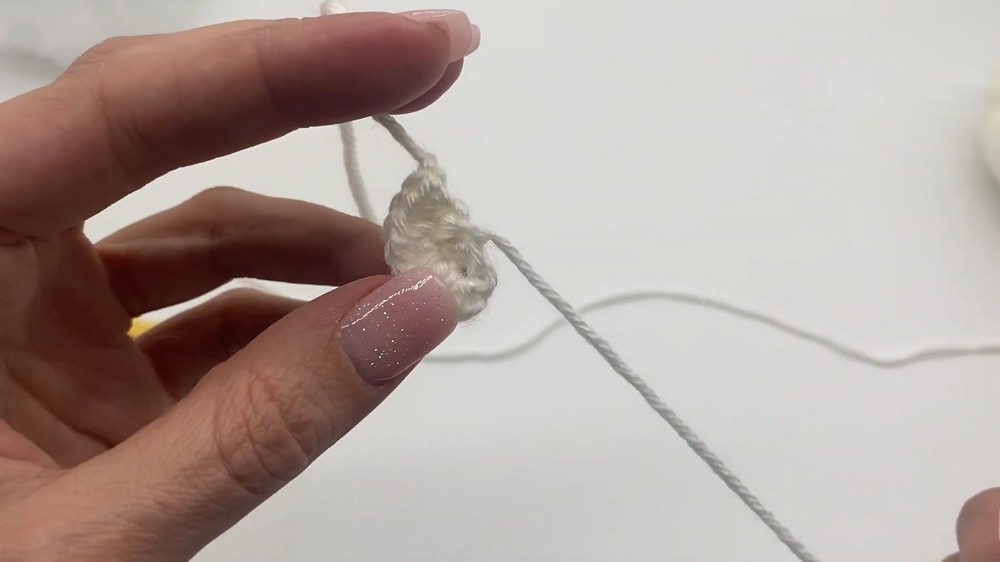
Step 8: Making the Wings
- Using white yarn, start with a magic ring and work 4 SC into the ring. Pull to close.
- Chain 1, turn your work, and create an increase row using Half Double Crochets (HDC):
- Work 2 HDC into each stitch from the previous row.
- You should have 8 HDCs at the end of this round.
- Finish off by chaining 1 and cutting the yarn, leaving a long tail for sewing.
- Make a second wing, then sew the wings to the body using the tapestry needle, positioning as desired.
Step 9: Attaching the Keychain
Secure the metal keychain ring to the center top of the bee’s back. Ensure it is firmly fastened for durability.
Tutor’s Suggestions
- Customizing Stripes: You can try different color stripes for a personalized bee. Add glitter yarn for a unique twist!
- Adding Details: Use felt or embroidery to enhance the bee's smile or add blush spots.
- Wing Placement: Position wings closer for a classic look or further apart for a playful design.
Uses
This bee is ideal for decorative purposes, a unique accessory, or gifting. Attach it to backpacks, purses, or use it as a desk ornament. Its cheerful style is guaranteed to lift spirits and spark conversations.
Conclusion
The Crochet Bumblebee Keychain Pattern is a straightforward yet rewarding project perfect for beginners and experienced crocheters alike. Its charming look, quick assembly, and versatility make it a delightful addition to your handmade creations. Whether gifted or kept for yourself, this little bee is sure to spread happiness.
Bonus Tip
Sprinkle lavender or other dried flowers inside the polyfill to make your bee a pleasant-scented charm! Perfect for gifting!
Leave a Reply