

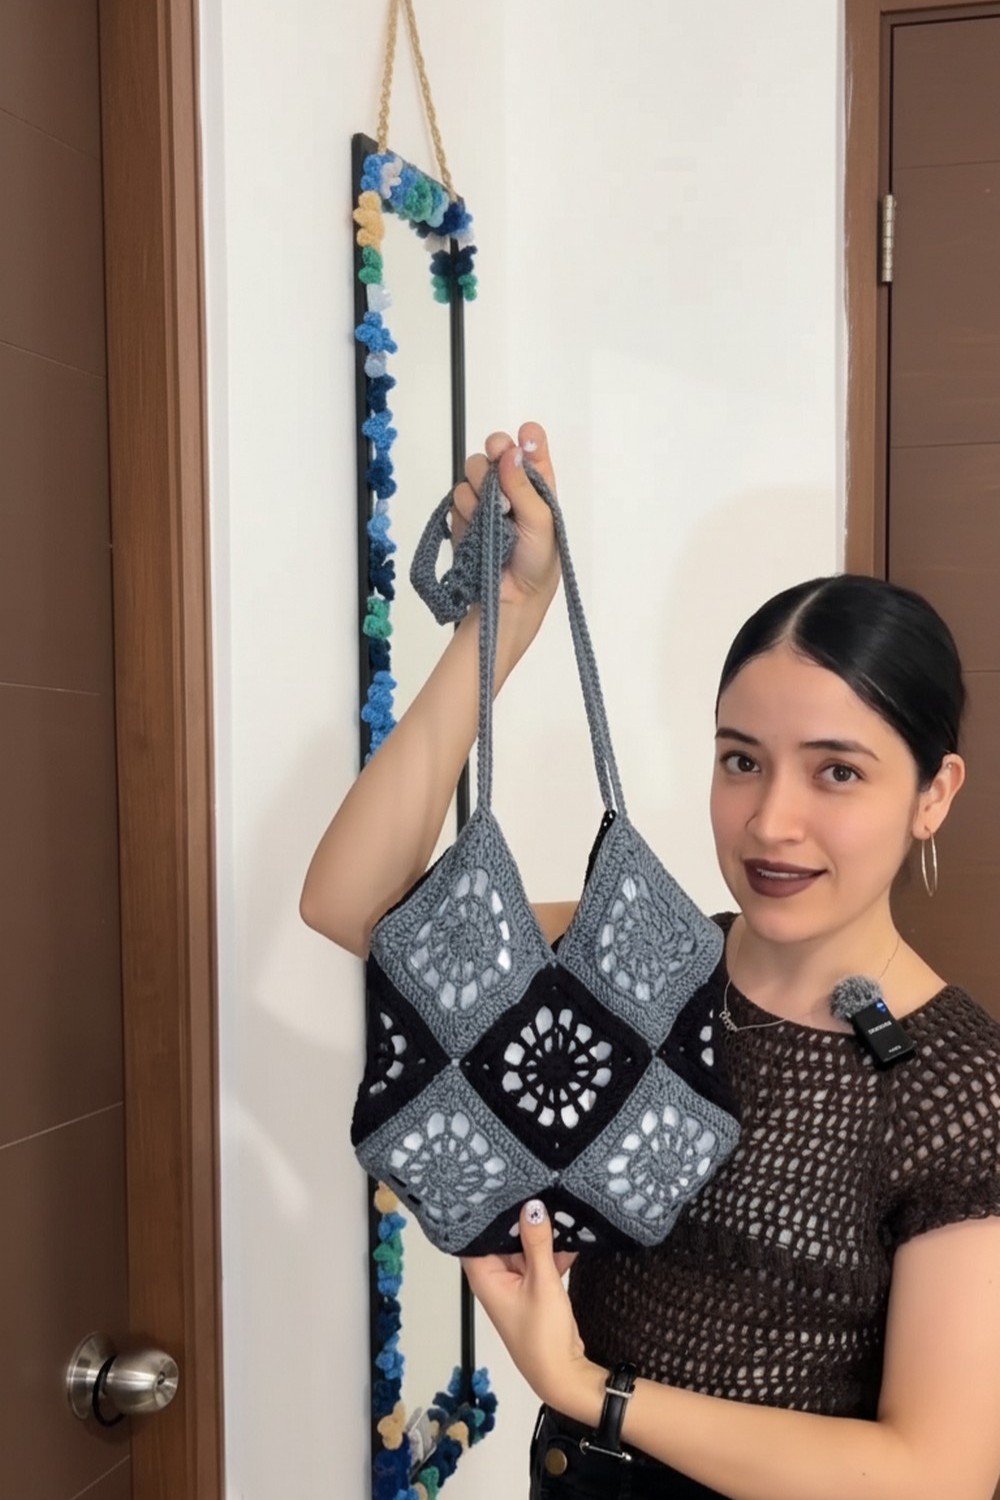
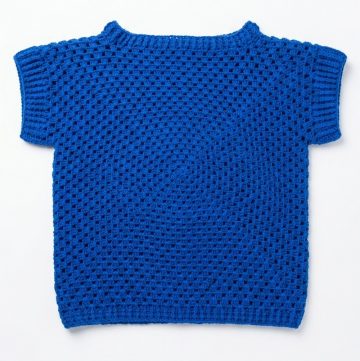
Wear your style with a free crochet granny square bag pattern that offers simple steps for a colorful accessory perfect for everyday outings.
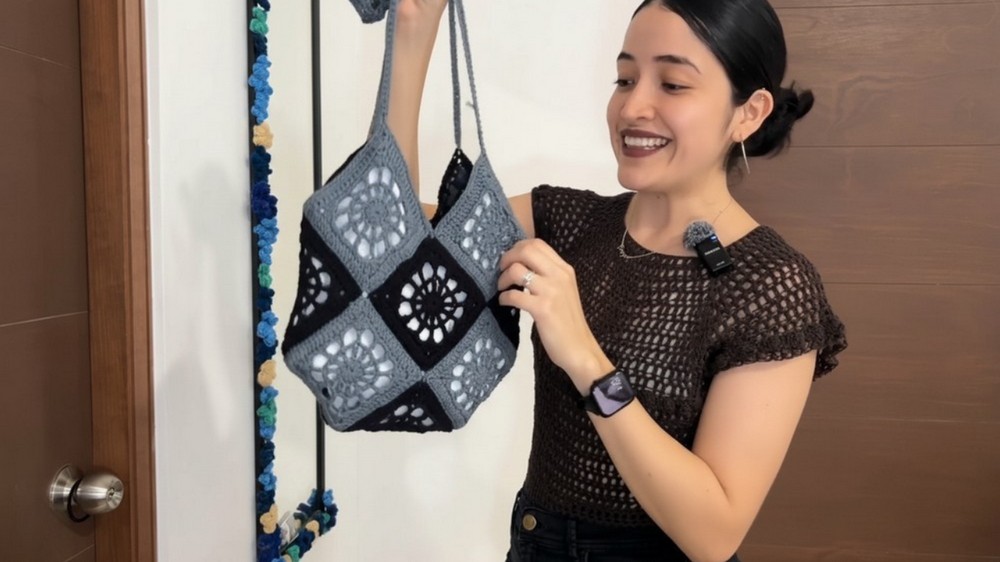
Holding a bag filled with color and patterns that catch everyone’s eye. This special design uses simple shapes and bright yarn to build a beautiful accessory that stands out wherever you go. People love using it for shopping trips or carrying favorite things safely because the strong and cozy stitches last a long time. A Crochet Granny Square Bag pattern brings together fun blocks into one stylish piece with easy handles that feel comfortable in your hand.
Bold Free Crochet Granny Square Bag Pattern to Stand Out
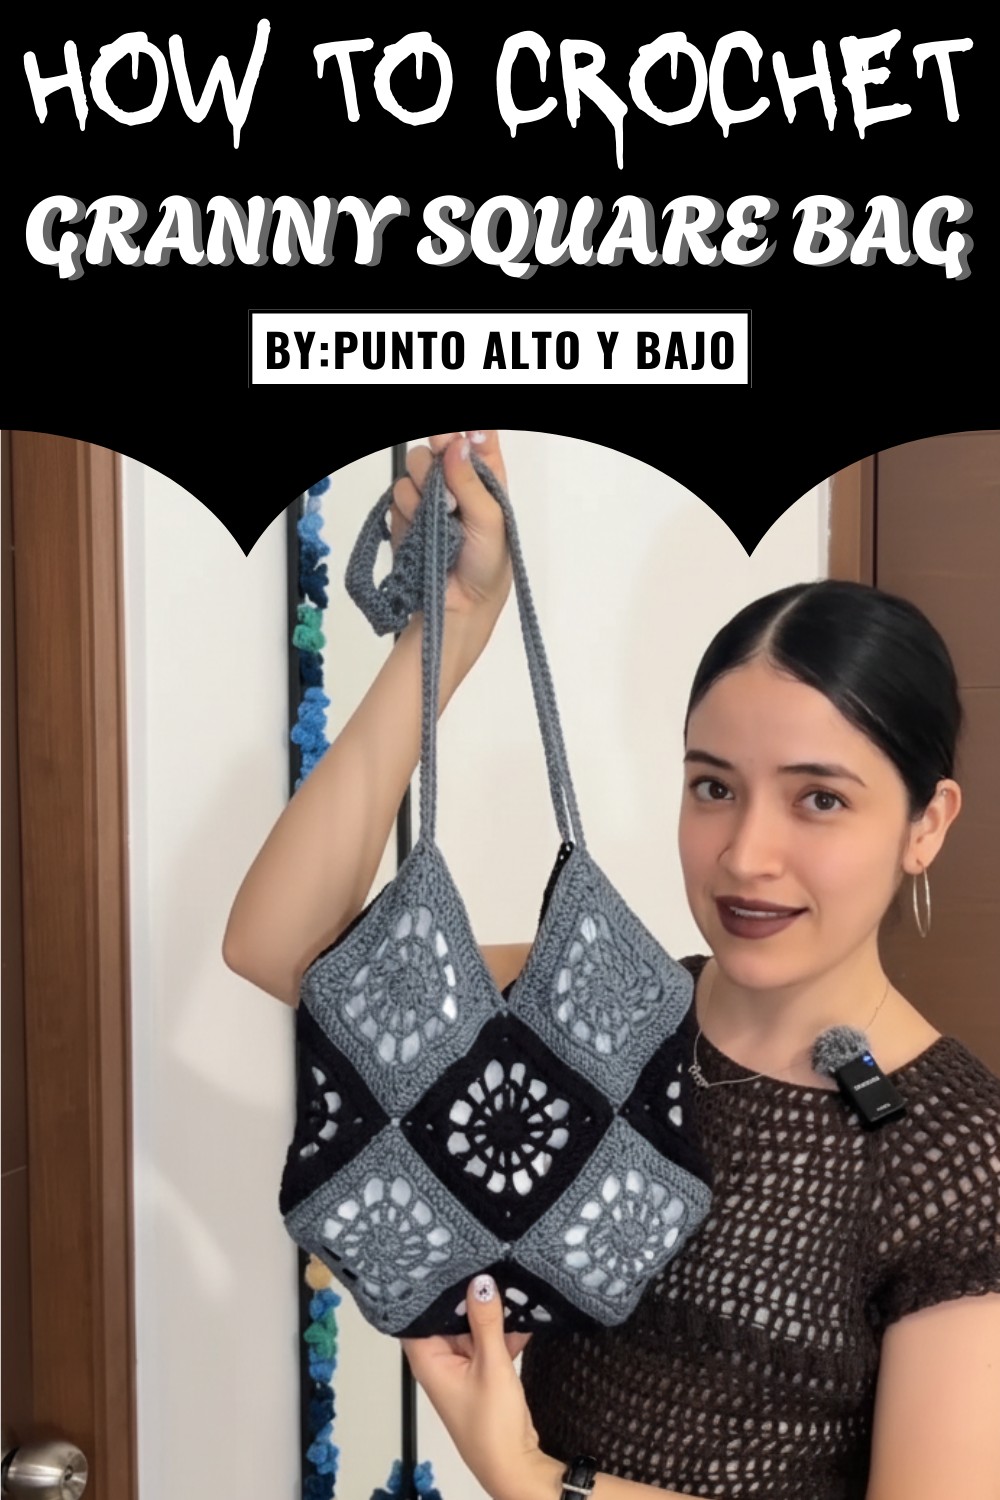
You can mix and match your favorite shades to make each bag unique so it reflects your personality. The classic look, with textured squares and playful designs, makes this bag not only useful but also fashionable for all ages. Whether you dress up or wear it daily, it is perfect for keeping the essentials close and adding a pop of handmade charm to any outfit.
Crochet Granny Square Bag Pattern
Materials
- Yarn: 100% cotton, 2 mm thickness (sample uses dark gray and black)
- Hook: 3.0 mm
- Tapestry/yarn needle
- Scissors
- Stitch markers
- Blocking board and pins (optional, but highly recommended)
- Fabric for lining (optional; recommended if using for bag)
- Sewing needle and matching thread (for lining, optional)
Abbreviations (US Terms)
| Abbreviation | Meaning |
|---|---|
| ch | Chain |
| sl st | Slip stitch |
| sc | Single crochet |
| dc | Double crochet |
| sp | Space |
| st(s) | Stitch(es) |
| MR | Magic Ring |
| rep | Repeat |
Special Notes
- Gauge is not critical for this pattern, but consistent tension yields best results.
- Blocking each granny square is highly recommended for a crisp shape.
- You may use one or more yarn colors for your squares.
- The squares are joined using slip stitch seams through back loops only for a flat, neat join; other join-as-you-go methods may be substituted.
Pattern
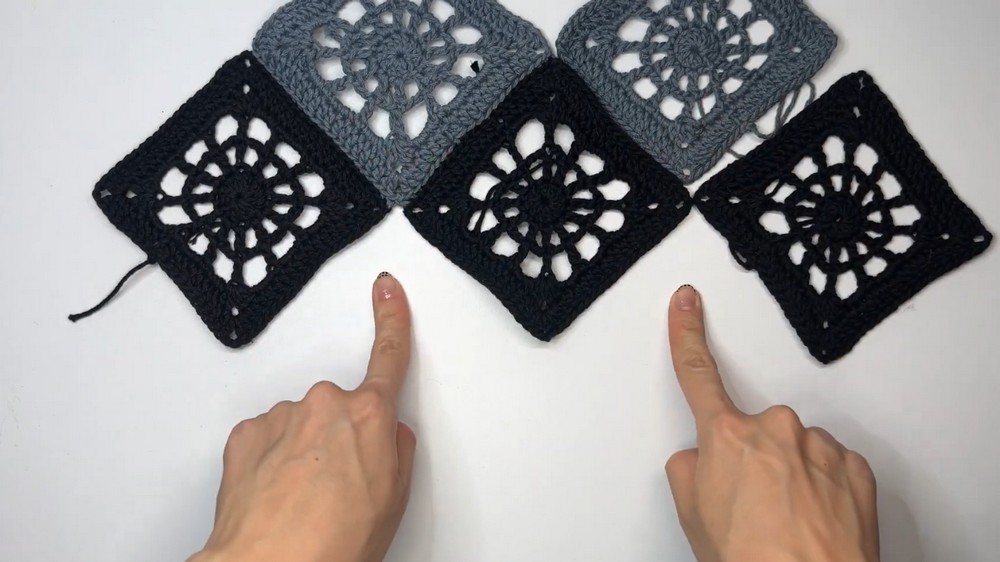
SPIDERWEB GRANNY SQUARE
(Each finished square measures approx. 11 cm per side before joining/blocking.)
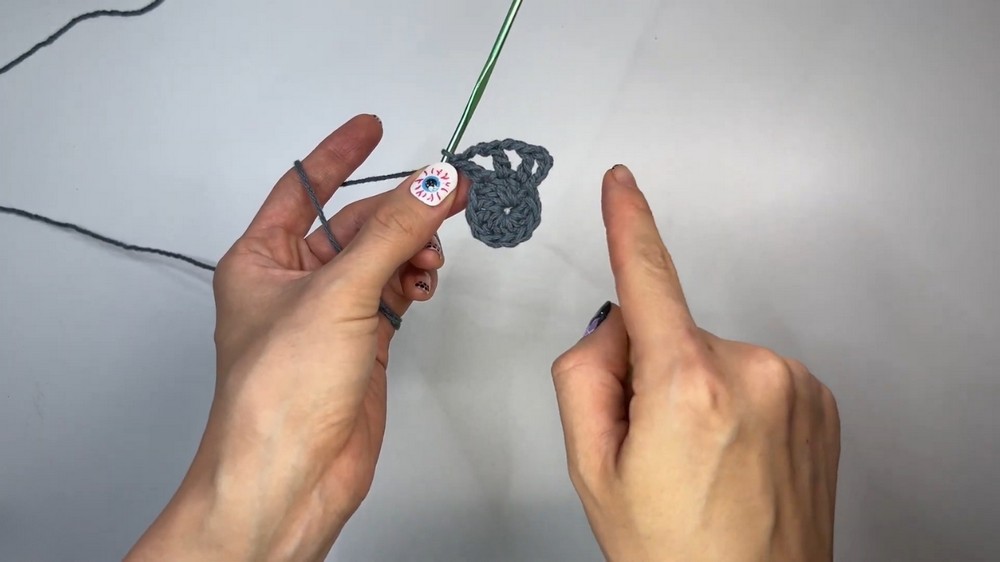
Foundation:
With first color, make a MR.
Round 1:
- Ch 2 (counts as first dc), dc 11 in ring. (12 dc total including first ch-2)
- Pull MR tight.
- Sl st to 2nd ch of starting ch-2 to join. (12 dc)
Round 2:
- Ch 2 (counts as dc), ch 2, dc in next st, ch 2, rep from * to * around (12 dc, 12 ch-2 sps).
- Sl st to 2nd ch of starting ch-2 to join.
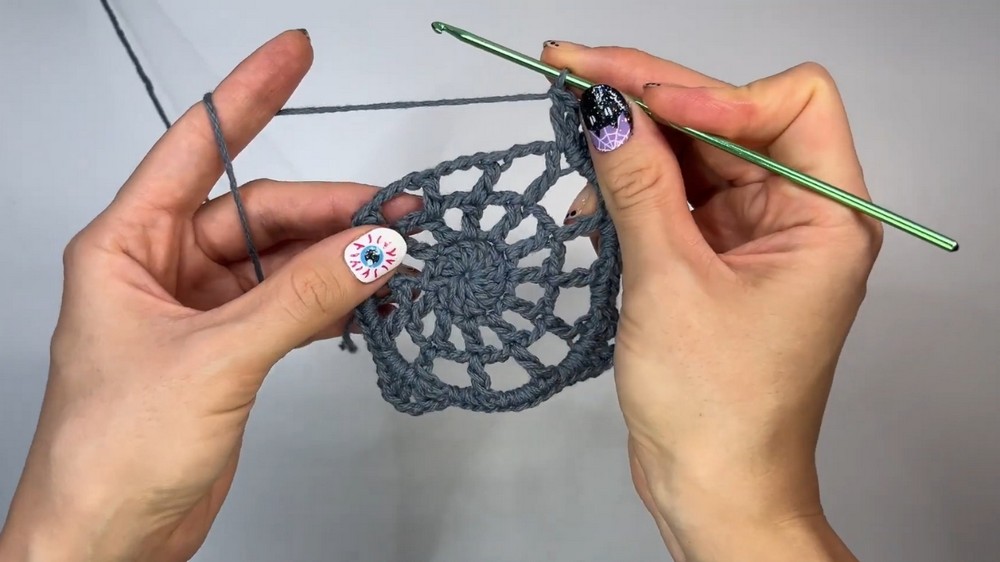
Round 3:
- Ch 2 (counts as dc), ch 3, dc in next dc, ch 3, rep from * to * around (12 dc, 12 ch-3 sps).
- Sl st to 2nd ch of starting ch-2 to join.
Round 4 (Form corners & square shape):
- Ch 1, sc in same st.
- In each ch-3 sp: 3 sc.
- In each dc: sc.
- After working 2 groups, into 3rd dc:
- (2 dc, ch 2, 2 dc) in same st (forms first corner).
- Rep 3 sc in each sp and sc in each dc across until next corner.
- (2 dc, ch 2, 2 dc) in corner st.
- Repeat steps until 4 corners made: after every 2 groups, make a corner.
- Finish with last 3 sc, then sl st to first sc to join.
Note: Corners are made after every two "sides"; corners have: (2 dc, ch 2, 2 dc) all in same stitch.
Round 5 (Border):
- Ch 2 (counts as dc).
- Dc in each st until you reach ch-2 corner.
- In each corner ch-2 space: (2 dc, ch 2, 2 dc).
- Continue all the way around.
- Sl st to 2nd ch of start ch-2 to close.
- Fasten off. Weave in ends.
BLOCKING (Optional, Recommended)
- Stretch each square gently so all sides are equal, use pins and a blocking board or towel, lightly mist with water.
- Allow to dry completely for best results and sharp corners.
ARRANGEMENT AND JOINING
- Arrange squares in desired layout (see video for bag example, but you may create runners or garments too).
- Take a photo or make notes to remember placement.
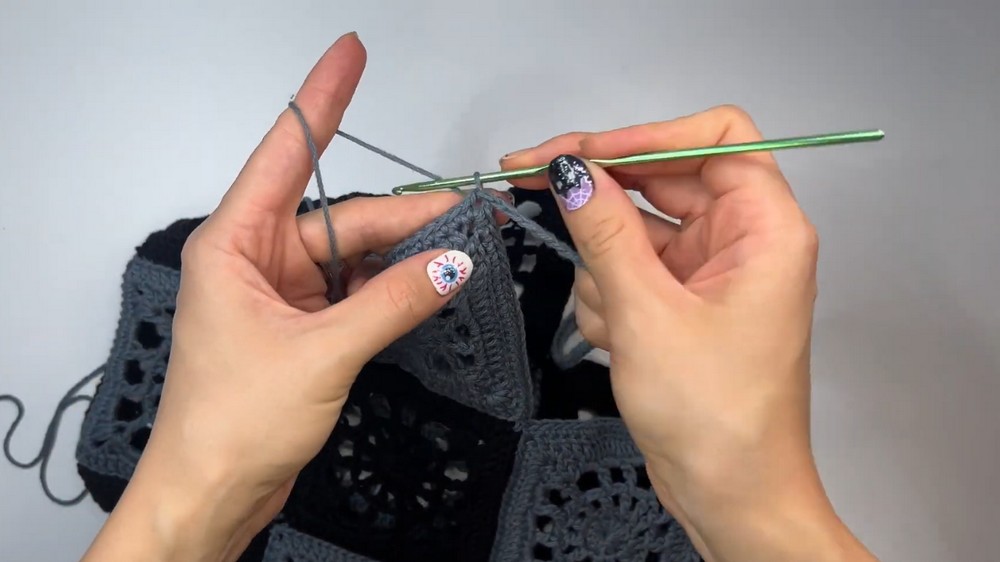
- Join squares with slip stitch seams:
- Place two squares right sides together.
- Starting in the corner ch-2 sp of both squares:
- Insert hook through back loop only of each, pull working yarn through, ch 1.
- Continue along edge:
- Insert hook through back loop only of each next st, sl st.
- Work until edge complete.
- Repeat for all edges, always working through back loops only for a flat join.
- When joining corners:
- Make sure to match corresponding chains and join them with a sl st.
- Weave in ends.
BAG ASSEMBLY
- When all the squares are joined into the desired bag shape, fold as shown (see time ~19:24):
- Fold the joined squares to align your bag sides and base.
- Continue joining open sides as above, always using slip stitches through back loops only, from the inside.
- Turn bag right side out.
EDGE FINISHING (Optional but recommended)
- Attach yarn at bag top edge.
- Work sc around edge, placing one sc in each st, and (sc, ch 2, sc) at each corner for a neat finish.
- For a thicker edge, repeat with one or two additional sc rounds; switch color if desired.
STRAP
- At a corner ch-2 space on top of bag, attach yarn.
- Ch 80 (or to desired strap length; ~41 cm long).
- Join to opposite corner ch-2 space with sl st.
- Ch 1, turn.
- Sc in each chain back across strap.
- Secure with sl st at starting point.
- Fasten off, weave in both ends.
LINING (Optional)
- Cut fabric to match inside dimensions of bag (may be one or two layers for opacity or color).
- With bag inside out, pin fabric in place, tucking excess under by ~0.5–1 cm for neat seam.
- Hand-sew in place using matching thread and small, discreet stitches.
- Turn bag right side out.
Conclusion
You have now completed a beautiful, multi-purpose granny square bag featuring a striking spiderweb motif. This pattern is easily adapted for countless other uses (garments, placemats, blankets, etc.). Blocking and careful joining yield a professional finish.
Pattern Corrections
- Each side of your finished square (before joining) must have the same number of stitches for seamless joining.
- Always join using corresponding stitches and spaces.
Tips
- Block each square before joining for professional results.
- For a more durable bag, always line the inside—especially if using for small or heavy items.
- Select a neutral or contrasting lining color for visual effect or cleanliness.
- Use a sturdy cotton or synthetic strap for extra strength if bag will be heavily loaded.
- Vary colors for different motifs or themes.
Leave a Reply