

Elegant Crochet Poppy Flower Pattern for Home Décor

Not only does this pattern offer a rewarding way to refine your crochet skills, but it also requires no glue or overwhelming assembly. The entire flower, including buds and leaves, is seamlessly worked with ease, making it both practical and enjoyable for crocheters. Its lifelike shape adds a natural touch to wreaths, floral arrangements, or even wearable accessories.
The project is a unique way to combine creativity with purpose, honoring meaningful moments or simply adding beauty to your everyday surroundings. Merge artistry and relaxation as you bring this iconic flower to life one stitch at a time—an experience that’s just as therapeutic as the finished result is stunning.

Materials Needed
- Yarn: 4-ply cotton yarn in 3 colors (green for the pistil & leaves, yellow for the stamen, and your chosen flower color, e.g., red).
- Crochet hook: Size 2.5 mm.
- Floral stem: 30–40 cm for each flower.
- Floral wire: 40 cm for leaves, buds, and the main flower.
- Stuffing: For the half-open bud.
- Scissors and tapestry needle.
- Optional: Glue for securing the floral wire.
Special Features of This Pattern
- Entirely One Piece: No need for attaching petals separately—it’s all crocheted seamlessly.
- Realistic Shape: The structure closely resembles a real poppy flower, petals, and leaves.
- Natural Design: The flower holds its shape and doesn’t require glue or external support to form its beauty.
Step-by-Step Instructions
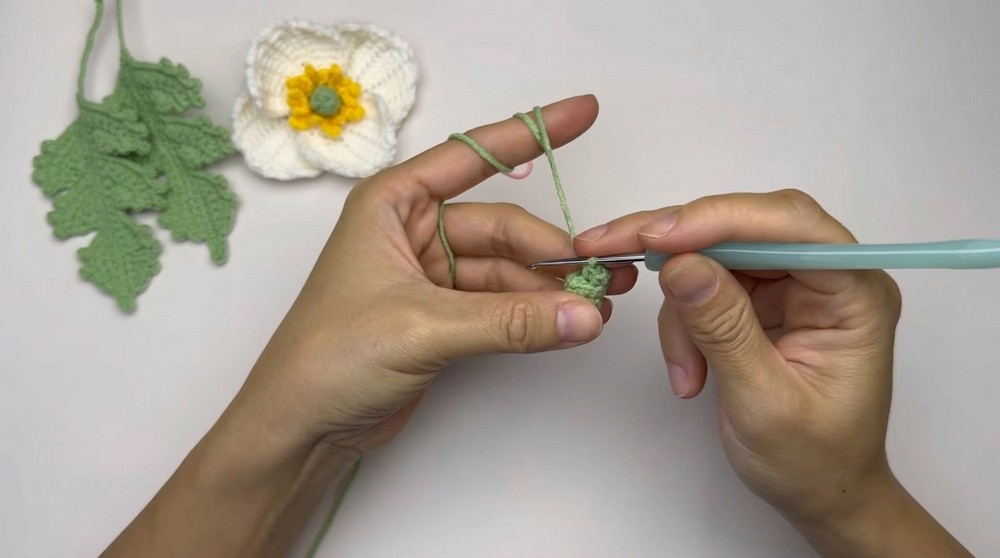
Chapter 1: Flower Pistil (Green Center)
- Start with a Magic Ring using green yarn.
- Chain 2 (do not count this as a stitch).
- Make 6 double crochets (dc) into the magic ring.
- Pull the yarn tail to close the ring tightly.
- Slip stitch (sl st) into the first stitch to close the round.
R-2:
- Chain 1 and make 6 single crochets (sc) around.
- Finish with a slip stitch into the first stitch.
R- 3:
- Chain 1, make 2 increases:
- Work 2 single crochets in the same space.
- Alternate between 1 sc and 1 sc increase. At the end, you'll have 8 stitches.
- Slip stitch into the first stitch to end the row.
Row 4:
- Work into the back loops only.
- Chain 1, then make 8 single crochets (sc) around without increasing or decreasing.
- This will create a base for the stamen.
R-5:
- Repeat 8 single crochets (sc) in all stitches, working through both loops.
- Slip stitch into the first stitch and fasten off.
2: Flower Stamen (Yellow Center)
- Attach yellow yarn to the front loops of Row 4.
- Create the stamen pattern:
- Chain 5 and slip stitch back into the same loop.
- Chain 7 and slip stitch into the same loop.
- Move to the next loop and repeat this pattern for all 8 front loops.
- Once all front loops are done, fasten off and weave in loose ends.
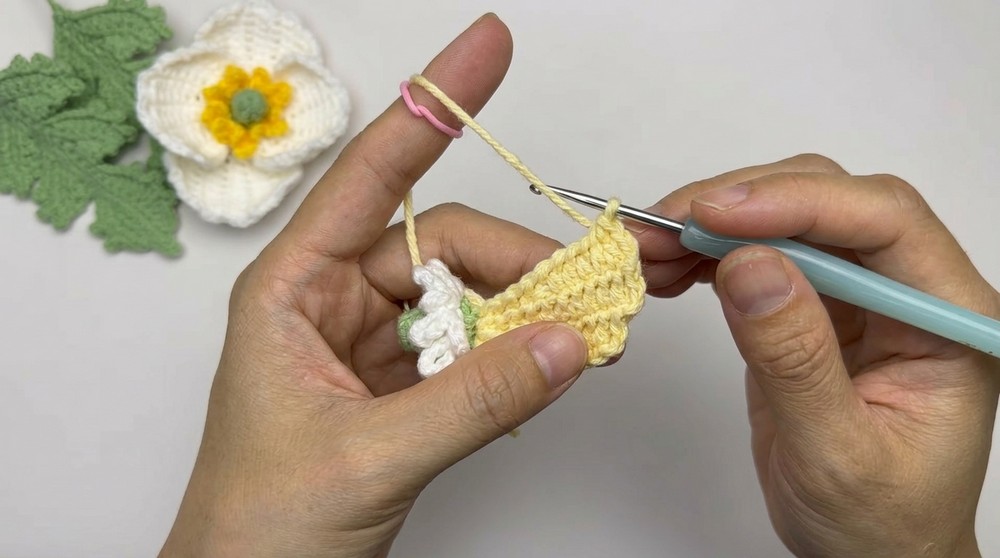
3: Flower Petals (First Layer)
- Attach the main flower color (e.g., red) to the remaining loops of Row 5.</p>
- Each petal works across 4 loops. Follow the steps below:Row 1 (Base):
- Chain 9. Work into the back vertical bars of the chain:
- 5 Afghan double crochets (unfinished).
- 2 unfinished single crochets into the last chain stitch.
- Insert into the first loop of Row 5 and pull through all loops to finish.
Row 2:
- Chain 4, then work 6 Afghan double crochets into the next vertical bars, ending with 2 single crochets.
- Attach to the next loop on the base.
Row 3–6:
- Continue enlarging the petal with the same technique, adding 3 half-double crochets and single crochets at the final rows to form the tip of the petal.
- Chain 9. Work into the back vertical bars of the chain:
- Each petal is made similarly across 4 loops around the pistil.

4: Second Layer of Petals
- Start a second round of petals in the back loops behind the first layer.
- Follow the same steps as the first layer, but chain 10 at the start of each petal for a slightly larger size.
5: Half-Open Flower Bud
- Begin with a magic ring and green yarn.
- Work 6 rows as the pistil, but make a single petal (use the same steps as above).
- Add a floral stem, stuff lightly, and tightly wrap the petal to form a bud.
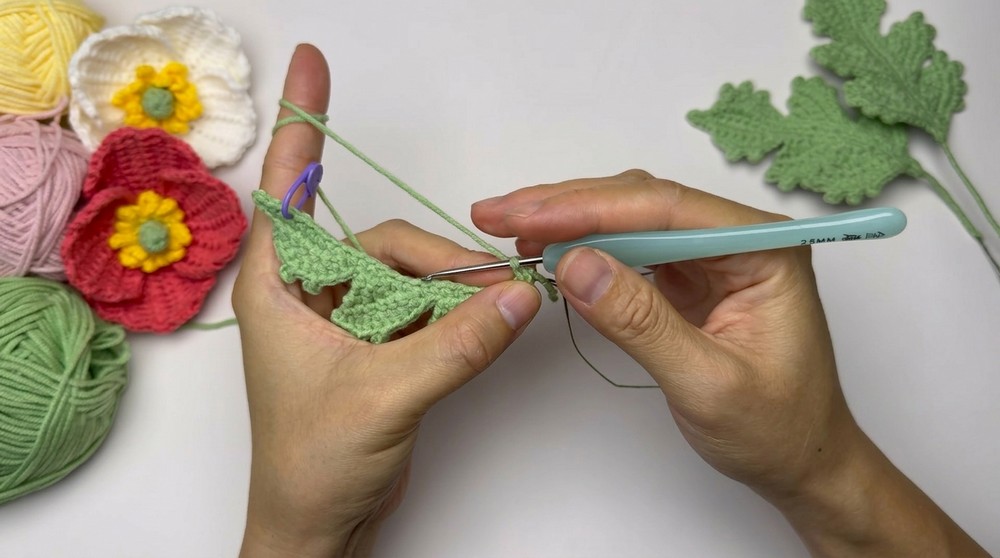
6: Leaves
- With green yarn, make a slip knot and chain 23.
- Work along the vertical bars:
- 1 single crochet, 1 half double crochet, then 2 double crochets repeatedly for shape
- Attach floral wire along the middle to keep the leaf stiff and natural.
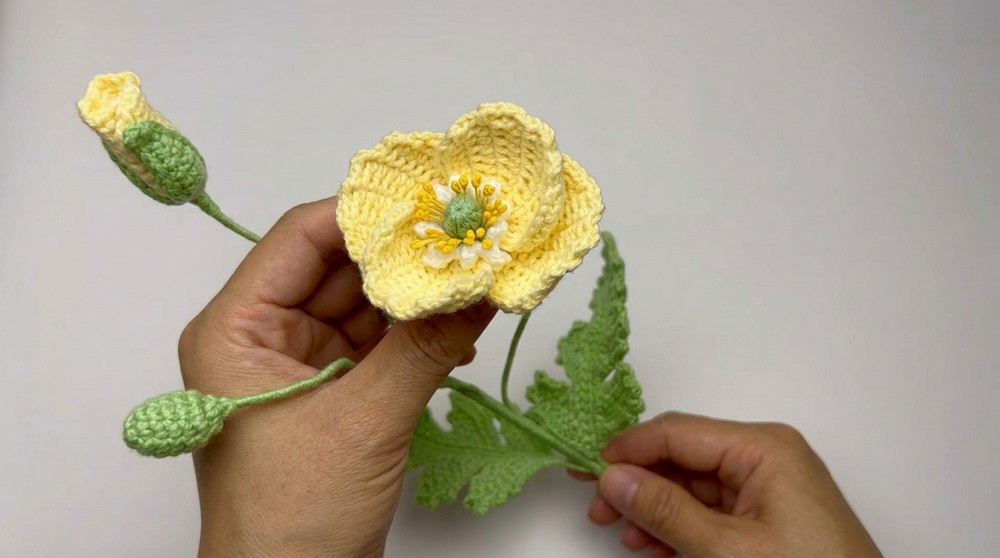
7: Assembling the Poppy Flower
- Use floral wire to create a sturdy cross through the pistil and petals for the main flower.
- Attach the half-open bud and green buds lower on the floral stem.
- Add the leaves, securing them with floral tape or glue.
- Adjust petals and leaves to style your flower naturally.
Tutor’s Suggestions
- Yarn weight: Use 4-ply cotton yarn for best results, but experiment with colors for unique variations.</li>
- Customization: Adjust petal size or add extra petals for a fuller flower.
- Best For: Home decor, brooches, gift wrapping, or memorable occasions like Remembrance Day.
A Helpful Tip
Always keep stitches loose when working with slip stitches or Afghan-style double crochets. This makes the petals more flexible and easier to shape.
Conclusion
You’ve now crocheted a stunning crochet poppy flower, complete with realistic features and a lifelike design. Whether you're decorating for a special event or gifting someone a handmade treasure, this flower is sure to impress. </p>


Leave a Reply