

Lightweight Crochet Crop Top Pattern for Effortless Style

This crop top pattern comes with the added benefit of customization—it can be crocheted to fit your exact measurements, ensuring it feels comfortable and flattering. Additionally, by designing your own garment, you're making a conscious step toward sustainable fashion and moving closer to reducing dependence on fast fashion trends. It serves as an eco-friendly alternative that combines aesthetics with mindfulness.
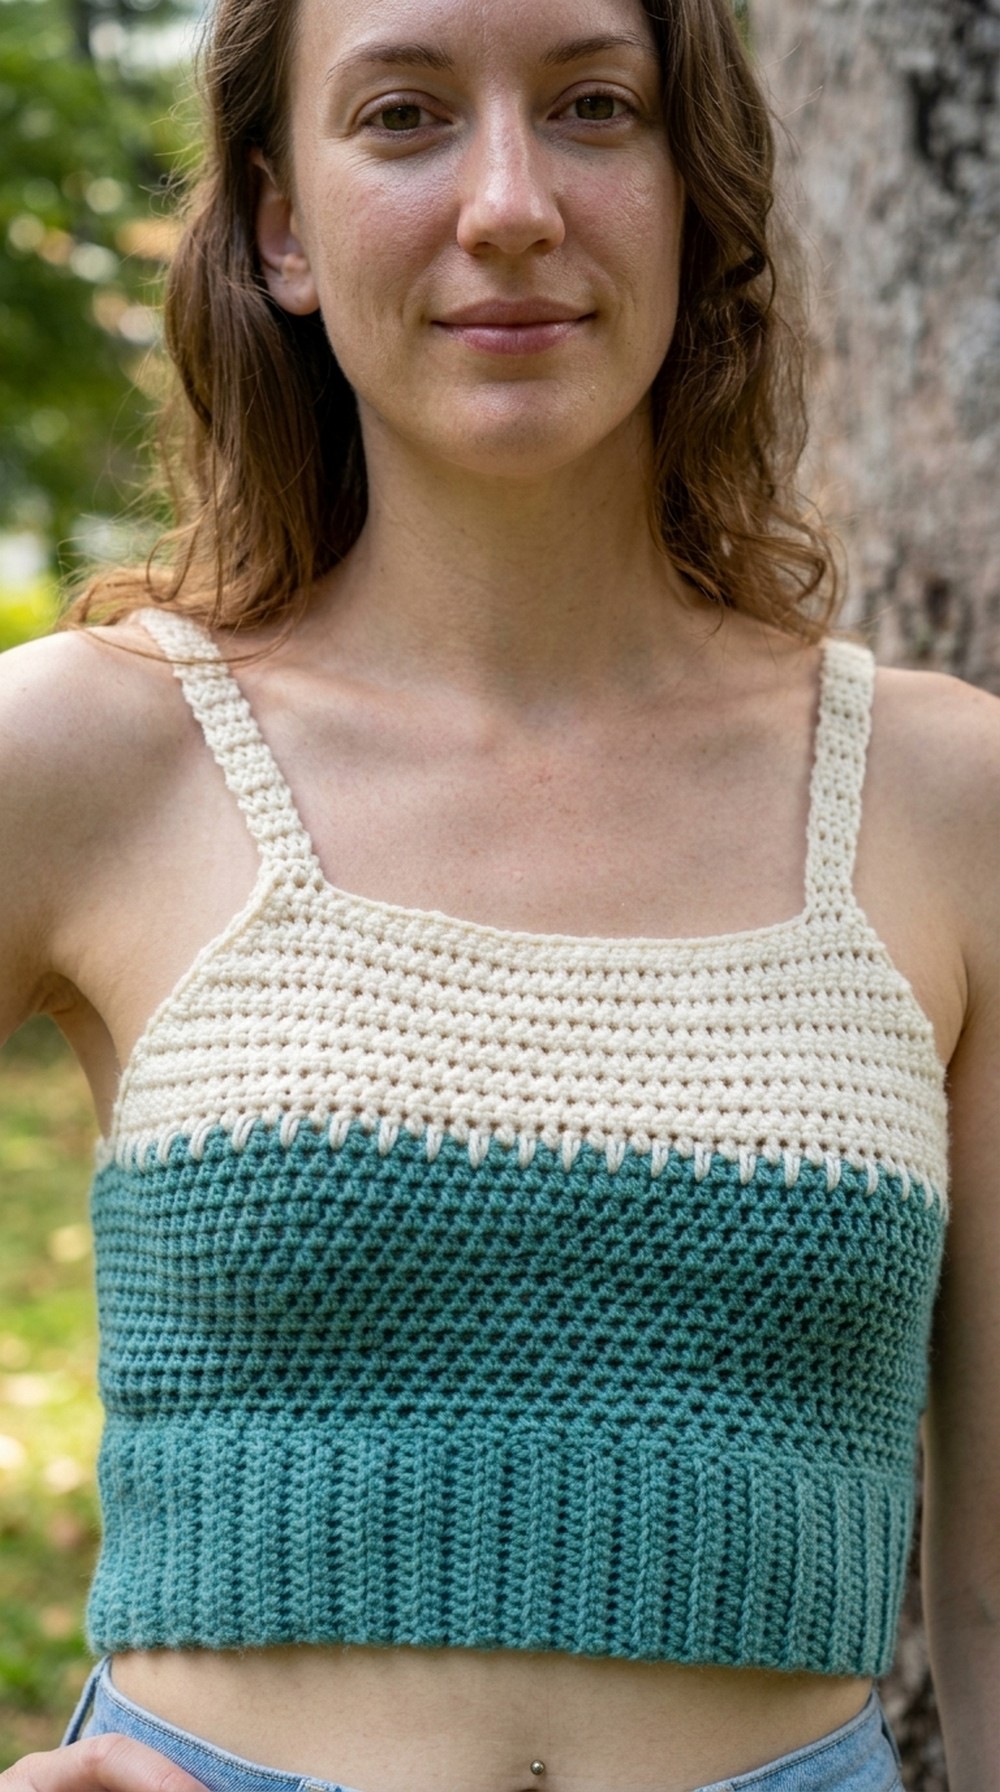
Lightweight and breathable, this handmade top works equally well for beach outings or festive activities, providing a chic look that's both practical and stylish. The crochet pattern is more than just a garment—it’s a way to showcase your skills and express your creativity. Perfect for weaving character and individuality into your wardrobe, this pattern is a timeless favorite for makers everywhere!
Difficulty Level: Beginner-friendly
Special Features:
- Custom-fit design ensures impeccable sizing.
- Versatile ribbing and texture stitches add style and functionality.
- Uses simple stitches like single crochet and half double crochet.
- Encourages creative variations for personalized textured looks.
Materials Needed
- Yarn: Milk cotton or similar, in two colors.
- Quantity:
- 2 skeins of 50g in Color 1 (e.g., blue)
- 1 skein of 50g in Color 2 (e.g., creamy white)
- Quantity:
- Crochet Hooks:
- One larger hook (4mm)
- One smaller hook (3.5mm)
- Additional Supplies: Scissors, Stitch Markers, Measuring Tape
Step-by-Step Pattern
Preparation: Taking Measurements
- Measure Your Waist: Write down this measurement.
- Measure Waist to Underarm: Record this to determine the crop top’s height.
Waistband - Ribbing
- Using the larger hook, make a slip knot.
- Chain 15 (or more for wider ribbing).
- Switch to the smaller hook.
- Identify the "knobs" on the back of the chain.
- Half Double Crochet (HDC):
- Yarn over, insert your hook into the 3rd stitch, pull up a loop, yarn over, and pull through all three loops.
- Continue HDC into every stitch along the chain.
- Turn Work & Chain 2:
- On this row, work HDC into back loops only (creates ribbing effect).
- Repeat until the ribbing measures just shorter than your waist measurement (approximately 2.5 inches less for stretch).
- Slip Stitch to Join Ends: Sandwich the ends together and slip stitch across to close the waistband.


Body
- Rotate the waistband to work on the top edge.
- Switch to Larger Hook:
- Start Row 1 by evenly spacing Single Crochet (SC) across the top edge of the waistband.
- Slip stitch at the end to join.
- Row 2: Begin increases:
- Chain 2 and place 2 HDC into the next stitch as your first increase.
- Add 1 HDC into each stitch, adding another increase (2 HDC) at desired spots marked with stitch markers.
- Row 3: Work plain HDC in every stitch (no increases). Slip stitch at the end.
- Row 4: Add increases for shaping (especially for bust):
- Use stitch markers to mark center points around bust. Add 2 HDC at those markers.
- Alternate Rows:
- Continue alternating rows with and without increases until reaching your waist-to-underarm measurement.
Horizon Section
- Mark the center of the top (front) and place stitch markers. Ensure an odd number of stitches between markers.
- Join Color 2:
- Tie a double knot and chain 2 to secure the new color.
- Work the following textured stitch pattern:
- Alternate between Half Double Crochet (HDC) stitches and Extended Half Double Crochet (EHDC) stitches, inserting EHDC into the stitch directly below the current row.
- Second row: SC all the way across.
- Alternate rows of HDC and SC until the desired height is achieved.
Decreasing for Bust Shaping
- Begin Decreases:
- For HDC Rows: Work an HDC decrease at the start and end of each row.
- For SC Rows: Complete an SC decrease at the start and end of each row.
- Ensure decreases are symmetrical by folding your work and aligning the angles on each side.
- Keep alternating HDC and SC rows with decreases until the piece fits snugly over your bust.
Straps
- Choose strap placement: Count stitches from the side to find strap placement and mark off.
- Create Straps:
- Chain 2 and make 3 HDC stitches across, turning work after every row.
- Measure the straps, ensuring they stretch slightly to your desired length (e.g., 16”).
- Secure straps using slip stitch on the desired position of the back of the top. Repeat for the second strap.


Weaving in Ends
- After attaching straps, weave in ends with a yarn needle for a clean and finished look.

Tutor’s Suggestions
- If your bust is larger than your waist, add extra increases at the front of the top for better fit.
- Feel free to experiment with stitches instead of sticking with the SC and HDC rows. This will create unique textures.
Uses
This crop top is perfect for summer wear, beach outfits, or as a layering piece under jackets and cardigans for a casual yet fashionable look. The light milk cotton fabric ensures comfort in warm weather while maintaining style.
Tip
When placing increases, avoid stacking them directly on top of each other row by row. Offset the stitch markers slightly for gradual shaping without bulk.
Conclusion
The Horizon Crop Top is a customizable, beginner-friendly project that allows you to crochet a versatile and flattering piece tailored to your measurements. Add your personal twist by experimenting with colors or stitch patterns!


Leave a Reply