

Celebrate festive cuteness with this Free Crochet Hello Kitty Christmas Pattern, a cute & creative project perfect for handmade holiday joy.
Add a touch of festive charm to your home with a cheerful Hello Kitty Christmas decoration designed to spark joy and holiday cheer. This crochet pattern goes beyond crocheting a simple piece—it allows you to crochet something meaningful to brighten your space or bring a smile to a loved one as a handmade gift. Featuring an adorable Hello Kitty face and a charming Christmas tree hat topped with a star, this project is a wonderful way to celebrate the season.
Unique & Simple Crochet Hello Kitty Christmas Pattern to Try Today

The benefits are far-reaching—crocheting this pattern not only enhances your holiday décor but also offers stress relief and a sense of accomplishment as you watch it come to life. Whether used as a tree topper, displayed on a mantel, or added to a unique gift box, this whimsical pattern brings warmth and personality to festive settings.
The pattern is accessible for beginners yet engaging enough for experienced crocheters to enjoy. With straightforward instructions and endless customization options, it’s a perfect addition to your holiday crocheting. Make your celebrations extra special with a handmade touch that’s as beautiful as it is fun to create.

Hello Kitty Christmas Crochet Pattern
Pattern Level
- Difficulty Level: Intermediate
- Skills Needed: Magic ring, increasing, decreasing, continuous rounds, front loop and back loop stitches, and color changes.
Materials Needed
- Yarn (in white, green, red, yellow, and black). Use your preferred weight, but ensure consistency for cohesive sizing.
- Crochet hook to match your yarn size.
- Stuffing (can use leftover yarn, pillow filling, or plush stuffing).
- Stitch marker.
- Scissors and a yarn needle.
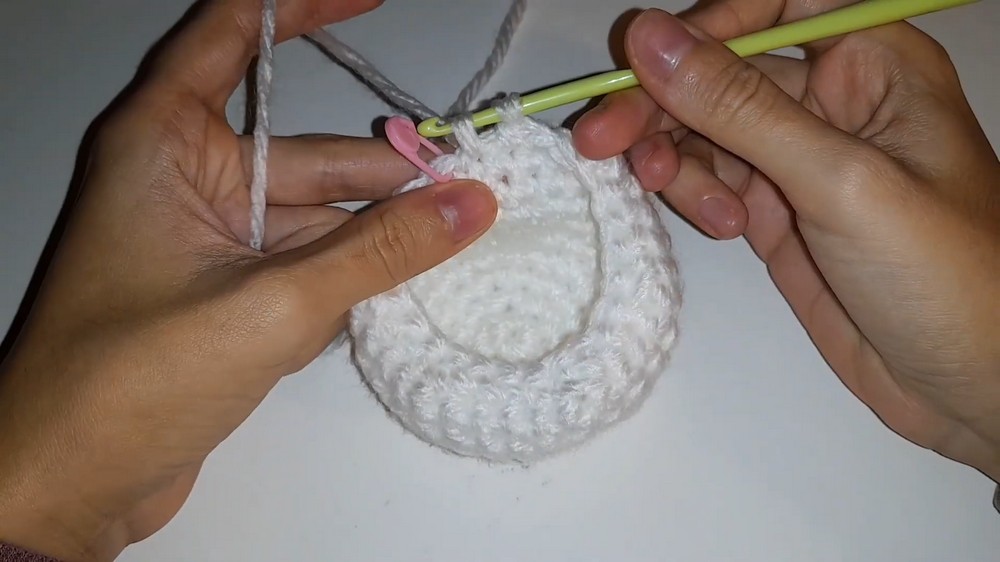
HELLO KITTY HEAD
- Start with Magic Ring:
- Make a magic ring with 6 single crochet (sc) stitches.
- Place a stitch marker in the last stitch to avoid confusion.
- Row 2 (Increase Round):
- 2 sc in each stitch (12 stitches total at the end).
- Row 3:
- 1 sc in the first stitch, 2 sc in the next stitch (increase). Repeat this pattern around the row (18 stitches total).
- Row 4:
- 1 sc in the first, second, and third stitch. Then increase in the fourth stitch (two single crochets). Repeat this pattern until the end (24 stitches).
- Row 5:
- 1 sc in the first, second, third stitches, and an increase in the fourth stitch. Repeat until the end (30 stitches).
- Rows 6-9:
- 1 sc in each stitch around (30 stitches per row).
- Row 10 (Decrease Round):
- 1 sc in the first three stitches, then decrease (combine two stitches). Repeat until the end (24 stitches).
- Row 11:
- 1 sc in the first stitch, decrease in the next. Repeat until the end (18 stitches).
- Row 12:
- 1 sc, decrease. Continue until the end (12 stitches).
- Stuff the Head:
- Before closing, fill the head with stuffing (use leftover yarn, pillow filling, or other soft materials).
- Row 13:
- Decrease in each stitch to close the head.
- Secure and Finish:
- Chain 2 and fasten off. Use the remaining yarn to hide the ends.

FACIAL DETAILS (Eyes, Nose & Whiskers)
- Eyes, Nose, and Whiskers:
- Use small pieces of black yarn for the eyes, yellow for the nose, and black for whiskers.
- Insert the yarn through the back of the head and secure the knots on the inside. Create simple shapes for Hello Kitty’s iconic features.
EARS
- Magic Ring:
- Make a magic ring with 4 sc stitches.
- Row 2:
- 1 sc in the first stitch, 1 increase in the second stitch. Continue this pattern (6 stitches).
- Row 3:
- 1 sc in the first and second stitch, 1 increase in the third stitch. Repeat until the end.
- Row 4:
- 1 sc in the first three stitches, 1 increase in the next. Repeat until the end (10 stitches).
- Sew the Ears Together:
- Pinch the ear together and sew through both sides using leftover yarn.
- Attach Ears to the Head:
- Use the remaining yarn to secure the ears on both sides of the head.
BOW
- Magic Ring:
- Chain 3.
- Double Crochet Segment:
- Make 2 double crochet (dc) stitches.
- Chain 3 again and make a slip stitch into the magic ring.
- Repeat for Symmetry:
- Repeat the double crochet segment to complete the bow shape.
- Secure:
- Pull the loose end to tighten the center of the bow, creating a distinct bow shape. Sew it onto Hello Kitty’s head.
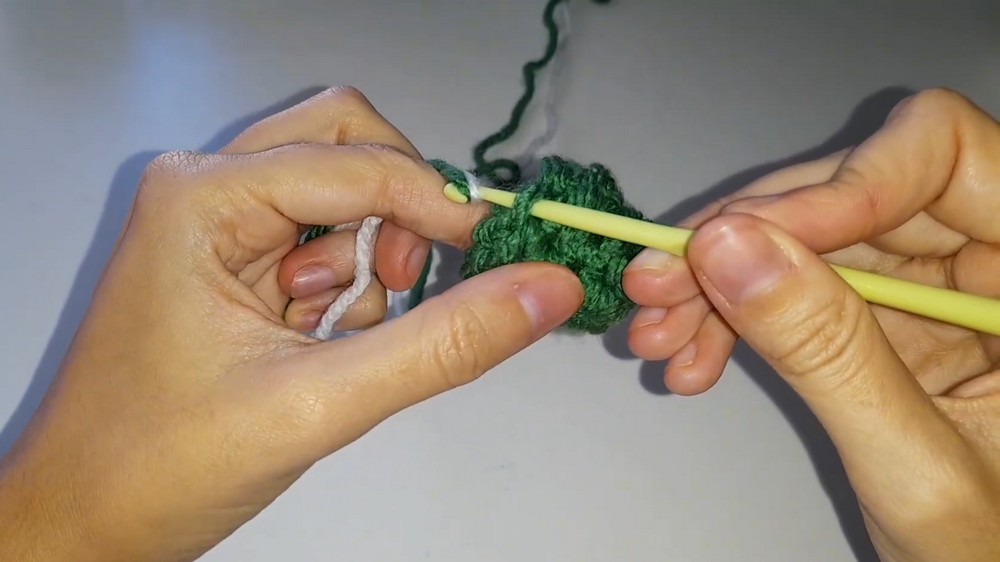
TREE HAT
- Base (Magic Ring):
- Chain 6 sc into a magic ring.
- Row 2:
- 1 sc in the first stitch, increase in the second. Repeat (9 stitches).
- Row 3:
- 1 sc in the first two stitches, increase in the third. Repeat (12 stitches).
- Snow-Like Layer (Front Loop Crochet):
- Crochet in the front loop only for this row. Then, chain 3 and create double crochets all around the visible lines to mimic layers of snow.
- Row 4:
- Increase by working in the round with the pattern of 3 sc stitches and 1 increase. Continue expanding the tree upward while adding crocheted snow layers in between rows to give the tree a festive touch.
- Secure to Head:
- Either glue the finished tree hat to the Hello Kitty head or use sewing techniques to attach it cleanly.
STAR
- Magic Ring:
- Make a magic ring and work double crochet, chain 2, single crochet alternately to form the points of the star.
- Repeat 5 Times:
- Complete 5 points to create the star shape.
- Attach to Tree:
- Sew or glue the star to the top of the tree hat.
Additional Features
- To make the Christmas tree base sturdier, fold the bottom part inward.
- Decorative colors can be added as ornaments to the tree using spare yarn or beads.

Uses
- This Hello Kitty Christmas crochet project is perfect for holiday decor, as a handmade gift for Hello Kitty fans, or even as a cute addition to a child’s toy collection.
Conclusion
This Hello Kitty Christmas crochet pattern combines creativity and charm, making it a stand-out holiday project. With its layered textures, adorable details, and seasonal touches, it’s a delightful way to spread festive cheer.
Tip
- Tip for Beginners: Mark your rounds carefully and take your time with the decreases to maintain a smooth shape. Use glue for simpler assembly if sewing feels tricky!


Leave a Reply