

Sip into fun with this Free Crochet Bubble Tea Keychain Pattern that makes a cute, playful charm ideal for keys, bags, or gifting friends with a sweet touch.
A tiny charm can instantly turn a plain bag or set of keys into something cute and fun. With the Free Crochet Bubble Tea Keychain Pattern, you can make a small handmade keychain that looks just like a miniature cup of bubble tea, complete with little pearls and a straw. The keychain usually has soft yarn, neat crochet stitches, and bright, cheerful colors that make it eye-catching and lively.
Fun Free Crochet Bubble Tea Keychain Pattern for Tiny Gifts

Its lightweight design makes it easy to hang on a bag or keys, while its playful shape adds a fun touch to everyday items. It can also serve as a zipper pull or a tiny, thoughtful gift for someone who enjoys handmade projects. The pattern follows simple, step-by-step instructions, making it beginner-friendly and enjoyable to create. By mixing yarn colors, each bubble tea keychain can look unique, whimsical, or classic. In the end, this crochet bubble tea keychain is a charming, creative, and delightful handmade accessory.
Crochet Bubble Tea Keyring Pattern
Materials Needed:
- Yarn:
- 3 colors of yarn (e.g., one for the cup, one for the lid, and one for the straw). Acrylic or cotton yarn works well for this keyring.
- Crochet Hook: 2.25 mm hook.
- Other Tools:
- A keychain ring.
- Tapestry needle.
- Fiberfill (or cotton) for stuffing the bubble tea.
- Scissors.
Gauge:
- Gauge is not critical for this project. Any size differences will only slightly alter the dimensions. Ensure your stitches are tight enough to prevent stuffing visibility.
Finished Size:
- The completed keyring will measure approximately 3–5 inches tall, depending on your yarn thickness and tension.
Customization Ideas:
- Yarn Colors:
- Choose playful pastel shades for a cute and whimsical tea cup.
- Use different colors for the "bubbles" and cup to create more variety.
- Personalized Embellishment:
- Consider adding beads, a small message tag, or embroidery to customize.
Pattern Notes:
- This project is worked mostly in continuous rounds (spiral). Use a stitch marker to mark the beginning of each round if needed.
- The base cup, lid, and straw are made separately and joined at the end.
- The "bubble beads" are simulated by small yarn knots or stitches.
Crochet Bubble Tea Pattern
Step 1: Crochet the Cup Base
- Start with a magic ring:
- Wrap the yarn around your fingers to make a magic ring.
- Make 8 single crochet (SC) stitches into the ring. Pull the tail tight to close the ring. (Total: 8 stitches in Round 1).
- Round 2:
- Work 2 single crochet (SC) stitches into each stitch from the previous round (increases).
- You should now have 16 stitches in the second round.
- Round 3:
- Work 1 single crochet (SC) in the first stitch, then work 2 SC into the next stitch (increase). Repeat this sequence (1 SC, 2 SC) around.
- (Total: 24 stitches in Round 3).
- Rounds 4–7:
- Work 1 single crochet (SC) into each stitch around (no increases or decreases).
- You’re now creating the height of the cup.
- Round 8:
- Begin the shaping for the top of the cup: In every third stitch, increase by working 2 SC. (Repeat: 1 SC, 1 SC, 2 SC) around.
- (Total: 32 stitches).
- Stuff the Cup:
- Insert fiberfill or cotton firmly into the cup to create a rounded, sturdy finish.
- Rounds 9-10:
- Work single crochet (SC) into each stitch for two continuous rounds.
- Fasten off and attach the yarn securely to the inside of the cup.


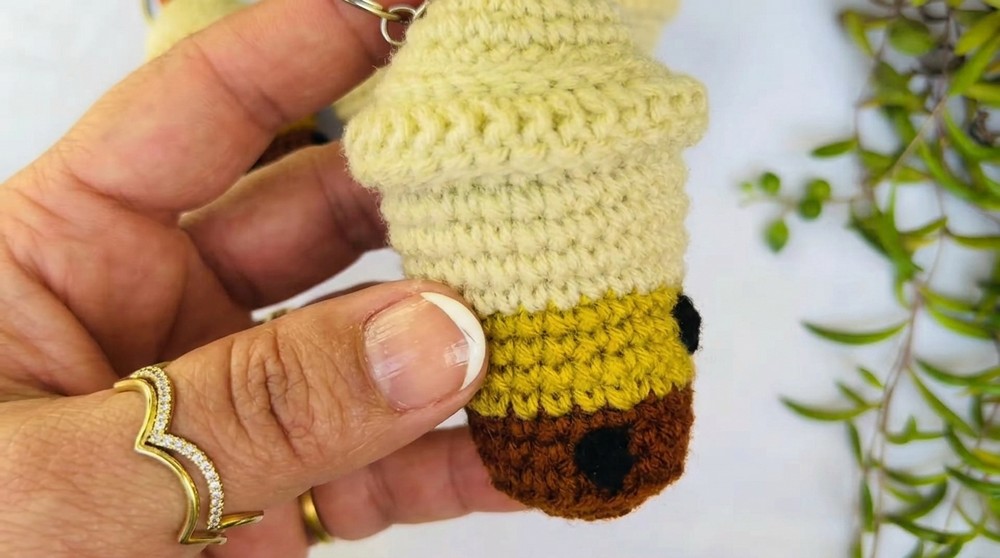
Step 2: Add the Bubbles
- Using Black or Dark Brown Yarn:
- Cut short strands of yarn and tie tight bubbles at the bottom of the cup. These simulate tapioca pearls or bubbles.
- Secure the "bubbles" evenly by stitching into the lower part of the cup with a tapestry needle.

Step 3: Make the Lid
- Magic Ring Start:
- With your lid color yarn, make a magic ring with 6 single crochets (SC) in the center. Pull tight.
- Round 2:
- Work 2 SC in each stitch (increase). (Total: 12 stitches).
- Round 3:
- Work 1 SC in the first stitch, then 2 SC in the next stitch. Repeat around. (Total: 18 stitches).
- Round 4:
- Work single crochets into each stitch without increasing to create the flat lid shape.
- Fasten Off and Shape:
- Secure the end by weaving it into the underside of the lid. Leave a tail for sewing it onto the cup later.
Step 4: Crochet the Straw
- Using the straw color yarn:
- Create a very tight magic ring with 6 single crochets.
- Work in a straight, tubular pattern:
- Create several rounds of 6 single crochets to make a straw.
- The length of your straw depends on personal preference, but about 2–2.5 inches is a good length for a keyring.
- Fasten Off:
- Leave a long tail for sewing the straw to the lid.
Step 5: Assembly
- Attach the Lid to the Cup:
- Using the tail end of the lid, sew the lid to the top edge of the cup base. Ensure it is centered. Pull tight and weave in the ends.
- Add the Straw:
- Sew the straw at a slight angle to the lid. Insert and secure the tail through the lid stitches.
- Optional Decoration:
- Add any embroidery, or create small stitched features (e.g., smiley eyes) using a different yarn color.
- Attach the Keyring:
- Fasten the keyring loop securely to the edge of the cup or straw using a sturdy knot or jump ring.

Tips for Success:
- Keep tension uniform for a neat, professional finish.
- Work with bright, fun colors for added appeal.
- Ensure all loose ends are woven in securely to give the finished design durability.
Conclusion
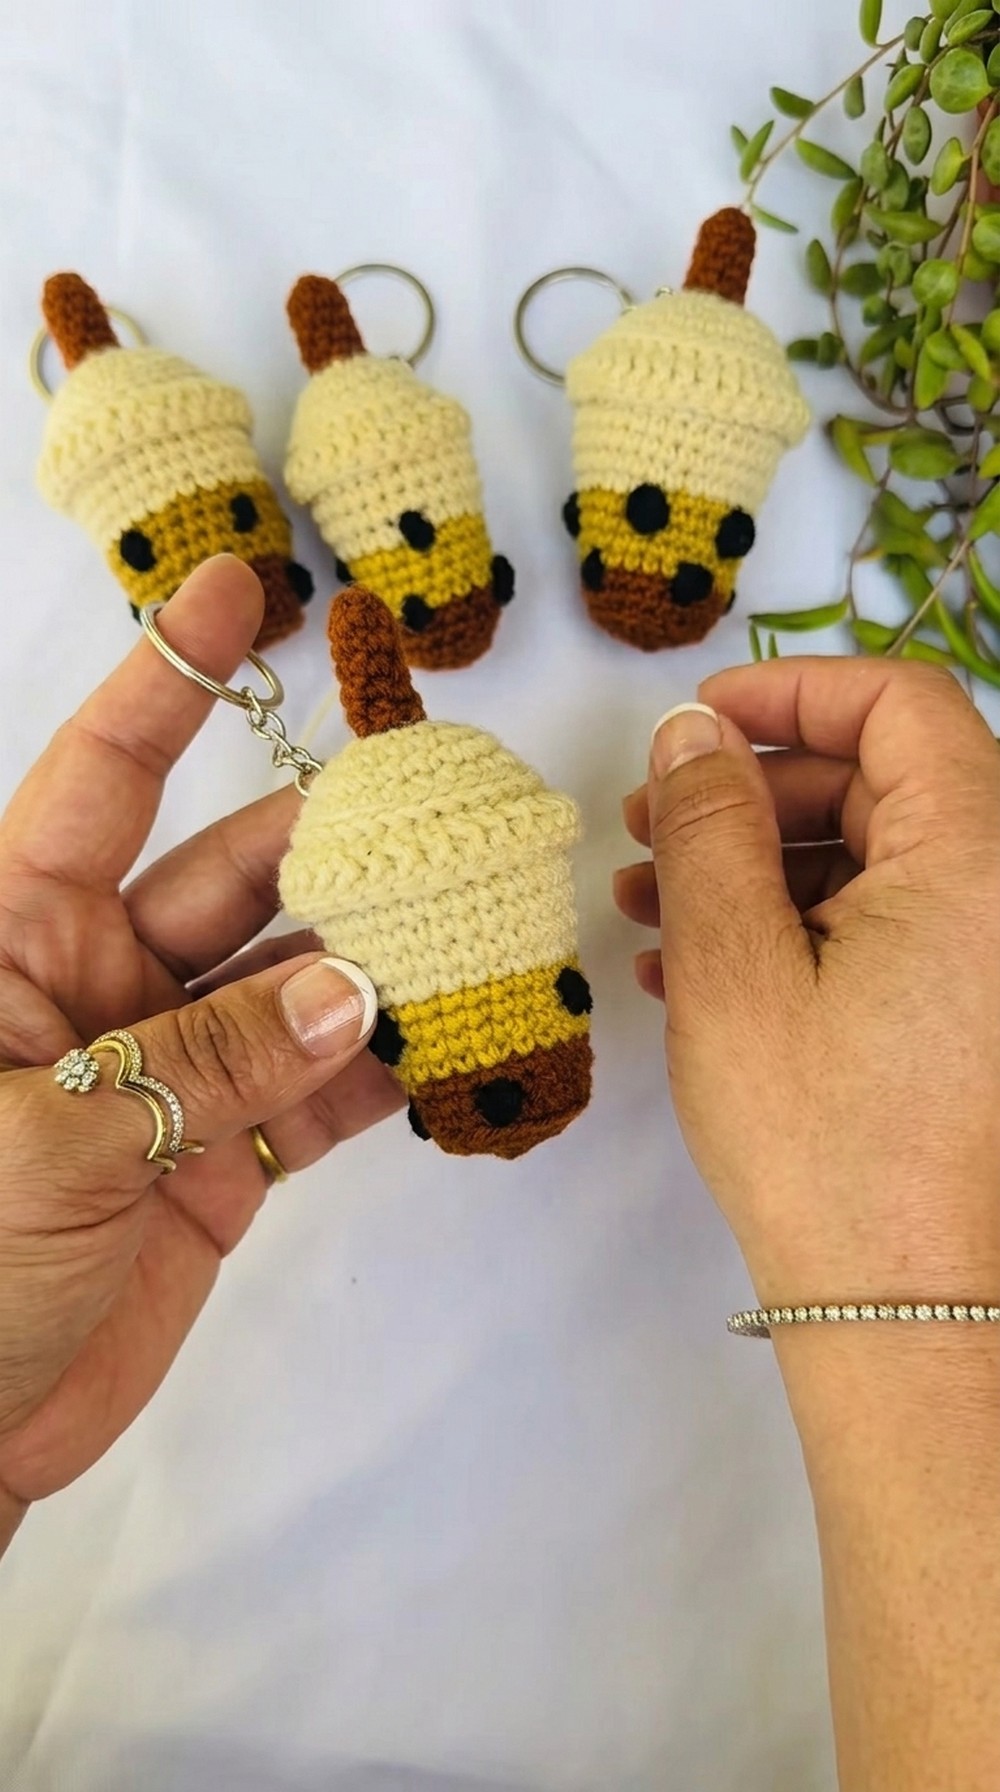
Congratulations on completing your Bubble Tea Keyring! This adorable design is perfect as a personalized accessory or a handmade gift. The cute bubble tea cup will be a favorite for tea lovers, and its compact size makes it an ideal addition to bags, keys, or backpacks.
Final Remarks
Your Bubble Tea Keyring is now ready to brighten up your everyday essentials. Experiment with different colors to mimic flavors like matcha, taro, or strawberry tea! If you enjoyed this project, consider making a whole set to give as gifts or even sell them as handmade items.


Leave a Reply