

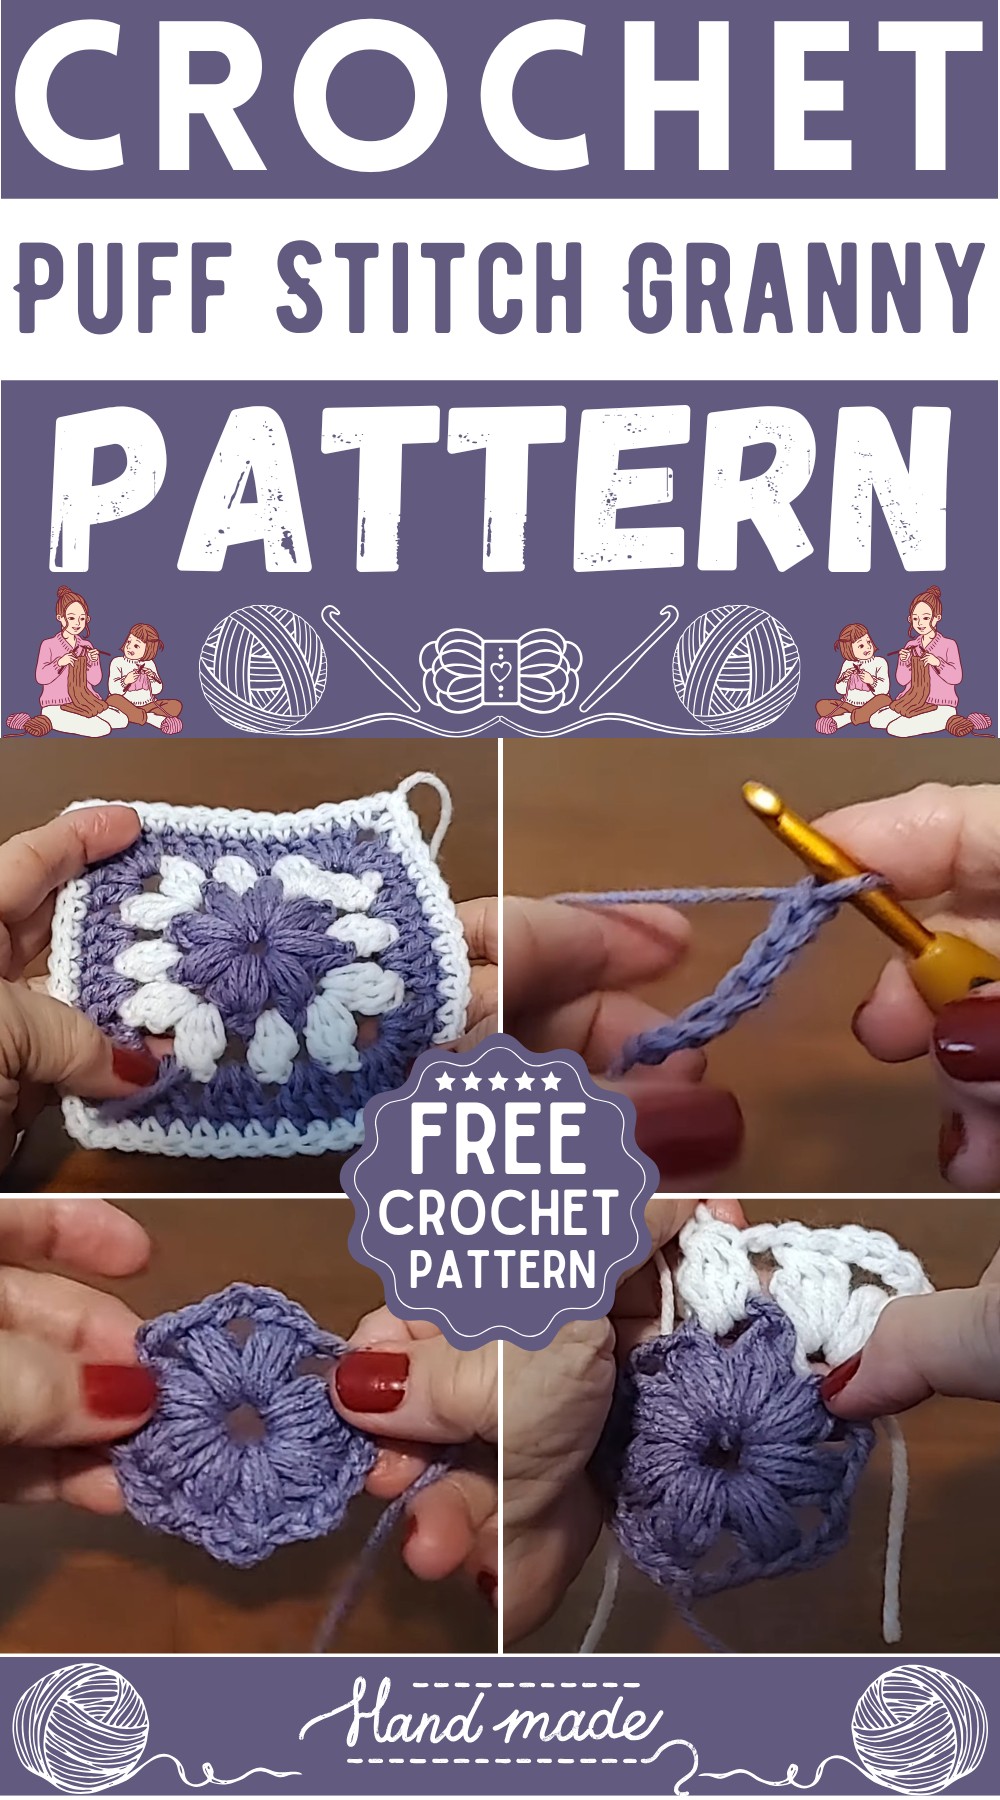
Imagine wrapping yourself up in a cozy, homemade blanket made of colorful squares, each with a little puff that adds an extra touch of softness. That's the magic of crochet puff stitch granny squares! This charming Crochet Puff Stitch Granny Square project turns simple yarn into a pattern of delightful textures.
Crochet Puff Stitch Granny Square
Materials Needed:
- 5mm crochet hook
- Yarn of choice in various colors
- Scissors
- Yarn needle
Pattern:
Foundation and First Puff Stitches:
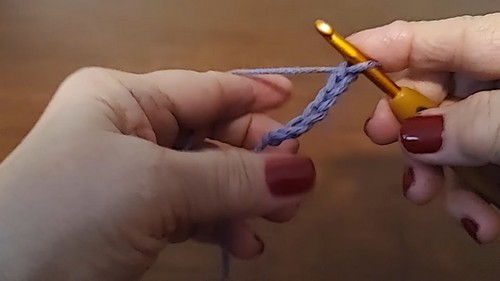
- Start off by chaining 6.
- Slip stitch into the first chain to form a ring.
- Chain 2. This will act as the first part of the puff stitch.
Puff Stitch:
- Yarn over, insert your hook in the center of the ring, yarn over and pull up a loop about half an inch. Repeat this step three more times until you have 9 loops on your hook. Yarn over and pull through all 9 loops on the hook.
- Chain 3.
- Repeat the puff stitch followed by chain 3 seven more times for a total of eight puff stitches. Make sure to chain 3 between each puff stitch.
- Slip stitch to the top of the first puff stitch to join.

- Slip stitch into the next chain-3 space.
Finishing the First Round and Changing Color:
- Chain 1, pull yarn tight, cut off, and secure.
Second Round (Adding Second Color):
- Attach the new color yarn to any chain-3 space and chain 1.
- Make three double crochets together (3 dc tog) in the same space as follows:
3 dc tog:
- [Yarn over, insert hook, yarn over, pull up a loop, yarn over, pull through the first two loops] repeat twice more for three half-finished double crochets. Yarn over and pull through all four loops on your hook.
- Since this is a corner, chain 4.
- In the same chain-3 space, make another 3 dc tog.

- Chain 2 and proceed to the next chain-3 space.
- Repeat the pattern three more times to create the other three corners of the square (each corner is 3 dc tog, chain 4, 3 dc tog).
- After the last corner, chain 2 and join with a slip stitch to the top of the first cluster.
Third Round (Adding Third Color):
- Attach the new color yarn to any corner and follow this pattern:
- Chain 1.
- In the corner space, do 3 double crochets, chain 2, 3 more double crochets.
- For the side spaces (chain-2 spaces), simply do 3 double crochets in each space work your way to the next corner.
- At each corner, work the same pattern as before, 3 double crochets, chain 2, 3 double crochets.
- Continue around the square and join with a slip stitch to the top of the first double crochet.
- Slip stitch into the corner space if you prefer a smoother finish, then chain 1 and cut off.
Fourth Round (Edging in Final Color):
- Attach yarn to any stitch before a corner.
- Chain 1 and make a single crochet in the same stitch.
- In the corner chain-2 space, do 1 single crochet, chain 2, and 1 more single crochet.
- Make 1 single crochet in each of the next 12 stitches.
- Continue around the square working 1 single crochet in each stitch and the corner pattern in each corner.

- Join with a slip stitch to the first single crochet and chain 1 to finish off.
- Cut yarn and weave in ends.
Additional Notes:
- The square can be made larger by repeating round three as many times as desired, adjusting for stitch counts on the sides as they grow.


Leave a Reply