

Charming Crochet Heart Cactus Pattern for Home Decor


Special Features
- Perfect for beginners with its use of simple stitches.
- Versatile design ideal for gifts, décor, or craft fairs.
- Includes a beautiful pot, soil, and a delicate flower to make it more realistic.
Level of Difficulty: Beginner
Materials Needed
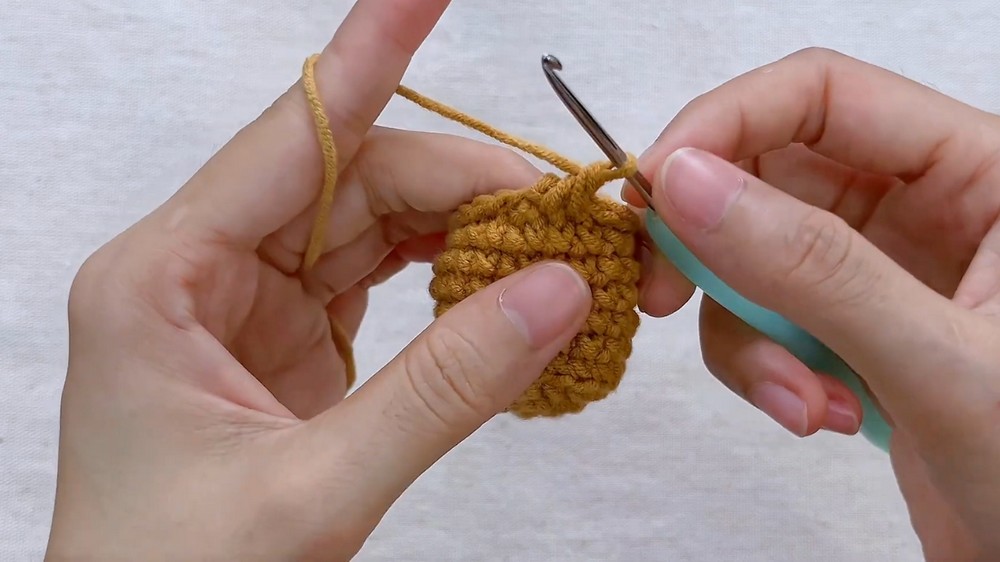
- Yarn: 5-ply cotton yarn in green, white, and brown colors.
- Hook: 2.5mm crochet hook.
- Scissors
- Yarn needle
- Glue (to assemble the cactus and pot).
- Cotton or Polyfill (for stuffing).
Step-by-Step Pattern
Part 1: Heart Cactus
Row 1: Create the Magic Ring
- Begin with a magic ring.
- Crochet 5 single crochets into the magic ring.
- Pull the yarn tightly to close the ring.
- Note: The heart will be crocheted in continuous rows, without joining rounds or chaining at the start of a new row.
R- 2: Increase
- Into the first stitch, make an increase (2 single crochets in the same stitch).
- Mark the first stitch to easily identify rows later.
- Repeat making increases in each stitch until there are 5 increases (10 stitches total).

Row 3: Alternating Pattern
- Into the first stitch, make 1 single crochet, then mark the stitch.
- Into the second stitch, make an increase.
- Alternate between 1 single crochet and 1 increase for the entire row (15 stitches total).
R- 4: Single Crochet
- Make 1 single crochet in every stitch around. There will be 15 single crochets total for this row.
- Fasten off this piece with a slip stitch and chain 1, then cut the yarn.
Create the Second Heart Half
- Follow the same pattern as the first heart half until the completion of Row 4.
- Do not fasten off or cut the yarn.
2: Join the Heart Pieces
Connecting the Halves
- Take the first completed heart half and align it with the second half.
- Insert your hook into the first stitch of the first half and make a single crochet to join the two halves together.
- Mark the first stitch of this row.

Row 5: Single Crochet Around Both Halves
- Make 15 single crochets around the stitches of the first half.
- Continue to the second half and make 15 single crochets around it.
- This will give a total of 30 stitches for Row 5.
6 & Row 7: Single Crochet Around
- Make 1 single crochet into each stitch for the next two rows (30 stitches per row).
Row 8: Shaping the Heart
- Make 13 single crochets, followed by a decrease.
- Continue by making another 13 single crochets and 1 decrease.
- Repeat this pattern for the entire row.
R- 9: Decreasing Further
- Make 5 single crochets, followed by a decrease.
- Repeat this pattern three more times for a total of 20 stitches.
10 Row : Final Decrease Rows
- Make 4 single crochets, followed by a decrease. Repeat this three more times.
Row 11: Start Stuffing the Heart
- After completing the row, begin stuffing the heart halfway with cotton or polyfill to give it a solid shape.
Final Row: Closing the Heart
- Make 2 single crochets, then a decrease. Repeat three more times.
- Fasten off with a slip stitch and chain 1. Leave a long tail for sewing.
- Use your yarn needle to thread the remaining tail through the front loops of the remaining stitches. Skip one loop and insert the needle into the next loop to gather and close the heart.
- Sew the open seams between the two halves for a seamless finish.

3: Pot Pattern
Row 1: Base of the Pot
- Make a slip knot and chain 9.
- Starting in the second chain from the hook, make 1 single crochet in each chain.
- At the last chain, make 3 single crochets in one stitch.
- Turn your work to the other side of the chain and make 1 single crochet in each stitch.
- At the starting stitch of the chain, make an increase (2 single crochets in the stitch).
- Slip stitch to join.
Row 2: Expanding the Base
- Chain 1 and make 1 increase into the first stitch.
- Make 1 single crochet into each of the next 6 stitches.
- Make 3 increases, and then make 6 single crochets down the other side.
- Make 1 increase in each of the last two stitches.
Row 3: Adjusting the Shape
- Chain 1 and alternate between 1 single crochet and 1 increase across the row. Repeat on both sides of the base.
- Complete the row with 6 single crochets on both ends.
4 to Row 9: Building the Pot
- Chain 1, and make 1 single crochet in each stitch for the next several rows to build the height of the pot. (30 single crochets per row).
R- 10: Slip Stitch for Detail
- Make 1 slip stitch into each stitch, working in the front loops only (30 stitches total).
Row 11: Crab Stitches
- Work crab stitches (backward single crochets) for the final row of the pot.
4: Soil and Flower
Soil
- Follow the first two rows of the pot pattern to create the soil.
White Flower
- Start with a magic ring.
- Create petals by working:
- Chain 2, double crochet, chain 3, slip stitch back into the ring.
- Repeat for 5 petals in total.
5: Assembly
- Stuff the pot with cotton or polyfill.
- Sew the soil to the top edge of the pot.
- Glue the heart cactus to the soil.
- Add the white flower to the top corner of the cactus using glue.
- Sew any remaining tails or loose ends.

Tutor Suggestions
- Use bright, contrasting yarn colors for a fun and whimsical look.
- Ensure tight stitches to keep the stuffing from showing.
- Mark the first stitch of each row to prevent losing track while working in continuous rounds.
Uses
- Perfect as a Valentine’s Day gift, home décor, or desk decoration.
- These heart cacti also work well as party favors, baby shower gifts, or even as a cute addition to your handmade collection.
Tip:
If you’re new to crocheting, take your time with the slip stitch and magic ring steps. They can feel tricky at first, but with practice, they’ll become second nature.
Conclusion
Congratulations! You’ve now crocheted a delightful mini heart cactus in a pot. This crochet project is a fantastic way to brighten your space, practice your crochet skills, and crochet something uniquely handmade. Feel free to customize it with different colors or sizes to suit your style.


Leave a Reply