

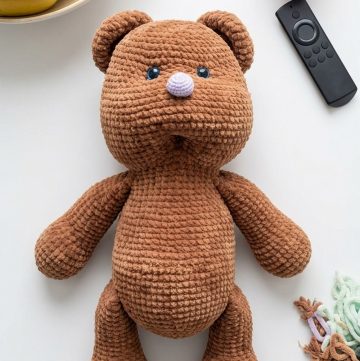
Put your hands on this super Crochet Christmas Pudding Cupcake Pattern. This pattern lets you make a really cute Christmas cupcake using yarn. The main part of the cupcake is brown, just like a real pudding. At the bottom, you'll attach a green skirt to the cupcake. But the cute part is still ongoing. Add a white cream topping that looks melting and flowing around. On top of the cream, there's a green leaf and a red berry. This step-by-step pattern is fun and easy to follow. So, let's start making this adorable crochet Christmas pudding cupcake!
Crochet Christmas Pudding Cupcake Pattern

Materials And Tools
- Cotton Blend Yarn Sport Weight 5ply (Yardage 330 M / 100 G [361 Yds / 3.5 Oz]) In Brown, White, Green And Red
- Crochet Hook 2 Mm [us Steel Hook 4, UK 21⁄2].
- Polyester Fiberfill For Stuffing.
- Safety Eyes, Diameter 8 Mm [0.31 In] - 2 Pieces.
- Remnants Of Embroidery Floss For Embroidering Cheeks And Mouth.
- Tapestry Needle With A Large Eye.
- Tailor Pins.
Abbreviations Used
- Mr: Magic Ring;
- St(S): Stitch(Es);
- Ch - Chain;
- Sl-st Slip Stitch;
- Sc - Single Crochet (Us);
- Inc - Increase (2 Sts Worked Into The Same Stitch);
- Dec Decrease (2 Stitches Crocheted Off Together);
- Hdc - Half Double Crochet (Us);
- Dc - Double Crochet (Us);
- Blo - Work Through The Back Loop Only;
- Puff - (Work 5 Unfinished Hdc's Into The Same Stitch And Crochet Them Off Together);
- Picot - Crochet Ch2 And Connect The Chain With A Sl- St In The First Ch.
- (Sc, Inc)... Times - Repeat Instructions In Parenthesis. Numbers In Parenthesis At The End Of A Row Or Round Indicate The Stitch
Count After Completion Of The Row Or Round.
Size: The Finished Toy Will Be About 11 Cm [4.3 In] Tall.
Main Pudding

In Brown Color. Stuff As You Go.
- Rnd 1: 6 Sc Into An Mr (6)
- Rnd 2: 6 Inc (12)
- Rnd 3: (1 Sc, Inc) X 6 (18)
- Rnd 4: (2 Sc, Inc) X 6 (24)
- Rnd 5: (3 Sc, Inc) X 6 (30)
- Rnd 6: (4 Sc, Inc) X 6 (36)
- Rnd 7: (5 Sc, Inc) X 6 (42)
- Rnd 8: (6 Sc, Inc) X 6 (48)
- Rnd 9: (7 Sc, Inc) X 6 (54)
- Rnds 10-11: (2 Rounds) 1 Sc In Every St (54)
- Rnd 12: (8 Sc, Inc) X 6 (60)
- Rnds 13-19: (7 Rounds) 1 Sc In Every St (60)
Insert The Safety Eyes Between Rounds 17 And 18, Leaving A Distance Of 9 Sts Between Them.
- Rnd 20: (8 Sc, Dec) X 6 (54)
- Rnd 21: 1 Sc In Every St (54)
- Rnd 22: (7 Sc, Dec) X 6 (48)
- Rnd 23: 1 Sc In Every St (48)
- Rnd 24: (6 Sc, Dec) X 6 (42)
- Rnd 25: 1 Sc In Every St (42)
- Rnd 26: (5 Sc, Dec) X 6 (36)
- Rnds 27-28: (2 Rounds) 1 Sc In Every St (36)
- Rnd 29: (4 Sc, Dec) X 6 (30)
- Fasten Off And Hide The End On The Inside.
Cupcake Case
In Green Color

- Rnd 1: 6 Sc Into An Mr (6)
- Rnd 2: 6 Inc (12)
- Rnd 3: (1 Sc, Inc) X 6 (18)
- Rnd 4: (2 Sc, Inc) X 6 (24)
- Rnd 5: (3 Sc, Inc) X 6 (30)
- Rnd 6: Attach the green piece to round 29 Of the Main Pudding And Crochet The Two Layers Together With Sl-st. (30)
Stuff It Lightly Before You Close The Seam. When Stuffing, Make Sure That The Bottom Green Side Stays Flat.

- Rnd 7: Blo (4 Sc, Inc) X 6 (36)
- Rnd 8: Blo 1 Sc In Every St (36) Rnd 9: 1 Sc In Every St (36)
- Rnd 10: (5 Sc, Inc) X 6 (42)
- Rnds 11-12: (2 Rounds) 1 Sc In Every St (42)
- Rnd 13: (6 Sc, Inc) X 6 (48)
- Rnd 14: 1 Sc Each In Every St (48)
Change Color To Red, Don't Cut Green Thread
- Rnd 15: 1 Sl-st In Every St (48)
Fasten Off Red Yarn And Hide The Ends On The Inside. Continue Work With Green Color.
- Rnd 16: 1 Sc In Every St Of Round 14 (48)
- Rnd 17: (Skip 1 St, 5 Hdc In Next St, Skip 1 St, Sl-st In Next St) Repeat 12 Times
Fasten Off, Leaving An End Long Enough For Sewing.
Icing

In White Color. Rnds 1-8: As For Main Pudding. 48 Sts
- Rnd 9: Making The Drips:
- Drip 1: Ch6, In The 3rd Ch From Hook, 1 Hdc, 3 Sc, 3 Sc In Round 9
- Drip 2: Ch8, In The 3rd Ch
- From Hook, 1 Hdc, 5 Sc, 3 Sc In Round 9 Drip 3: As Drip 1 Drip 4: Ch7, In The 3rd Ch From Hook, 1 Hdc, 4 Sc, 3 Sc In Round 9
- Drip 5: As Drip 1
- Drip 6: As Drip 2
- Drip 7: As Drip 1 Drip 8: As Drip 3
- Drip 10: As Drip 2 Drip 11: As Drip 1 Drip 12: As Drip 3 Drip 13: As Drip 1 Drip 14: As Drip 2 Drip 15: As Drip 1 Drip 16: As Drip 3 Fasten Off,
- Leaving An End Long Enough For Sewing.
- Drip 9: As Drip 1
Arms (Make 2)
In Brown Color
- Rnd 1: 6 Sc Into An Mr (6)
- Rnds 2-4: (3 Rounds) 1 Sc In
Every St (6)
Stuff With Fiberfill. Flat The Open End The Piece And Crochet The Two Layers Together With Sc.
Fasten Off, Leaving An End Long Enough For Sewing.
Legs (Make 2)
In Brown Color
- Rnd 1: 6 Sc Into An Mr (6)
- Round 2: (1 Sc, Inc) X 3 (9)
- Rnds 3-5: (3 Rounds) 1 Sc In E Every St (9)
- Rnd 6: (1 Sc, Dec) X 3 (6)
Stuff With Fiberfill. Flat The Open End The Piece And Crochet The Two Layers Together With Sc.
Fasten Off, Leaving An End Long Enough For Sewing.
Bow
In Red Color.
- Into An Amr: (Ch3, Dc, Hdc, Dc, Ch3, Sl-st) Repeat 2 Times
Pull The Ring Tight. Fasten Off, Leaving An End Long
Enough For Sewing.
Holly Leaves
In Green Color
- Rnd 1: Into An Mr: (Ch6, Sl-st Into The 2nd Ch. From
Hook, Sc In Next Ch, Hdc In Next Ch, Dc In Next Ch, Hdc In Next Ch, 2 Sc Into An Arm) Repeat 3 Times.
- Rnd 2: (Sl-st In Next 2 Sts, Picot, Sl-st In Next 2 Sts,
- Picot, Sl-st In Next St, Sl-st In Ch On The Top Of Leaf,
- Picot, Sl-st In Next 2 Sts, Picot, Sl-st In Next 2 Sts, Picot, Sl-st In Next 3 Sts) Repeat 3 Times.
Fasten Off, Leaving An End Long Enough For Sewing.
Berries
In Red Color.
- Crochet A Chain Of Ch3.
- In The First Ch. Make 1 Puff Stitch, Ch2, Sl-st. Without Cutting The Yarn Work
- Another 2 Berries.
Fasten Off, Leaving An End Long
Enough For Sewing.
Assembly And Decoration
- 1.sew Cupcake Case To The Main Pudding Piece Along Round 16
- 2. Sew The Icing To The Top Of Main Pudding Piece.
- 3. Sew Arms Two Rounds Above The Cupcake Base
- 4.sew Legs To The Round 8 Of The Cupcake Case
- 5. Sew The Berries To The Center Of The Leaves.
- 6. Sew The Leaves To The Top Of Icing.
- 7.sew A Bow To The Red Line.
- 8. With Pink Thread Embroider Cheeks And Mouth.
Our Charming Little Christmas Pudding
Is Ready!

Free crochet pattern by @mycrochetwonders
Leave a Reply