

A crochet chinchilla keychain amigurumi pattern is a fun little project for people who like to make cute things out of yarn. It's a way to crochet a tiny, soft chinchilla that you can hang on your keys or as a charm.
Crochet Chinchilla Keychain Pattern

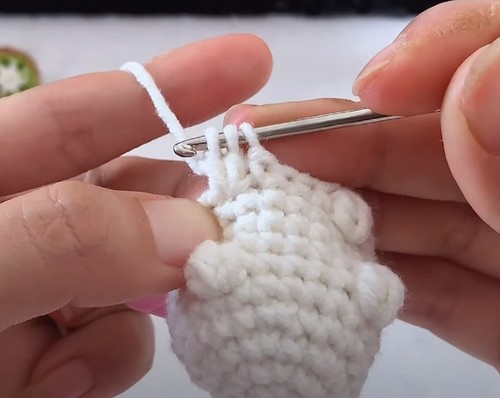
The pattern tells you how to make it step by step, starting with a little yarn loop and making stitches to form the chinchilla's body, ears, and tail. You use a special hook to pull the yarn through loops to make the right shape. When it's all crocheted together, you can add little eyes and a nose to give it a face. In the end, you attach a key ring, and then you have a sweet little chinchilla friend to take with you wherever you go!
Body Pattern

- Start with a magic ring: Crochet 6 single crochet stitches (sc) into the magic ring.
- Round 2: Increase (inc) in each stitch around (12 stitches).
- Round 3: 1 sc, 1 inc repeat around (18 stitches).
- Round 4: 1 sc, 1 inc, 1 sc repeat around (24 stitches).
- Round 5: 1 sc in each stitch around (24 stitches).
- Round 6: 1 sc in the next 9 stitches, 1 bobble stitch, 1 sc in the next 4 stitches, 1 bobble stitch, 1 sc in the last 7 stitches (24 stitches).
- Rounds 7-9: 1 sc in each stitch around (24 stitches each round).
- Round 10: 1 sc in the next 10 stitches, 1 bobble stitch, 1 sc in the next 4 stitches, 1 bobble stitch, 1 sc in the last 7 stitches (24 stitches).
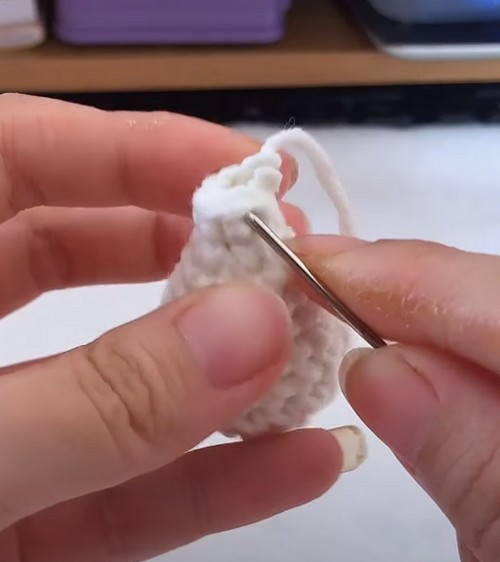
- Round 11: 1 sc, 1 decrease (dec), 1 sc repeat around to reduce stitches.
- Round 12: 1 sc, 1 dec repeat around.
- Round 13: Complete the round with decrease stitches only then fasten off, leaving a long tail for closing and sewing.
- Close the opening and fill the body with stuffing before completely fastening off.
Ears Pattern (Make 2)
- Start with a magic ring, crochet 6 sc into the ring.
- Round 1: 1 increase in each stitch around (12 stitches).
- Round 2: 1 sc, 1 inc repeat around, then slip stitch to end the round.
- Fold the ear and sew the edges to form the ear shape.
Tail Pattern
- Start with a magic ring, crochet 6 sc into the ring.
- Round 1: 1 sc in each stitch around (6 stitches).
- Round 2-8: Continue as per body pattern, increasing where necessary to create a bushy tail effect. Include some bobble stitches for texture if desired.
- Stuff lightly before finishing, close the end, and then attach to the body.
Assembly
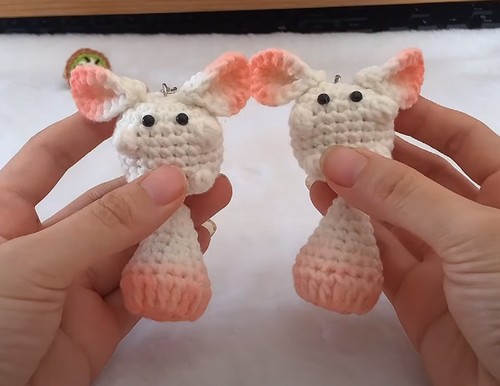
- Attach the ears and tail to the body at the appropriate positions.
- Add facial features such as eyes or a nose with embroidery or small beads according to your preference.
Finally, add a keychain loop or ring to the top of the chinchilla's head to complete your keychain.


Leave a Reply