Imagine wearing the joy of a birthday party right on top of your head! That's what you'll do with a Crochet Birthday Cake Hat. This adorable hat looks just like a yummy cake, complete with playful icing drips, a cheerful candle on top, and a puff of yellow yarn that stands in for a bright flame.
Crochet Birthday Cake Hat

Materials Needed:
- Yarn in various colors (at least 3: main cake color (A), glazing color (B), and a color for the candle (C))
- Crochet hook (4mm suggested)
- Yarn needle
- Scissors
- Stitch markers
Bottom Tier (Cake Base):
Starting with Color A:
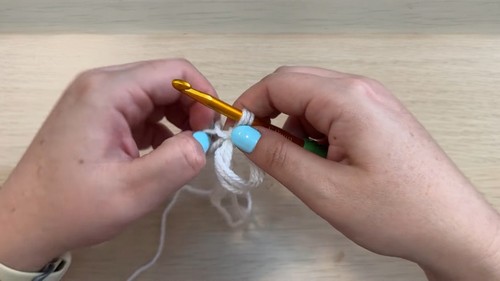
- Triple your yarn for stiffness. Begin with a magic ring.
Round 1:
- Work 10 half-double crochets (hdc) into the magic ring. Join with a slip stitch to the first hdc.
Round 2:
- Chain 1. Work 2 hdc in each stitch around (20 hdc total). Join and chain 1.
After Round 3:
- Work 1 hdc in the first stitch, 2 hdc in the next; repeat around (30 hdc total). Join and chain 1.
Rounds 4-13 (or 11 for child size):
- Work 1 hdc in each stitch around. For an adult size, increase in a consistent manner to maintain a flat circle until round 6, then continue without increasing through round 13. Join each round with a slip stitch and chain 1.
Top Tier (Cake Top):
- Repeat steps for the bottom tier but stop increasing at Round 4 for a smaller size to sit atop the bottom tier.
Glazing for Top and Bottom Tiers:
Change to Color B:
- Triple your yarn.
- Attach yarn to the indicated round with a slip stitch.
- Work puff stitches around using the front loops only, chaining 1 between each puff stitch. Finish the round with a slip stitch.
Candle (Optional):
With Color C:
- start with a magic ring.
Round 1:
- Work 6 single crochets (sc) into the ring. Join with a slip stitch.
Rounds 2-9:
- Work 1 sc in each stitch around, back loops only for round 2. Join each round with a slip stitch and chain 1.
Cut the yarn:
- leaving a long tail for sewing. Sew the candle to the top tier.
Flame for Candle:
With a Yellow Yarn (D):
- chain 6.
- Starting from the second chain from the hook, work a series of stitches back across the chain (slip stitch, single crochet, half-double crochet, single crochet, slip stitch).
- Chain 1, turn the work, and repeat the pattern back across.
- Cut yarn, leaving a tail for sewing. Attach the flame to the top of the candle.
Side Glazing and Decorations:
- Repeat similar steps for side glazing and decorations around both tiers of the cake using the puff stitch pattern instructed for the top glazing but spaced out as desired along the sides.
Assembly:
- Sew the top tier onto the bottom tier securely, and weave in all ends. Add any additional decorations or embellishments as desired.
https://youtu.be/aMHx0eKM0-4




Leave a Reply