

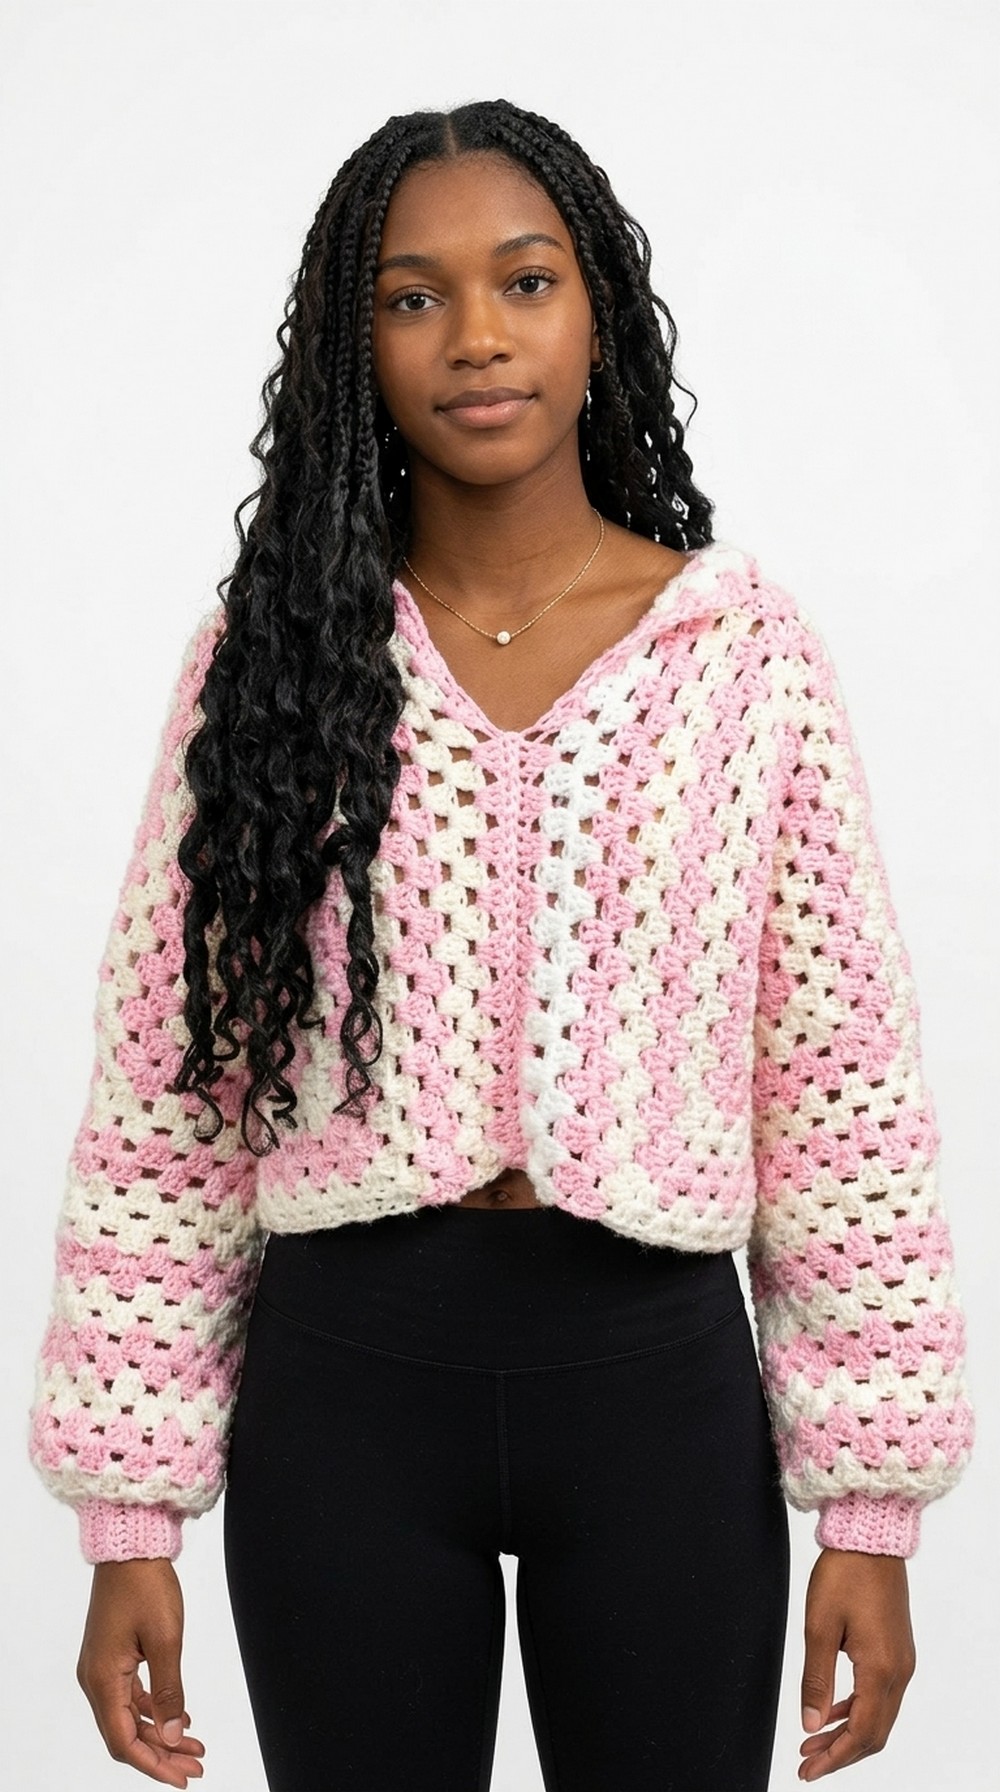
Stay stylish and warm with this Free Crochet Hexagon Sweater Pattern that offers a comfy, eye-catching sweater ideal for layering, everyday wear, or gifting.
Wrapping yourself in something cozy, colorful, and handmade that feels as warm as a hug. This beautiful creation brings together art and comfort in the form of a vibrant crochet sweater, built uniquely with hexagon granny squares. Its design is not only eye-catching but also practical, as it combines hexagon patterns into a sweater that looks both modern and classic.
Free Crochet Hexagon Sweater Pattern to Upgrade Your Wardrobe

This piece is perfect for chilly days, layering over casual outfits, or even as a statement piece when heading out. The sweater’s shape gives it a flattering fit, while its handmade charm ensures no two are exactly alike. Whether made in soft neutral tones or bright cheerful colors, its beauty lies in its versatility and the love poured into every stitch. This pattern encourages creativity, offering endless customization to make it just right for you. It’s not just a garment, it’s a labor of love and a piece of wearable art.

Crochet Hexagon Granny Square Sweater
Materials List
- Yarn:
- Weight: Acrylic Yarn, size 4 (Medium)
- Recommended: "I Love This Yarn" from Hobby Lobby (soft texture).
- Colors: At least 2 complementary colors for a customizable look.
- Yardage: 2 skeins of each color, or adjust based on your size and color choices.
- Hook Size:
- Main Sweater: 5.75 mm crochet hook (creates a chunky effect and fast progress).
- Ribbing (Optional): 5 mm crochet hook (for a neater finish).
- Additional Supplies:
- Tapestry needle (for weaving in loose ends and seaming).
- Scissors.
Skill Level
Intermediate:
You’ll need experience with working in rounds, granny-style stitches, adding sleeves, joining panels, and basic increases/decreases.
Key Abbreviations (US Terminology)
- ch: Chain
- sl st: Slip Stitch
- dc: Double Crochet
- sc: Single Crochet
- dec: Single Crochet Decrease
- yo: Yarn Over
Special Notes
- Hexagon Formation: This sweater is constructed from two hexagon granny squares—stitched together and extended to form sleeves, body, and cuffs.
- Customization: Adjust the number of rounds for the hexagons and sleeves according to your desired fit.
- Care: Steaming the finished garment ensures a more polished and draped look.
Pattern Instructions
Hexagon Granny Square Panels
Round 1:
- Create a magic ring.
- ch 3 (counts as the first dc).
- Work 2 dc into the magic ring.
(First cluster of 3 dc complete). - ch 1, then work 3 dc into the magic ring.
- Repeat [ch 1, 3 dc] until you have 6 clusters of 3 dc.
- Pull the tail of the magic ring to close the center tightly.
- Slip stitch (sl st) into the top of the initial ch 3 to close the round.
(6 clusters of 3 dc separated by ch 1 spaces.)

Round 2:
- ch 3 (counts as the first dc).
- Work 2 dc into the first ch-1 space.
(This creates half of the corner.) - Move to the next ch-1 space and work:
[3 dc, ch 1, 3 dc] (forms a corner). - Continue working [3 dc, ch 1, 3 dc] in each ch-1 space for 5 more corners.
- For the last ch-1 space: work 3 dc, ch 1, then sl st to the top of the initial ch 3 to close the round.
Round 3 and Beyond:
- Start with ch 3 (counts as the first dc), then in the next gap:
- Work 2 dc in the same space as the ch 3.
- In corner spaces: Work [3 dc, ch 1, 3 dc].
- In all non-corner spaces: Work 3 dc.
- Continue working this pattern for as many rounds as needed to fit your arm when folded (14 rounds are recommended for size medium).
- Hold the folded hexagon up to your arm regularly to check the fit.
- Fasten off and weave in ends once the first hexagon is complete.

Note: Repeat the steps above to create the second hexagon.

Seaming and Sleeve Setup
Join Hexagons:
- Lay one hexagon flat, then fold it half diagonally into a sleeve shape. Repeat for the second hexagon.
- Place the two folded hexagons together, wrong sides facing out.
- Seam the panels with single crochet (sc) as follows:
- Start at the bottom corner, sc through corresponding stitches on both layers to seam the side up to the armpit.
- Leave sufficient unseamed space for the front neckline.

Sleeves
Round 1 (Sleeve Extension):
- Join yarn at the bottom of the armhole.
- ch 3 (counts as the first dc).
- Work 2 dc into the same space.
- Continue working 3 dc clusters into each gap around the armhole.
- Sl st to the top of the ch 3 to close the round.
Subsequent Rounds:
- Repeat the same 3 dc cluster pattern, adding rows until the sleeve reaches your desired length.
(13 rounds suggested for size medium.)
Cuffs (Optional, for Tapering Sleeves)
Setup Round:
- Switch to a smaller hook (5 mm).
- Work a single crochet decrease (sc dec) around the sleeve opening to create a tapered effect:
- Insert hook into next st, yo, pull through 1.
- Insert hook into next st, yo, pull through 1.
- yo, pull through all 3 loops on the hook.
- Continue sc dec around the sleeve opening.
Ribbing:
- ch 6 (length of your cuff ribbing).
- Starting from the 2nd ch from the hook, work sc in each chain.
- At the base of the ribbing, sl st into the next 2 base stitches on the sleeve to attach.
- Turn your work, skipping the sl sts, and repeat sc in back loops only to achieve a stretchy ribbing.
- Continue ribbing around the cuff and seam the ends together when complete.
Body and Bottom Extension
- If the sweater’s length is too short, attach yarn at the bottom edge and work rounds of 3 dc clusters with ch 1 between for desired length.
Finishing
- Sew in all loose ends with a tapestry needle.
- Steam the finished sweater for a polished look.
- Try it on and enjoy your masterpiece!
Conclusion
Congratulations! You’ve created a cozy and stylish Hexagon Granny Square Sweater. It’s a versatile project that can be tailored to fit your style and size preferences. Pair it with your favorite jeans, skirt, or pants for a chic look.
Pattern Corrections and Tips
- Check Fit Regularly: Hold the hexagon against your arm and body as you work to ensure a perfect fit.
- Neat Joining: Use single crochet for seaming to create a clean and durable seam.
- Experiment with Colors: Use variegated yarn or alternate color changes for a unique design.
- Cuff Finishing: Using a smaller hook for the ribbing ensures a snug fit around wrists.
- Avoid Yarn Snags: Keep tension consistent when working puff stitches or decreases for smooth results.


Leave a Reply