

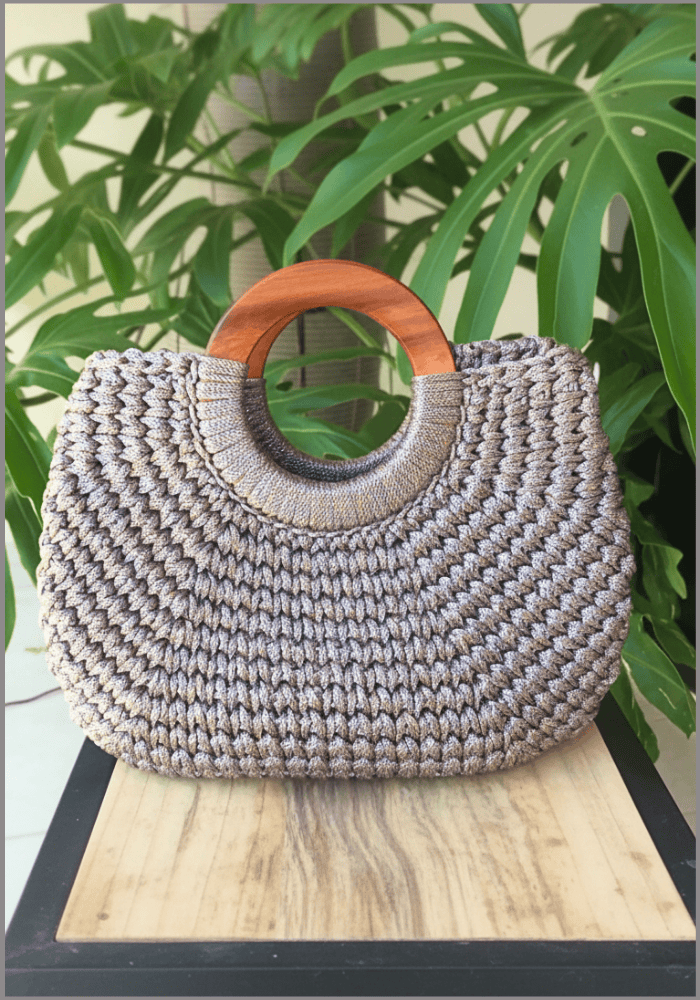
Learn how to make a stylish and sturdy Free Crochet Beach Bag Pattern with easy steps, perfect for carrying essentials on your next beach day.
A sunny day at the beach feels even better when you have a stylish yet functional bag to carry all your essentials. This project brings to life a crochet beach bag that’s not just practical but also a symbol of charm and creativity. This bag not only serves as a reliable companion for trips to the beach but also makes for a thoughtful handmade gift or a reusable alternative to everyday shopping bags.
Portable Crochet Beach Bag Pattern Easy to Carry
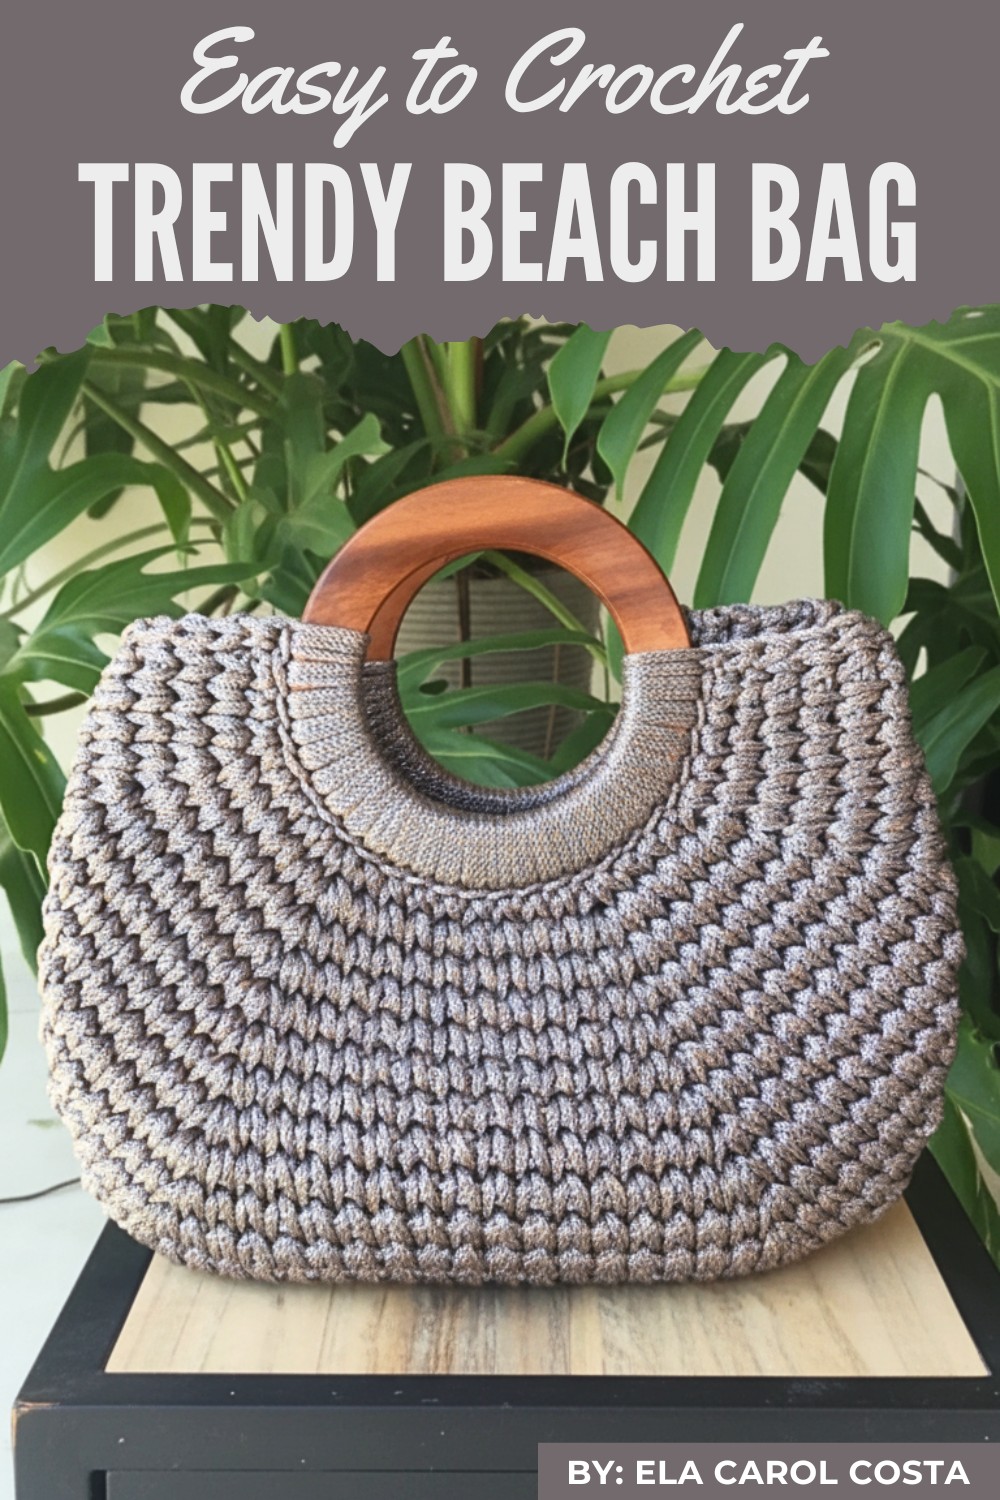
Beautiful in its simplicity, this lightweight yet sturdy accessory is useful for carrying everything from sunscreen to snacks – perfect for those who value both functionality and timeless charm.
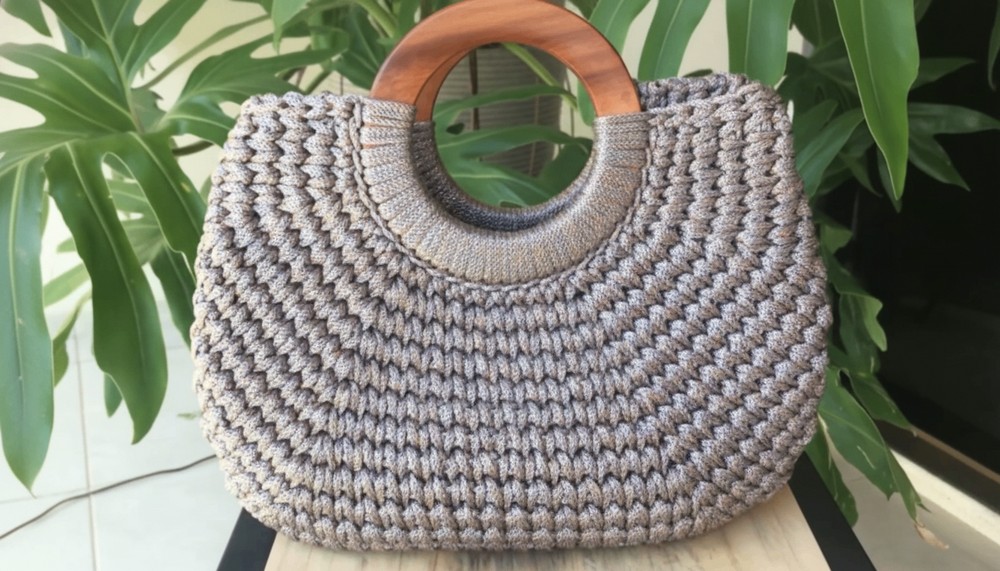
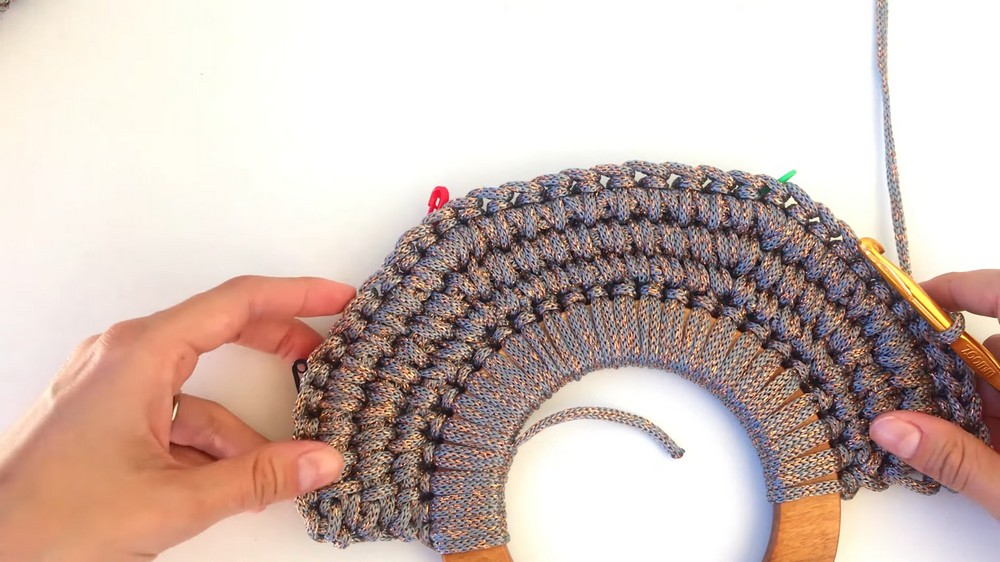
Starting with two crochet panels, the process walks you through joining them using a slip stitch technique on the “third loop,” ensuring neat, professional edges.
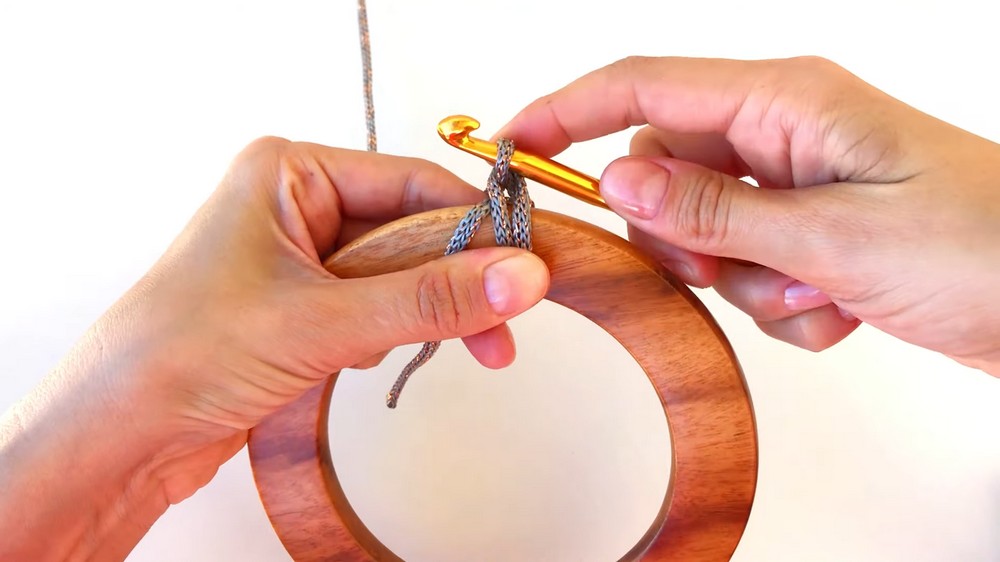
Each step focuses on simplicity and precision, making it easy to follow while still giving the finished piece a polished and durable look.
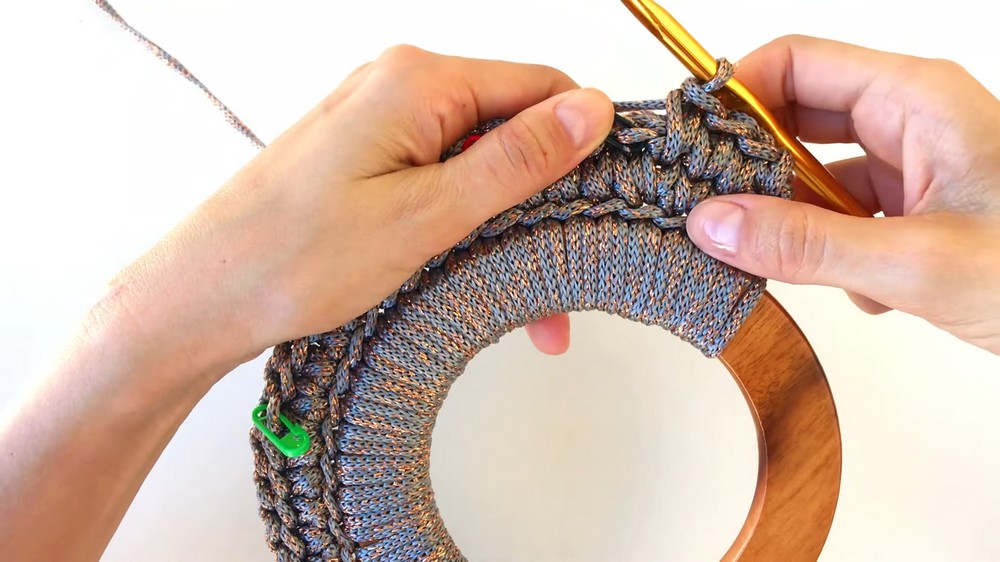
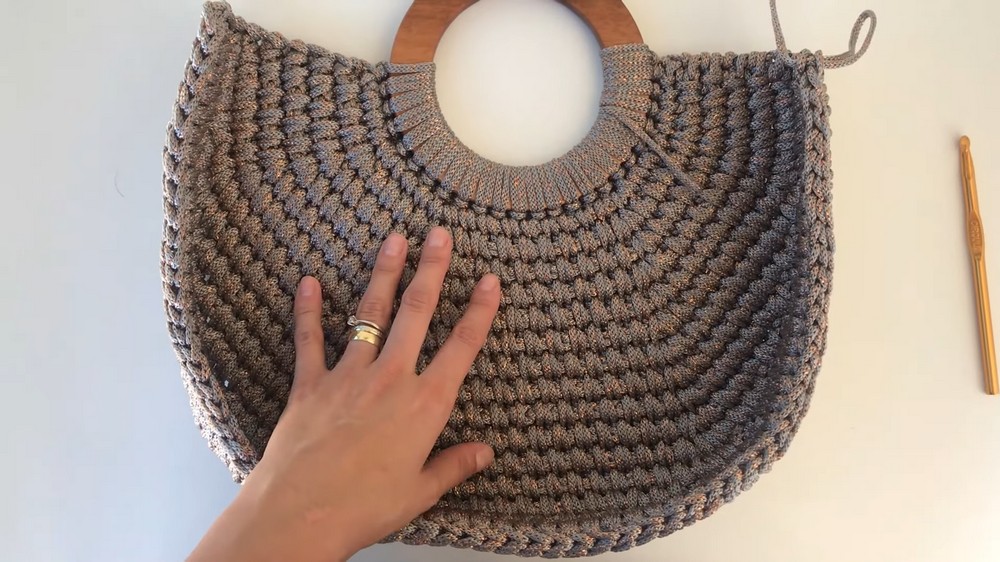
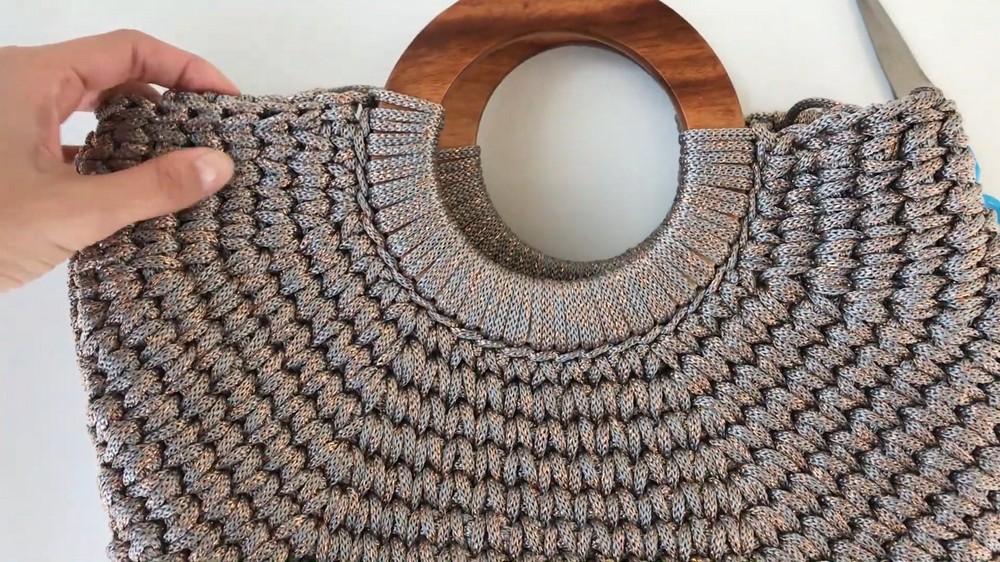
The handle-making process is both easy and smart, with tips to ensure they stay secure and strong for years of use.
Additional techniques like hiding thread ends, burning and gluing them, and fixing any uneven edges make this bag extra sturdy and well-finished.
While the process is accessible to those with some basic crochet knowledge, it introduces methods that even experienced crocheters will appreciate and enjoy practicing.

FREE Crochet Beach Bag Pattern
Part 1: Introduction and Initial Steps
Link: Part 1
Level of Difficulty:
Beginner to intermediate. Basic skills are covered, requiring no prior experience.
Tutor's Suggestions:
The tutor emphasizes the importance of following each step carefully and not rushing through the process. It’s suggested to practice the basic techniques before moving forward.
Uses:
Great for personal projects, gifts, or as a starting point for further advanced creations.
Part 2: Intermediate Steps and Techniques
Link: Part 2
Level of Difficulty:
Intermediate. Requires grasp of basic skills covered in Part 1.
Tutor's Suggestions:
Focus on precision and accuracy. The tutor advises watching the steps multiple times, if necessary, to fully understand the techniques.
Uses:
Enhances your skillset significantly, preparing you for more complex projects.
Part 3: Final Adjustments and Completion
Link: Part 3
Level of Difficulty:
Intermediate to advanced. The skills from previous parts are essential.
Tutor's Suggestions:
The tutor suggests being patient and meticulous in the final stages to ensure a high-quality finish. Testing various parts thoroughly is essential.
Uses:
Completion of this series provides a comprehensive understanding and ability to tackle similar or more complex projects in the future.
Conclusion
Following this comprehensive guide will enhance your skillset, providing you with valuable knowledge and techniques. Whether you are working on personal projects, creating gifts, or seeking to improve your craft, this video series will be an invaluable resource.
Tip
Always have a notepad to jot down important tips and steps as you follow the videos. This will make it easier to refer back to crucial information without having to replay sections repeatedly.
This structure is based on the kind of content that such video tutorials typically include. Watching the actual videos will provide the specific details you need for each section.


Leave a Reply