

Stylish Crochet Headband Pattern for Women of All Ages
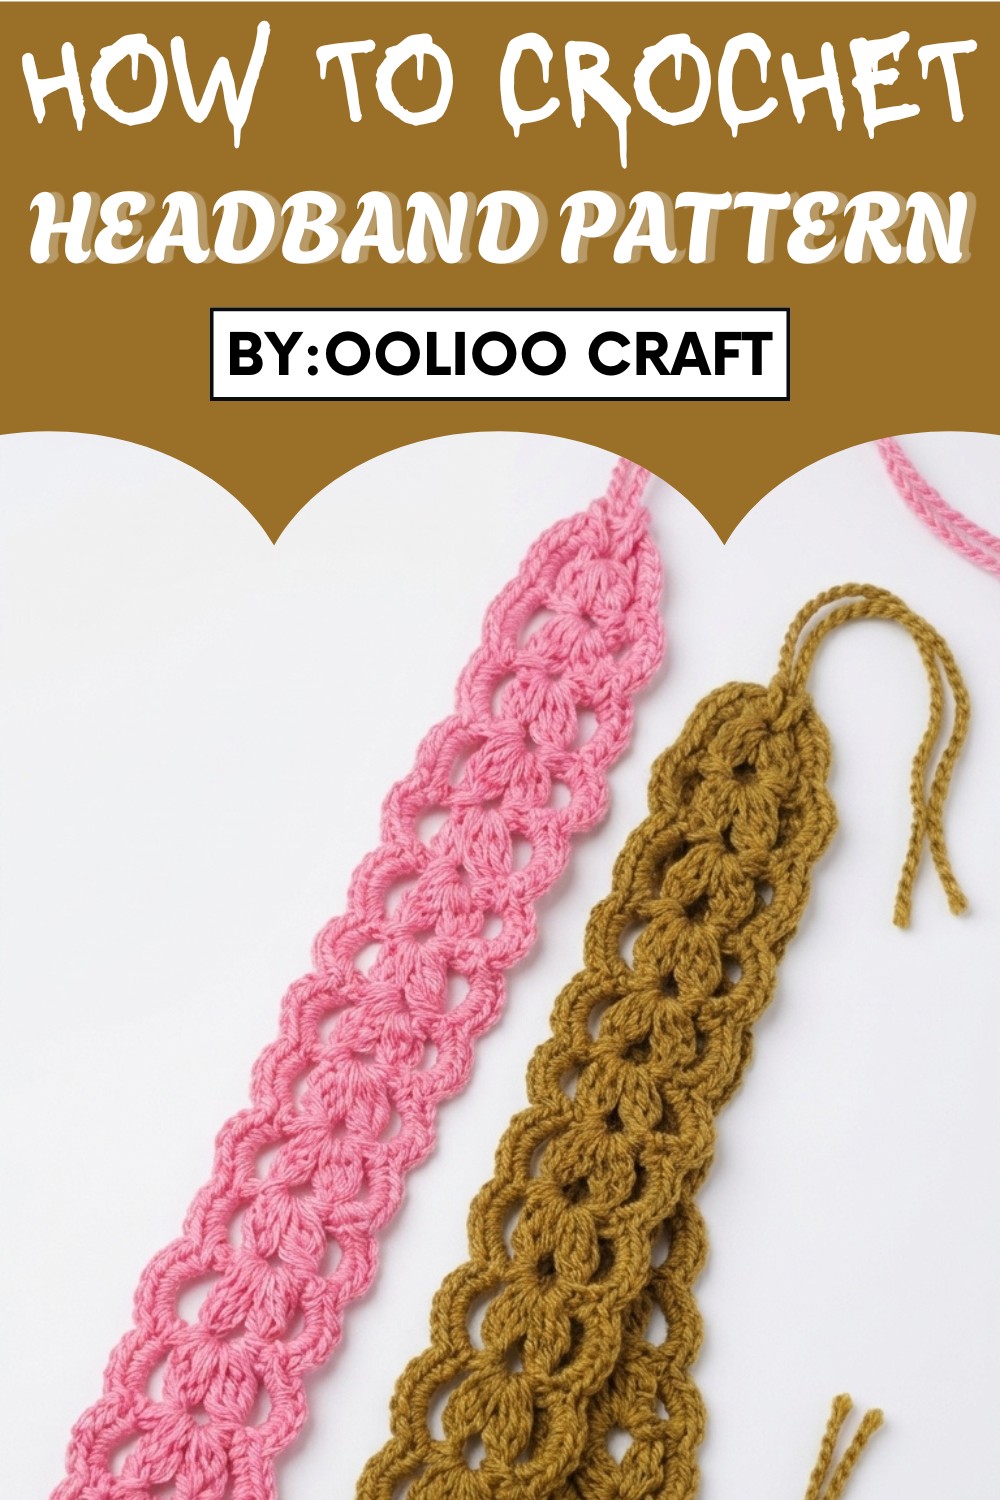
The pattern is designed to be beginner-friendly, using simple crochet techniques like chains, half-double crochets, and slip stitches. This makes it an enjoyable project for newcomers while still providing room for creativity. In addition, it can be adjusted to different sizes and even repurposed as a stylish belt, giving it a multifunctional appeal.
Beyond a fashion accessory, it’s a thoughtful gift idea for birthdays, holidays, or casual surprises—guaranteed to impress your loved ones. A crochet pattern is more than just an accessory; it’s a unique piece of handmade art that combines utility with timeless style, effortlessly turning your look for any occasion.
Special Features
- Beginner-Friendly Design: Simple stitches and techniques make this project easy for new crocheters.
- Dual Purpose: Can be used as a hairband or belt.
- Optional Customization: Add wooden beads for added charm, or keep it minimal for simplicity.
- Perfect for Festivals: A handmade accessory that complements festive outfits beautifully.
Difficulty Level
Easy: Ideal for beginners who want to practice basic stitches like the slip knot, chain, slip stitch, single crochet, and half double crochet.
Materials Needed
- Yarn: 4-ply cotton yarn (any color of choice).
- Crochet Hook: 3 mm hook.
- Wooden Beads: Optional, for decoration.
- Scissors: For trimming yarn.
- Darning Needle/Wool Needle: For weaving ends and securing finishing touches.
Step-by-Step Pattern
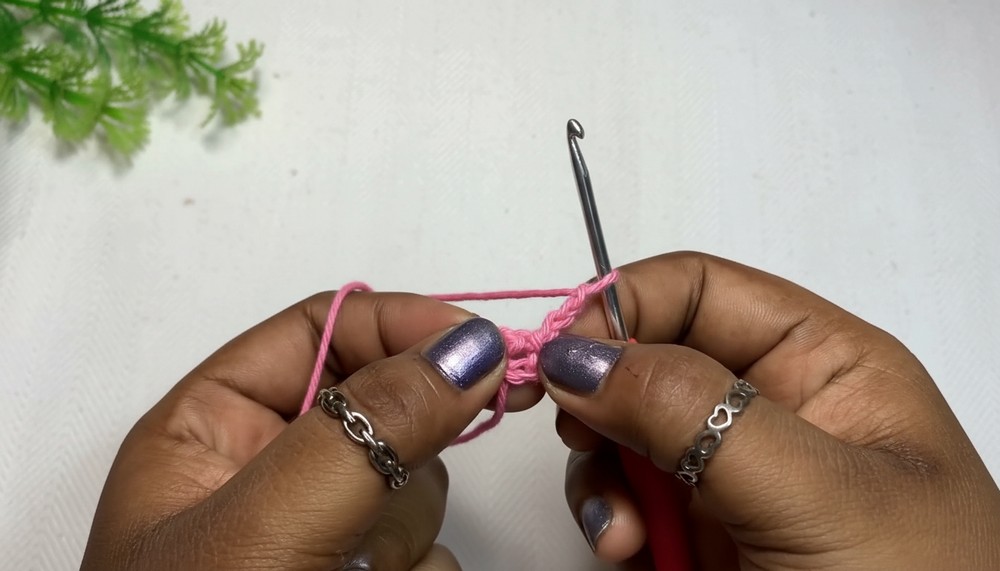
Step 1: Starting with the Slip Knot
- To begin, make a slip knot.
- Cross the yarn to form a loop.
- Pull the working yarn through the loop and tighten it.
- Attach your hook to the knot and smoothen it.
Step 2: Creating Chains
- Crochet 5 chains to form the base.
- Wrap the yarn around the hook and pull through. Repeat this 5 times.
- Chain count: 1, 2, 3, 4, 5.
3: Forming the Circle
- To join and form a small circle, insert the hook into the first chain.
- Pull the working yarn through the chain and the loop already on your hook to make a slip stitch.
- This creates the circle, which will serve as the base for the pattern.
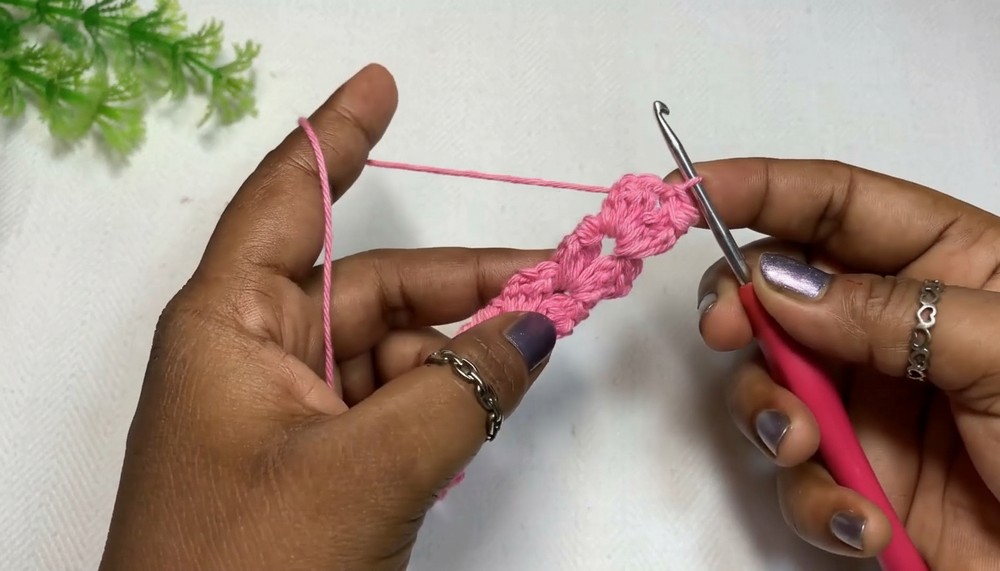
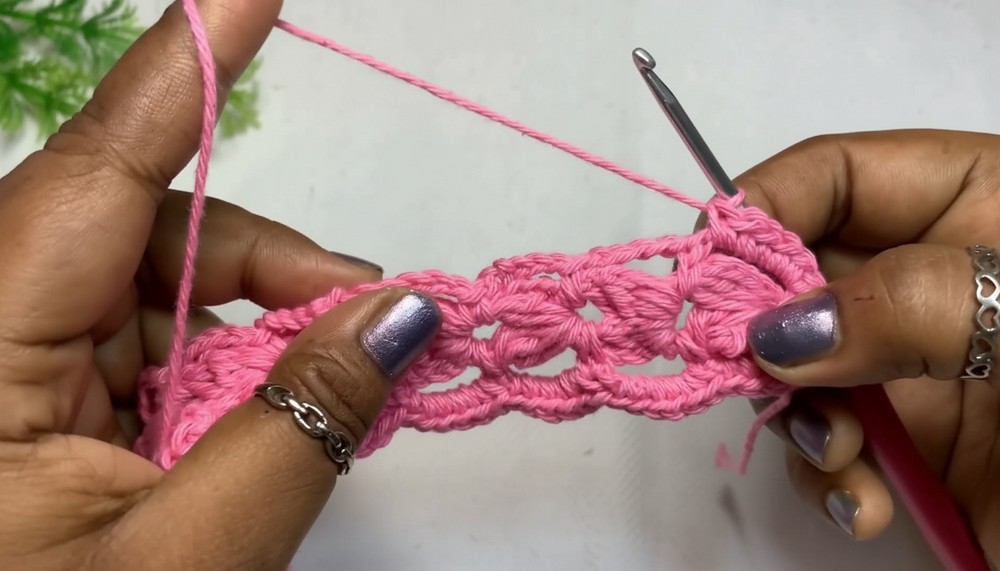
4: Starting the Stitch Pattern
- Chain 3 to begin.
- Make incomplete half double crochet stitches:
- Yarn over, insert the hook into the circle, pull up a loop.
- Yarn over again, and pull through the first two loops only (leave the third loop on the hook). This creates an unfinished stitch.
- Repeat this step 3 times to have three unfinished stitches on the hook.
- Yarn over and pull through all three loops on the hook.
5: Adding Chains and Repeating
- Chain 2 to create a gap.
- Into the same circle, make 3 incomplete half double crochet stitches, following the previous step.
- Pull through all four loops on the hook to complete the set.
- Repeat this sequence until you've finished a round.
6: Turning the Work
- Turn your work gently to crochet back over the pattern. Ensure the yarn is placed correctly.
- Insert the hook into the middle gap created by the chains and make a slip stitch.
- Repeat the pattern by chaining 3, continuing with incomplete half double crochets, and adding sets as needed.
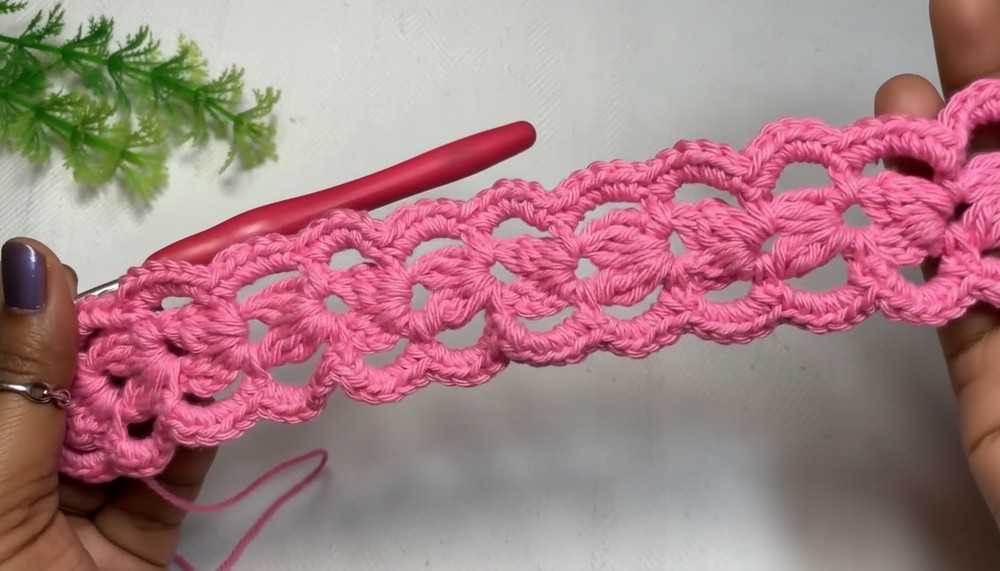
7: Repeat for Desired Length
- Continue repeating the above steps until you achieve the desired length for the hairband.
- The tutor suggested making 15 repeats of the pattern but adjust based on your preference.
8: Adding Edges
- Once the desired length is achieved, create decorative edges on both sides:
- 5 chains followed by single crochets into the gaps along the edges.
- Ensure the single crochets are tight for a clean finish.
- Continue this process along all gaps to create uniform decorative edges.
9: Final Round
- Add 6 single crochets into each chain loop from the previous row:
- Insert the hook into the loop, pull up a loop, and yarn over to finish a single crochet.
- This step enhances the look by giving a neat and sturdy edge to the pattern.
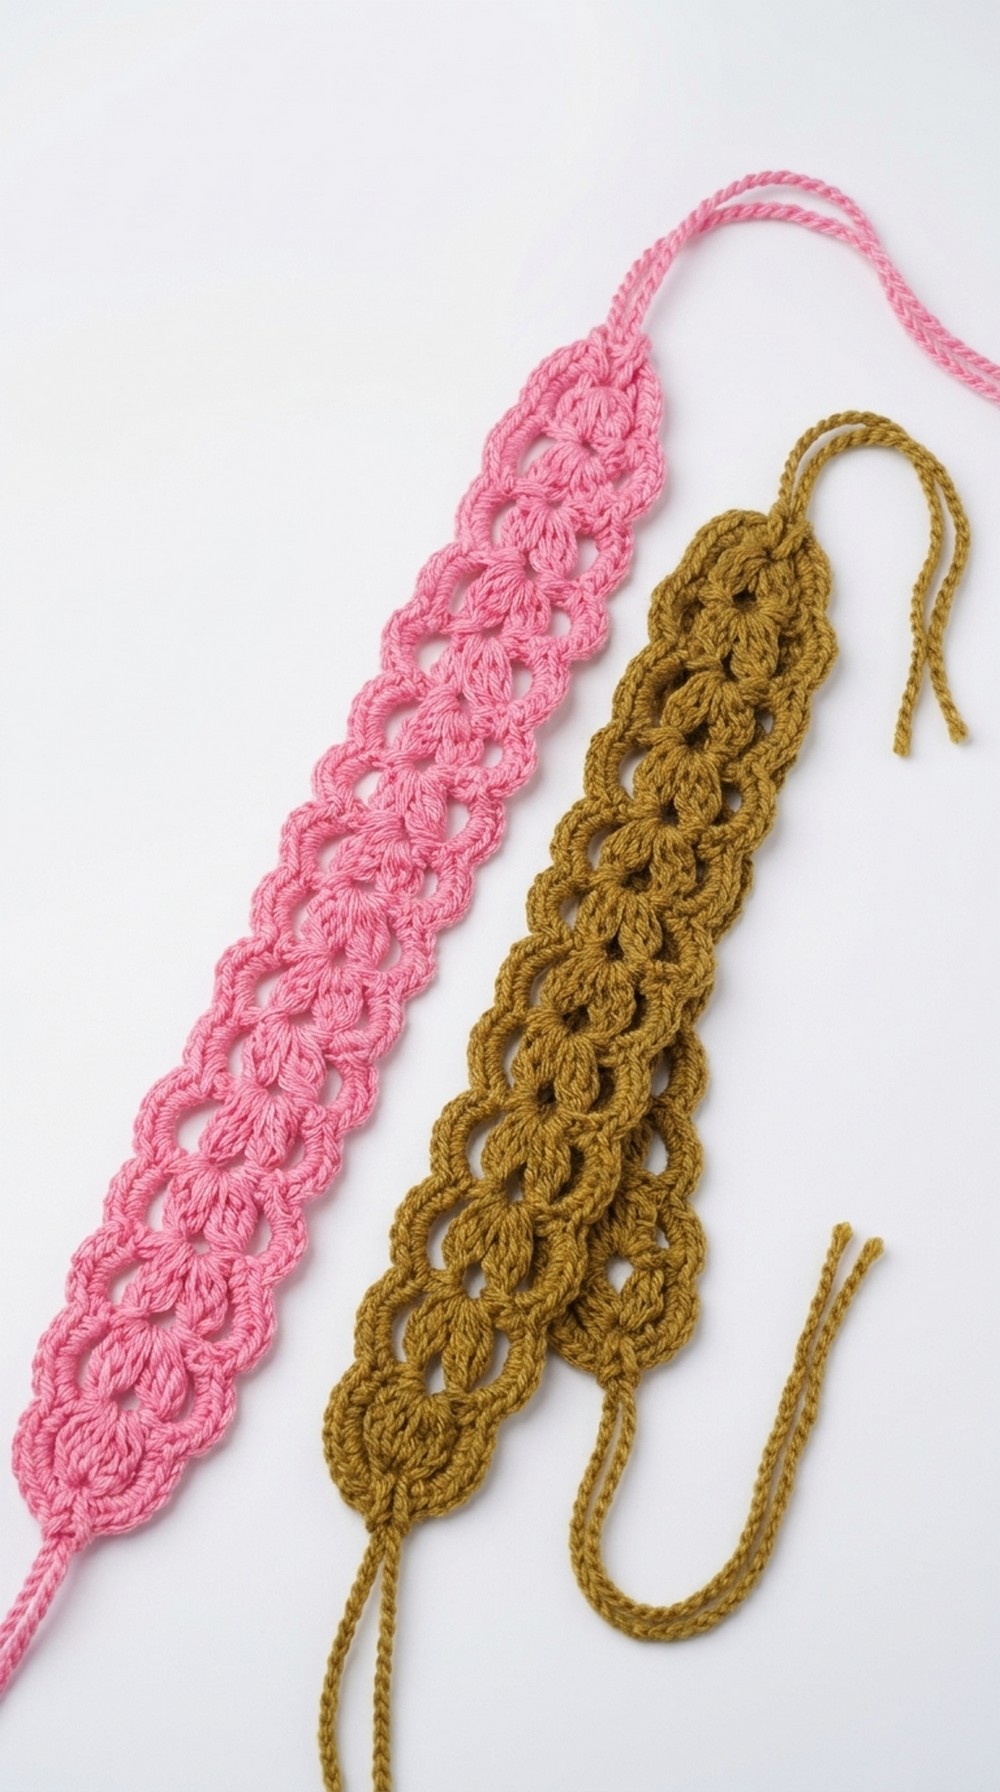
10: Making the Cord
- Create the tie cord by making 110 chains (or adjust depending on the required length):
- The tutor recommends doubling the length since cords will be folded for attachment.
- Finish one cord, and create another of equal length.
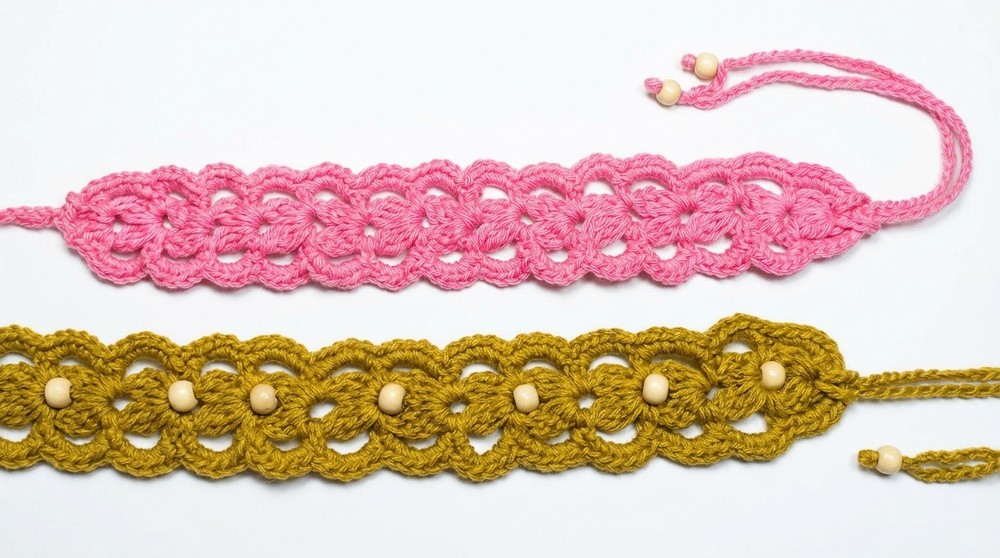
11: Attaching Beads (Optional)
- Attach beads to the cord ends for decoration.
- Knot the ends firmly to secure the beads and ensure they don’t slip off.
Final Step: Attaching the Cord
- Insert the cord through gaps at either end of the completed hairband.
- Adjust the length evenly and tie a knot to secure.
- If desired, glue or stitch the cord for a permanent attachment.
Tutor’s Suggestions
- No Beads? No Problem!: You can skip beads for a minimalist look or add decorative stitching instead.
- Adjust Length: For wider belts or hairbands, increase row repeats.
- Finishing Care: Weave in loose yarn neatly for a polished finish.
Uses
- Hair Accessory: Complements festive or everyday outfits beautifully.
- Stylish Belt: Use it as a functional decorative accessory for dresses, shirts, or skirts.
Conclusion
This Crochet Headband is not only stylish but also practical and customizable for various occasions. It’s easy to follow, perfect for gifting, and suitable for all ages. Whether adorned with beads or left as is, this headband pattern is sure to elevate your fashion game.
Tip
While crocheting edges, keep your stitches tight and consistent for a polished and professional look.


Leave a Reply