

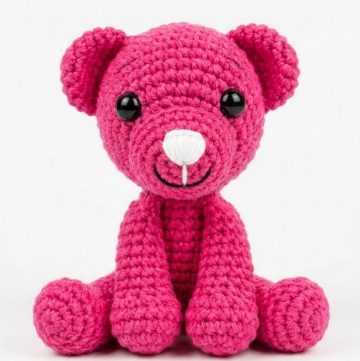
Start crocheting by making an adorable Crochet black panther with this fun and simple guide. Perfect for people of all skill levels, this project lets you stitch together a delightful and soft companion. The instructions are easy to follow, making it a great way to unwind and perhaps even pick up a new skill.
Adorable Crochet Black Panther

Materials:
- Bernat Blanket yarn in Coal or a similar dark gray color
- 12 mm safety eyes
- Safety nose
- Polyfill stuffing
- Scissors
- 6 mm crochet hook
- Tapestry needle
- Stitch marker
Instructions:

Start with a magic ring:
- Wrap the yarn around your first three fingers and pinch it with your thumb.
- Wrap the yarn across the back of your hand and grab it with your pinky.
- Insert your crochet hook through the second loop, twist it, and pull the yarn through.
- Place 6 single crochets inside the magic ring.
- Pull the tail to close the circle.
Round 1:
- Increase in every stitch around (12 stitches total).
Round 2:
- Increase in the first stitch, single crochet in the next stitch.
- Repeat around for a total of 18 stitches.
In Round 3:
- Increase, then do two single crochets.
- Repeat this pattern around six times for a total of 24 stitches.
Round 4:
- Start shaping the head by creating a cup/bowl shape with 15 single crochets.

Formation of ears:
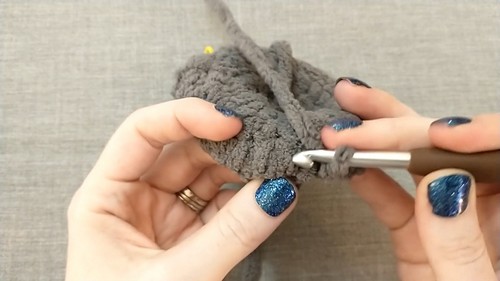
- Do a double crochet, triple crochet, and double crochet all into the same stitch to form the first ear.
- Single crochet six, then repeat the ear pattern for the second ear.
- On the last stitch, switch to crocheting in the back loops only for one single crochet.
For Round 5:
- Single crochet in the back loops only for 15 stitches until you reach the space for ears.
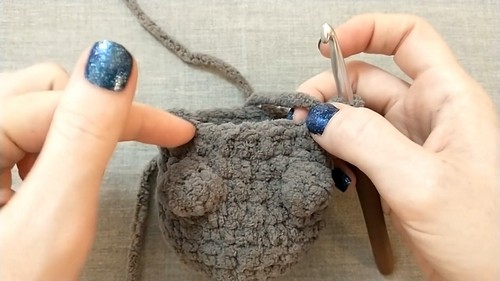
Round 6:
- Work behind the ear, find two loops, and single crochet.
- Do six single crochets in back loops only between the ears.
- Skip the ear stitches and single crochet to the next stitch on the other side.
- Repeat the same technique for the second ear.
- Continue with a regular single crochet for the last stitch of the round.
Round 7:
- Do 24 single crochets all around.
After Round 8:
- Single crochet four, then do a bobble stitch for the first foot.
- Repeat with four single crochets, another bobble stitch, then finish the round with 14 single crochets.
Rounds 9-10:
- Single crochet 24 around (twice for two rounds).
Round 11:
- Begin forming the hind feet with bobbles, ensuring that you have a total of 24 stitches at the end of the round.
- Adjust the placement of bobble stitches to align with the front feet.
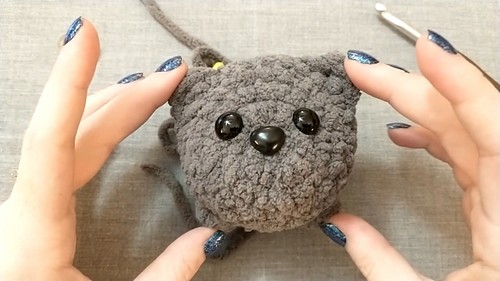
Eye and Nose Placement:
- Insert safety eyes between rounds 2 and 3, approximately 3 stitches apart, aligning directly below the ears.
- Insert the safety nose at the center of the magic ring, ensuring symmetry.
In Round 12:
- Single crochet 24 stitches around.
Round 13:
- Perform an invisible decrease, then single crochet 2.
- Repeat this six times for a total of 18 stitches.
Round 14:
- Do an invisible decrease, then one single crochet.
- Repeat six times for a total of 12 stitches.
Add stuffing:
- Before you close, add polyfill to give your plushie shape.
Round 15:
- Do six invisible decrease slip stitches (to make the back flat).
Tail:
- Start with a chain of seven.
- Skip the first chain, then single crochet back down the chain, increasing in the first two chains and single crocheting in the remaining chains.
- Slip stitch to the base and fasten off, leaving a long tail for sewing.
Sew up the hole:
- Use the tail yarn to weave through the final round's stitches and tighten to close the hole.
- Weave in the tail end securely.
Leave a Reply