

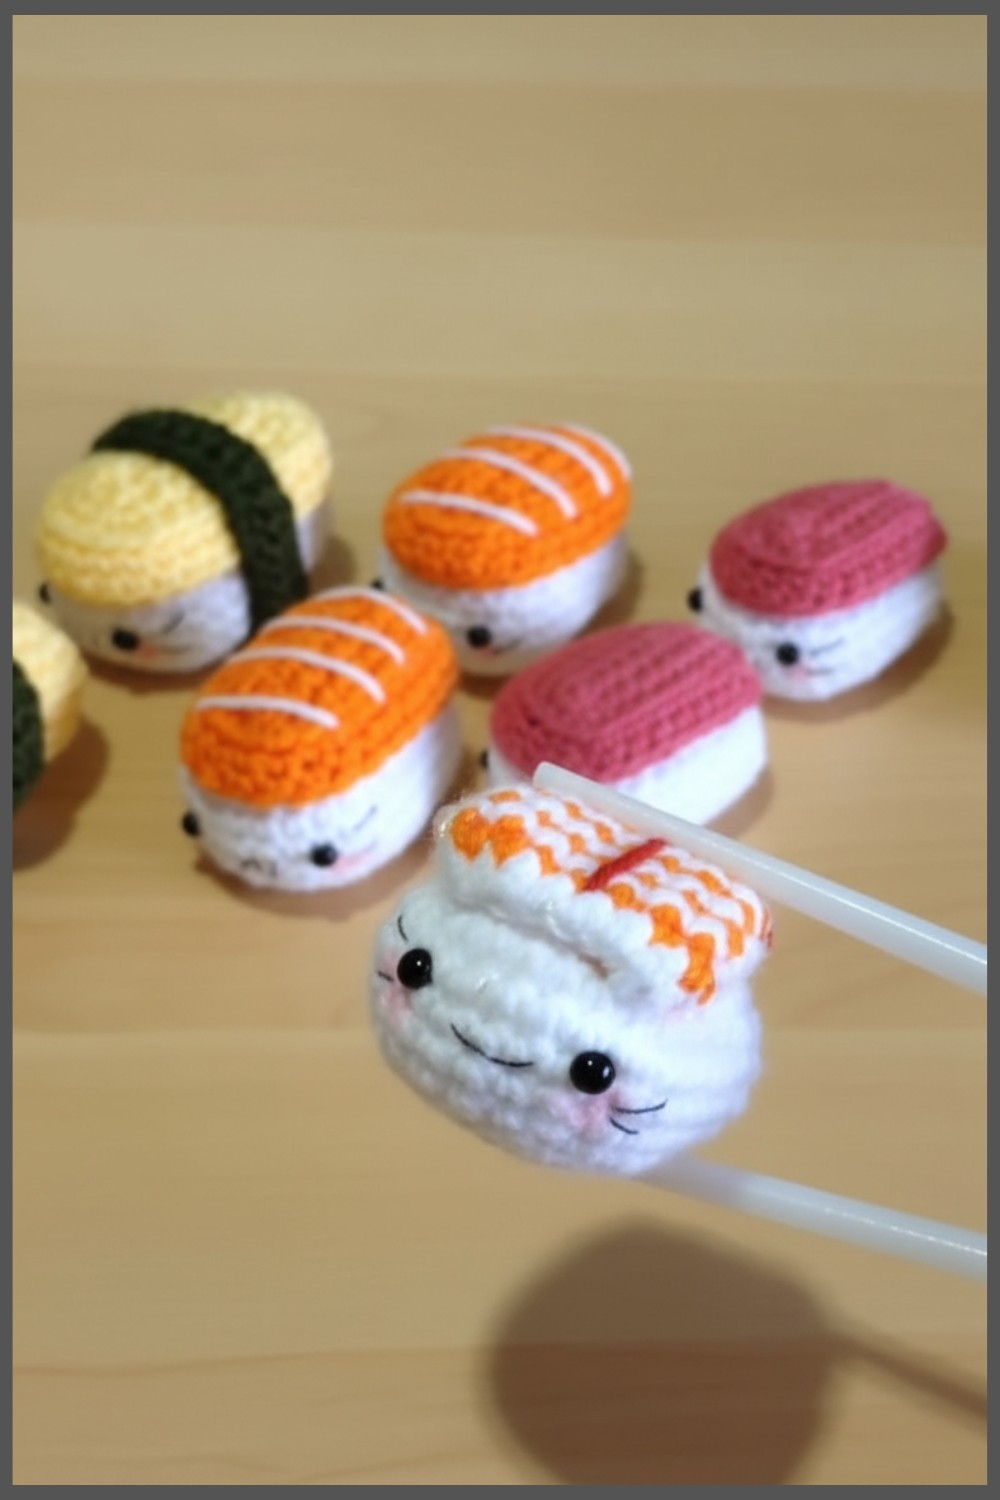
Whisk into fun with this crochet sushi pattern and finish with a delightful, quirky piece that brings charm and smiles to your home collection
Imagine seeing a tiny roll that looks just like your favorite food in bright colors and soft shapes. People love this small roll because it reminds them of tasty sushi and adds fun to any place. You can make a Crochet Sushi pattern and use it to decorate your living room or kitchen or even give it as a playful gift to someone you care about. The roll is easy to show on a table or shelf and makes everyone smile.
Lovable Crochet Sushi Pattern Perfect for Cozy Decor
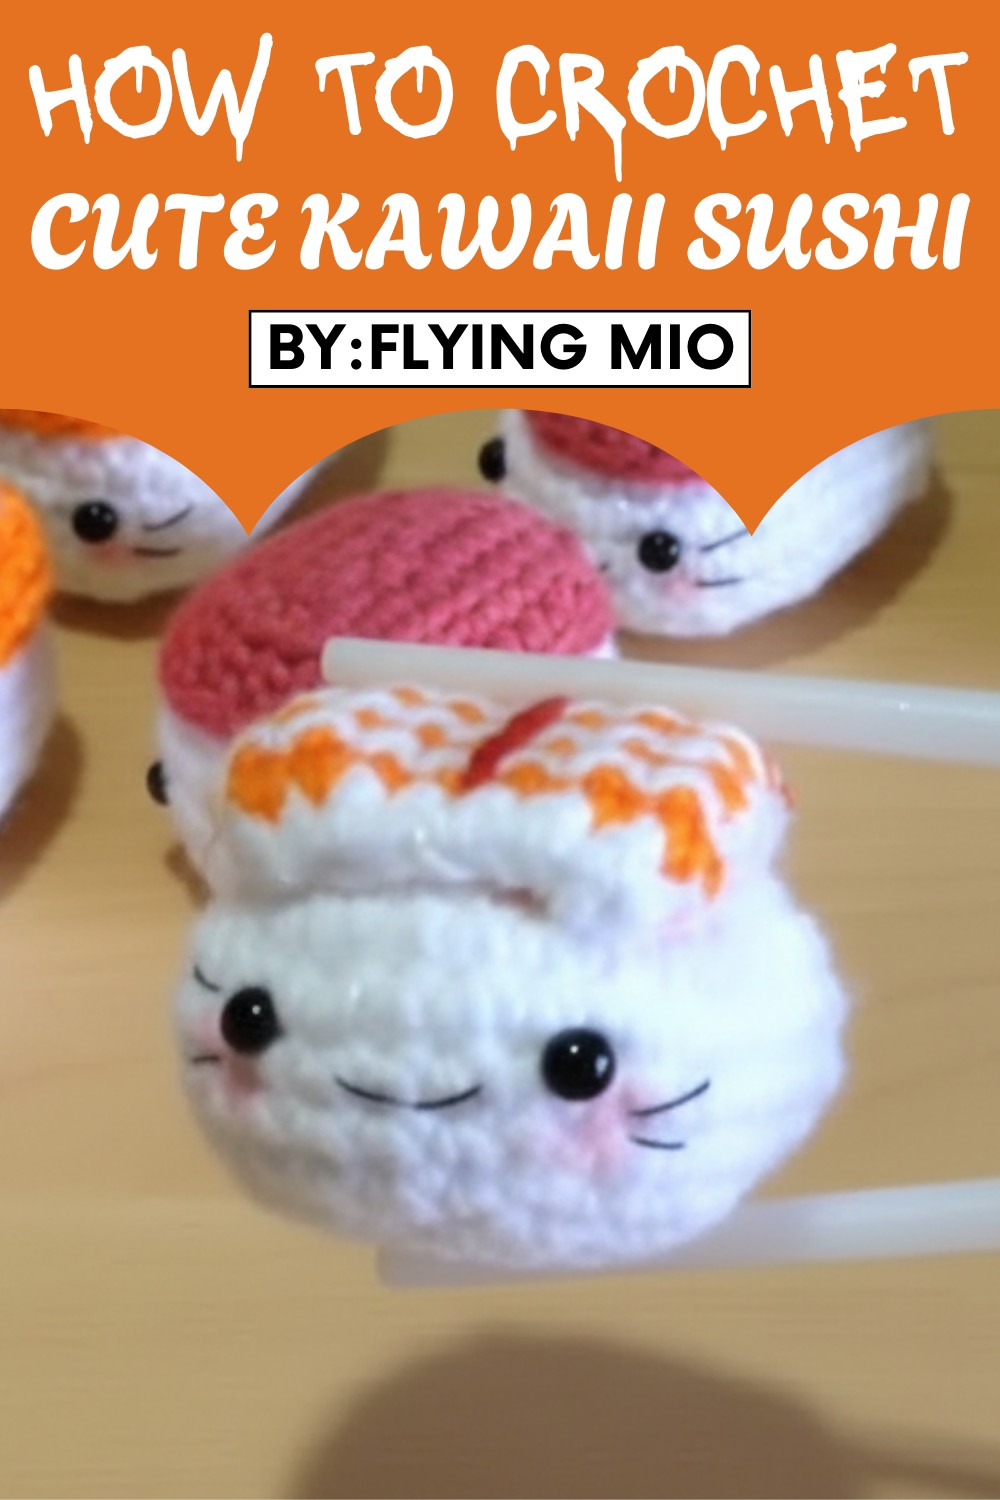
Children enjoy playing with it as a toy because it feels gentle and light in their hands. Many use this roll for party decorations or as a special surprise in lunch boxes. The Crochet Sushi pattern teaches you step by step how to make the roll and lets you pick the colors you love most. One simple roll brings a big feeling of happiness and can share joy when you make it for friends or family.
Materials List
Yarn:
- (category 4) acrylic or cotton yarn in the following colors:
-
- White (rice)
- Orange (shrimp)
- Red (tuna)
- Light pink or salmon (salmon)
- Yellow (egg)
- Dark green (seaweed)
- Black, pink, or brown (face details)
- Small amount of stuffing (polyfill or yarn scraps)
Crochet Hook:
- Size E/4 (3.5 mm) or hook size recommended for your yarn
Notions:
- Tapestry/yarn needle (for sewing, weaving in ends)
- Safety eyes or small black beads or felt (for eyes)
- Embroidery thread for face
- (Optional) Hot glue gun (for secure attachment)
- Scissors
- Stitch marker
- (Optional) Blush or fabric paint for cheeks
Key Abbreviations
| Abbreviation | Meaning |
|---|---|
| ch | chain |
| sc | single crochet |
| sl st | slip stitch |
| inc | increase (2 sc in the same st) |
| dec | decrease (sc 2 together) |
| st(s) | stitch(es) |
| FO | fasten off |
Special Notes:
- Worked in joined rounds or continuous spirals as you prefer.
- Gauge is not critical; tighter stitches give a firmer plushie.
- Use a stitch marker if working in a spiral.
crochet sushi pattern
1. Rice Ball Base (All Sushi Types)
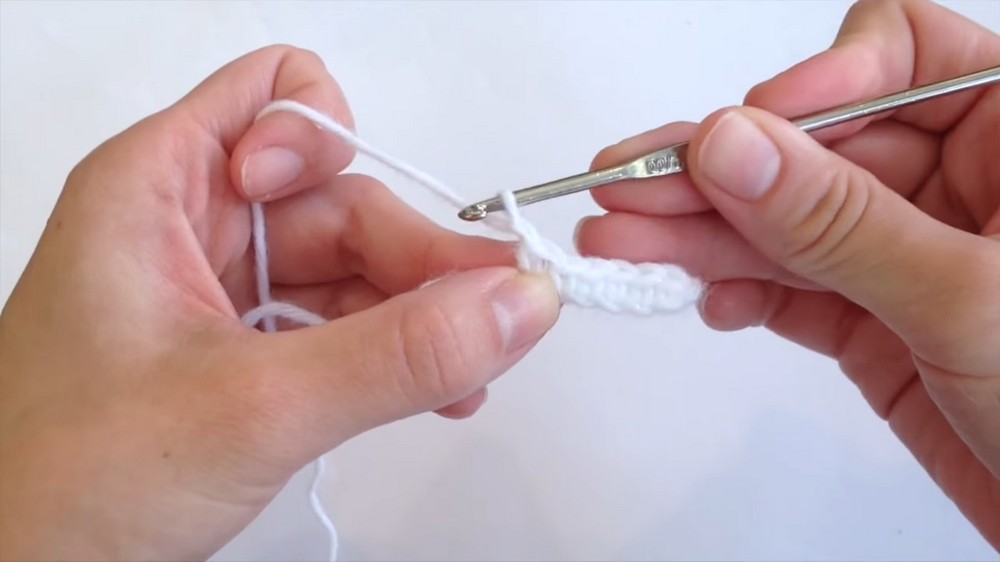
- With white yarn, ch 7 (forms the foundation chain).
- Row 1:
sc in 2nd ch from hook and in each chain across (6 sc total).
(Turn after each row.) - Rows 2–4:
ch 1, turn, sc in each st across (6 sc).
(You have a rectangle at this point.)
Shaping into an Oval:
4. Round 1: Working around the rectangle edges:
- sc evenly along short edge (end), work 2 sc in each corner, sc along the long side, 2 sc in next corner, sc back along opposite side, 2 sc in next corner, repeat until you make an oval. You may have about 18–20 sts at this point, depending on your tension.
5. Rounds 2–4:
sc in each st around, placing 2 sc in each corner as needed to keep the oval flat (increase only at corners).
6. Rounds 5–6:
sc in each st around with NO increases.
You will notice the edges will start curving in, forming a shallow bowl shape.

Decreasing to Close:
7. Round 7:
(sc in next 2 sts, dec) around, repeat as needed.
- Round 8:
Continue to sc, but skip 1 st every 3–4 sts to taper the shape.
Stuff the piece with filling before the hole is too small. - Repeat decreases/skipping until closed.
FO. Weave in end. - Push yarn tail into the body to hide.
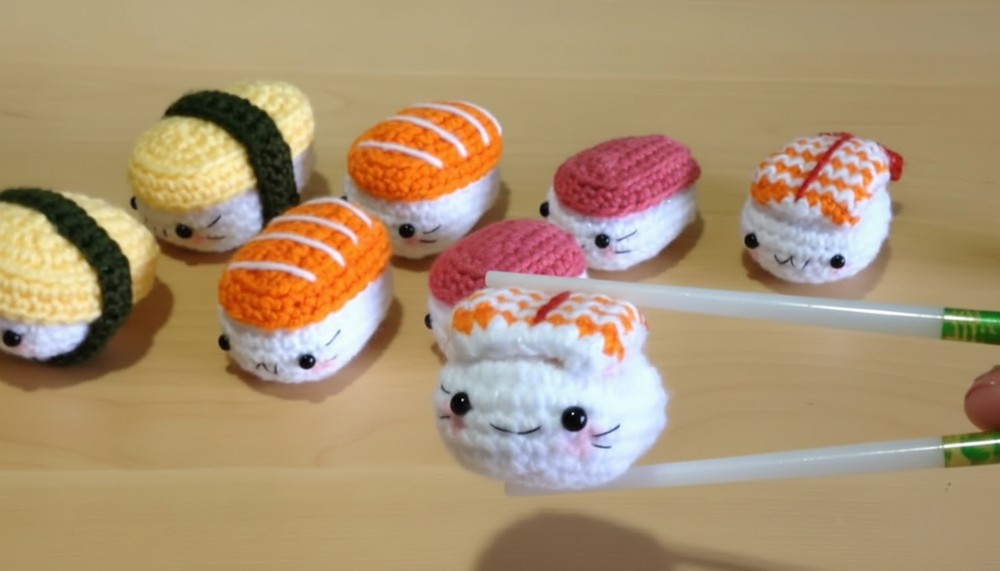
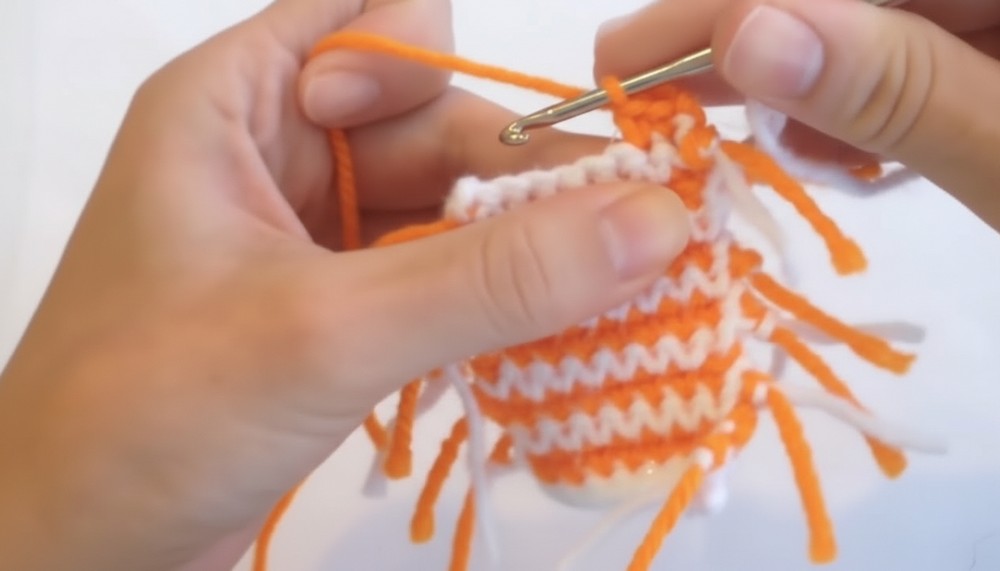
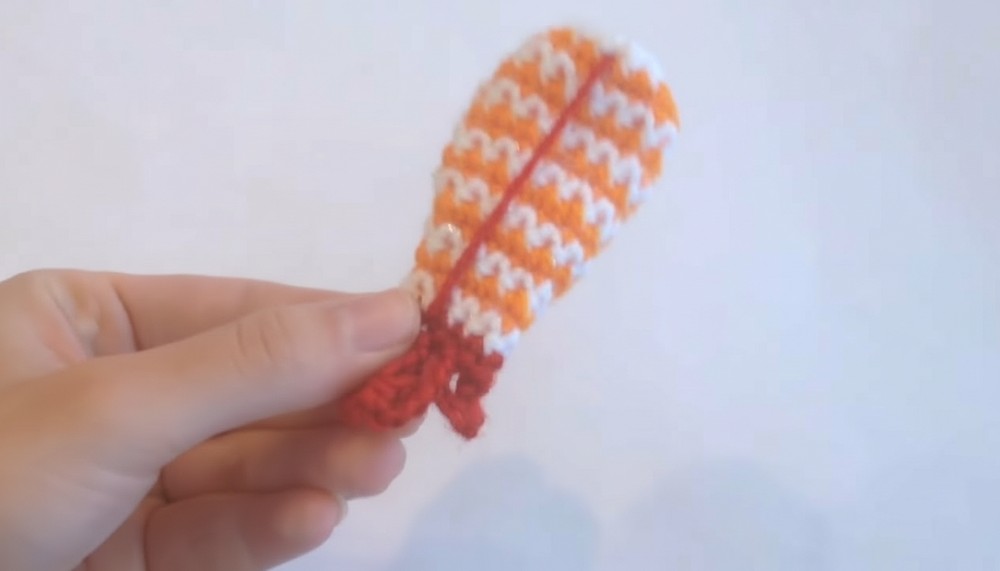
2. Shrimp Topper
- With white yarn, ch 6.
- Row 1: sc in 2nd ch from hook and across (5 sc).
- FO and join orange yarn. Work next row in orange.
- Row 2: ch 1, turn, sc across (5 sc).
- FO and switch to white again.
Row 3: repeat as previous row. - Continue alternating orange and white until you have a little rectangle with stripes, finishing with red.
- For shrimp tail:
With red, ch 10–12; sl st into 3rd ch from the end to form a small loop (repeat to make more "tail" segments; make 3–4 loops). - Sew/weave a red line down the center, or stitch into the stripes if desired.
- Attach shrimp topper to rice ball with a glue gun or sewing.
3. Salmon, Tuna, or Egg Topper
- Salmon:
- With salmon/pink yarn, ch 7.
- sc in 2nd ch from hook and across (6 sc).
- Work 3 rows as for the rice base.
- On the next row, work in BACK LOOPS ONLY to get a sharper bend (sc blo across), for 2 more rows (or until you get a "cap" shape).
- Use white yarn to embroider diagonal lines for a realistic salmon look.
- Attach to rice ball with hot glue or sew in place.
- Tuna:
- As for salmon, but with red yarn and no decorative lines.
- Egg (Tamago):
- As for salmon, but with yellow yarn.
- For "seaweed": With dark green, ch ~20–22, sl st back to beginning to form a long band.
- Wrap around the center of the egg and rice ball. Attach ends on the underside by sewing or with a dab of glue.
4. Face (all Sushi Types)
- Attach safety eyes or sew on beads/felt circles in a low, center position on the rice base.
- Embroider mouth and/or whiskers with black, brown, or pink thread.
- Optional: Add a touch of blush or pink embroidery for cheeks.
5. Finishing Touches
- Weave in all loose ends.
- Hide extra yarn ends inside your plushies.
- Arrange toppers on rice balls and secure with glue or sewing. Allow glue to dry fully if used.
- Enjoy and display your adorable sushi amigurumi collection!
Conclusion
With these clear steps, you can create a charming variety of crochet sushi characters. Each sushi is fully customizable in color and facial expression for maximum creativity and fun. Ideal for beginners ready to practice working with simple shapes and color changes.
Pattern Correction and Tip
Correction:
- If your oval base puckers or is uneven, double-check that your increases/decreases are symmetrical on both ends.
- Keeping your stitches tight will help maintain plushie shape and stuffing retention.
Tip:
- Use a stitch marker to keep track of your starting place if working in spirals.
- Try pinning toppers before gluing/sewing so you can ensure proper placement.
- Experiment with colors and faces to create your unique sushi collection!

Leave a Reply