

Spark your creativity with this Crochet Bearbrick Amigurumi Pattern, perfect for adorable gifts, décor accents, and a playful handmade touch.
There’s something magical about creating a small, handmade treasure that spreads joy and warmth. A crochet bearbrick amigurumi is a wonderful example of this, blending creativity and charm into a single adorable piece. This tiny bear brings life to any space with its soft yarn texture and playful design. Perfect for decorating your home, gifting to loved ones, or carrying as a cute keychain, it’s a versatile companion for all ages. Each piece is unique, crocheted with intricate details that give it personality and character.
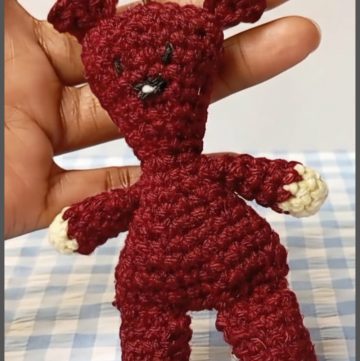
Eye-Catching Crochet Bearbrick Amigurumi Pattern Perfect for Display

Whether you’re making it as a heartfelt gift for a birthday, baby shower, or simply to brighten someone’s day, its story becomes even more special when made with your own hands. This little creation is more than just a toy – it’s a symbol of love and care, radiating joy wherever it goes. A perfect way to showcase talent and cherish handmade art.

Materials List
- Yarn: Your preferred color of DK-weight (light worsted-weight) yarn or cotton yarn
- Hook: 2.5 mm crochet hook
- Stuffing: Cotton or polyester fiberfill
- Tapestry Needle: For sewing and weaving ends
- Scissors
- Optional: Stitch markers to mark the beginning of rounds
Key Abbreviations (US Terminology)
- ch: Chain
- sc: Single crochet
- st: Stitch
- inc: Increase (make two single crochets in the same stitch)
- dec: Decrease (single crochet two stitches together)
- sl st: Slip stitch
- [...]: Repeat instructions within brackets
- (x sts): Number of stitches in the round after completing it
Special Notes
- The pattern uses a magic ring to start each piece. If you're unfamiliar, practice this technique before beginning.
- This pattern is worked in continuous rounds (spirals) unless stated otherwise. Use a stitch marker to keep track.
- Stuff the parts firmly for a well-shaped toy.
- For symmetry, position and sew parts carefully.
Pattern Instructions
Arms (Make 2)
- Round 1: Start with a magic ring. Work 6 sc into the ring. Tighten the ring and sl st into the first sc to close. (6 sts)
- Round 2: Ch 1, [inc in each st around]. (12 sts)
- Rounds 3-4: Sc in each st around. (12 sts)
- Round 5: [sc, dec]. Repeat 3 times. (9 sts)
- Round 6-8: Sc in each st around. (9 sts)
- Fasten off, leaving a long tail for sewing. Stuff lightly.


Legs (Make 2)
- Round 1: Start with a magic ring. Work 6 sc into the ring. Tighten the ring and sl st into the first sc to close. (6 sts)
- Round 2: Ch 1, [inc in each st around]. (12 sts)
- Round 3: Sc in each st around. (12 sts)
- Round 4: [sc 2, inc]. Repeat 4 times. (16 sts)
- Rounds 5-8: Sc in each st around. (16 sts)
- Fasten off, leaving a long tail for sewing. Stuff firmly.
Ears (Make 2)
- Round 1: Start with a magic ring. Work 6 sc into the ring. Tighten the ring and sl st into the first sc to close. (6 sts)
- Round 2: Ch 1, [inc in each st around]. (12 sts)
- Round 3: [sc, inc]. Repeat 6 times. (18 sts)
- Round 4: Sc in the back loop only for all 18 sts. (18 sts)
- Fasten off, leaving a long tail for sewing. Do not stuff the ears.
Head and Body
Head
- Round 1: Start with a magic ring. Work 6 sc into the ring. Tighten the ring and sl st into the first sc to close. (6 sts)
- Round 2: Ch 1, [inc in each st around]. (12 sts)
- Round 3: [sc, inc]. Repeat 6 times. (18 sts)
- Round 4: [sc 2, inc]. Repeat 6 times. (24 sts)
- Round 5-9: Sc in each st around. (24 sts)
- Round 10: [sc 3, inc]. Repeat 6 times. (30 sts)
- Round 11-12: Sc in each st around. (30 sts)


Body
- Round 13: [sc 3, dec]. Repeat 6 times. (24 sts)
- Round 14: [sc 2, dec]. Repeat 6 times. (18 sts)
- Round 15: Stuff the head firmly. [sc, dec]. Repeat 6 times. (12 sts)
- Round 16: [dec] 6 times. (6 sts)
- Fasten off and close the opening securely.
Assembly & Shaping
- Ears: Sew the ears symmetrically between Rounds 4 and 8 on the head, ensuring they are evenly spaced and symmetrical.
- Arms: Attach the arms to each side of the body at an angle near the seam of the head and body. Use the long tail and tapestry needle.
- Legs: Sew the legs at the bottom of the body evenly spaced to support the bear sitting upright. Stuff lightly during secure sewing.
- Embroider facial details: Use black or contrasting thread to create the eyes, nose, and smile before final stuffing.
Final Stuffing and Closing
- Perform any last filling adjustments to the body or limbs to ensure the toy holds its shape firmly.
- Securely weave in all loose ends and trim any excess thread neatly.
Conclusion
Congratulations! Your adorable crochet toy bear is now complete. Perfect as a gift or to add to your crochet creations collection, this bear is a delightful companion for all ages. Share your finished project with the Crochet Joy community to inspire and celebrate your creativity.
Pattern Correction
- If you notice uneven stitches or rounds don’t align, count your stitches after each round. Adjust with increases or decreases as needed.
- Always double-check that the head, arms, legs, and ears are symmetrical during assembly for a polished look.
Tips for Success
- Use safety eyes: If you prefer, safety eyes can replace hand-embroidered eyes. Attach these securely before stuffing the head.
- Experiment with colors: Try two-tone yarns or stripes for a playful look.
- Mark your rounds: Use a stitch marker to note the beginning of your rounds while working in continuous spirals.
- Practice tension: Aim for a consistent stitch tension to ensure a professional finish.


Leave a Reply