

Fun Ways to Crochet a Bear Keychain for Keyring Enjoyment
Designed with simplicity in mind, the pattern is accessible for beginners while offering satisfying results for more experienced crocheters. With just a few basic materials, this compact and creative project can be customized with your choice of yarn colors and embellishments, allowing you to crochet something truly unique. Its versatility in pattern makes it a fantastic option for last-minute gifts, crochet fairs, or even as a personal treat to elevate your keyring.
Beyond its aesthetic appeal, this crochet pattern is also practical, ensuring your keys stay secure while adding a dash of fun to your accessories. By crocheting this bear keychain, you’re not just making a cute accessory—you’re crocheting a meaningful, handmade item that brings smiles and sets your creations apart with a touch of personality and creativity.
Materials Needed
To begin this project, you’ll need:
- Chunky weight yarn
- 4.5 mm crochet hook
- 10 mm safety eyes
- Yarn needle
- Stuffing
- Scissors
- Black yarn for nose and mouth embroidery
- Keychain accessory
Special Features
- The bear pattern is compact and cute, making it ideal for keychains.
- The pattern is adjustable and can be adapted for a variety of yarn colors to personalize your creation.
- The keychain is sturdy and functional, so it’s built to withstand everyday use.
Level of Difficulty
This Crochet Bear Keychain pattern is designed for beginners and intermediate crocheters. The crochet techniques are simple and repetitive, while detailed step-by-step instructions help guide you through trickier steps (like creating the ears and sewing the details).
Step-by-Step Instructions
-
Start with the Base:
- Begin with a magic circle (or chain 2 if not familiar with the magic circle).
- Make six single crochets inside the circle. Tighten the loop, and slip stitch into the first stitch to complete Round 1.
-
Increasing Rounds:
- For Round 2, chain 1 (does not count as a stitch) and place two single crochets in each stitch. You’ll finish with 12 stitches.
- In Round 3, increase every second stitch (1 single crochet in one stitch, 2 in the next). Finish with 18 stitches.
- In Round 4, increase every third stitch. Repeat the pattern 1-1-2, and end up with 24 stitches.
- In Round 5, increase every fourth stitch by following the pattern 1-1-1-2. Once completed, you should have 30 stitches.
-
Creating the Ears:
- For Round 6, place one single crochet in the next 10 stitches.
- Work the bear’s first ear across three stitches by making one half double crochet, one double crochet, one treble crochet, and another double crochet in the same stitch before finishing with a half double crochet.
- Resume single crochets in both loops for the next six stitches.
- Repeat the same process for the second ear.
- Finish the round with single crochets in the remaining stitches and join with a slip stitch.
-
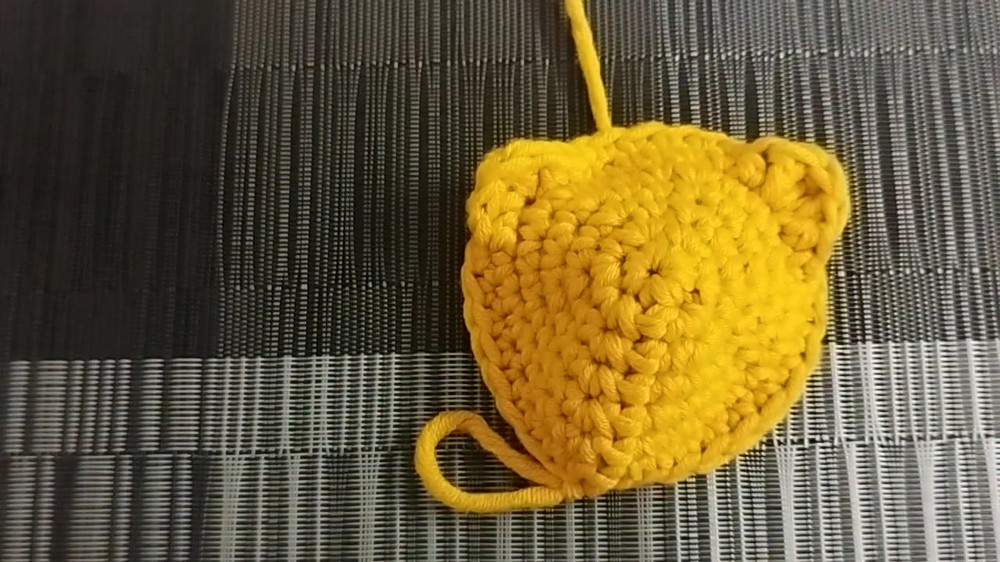
Sculpting the Shape:
- For the next round, single crochet in all stitches. When reaching the ears, crochet into the back loops of the ear stitches while returning to normal stitches afterward. You should maintain 30 stitches at the end.
-
Adding Safety Features:
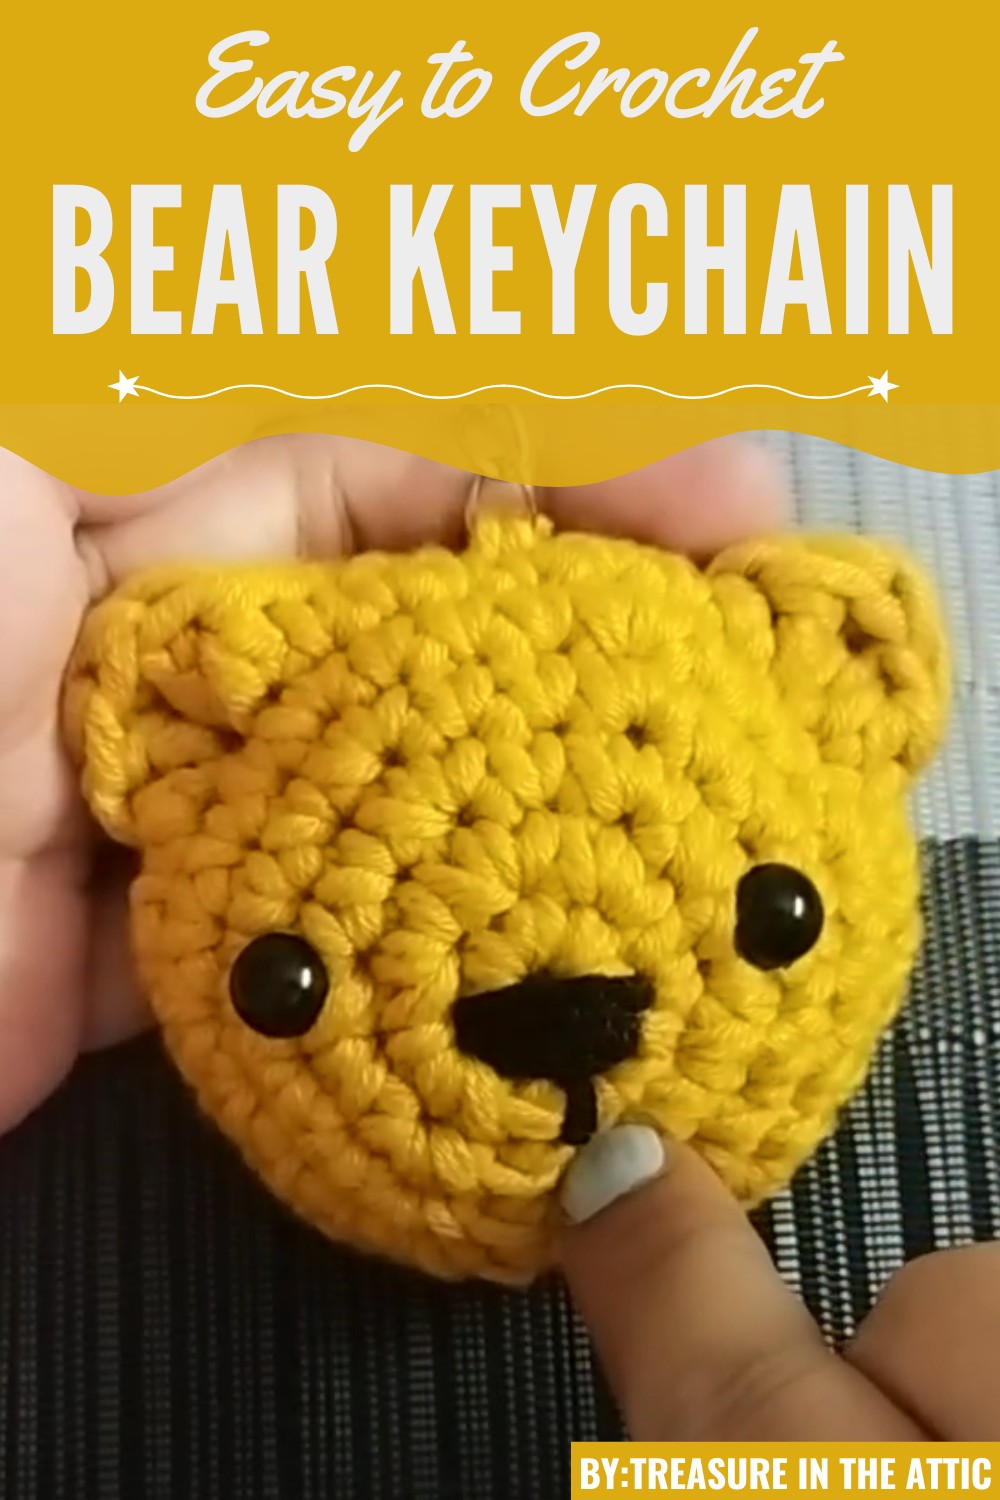
- Attach the 10 mm safety eyes, aligning them with the ears. The positioning is key to achieving the cute bear look. Add the washers to secure the eyes.
-
Decreasing Rounds:
- Round 8: Work one single crochet in three stitches, followed by an invisible decrease. Repeat until you end the round with 24 single crochets.
- Round 9: Work 12 decreases, bringing the total to 12 stitches.
-
Stuffing and Closing:
- Lightly stuff the bear’s head. Ensure it is firm enough to maintain its shape but not overly stretched.
- For the final round, make six decreases. Leave a long tail and fasten off. Use the tail to close the opening by weaving in and out through the last round of stitches and pulling tight.
-
Adding the Keychain:
- Attach the keychain accessory at the top using the leftover yarn. Sew securely to ensure durability.
-
Embroidering the Nose and Mouth:
- Use black yarn to embroider the bear’s nose and mouth. Start with the nose, positioning it between the eyes, and then add a tiny mouth before tying off the yarn securely at the back.


Tutor’s Suggestions
- Work at your own speed: Adjust the video speed settings if it feels too fast or slow.
- Align the safety eyes carefully to match the bear’s ears for a balanced look.
- Avoid overstuffing to maintain shape without stretching the yarn.
Uses
The completed bear can be used as:
- A decorative keychain
- A small gift for friends or family
- An item for crochet fairs or handmade markets
- A fun accessory for bags, backpacks, or purses
Tip
For a more polished look, block your finished bear lightly to set the stitches in place. Proper stitch alignment will enhance the overall neatness of your final piece.
Conclusion
A crochet bear keychain is a rewarding and delightful experience. With minimal materials and basic crochet skills, you can crochet an adorable keepsake that’s both fun and functional. The step-by-step guidance ensures a smooth crocheting process, from the magic circle to the finishing touches. Whether for a loved one or your own use, this bear keychain is sure to bring a smile with its charm and versatility.


Leave a Reply