

Weave timeless charm with this Free Crochet Seed Stitch Pattern, simple to follow, perfect for cozy projects and stylish handmade textures.
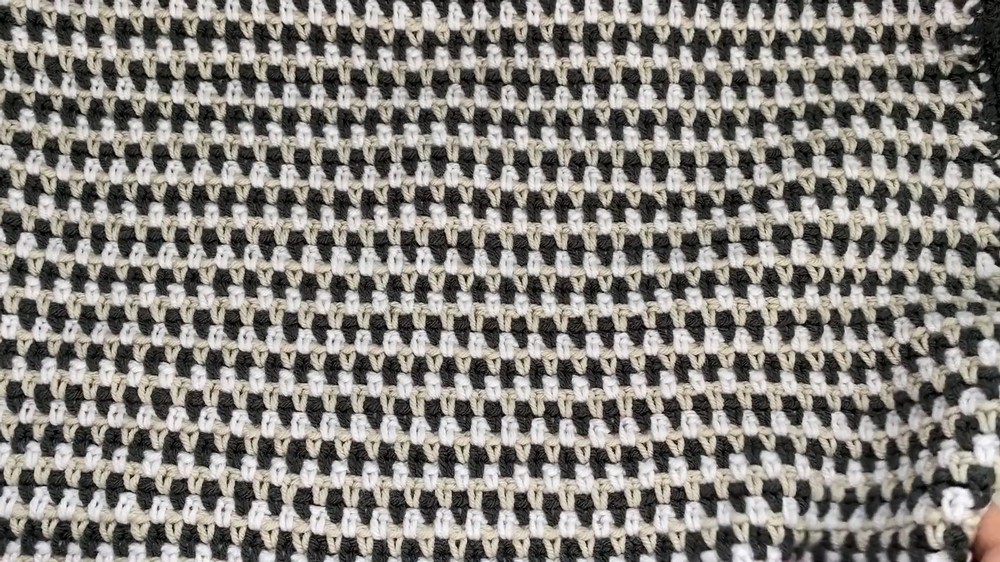
On a crisp winter morning, the rhythmic motion of a crochet hook sings a story of creativity. The seed stitch emerges, a pattern that carries elegance in its simplicity and charm in its texture. As the gentle loops intertwine, each thread reveals a vision of timeless beauty, sewing practicality with style. The stitch’s distinct structure, formed from alternating single crochet and chain stitches, gives it a subtly raised texture, reminiscent of nature’s patterns, such as dew-dropped seeds resting on fertile ground.
Effortless Crochet Seed Stitch Pattern You’ll Love to Try

Its uses reach far and wide, offering versatility for creating cozy blankets, accent pillows, warm scarves, or baby items. Whether you're aiming for bold color contrasts or soft, monochromatic tones, the seed stitch adapts beautifully to varied yarn choices and palettes. The benefits extend beyond aesthetics—it’s an excellent stitch for beginners to practice while achieving stunning results, allowing room for ease and refinement. Meanwhile, experienced crocheters can utilize it for larger, intricate projects that showcase their skills.
Materials You'll Need
- Yarn: Three colors of medium-weight (#4) yarn (e.g., charcoal, mushroom, and white or your preferred colors).
- Crochet hook: 5mm crochet hook.
- Darning needle.
- Scissors.
The seed stitch invites moments of meditative focus, where the act of looping the yarn becomes a calming ritual. And as each row grows, so does the satisfaction of crafting something uniquely yours a creation that balances functionality, grace, and heartfelt charm.

Step-by-Step Instructions
Steps
1. Starting the Project
- Begin by creating a slip knot on your hook using one color of yarn (e.g., blue).
- Make a foundation chain with an even number of chains, depending on the desired size of your project.
- For demonstration, the video uses 20 chains.
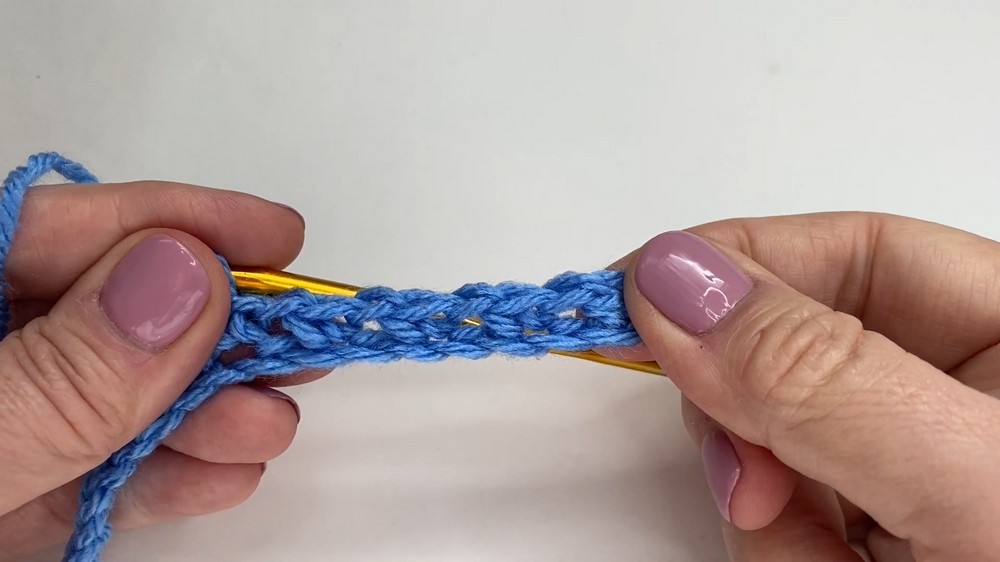
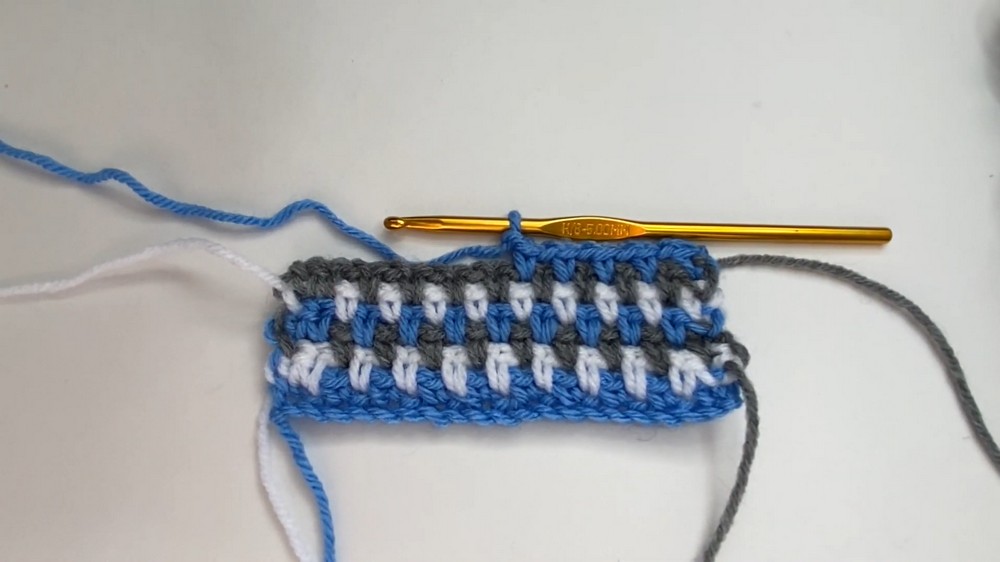
2. Row 1: Seed Stitch (Single Crochet + Chain)
- Work a single crochet (SC) in the second chain from the hook.
- Chain 1, skip the next stitch, and work another SC into the following stitch.
- Repeat the pattern: chain 1, skip 1, single crochet into the next stitch, until you reach the end of the row.
- End the row with a single crochet.
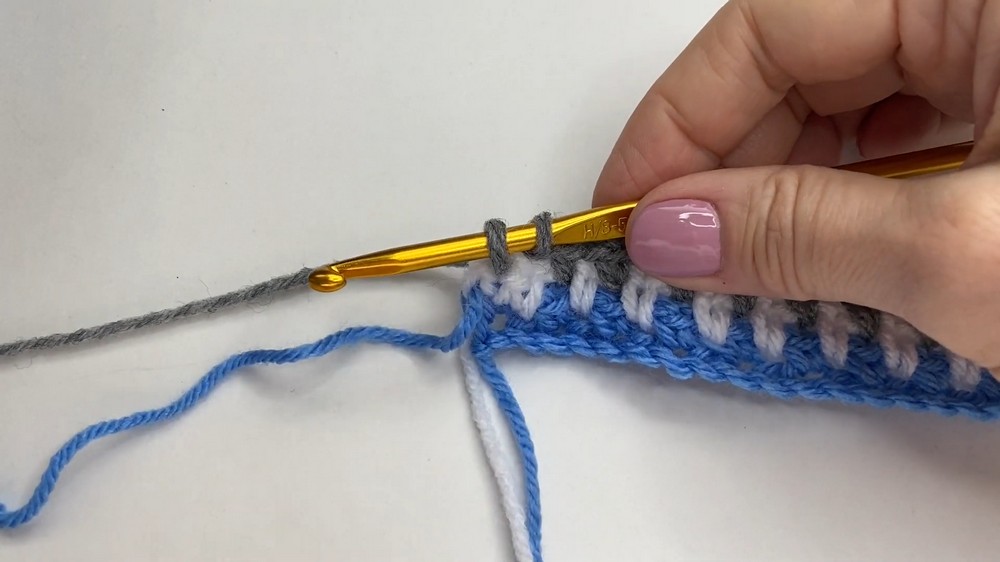
3. Changing Colors
- At the end of the row, stop halfway through your final single crochet.
- Add a new color (e.g., white) and finish the stitch using the new color.
- Chain 1, turn, and begin the next row without cutting off the previous yarn.
- Carry the previous color up the sides to avoid cutting and reattaching yarns.
4. Row 2: Alternating Stitch Placement
- Begin the row with a single crochet in the first stitch.
- Work a SC in the chain space (the gap from the chain 1 in the previous row).
- Repeat: chain 1, skip one stitch, work SC into the chain space, until the end of the row.
- Finish with two single crochets: one in the last chain space and one in the final stitch.
- Stop halfway through the last single crochet, and switch to the third color (e.g., gray).
5. Alternating Between Rows 1 and 2
- Row 1: Chain 1, skip 1, single crochet in the next chain space.
- Row 2: Start with two single crochets (one in the first stitch and one in the chain space), followed by chain 1, skip 1, and continue with single crochets in chain spaces.
- Alternate between row 1 and row 2 as the pattern progresses.
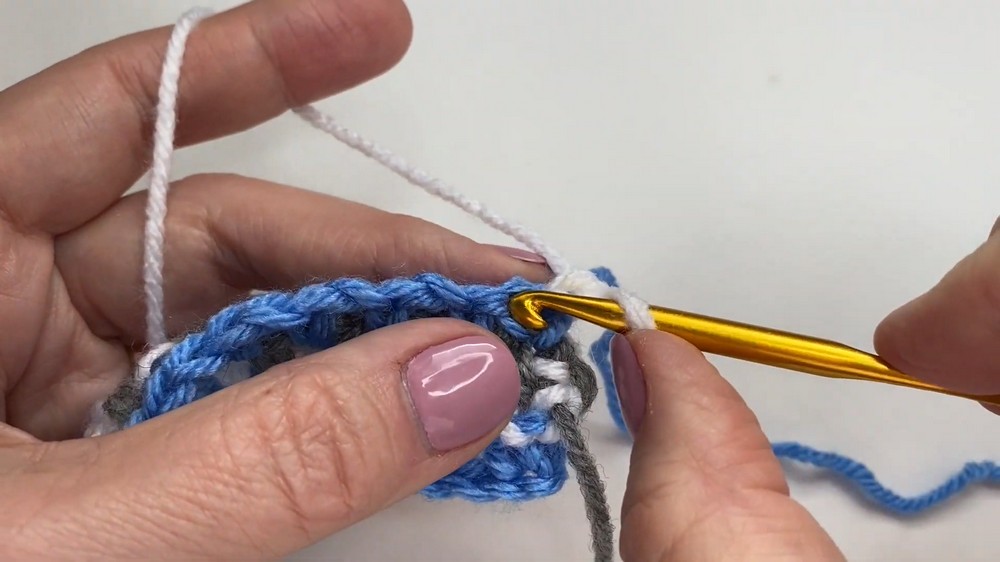
6. Carrying Yarn and Color Management
- Always carry the unused yarn up the edge of your project by looping it over the working yarn. This helps avoid loose ends and keeps the edges neat and tidy.
- Ensure your stitches stay in the chain spaces, not the stitches, for a uniform look.
7. Finishing Touches
- Add an edging to your project. For example:
- Work a round of single crochet stitches around the edges of your project.
- You may finish with a slip stitch edging for added refinement.
Special Features
- Versatile Stitch: The seed stitch can be used for various projects like blankets, scarves, or pillow covers.
- Textured Look: This stitch gives a lovely textured and structured appearance.
- Neat Edges: By carrying yarn up, the edges remain clean and professional-looking.
- Color Changes: Adds dimension and style to the overall design by alternating colors during rows.
Level of Difficulty
This pattern is beginner-friendly, but it also suits intermediate crocheters aiming to practice clean edges and color changes.
Tutor's Suggestions
- Count Your Chains: Ensure your foundation chain has an even number of stitches to maintain the pattern.
- Tension Control: Keep your tension consistent when working with multiple yarns. Loose or inconsistent stitches can ruin the neatness of the edges.
- Placement Accuracy: Always insert your hook into the chain spaces, not the stitches, to preserve the uniformity of the pattern.
- Use Medium Yarn: Choose soft, medium-weight yarn (#4) for a balanced look and feel.
Uses
- Ideal for a variety of projects such as blankets, baby items, scarves, bags, and other textured accessories.
- Perfect for gifting, lightweight throws, or even beginner projects for practicing stitch consistency and color management.
Tip
While carrying yarn at the edges, ensure the unused yarn is looped over and tucked neatly into the work. This approach avoids having to weave in loose ends and keeps the edges from looking bulky.
Conclusion
The seed stitch is a beautiful and functional crochet technique that combines simplicity with sophistication. This tutorial demonstrates how two basic stitches—single crochet and chain stitches—can produce an elegant textured look ideal for countless projects. Its flexibility makes it suitable for crocheters of varying skill levels, while the use of alternating colors adds further charm. With neat edges and an eye-catching pattern, this stitch transforms simple yarn into something exquisite. Dive into this project and enjoy both the process and the delightful outcome. Happy crocheting!

Leave a Reply