

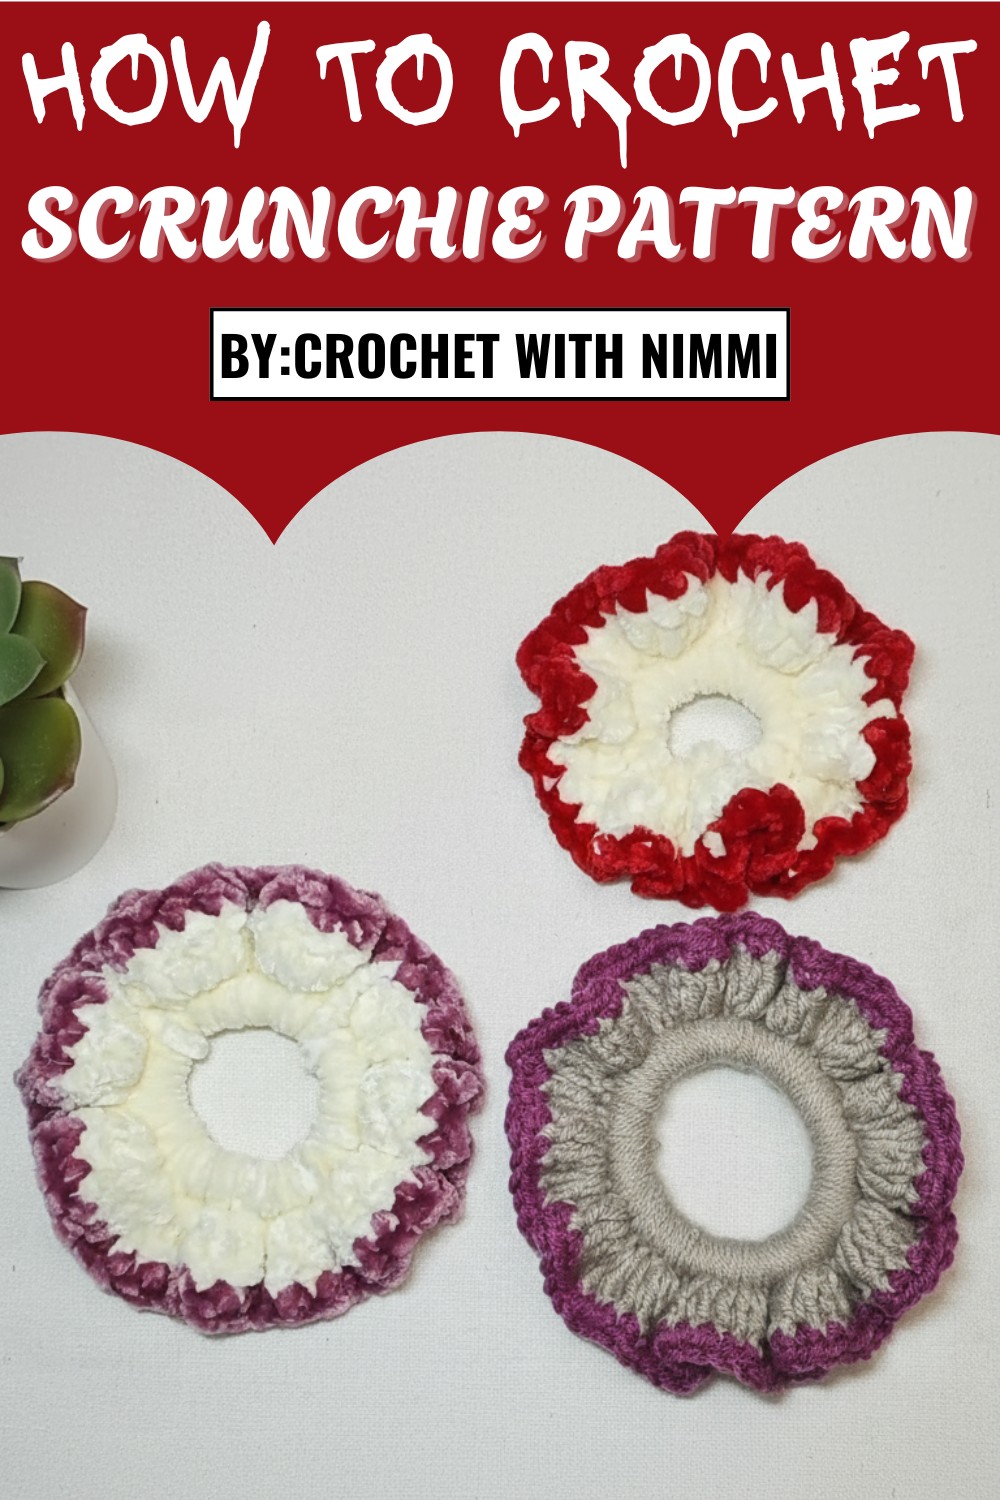
Elegant Crochet Scrunchie Pattern for Stylish Hair Accessories
Level of Difficulty
- Beginner-Friendly: The tutorial includes basic stitches like slip knot, single crochet, double crochet, and slip stitch, making it a great project for those starting their crochet journey.
Materials Needed
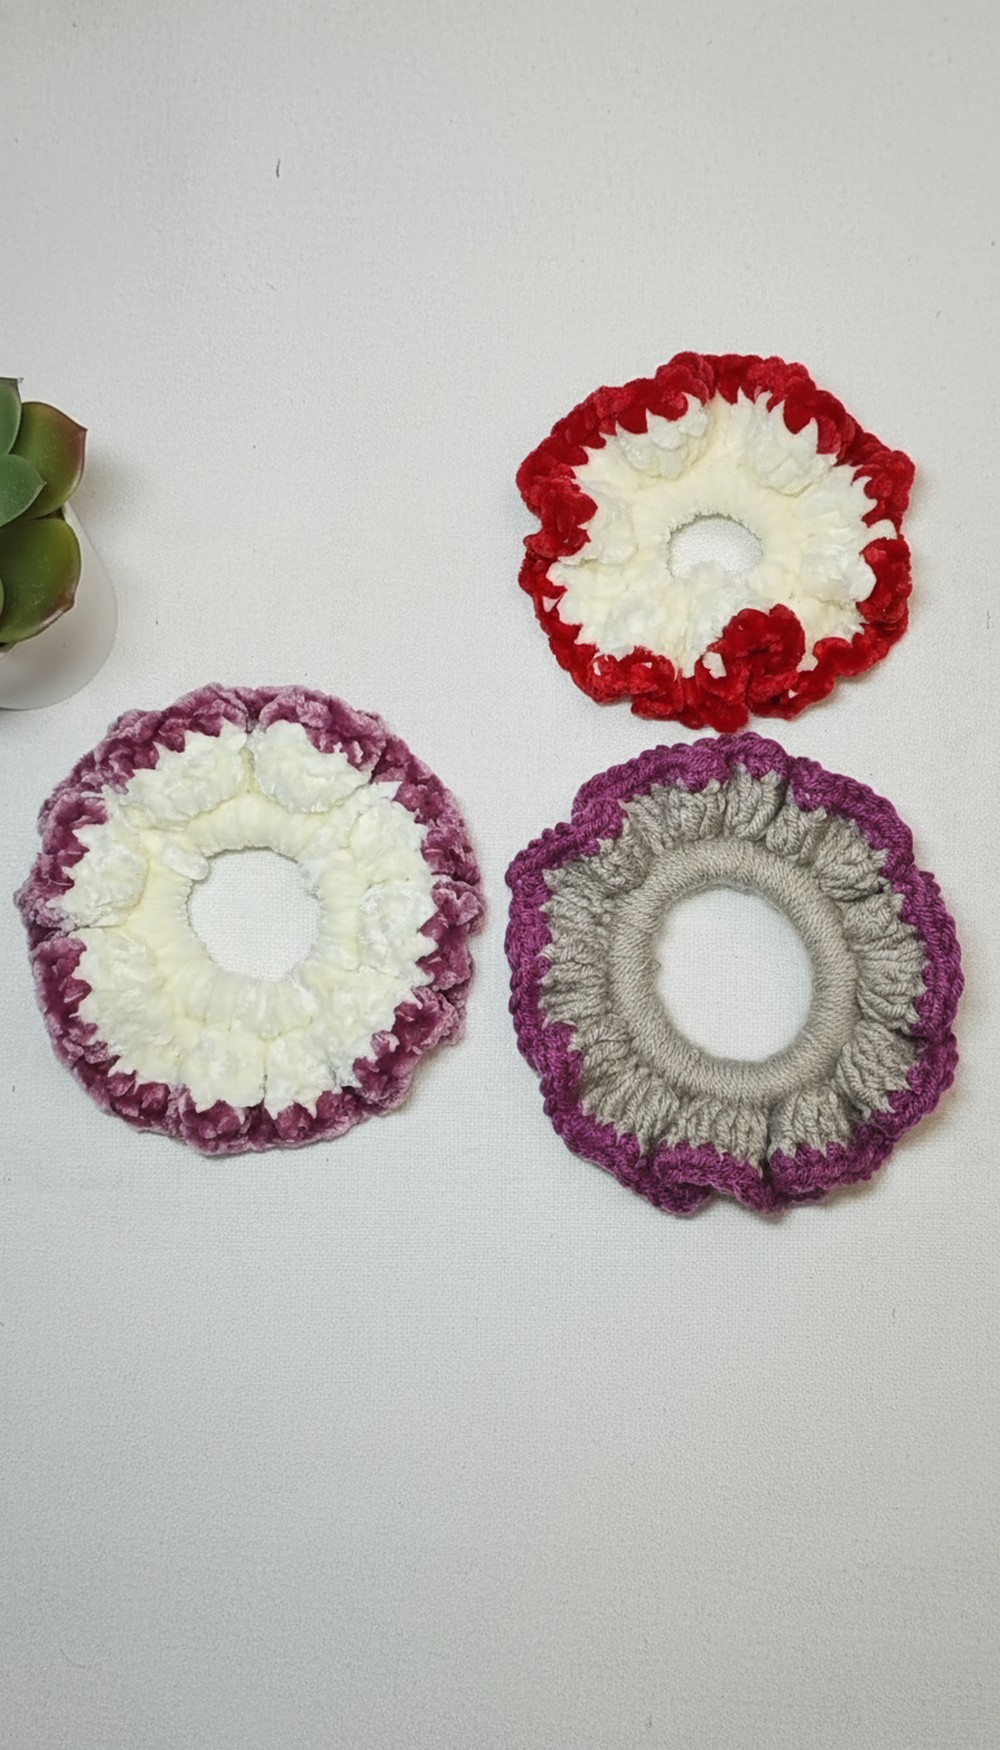
- Yarn (Velvet or Cotton): Choose a yarn that matches your scrunchie's color for a seamless look.
- Rubber Bands: Simple, basic rubber bands.
- Crochet Hook: Based on your yarn thickness (e.g., 4.5 mm crochet hook for velvet yarn).
- Scissors: To cut excess yarn at the end.
Step-by-Step Instructions
Step 1: Prepare the Slip Knot
- Take the yarn and wind it around your fingers to form a loop.
- Pull the long end of the yarn through the loop to create a slip knot.
- Insert your crochet hook into the slip knot and adjust the tension so it’s not too tight or too loose.
2: Attach the Yarn to the Rubber Band
- Hold the rubber band with one hand and wrap the yarn around it.
- Create a secure grip where the yarn and rubber band meet.
- Insert the crochet hook under the rubber band and pull the yarn through to form the starting stitch.
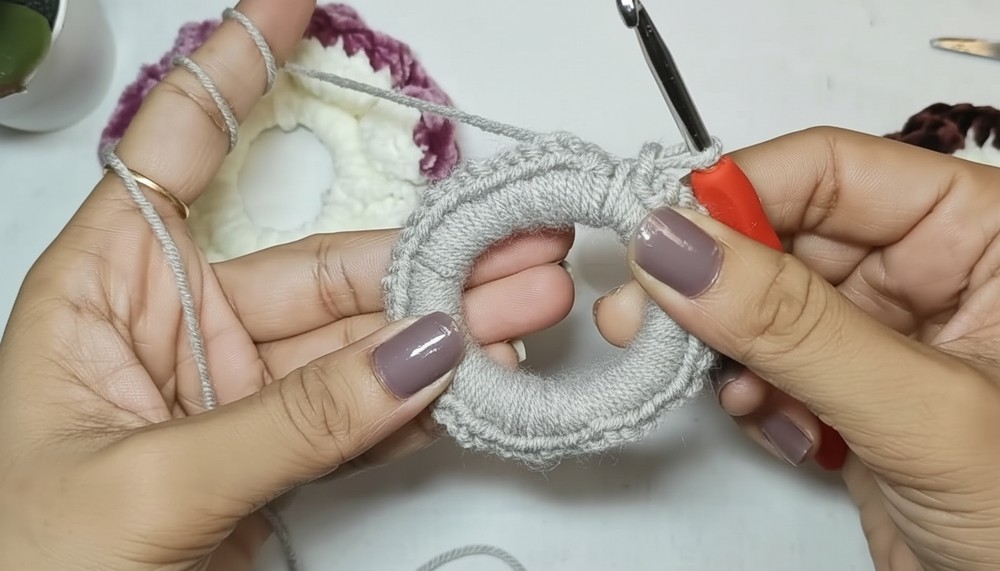
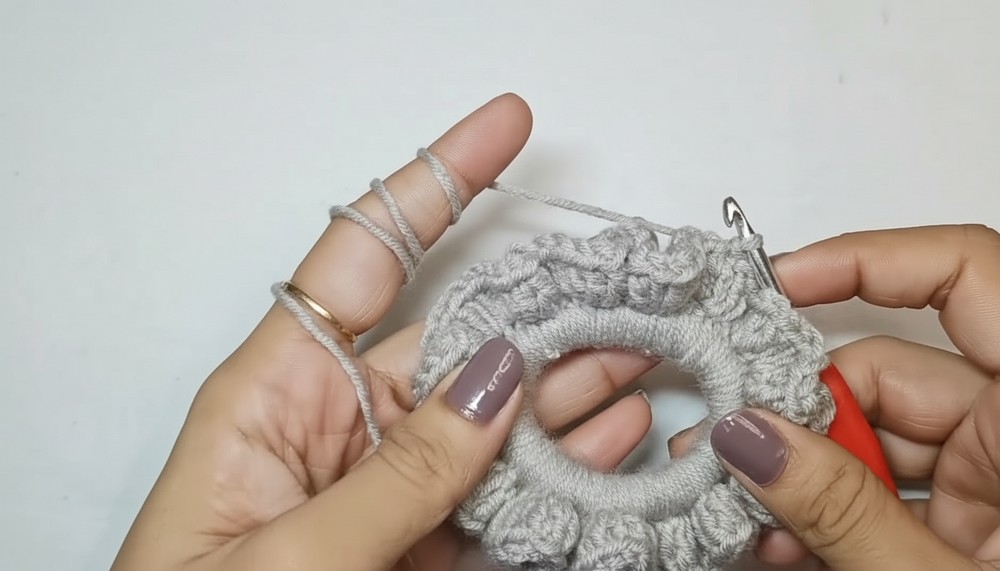
3: Work Single Crochet Around the Rubber Band
- Hold the rubber band and yarn. Insert the hook into the middle of the rubber band and pull a loop.
- Complete single crochet stitches by wrapping the yarn over the hook and pulling through both loops.
- Continue creating single crochet stitches closely around the rubber band until it’s fully covered.
- Ensure the stitches are tight enough so the rubber band isn’t visible.
Special Tip
For a visually seamless finish, match the yarn color to the rubber band so no contrasting color peeks through when stretched.
4: Slip Stitch for Closure
- Once single crochet stitches fully cover the rubber band, locate the first single crochet stitch you made.
- Insert the hook into that stitch and pull the yarn through both loops. This creates a slip stitch and secures the round.
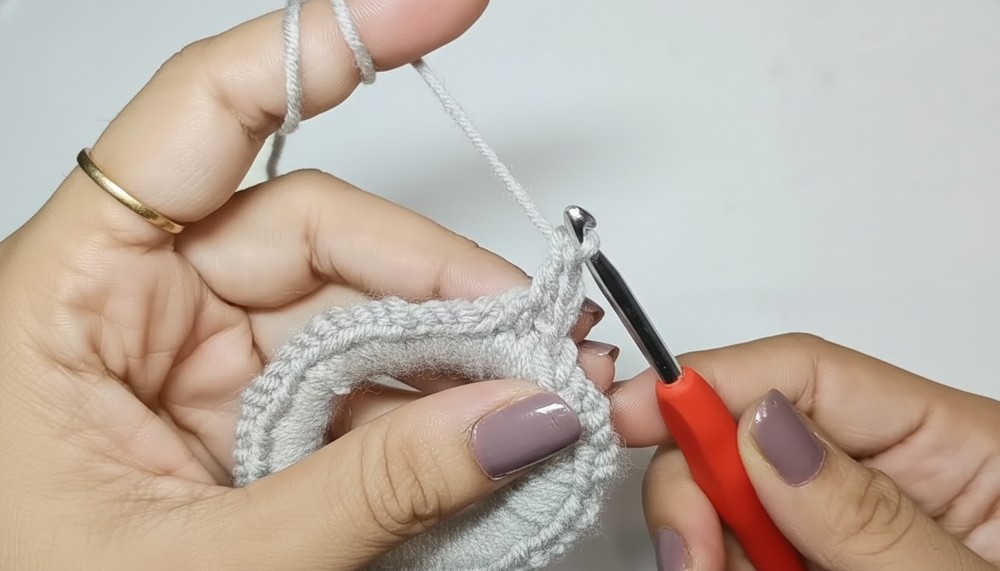
5: Add a Second Row Using Double Crochet
- After completing slip stitches, chain two stitches to begin the next round.
- Work two double crochet stitches into each previous single crochet stitch.
- To create a double crochet (DC): Yarn over the hook, insert it into the stitch, pull up a loop, yarn over, pull through two loops, yarn over, pull through the last two loops.
- Continue this process until you’ve worked double crochets around every single crochet stitch.
- Finish this round with another slip stitch to secure.
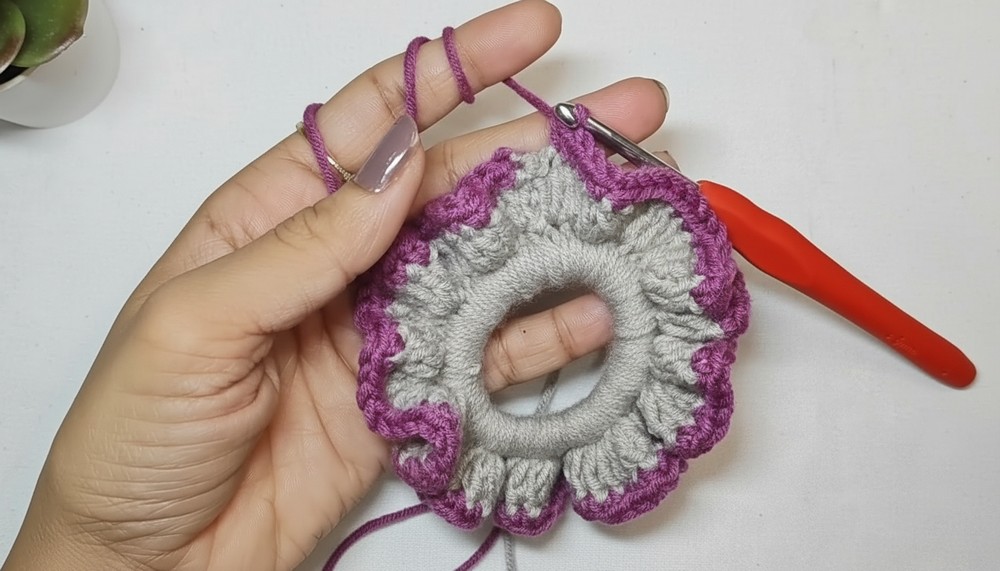
6: Create the Elegant Border (Optional)
- To make the scrunchie more decorative, pick a second yarn color for the border.
- Attach the new color using another slip knot and secure it around the last completed stitch.
- Work single crochet stitches in the new color along every double crochet stitch from the previous row.
- Once you complete the border, use a final slip stitch to secure and cut off excess yarn.
7: Secure and Finish
- Tie knots with the leftover yarn pieces to secure the scrunchie.
- Trim the excess yarn using scissors. Ensure no lose ends stick out.

Uses
- Hair Accessory: Perfect for styling ponytails, buns, or even bracelets.
- Gift Item: Handmade scrunchies make thoughtful and personalized gifts.
- Home Business: Crochet scrunchies are great for showcasing your craftsmanship and selling online.
Tutor’s Suggestions
- Use velvet yarn for a soft and luxurious finish or cotton yarn for durability.
- Keep your stitches even—not too tight or loose—for a professional, uniform look.
- Beginners are encouraged to watch basic tutorials on slip stitch and crochet techniques before starting.
Conclusion
Crocheting a scrunchie is an enjoyable and rewarding project, suitable for both beginners and advanced crocheters. With attention to detail and a little practice, you’ll crochet accessories that are not only practical but stylish. Try experimenting with different yarn types and colors to keep your designs fresh and unique!
Final Tip
To make the scrunchie fun and fluffy, opt for chunky blanket yarn! This will add volume without extra effort, giving your scrunchie a plush appearance.
Leave a Reply