

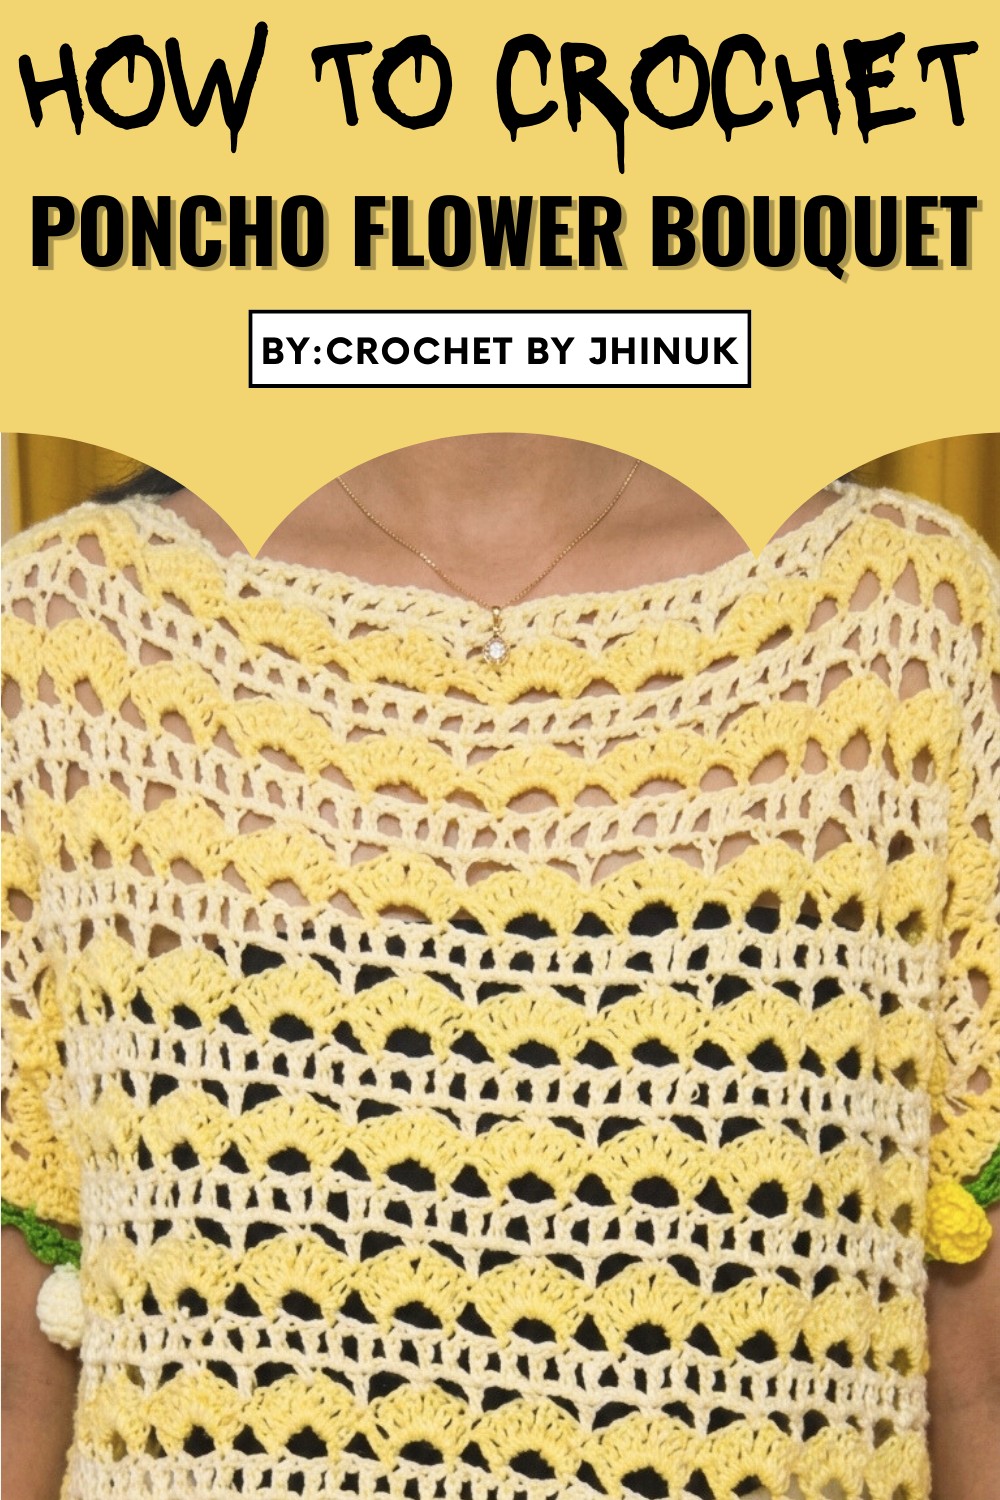
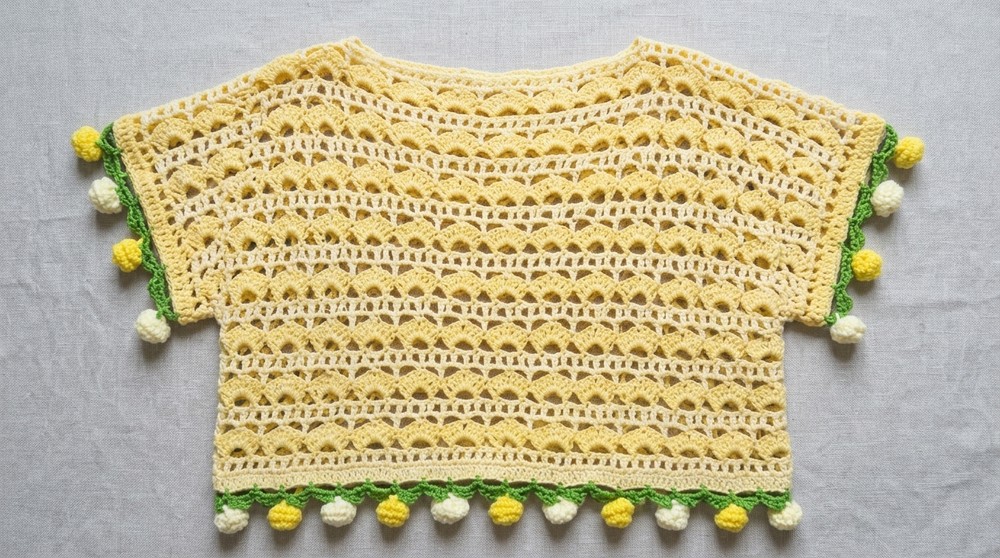
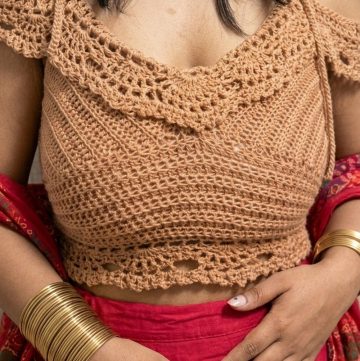
Learn How to Crochet Poncho Pattern for Any Occasion
Handmade crochet poncho also bring practical benefits. It encourage sustainable fashion choices and offer a budget-friendly way to update your wardrobe. Plus, the meditative nature of crocheting provides a calming activity to enjoy while making something beautiful and useful.
The versatility doesn’t end with style; wear them as a go-to casual piece or elevate your outfit with artsy flair. Whether it’s a gift, personal project, or a wardrobe favorite, a crocheted poncho combines comfort, creativity, and classic charm in a way few other garments can.
Materials Needed:
- Yarn: Cotton yarn in butter yellow, light yellow, and green (or your preferred colors).
- Hook Size: 4 mm crochet hook.
- Yarn needle for sewing.
- Measuring tape.
Skill Level:
Beginner to Intermediate. Basic knowledge of double crochet, single crochet, chain stitches, and slip stitches is required.
Special Features:
- Flowing and light design that is perfect for warm weather.
- Built-in armhole structure for a neat finish.
- Embellished with flowers and leaves for a chic and delicate look.
- Customizable length and design for varied sizes.
Pattern Instructions (Step-By-Step):
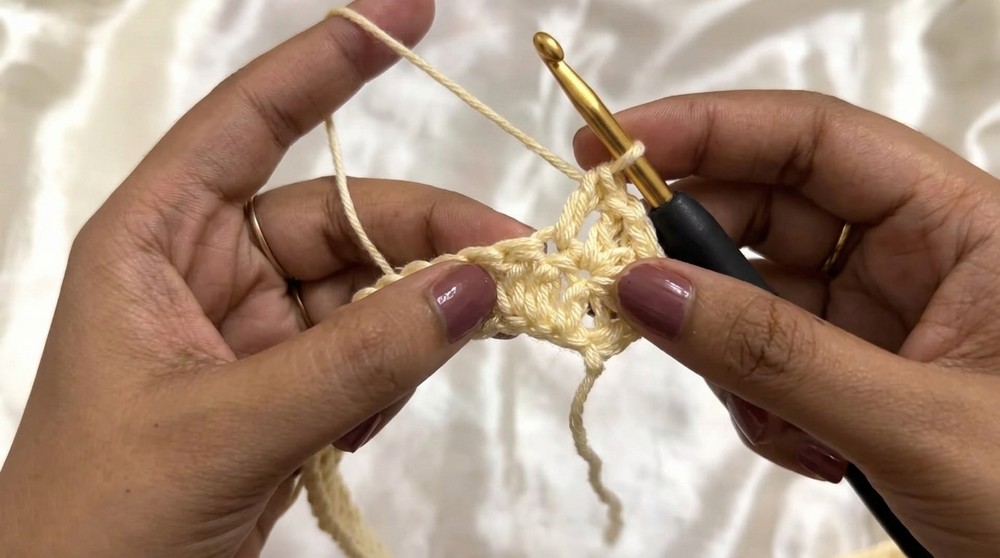
Step 1: Foundation Chains
- Start with a slip knot using the lighter yellow yarn.
- Chain a multiple of 8 + 1 chain. Adjustments for different sizes are provided in a chart (e.g., for the demo, chain 128 + 1 extra).
2: First Round (Double Crochet Row)
- Insert into the second chain from the hook and create one double crochet (dc).
- Continue making 1 double crochet in each chain until the end.
3: Second Round (Patterns Begin)
- Chain 1, turn your work, and make a double crochet in the first stitch.
- Begin the pattern: Chain 1, skip the next stitch, and make 1 double crochet in the next stitch.
- Repeat this pattern (chain 1, skip one, double crochet) across the row.
- At the end, chain 1 and turn.
4: Adding 5-Chain Loops (Round 3)
- Change to your desired color (optional).
- Chain 3 and make a single crochet into the first double crochet.
- Chain 5, skip one double crochet, and make a single crochet into the next double crochet.
- Repeat this pattern (chain 5, skip one stitch, single crochet) until the entire round is complete.
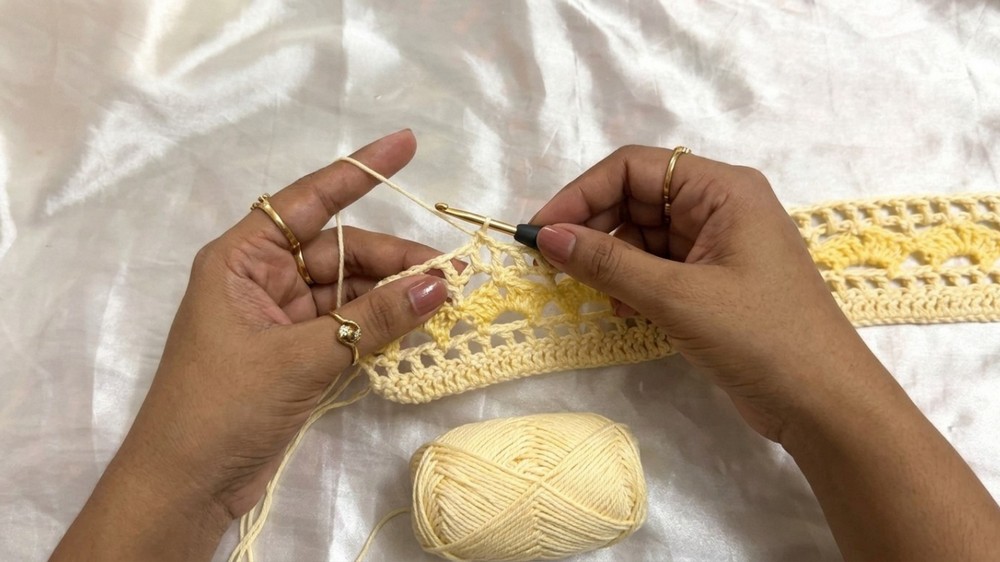
5: Shell Pattern (Round 4)
- Into each 5-chain loop, work the following sequence:
- 3 double crochets, Chain 1, 3 more double crochets into the same loop. This completes one shell.
- In the next 5-chain loop, make 1 single crochet.
- Continue alternating between the shell pattern and a single crochet in each loop round.
- Complete the row.
6: Creating Box Pattern
- For the next round, create box patterns by working:
- 1 double crochet in every chain one space (from the previous shell round).
- Separate each double crochet with chain 1. Continue for an entire round.
7: Repeat Rows to Build Length
- Alternate the box rounds, 5-chain loops, and shell rounds in sequence.
- Continue repeating these rounds until your desired length is reached (e.g., 35 cm in the tutorial).
8: Joining Patches
- Create two rectangular panels of identical length. Place them side by side, leaving space for the neckline.
- Join 35 stitches on both sides using single crochet stitches, leaving a hole in the middle for the neckline.
9: Shaping the Armholes
- On the wrong side of the top, mark the desired armhole length (e.g., 19 cm).
- Sew up the sides from the bottom to your marker using a yarn needle, leaving the armholes open.
10: Finishing the Sleeves
- Attach your yarn to the armhole edge.
- Work an alternating pattern: Chain 2, skip a stitch, double crochet in the next.
- Complete the round and slip stitch into the beginning stitch.
- For a neat edge, continue with double crochet into each space/stitch and finish with a slip stitch.
- Repeat on the other armhole.
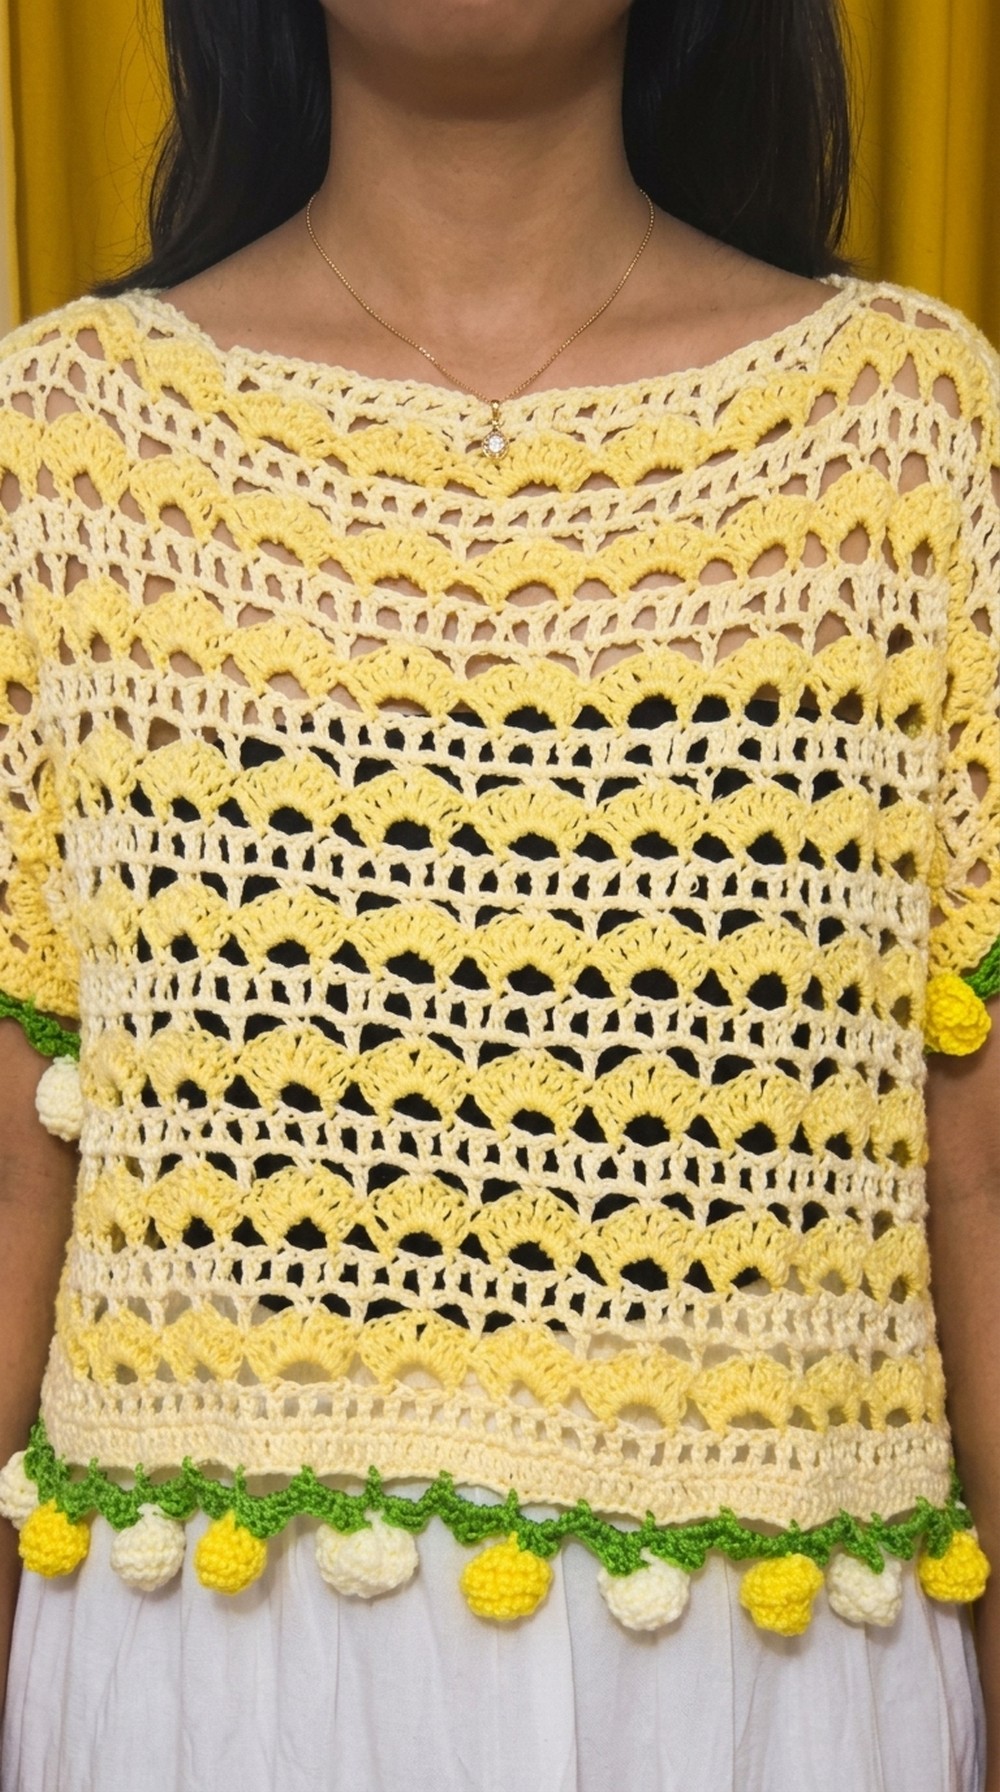
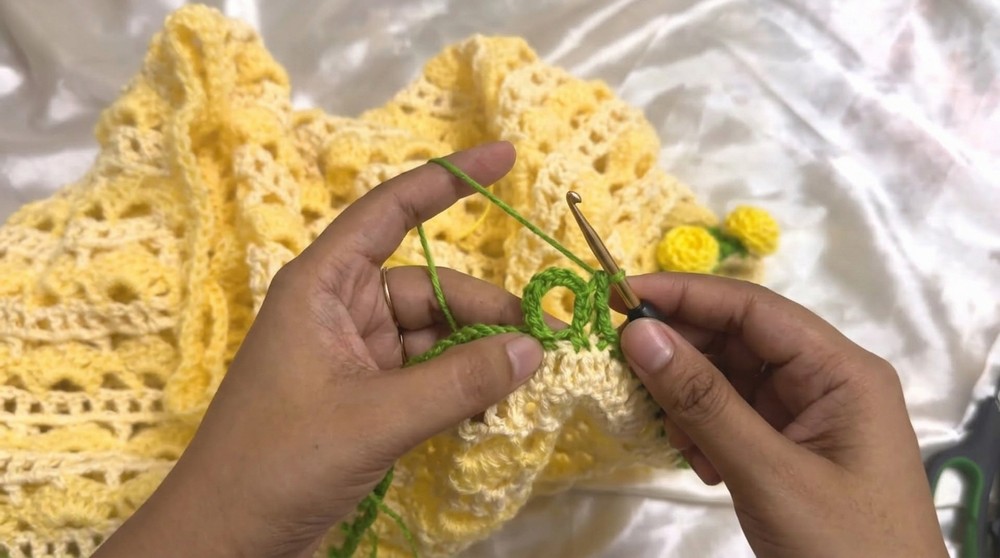
Step 11: Adding Floral Embellishments
- Creating the Leaf Base:
- Attach green yarn to the bottom hemline and create loops:
- Chain 5, skip 4 stitches, single crochet into the 5th stitch. Repeat this across the entire round.
- Into each chain loop, work single crochet, half double crochet, chain 3, slip stitch, half double crochet, single crochet to form leaves.
- Attach green yarn to the bottom hemline and create loops:
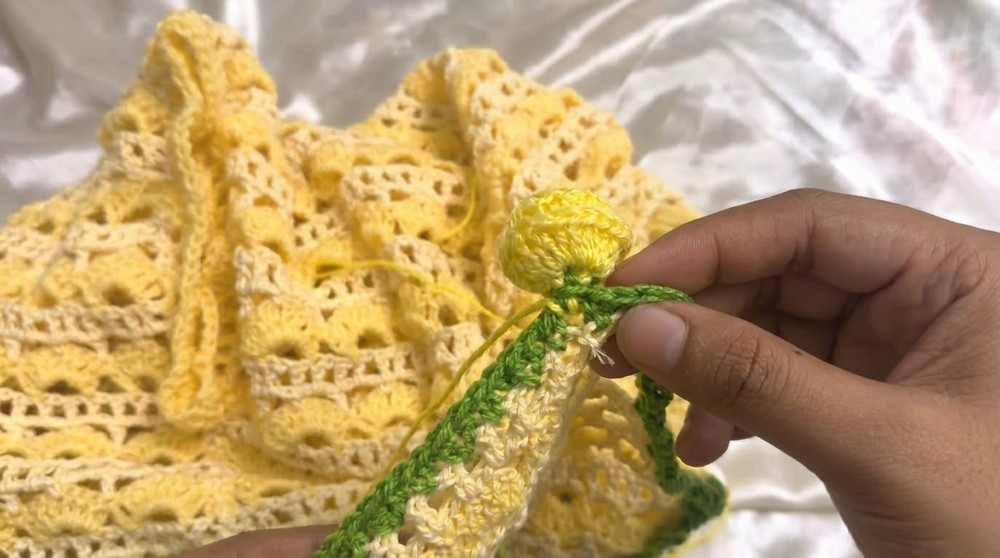
- Making Roses:
- Use lemon yellow yarn. Attach yarn between two leaves on the hemline.
- Chain 15, skip the first 3, and work 3 double crochets in each consecutive chain.
- The stitches will naturally curl into a rose shape as you finish.
- Sew the rose tightly, and attach it between leaves along the bottom.
Tutor’s Suggestions:
- Use lightweight cotton yarn for a breathable look, especially for summer wear.
- Customize the combination of colors for a more personalized and unique touch!
- Make the roses optional if you want a more minimalistic design.
Uses
- Ideal for casual summer outings or beachwear.
- Stylish layering piece for modest and comfortable fashion.
- A wonderful handmade gift for friends and family.
TIP: When working the roses, always leave a long tail for sewing to avoid uneven edges. This saves time and ensures a professional finish.
Conclusion:
The Crochet Poncho Bouquet Top is a beautiful addition to any wardrobe, blending style, comfort, and creativity. With its customizable features and detailed stitching patterns, this project is ideal for crocheters looking to move from basic to intermediate projects. Whether you wear it for a day out or an evening event, it’s guaranteed to turn heads.

Leave a Reply