

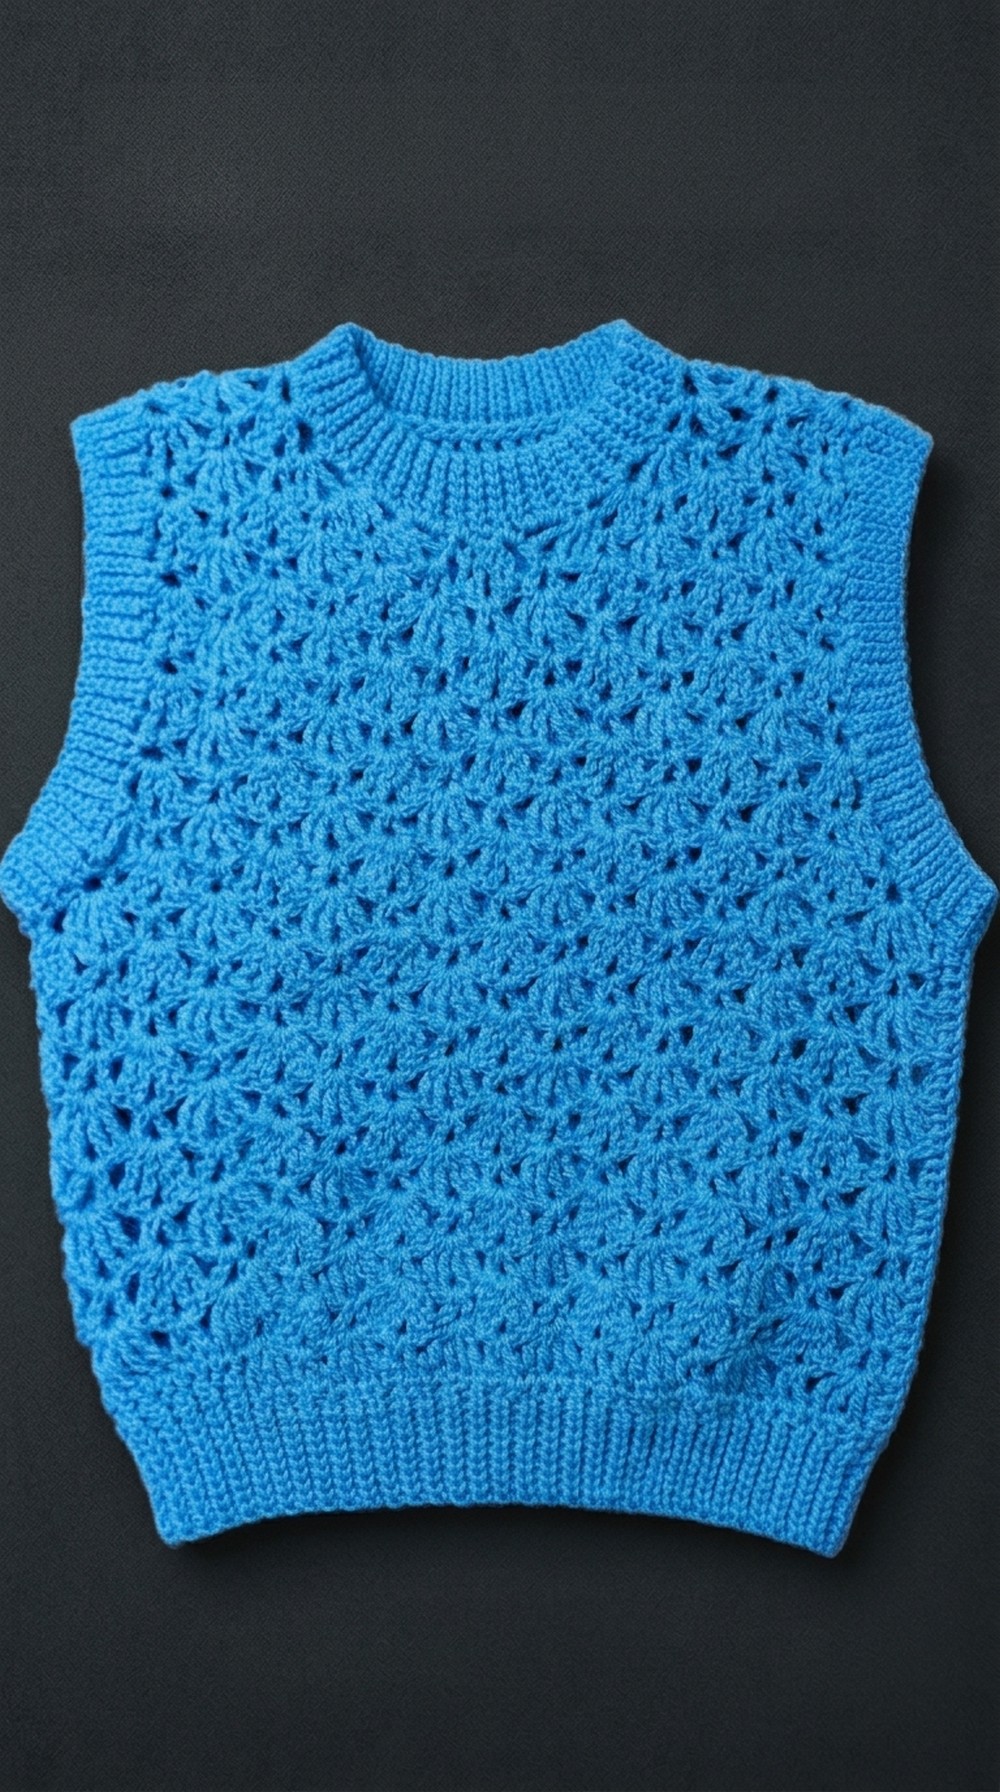
Lightweight Crochet Sweater Vest Pattern for Women

This pattern offers more than just aesthetics—it’s a functional piece that keeps you comfortable without feeling heavy. Its lightweight pattern delivers a breathable yet warm addition to your seasonal attire, while customizable sizing ensures a perfect fit for any body shape. Whether gifting it to a loved one or enhancing your own style, this pattern allows you to work at your own pace, inviting mindfulness with every stitch.
With clear steps and simple instructions, even beginners can create a professional-quality outfit. Elevate your wardrobe with this practical and stylish investment—it’s more than just a garment; it’s an experience of bringing comfort and creativity together.
Materials Needed:
- 4.5 mm Crochet Hook
- Medium-weight yarn (any brand, such as Winter King or an equivalent)
- Scissors
- Yarn needle
- Measuring tape
Skill Level:
Beginner-Friendly to Intermediate. Understanding of basic crochet stitches like double crochet, triple/tripouble crochet, slip stitches, and chaining is required.
Special Features of the Sweater Vest:
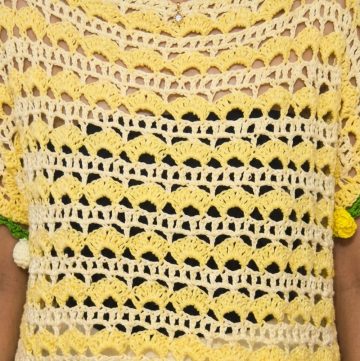
- Uses Shell and V-Stitch Patterns for a modern, textured finish.
- Customizable in Size: Includes guidelines for adjusting measurements (written pattern available for other sizes).
- Clean Ribbing & Edges for a professional look.
- Lightweight and Cozy: Ideal for layering over shirts or dresses in chilly weather.
Instructions
Step 1: Back Panel
- Foundation Chain:
- Start with a slip knot and chain 17. For different sizes, adjust the chain count based on the written pattern.
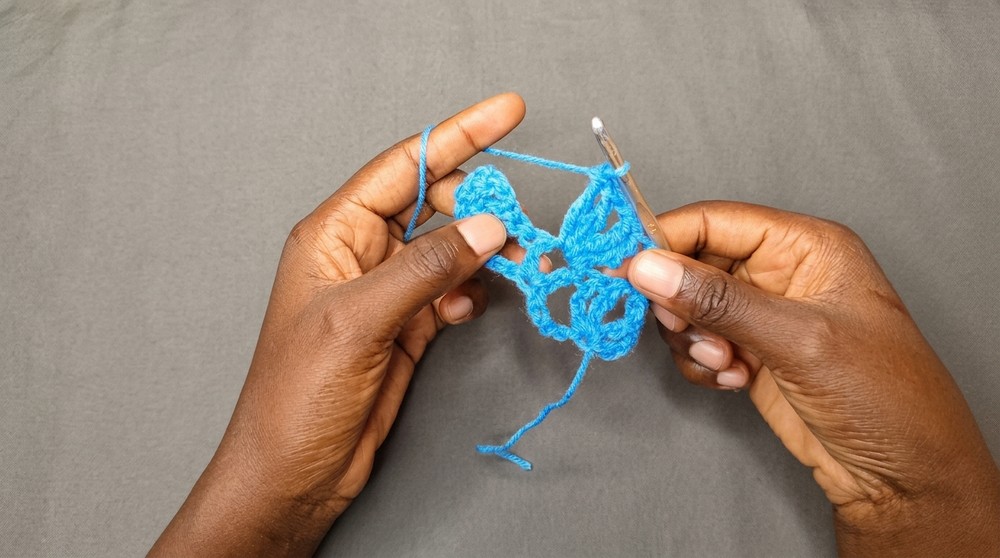
- Row 1: Create the First Pattern (Shells and V-Stitch)
- Yarn over twice and make a tripouble crochet into the 5th chain from the hook.
- Chain 1, create two more tripouble crochets to form a shell in the same space.
- Skip 5 chains, then make a V-stitch (1 double crochet, chain 1, 1 double crochet) in the next chain.
- Skip 5 more chains and end with a shell in the last chain.
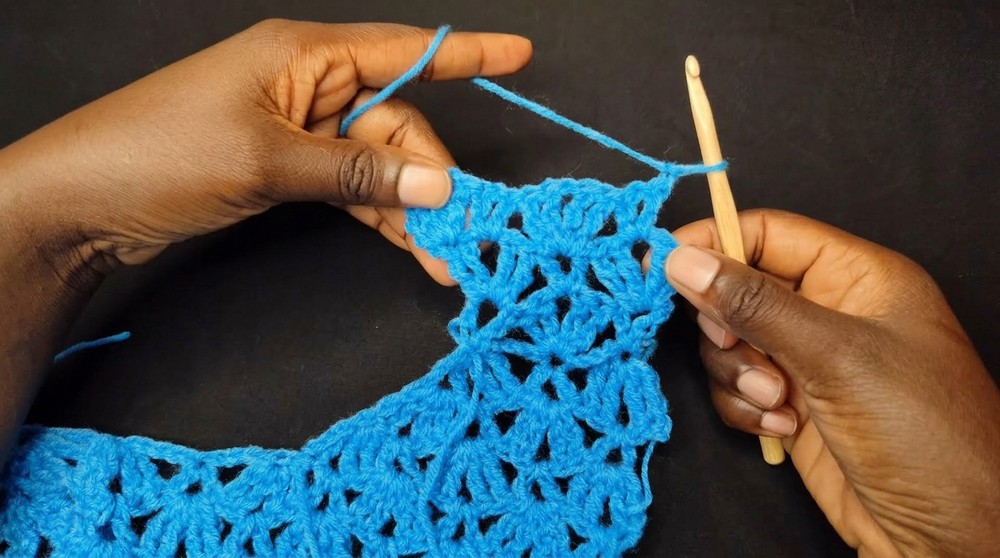
- Row 2: Reverse the Pattern
- Chain 1, turn your work. Slip stitch into the first two stitches, then into the chain-1 space of the first shell.
- Replace the shell with a V-stitch (chain 4, 1 double crochet in the space).
- For the V-stitch in Row 1, place a shell on top.
- Repeat across: replace shells with V-stitches and vice versa.
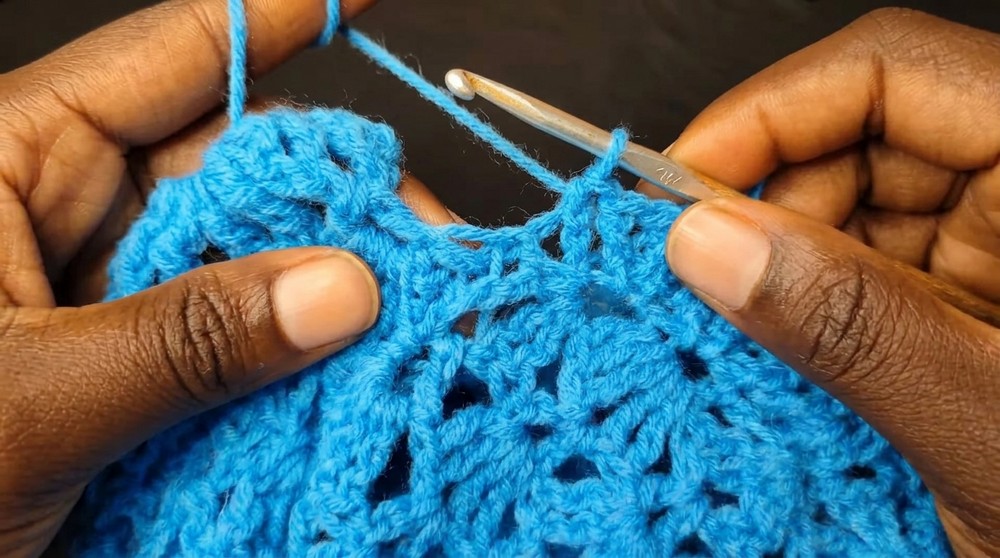
- Row 3-Onwards: Starting Increases for Shape
- Increase is only done on one side to shape the shoulder. To increase:
- Chain 4, turn your work, and place a shell stitch into the first stitch.
- Continue the established pattern (shells on top of V-stitches and V-stitches on top of shells).
- Work increases every other row, focusing on only one shoulder side.
- Increase is only done on one side to shape the shoulder. To increase:
- Repeat Rows & Measure
- Continue following the pattern until the back panel reaches your desired height minus 2 inches for ribbing (e.g., for an 18” height, stop at 16”).
- Note: Always skip working into chain-1 spaces when doing single crochet rows near the ribbing.

2: Ribbing for the Back Panel
- Start the Ribbing:
- Chain 9 at the end of your last stitch on the back panel.
- Work slip stitches back into the chain to create the ribbing row.
- Work Across the Edge:
- Slip stitch into the next two stitches on the back panel.
- Then, turn your work and slip stitch only into the back loops to create that distinct ribbed texture.
- Repeat: Work in two stitches, skip the next on the panel edge, and continue until the ribbing is complete.
3: Front Panel
- Foundation Setup:
- Begin as you did for the back panel. However, the increases are worked along the neckline side only.
- Complete the same row repeats for the front panel as the back panel.
- Shaping the Neckline:
- After 6 rows, work increases only on the inner neckline edges.
- Follow the pattern, ensuring an equal count of V-stitches/shells on both sides of the neckline by the end.
- Joining Both Front Panel Halves:
- Once both sides of the neckline are shaped, join while ensuring symmetry with the back panel’s rows and counts.
4: Joining Back and Front Panels
- Lay the panels on top of each other, wrong sides facing out.
- Use slip stitches to join the sides, leaving space for armholes. Ensure neat alignment.
5: Neckline Ribbing
- Start at any neckline point and chain 6.
- Work slip stitches back into the chain, matching it with the edges of the neckline rows.
- Make 2 slip stitches in the edges of each row, then return as before, creating back-loop-only ribbing.
Step 6: Armhole Ribbing
- Start at the top of the armhole and chain 6.
- Repeat the ribbing process just as done for the neckline.
- Work evenly around the armhole edge, ensuring no tightness to avoid puckering.

Tutor’s Suggestions:
- Yarn Selection: Use medium-weight yarn for structure while maintaining warmth. Blend yarns work well for added durability and softness.
- Sizing Adjustments: Ensure correct panel measurements based on individual body shapes. Avoid working tightly near the armholes for an easy fit.
- Tips for Beginners: Use stitch markers at critical points (e.g., increases or joining points) to keep track of your rows.
Uses
- Perfect for layering over dresses, shirts, or turtlenecks in any season.
- A thoughtful, timeless handmade gift suitable for both casual and formal looks.
- Encourages mindfulness while crocheting—perfect as a relaxing and functional project.
Tip:
When working ribbing, always slip stitch loosely to avoid a tight edge. Loose slip stitches help maintain flexibility and structure for a professional look!
Conclusion:
This crochet sweater vest pattern showcases versatility, warmth, and timeless beauty. Its textured shell and V-stitch pattern paired with the ribbed edges give it a clean and stylish design. Whether you’re making it for yourself or as a thoughtful gift, it’s a piece that will complement multiple outfits and occasions.

Leave a Reply