

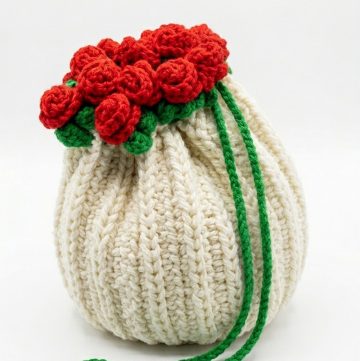
Fresh charm unfolds in this Free Crochet Rectangular Bag Pattern offering a stylish everyday companion with ease and practical appeal, lasting charm each day.
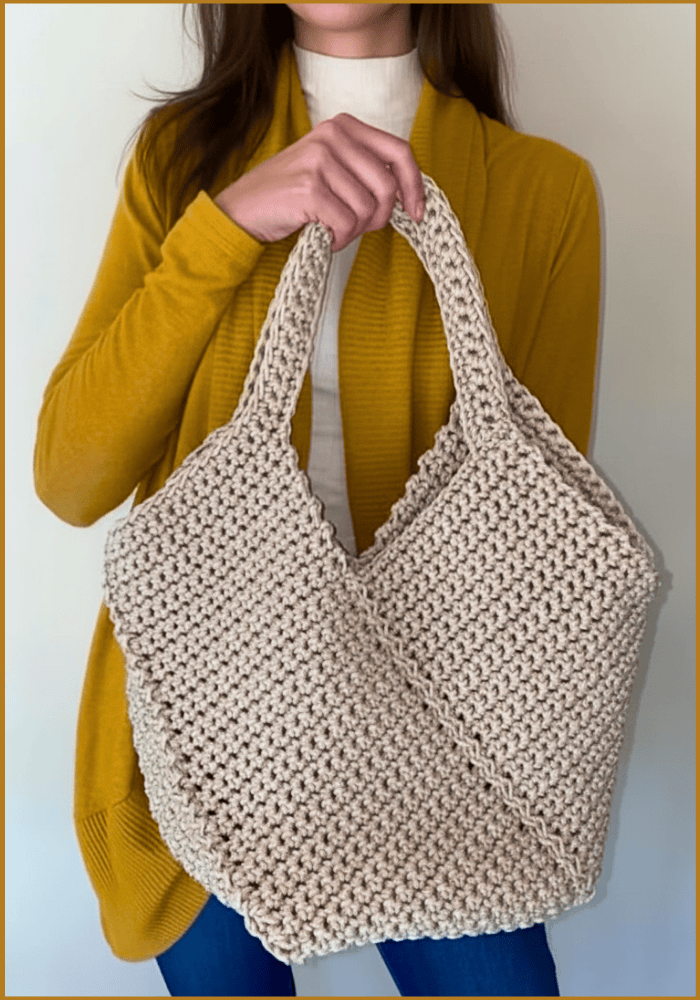
Everyday accessories can carry a quiet charm when shaped with purpose and simplicity, offering both usefulness and subtle style. The Free Crochet Rectangular Bag Pattern introduces a clean, structured form that suits anyone who values order, comfort, and a touch of modern flair in their routine. Its steady silhouette keeps essentials neatly arranged, making it suitable for workdays, casual outings, or moments when light travel is needed.
Warmth Crochet Rectangular Bag Pattern to stay soft
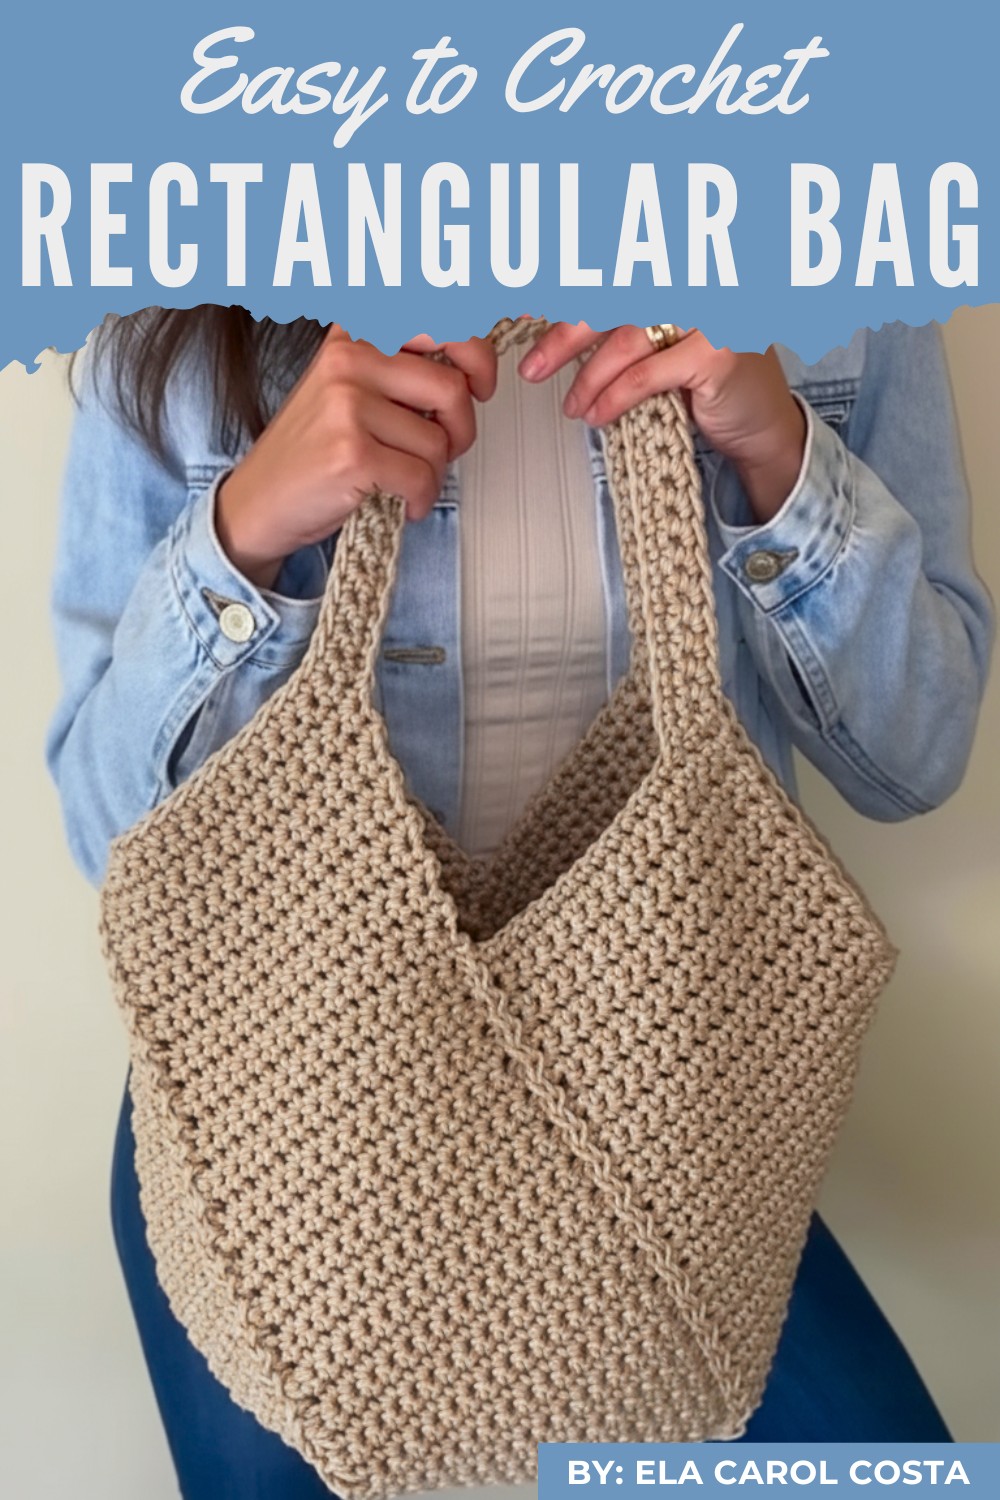
The spacious interior supports books, tablets, small pouches, and personal items without losing its shape, allowing the bag to remain tidy and reliable throughout the day. Soft texture gives it a warm feel, while the rectangular shape adds a polished edge that pairs easily with denim, dresses, officewear, or weekend staples. The lightweight nature ensures it stays comfortable on the shoulder, even during longer walks or busy errands.

With the option to personalize colors and subtle accents, each version can reflect personal style while maintaining the same practical structure. Its balanced design makes it a thoughtful choice for gifting as well, offering both function and understated charm. This rectangular bag combines simplicity, comfort, and everyday usefulness, making it a dependable piece that fits naturally into a wide variety of wardrobes and lifestyles.
Step-by-Step Guide: How to Crocheted Bag
Materials Needed
- Yarn:
- 3 mm Náutico yarn in cream color (or any yarn of your choice).
- Crochet Hooks:
- 7 mm crochet hook (primary work).
- Tapestry Needle: For sewing the pieces together.
- Scissors: For cutting yarn.
Step-by-Step Instructions
1. Make the Rectangles
a. First Rectangle with Handles
- Start by making 17 chain stitches, but only use 16 chain stitches, leaving the extra stitch to turn the work.
- Begin single crochet stitches in the second chain and work 16 single crochets across the row.
- Turn and continue crocheting 16 single crochets for 47 rows.
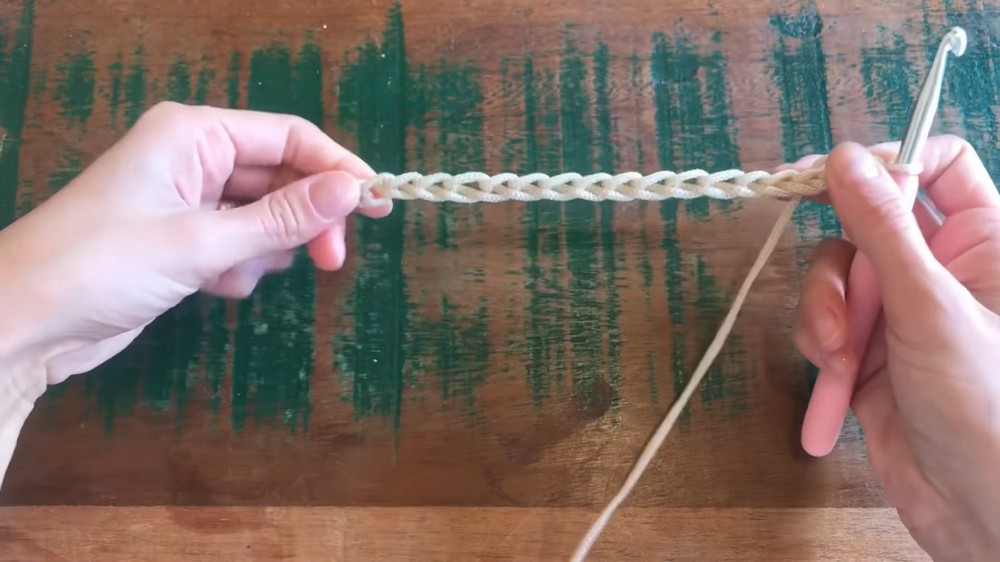
b. Create the Handles
- After completing the 47 rows, make the handles by adding 30 chain stitches to the end of the row.
- Turn the work and crochet single stitches along the chain stitches (one single crochet for each stitch) and then continue across the rectangle.
- Add two more rows of single crochet for the handles, bringing the total to 50 rows.
c. Second Rectangle with Handles
- Repeat the process to make another rectangle with handles, identical to the first one.
d. Simple Rectangles Without Handles
- For the base rectangles, crochet the same 50 rows of 16 single crochets, but do not add handles.
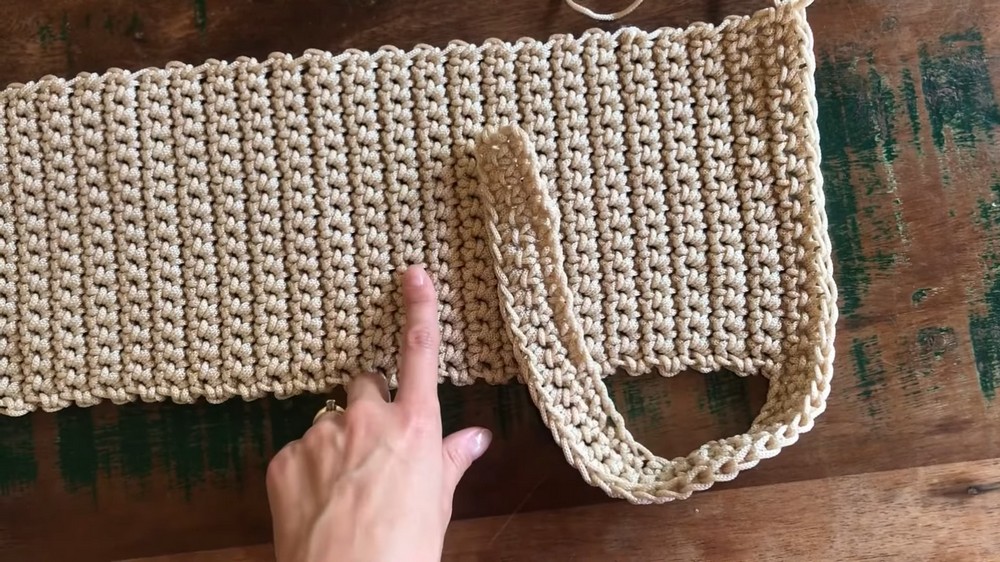
2. Assemble the Bag
a. Sew the First Two Rectangles
- Position one rectangle with handles and one without handles. Align their edges.
- Use yarn from the spool and a tapestry needle to sew them together.
- Use a zigzag slip stitch method:
- Insert the needle into a stitch on one side and pull it across to the other side.
- Sew in a zigzag pattern, alternating between stitches on the left and right sides.
b. Create the Bag’s Bottom
- Continue sewing around the edges of the pieces to form a square bottom.
- The seam will naturally create the bag’s “beak” or base as you stitch all edges together.
c. Attach the Second Pair of Rectangles
- Repeat the process (position, sew, and zigzag stitch) for the remaining two rectangles, ensuring all seams align properly.
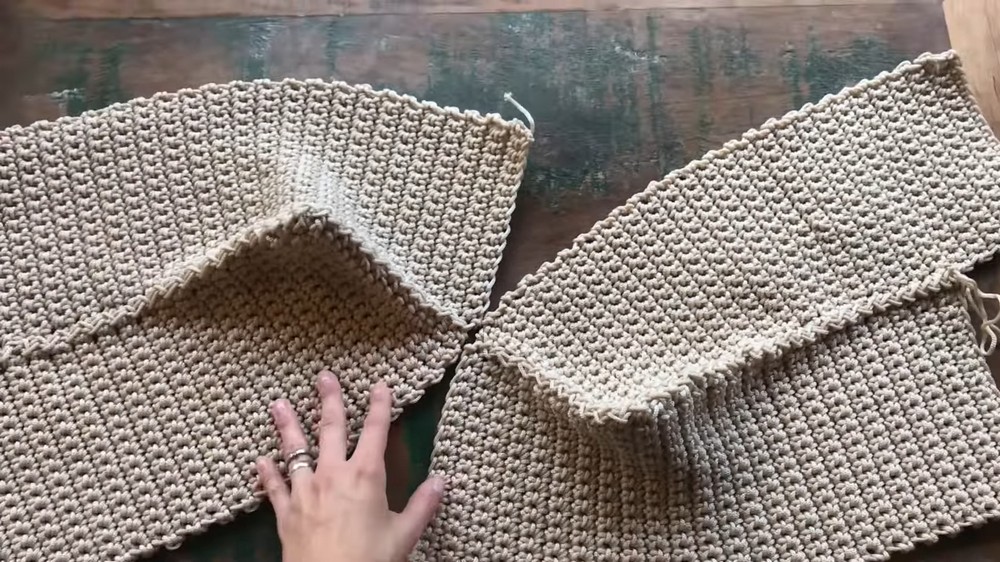
d. Join Both Halves
- Turn one pair of rectangles to the left side and the other to the right side. Align their seams.
- Use the same zigzag stitch method to connect the two halves, working around all edges until the bag is fully joined.
3. Attach the Handles
a. Position the Handles
- Lay the handles across from left to right, ensuring they align properly for balanced carrying.
b. Sew the Handles
- Use a traditional seam technique to sew the straps securely to the bag’s body with a tapestry needle.
- Sew back and forth to reinforce the straps and ensure durability.
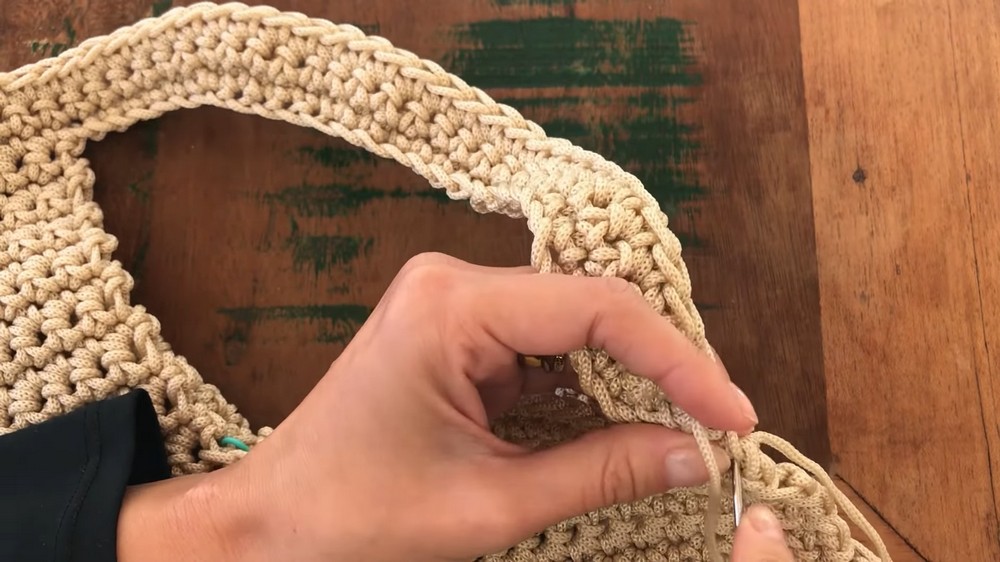
c. Tie Off Loose Threads
- Tie off any remaining threads, trim excess yarn, and hide the knots within the seams for a clean finish.
Special Features
- Simple Design: The rectangular shape and basic stitches make this project approachable and versatile.
- Added Handles: The handmade straps provide functionality while maintaining the elegance of a crocheted design.
- Durable Construction: Sewn seams and reinforced handles ensure the bag’s longevity.
Level of Difficulty
Beginner to Intermediate:
The design uses basic single crochet stitches and a simple pattern. Though easy to follow, the sewing process requires attention to detail for clean assembly.
Tutor’s Suggestions
- Use Markers: Place stitch markers when sewing to ensure alignment and even seams.
- Be Consistent: Count your stitches accurately to avoid uneven rows or seams.
- Customize Materials: Feel free to use yarn and crochet hooks you have at home, as long as you maintain the same rectangle measurements.
Uses and Applications
- Daily Tote Bag: Perfect for carrying small essentials like a wallet, phone, or keys.
- Gift Idea: Personalize the yarn color and size to make unique, thoughtful gifts.
- Beginner’s Craft Project: A great way for beginners to practice stitching and assembling.
Final Tip
Use a light-colored yarn if you’re new to crocheting, as it makes stitches easier to count. Double-check your seam alignment to maintain a clean and professional-looking finish.
Conclusion
This tutorial provides clear guidance to help you create a beautiful crocheted bag. The straightforward design, combined with helpful tips from Carol, allows you to explore your creativity while crafting a functional accessory.
Leave a Reply