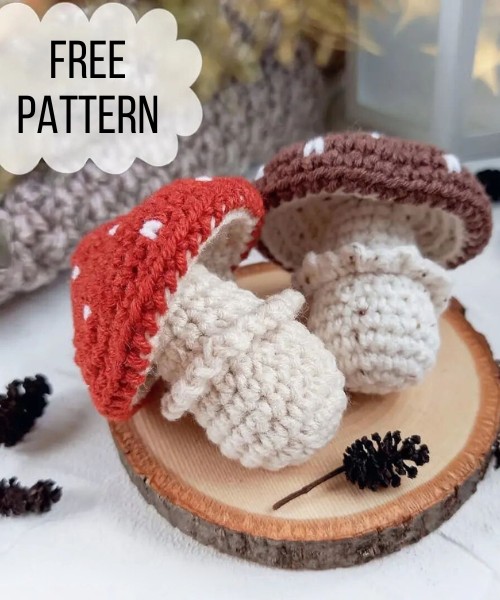
Start making your own crochet mushroom with this easy guide. It has every step you need to know. You will make a mushroom that looks cute and simple with a body that is light white or beige. The top of the mushroom is a pretty red-brown color. Just follow the steps in this guide, and you will make a sweet little crochet mushroom to keep or give away.
Free Crochet Mushroom Pattern
Materials
Yarn:
- Alize Cotton Gold: 36, brick red (330m/100g)
- YarnArt Jeans: 5, cold beige (160m/50g) • YarnArt Jeans: 01, white (160m/50g)
Tools:
- Crochet hook 2-2,5 mm
- Yarn needle
- Scissors
- Stitch markers
- Fiberfill
Abbreviations
- mr - magic ring ch chain stitch sc-single crochet
- inc increase
- dec - decrease
- FLO front loops only
- BLO - back loops only
- (...) x n repeat the section in brackets n times
- The number in brackets at the end of each round shows the total number of stitches

Use cold beige yarn.
- Rnd 1: 7 sc in a mr (7)
- Rnd 2: 7 inc (14)
- Rnd 3: (1 sc, inc) x 7 (21)
Stem
- Rnd 4-6: 21 sc (21) - 3 rounds
- Rnd 7: (5 sc, dec) x 3 (18)
- Rnd 8: 18 sc (18)
- Rnd 9: BLO - 18 sc (18)
- Rnd 10: (7 sc, dec) x 2 (16)
- Rnd 11: 16 sc (16)
Begin stuffing the stem and continue stuffing as you go.
- Rnd 12: 3 sc, dec, 6 sc, dec, 3 sc (14)
- Rnd 13: 14 sc (14)
- Rnd 14: (5 sc, dec) x 2 (12)
- Rnd 15: FLO - (1 sc, inc) x 6 (18)
- Rnd 16: BLO - 1 sc, inc, (2 sc, inc) x 5, 1 sc (24)
- Rnd 17: BLO (3 sc, inc) x 6 (30)
- Rnd 18: BLO-2 sc, inc, (4 sc, inc) x 5, 2 sc (36)
- Rnd 19: BLO - (5 sc, inc) x 6 (42)
Fasten off and weave in the yarn end.
Attach the yarn to the round with front loops (round 9) and work the following: (ch 1, 1 sc, ch 2, 1 sc) to the end of the round. Slip stitch into the first stitch of the round. Fasten off and weave in the end.

Cap
Use brick red yarn. You can embroider the spots on the cap, or you can crochet them while making the cap. Make a spot as follows.
Insert the hook into the next stitch and make a yarn over with white yarn. There are two loops on the hook: white and brick red.

Switch to brick red yarn, yarn over and pull the yarn through these loops. This creates V-shaped spots.

Make spots in a chaotic order.
Start making spots in the third round and crochet them each odd round in a checkerboard pattern. If you want, you can make spots in each round, but not in the last one.

- Rnd 1: 5 sc in a mr (5)
- Rnd 2: 5 inc (10)
- Rnd 3: (1 sc, inc) x 5 (15)
- Rnd 4: 1 sc, inc, (2 sc, inc) x 4, 1 sc (20)
- Rnd 5: (3 sc, inc) x 5 (25)
- Rnd 6: 2 sc, inc, (4 sc, inc) x 4, 2 sc (30)
- Rnd 7: (5 sc, inc) x 5 (35)
- Rnd 8: 3 sc, inc, (6 sc, inc) x 4, 3 sc (40)
- Rnd 9: (19 sc, inc) x 2 (42)
- Rnd 10: 42 sc (42)
Fasten off and leave a long tail for sewing.
The spots are made each odd round.
This is how the cap looks from the inside.

Assembly
Sew the cap to the stem. Sew it, inserting the needle into half loop of both pieces.
Do not stuff the cap.
Fasten off and hide all the yarn ends.

This pattern is a work of authorship.
It is a free pattern.
When publishing a picture of a finished toy.

Free crochet pattern by @amiany.design


Leave a Reply