

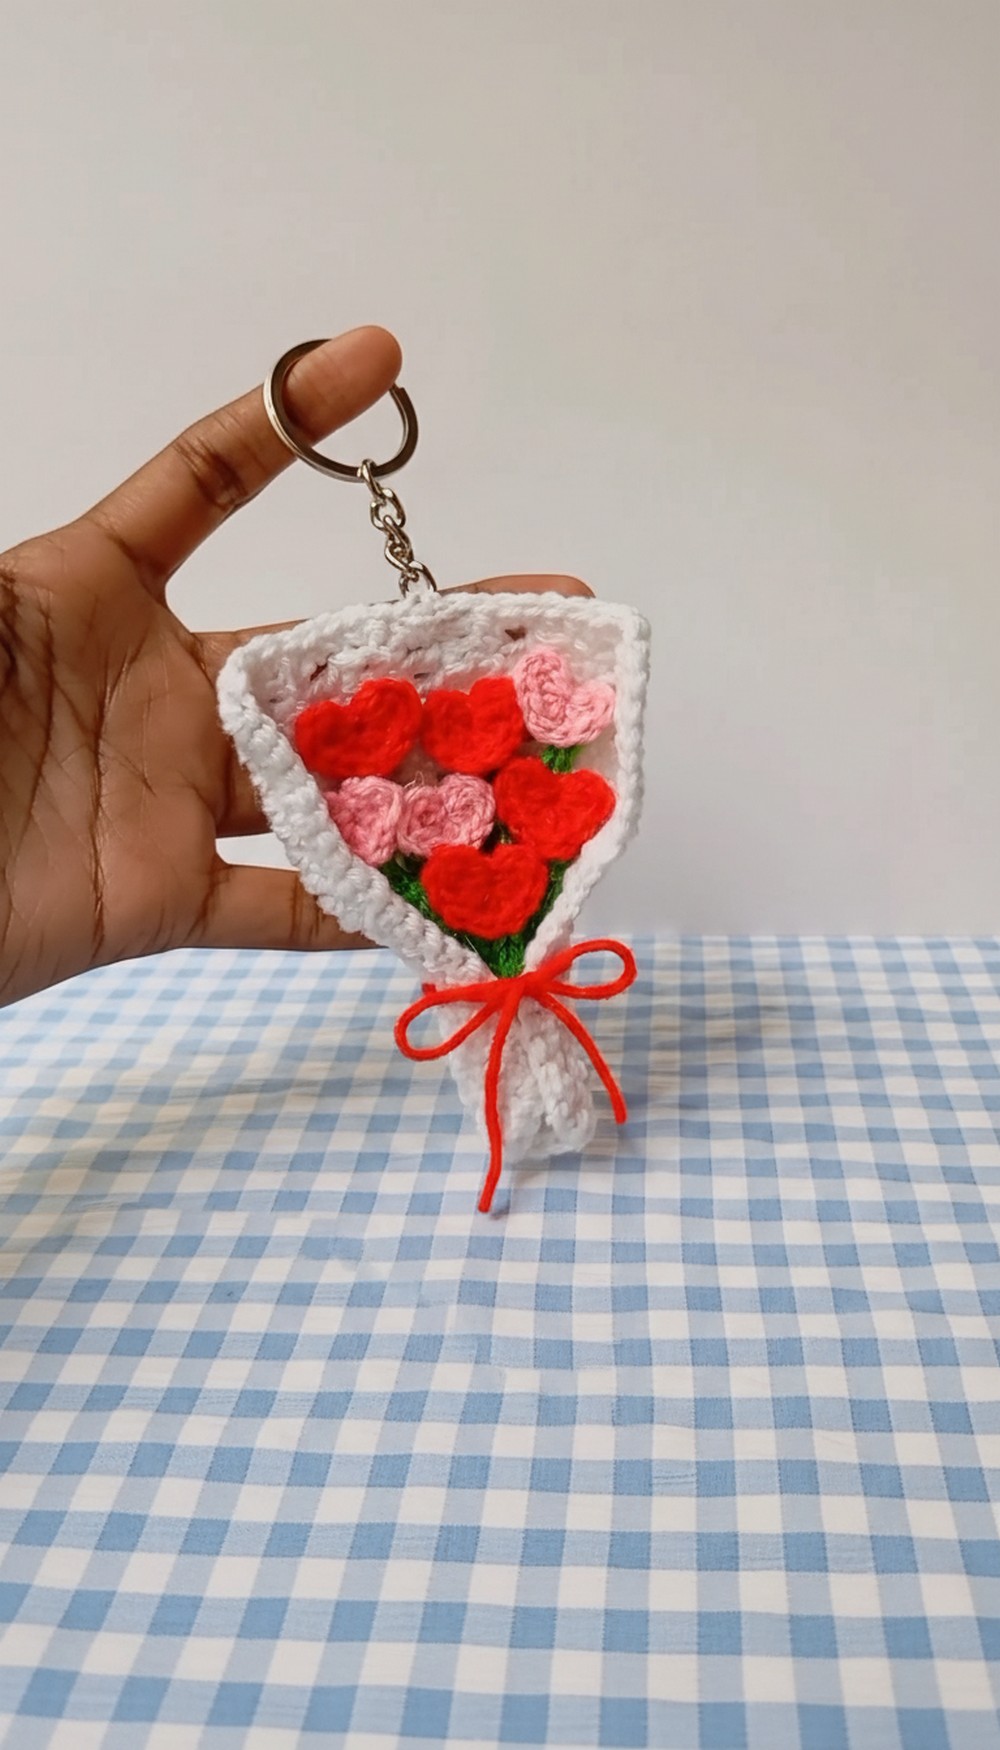
Fill your moments with this crochet heart bouquet pattern that offers warmth and charm for gifting or decorating on any special occasion.
This adorable crochet creation is filled with charm and warmth, bringing a touch of love to any occasion. The crochet heart bouquet pattern is perfect for gifts, home décor, or as a thoughtful keepsake, adding a unique and delicate vibe to your space. The blend of soft textures and vibrant colors makes it a symbol of affection, ideal for Valentine’s Day, anniversaries, or even baby showers.
Charming Crochet Heart Bouquets for Every Special Occasion
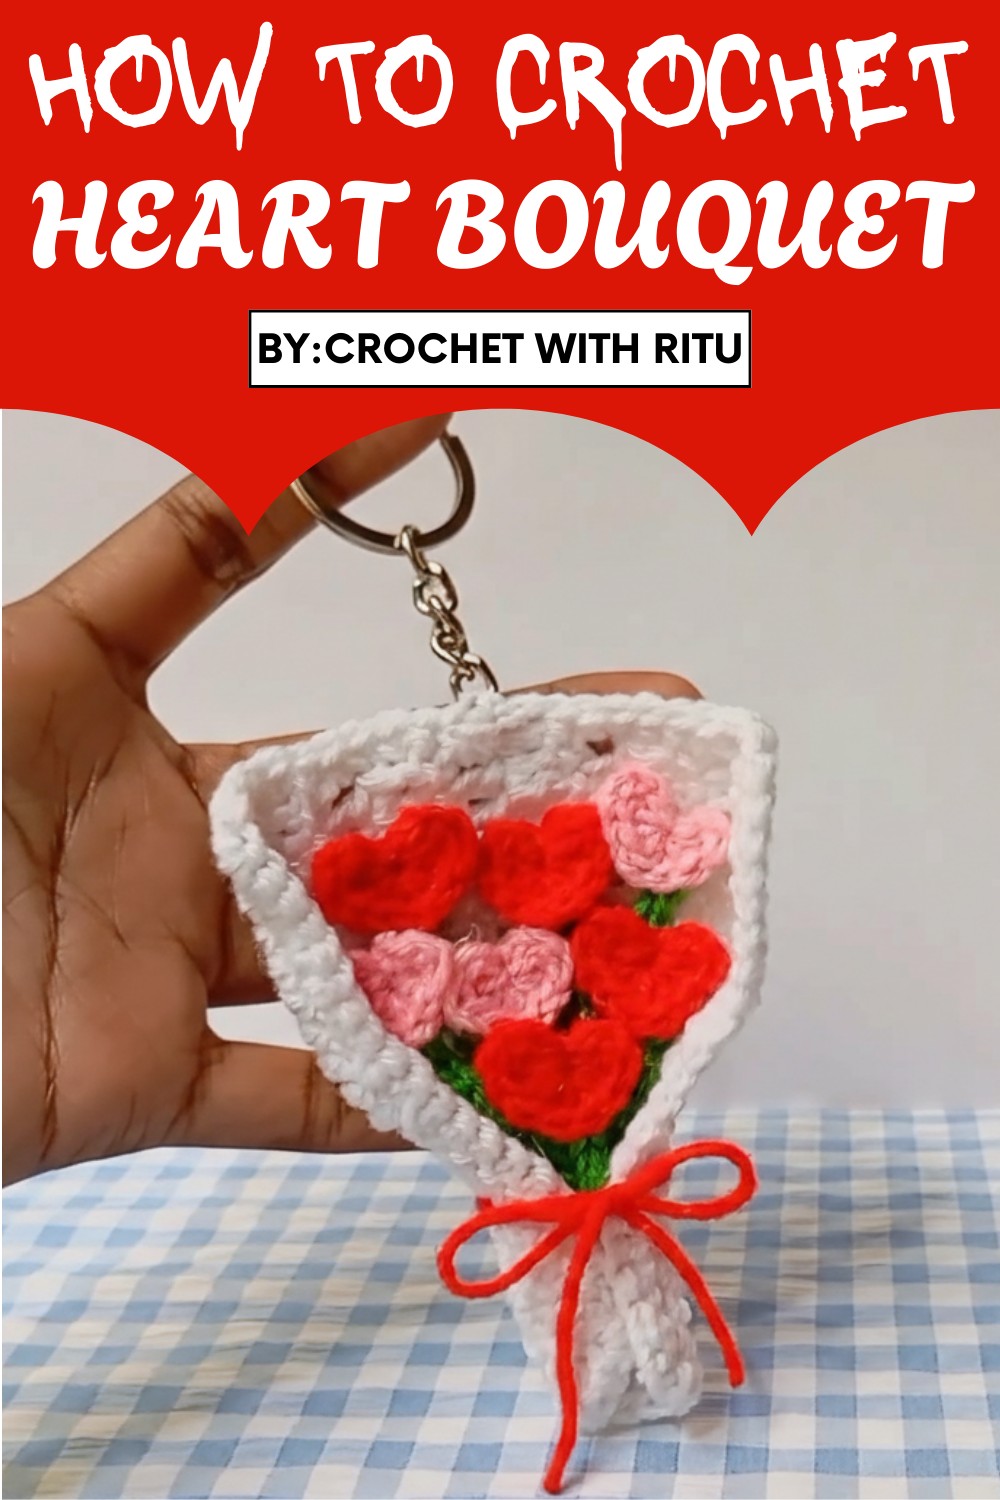
Whether it’s placed in a vase, used as a table centerpiece, or a heartfelt handmade gift, this bouquet is versatile enough to suit any setting. Its petite size and intricate details make it stand out as a lovely addition, bringing smiles everywhere it goes. Simple yet meaningful, it’s a wonderful project that speaks the language of love without ever uttering a word. This design isn't just beautiful—it's a tiny expression of care, carefully crocheted with intention, to brighten anyone's day.
Materials
- Yarn:
- 4-ply yarn in red or any color for hearts.
- 4-ply yarn in green for stems.
- 4-ply yarn in white for the wrapping paper.
- Crochet Hook: 3 mm
- Tapestry Needle for weaving in ends.
- Hot Glue Gun (or any strong craft glue).
- Keychain Ring
- Scissors
Key Abbreviations (US Terminology)
- ch: chain
- sc: single crochet
- dc: double crochet
- hdc: half double crochet
- sl st: slip stitch
- MC: magic circle
Special Notes
- Work tightly for better structure and sturdiness.
- Weave in loose ends carefully to avoid unraveling.
- Keep glue usage on the back of the piece only where it won't be visible.
- Adjust colors to your preference for customization.
Pattern Instructions
Mini Crochet Heart
Step 1: Magic Circle and Setup
- Using red yarn, create a Magic Circle (MC).
- Ch 2 (counts as the first stitch).
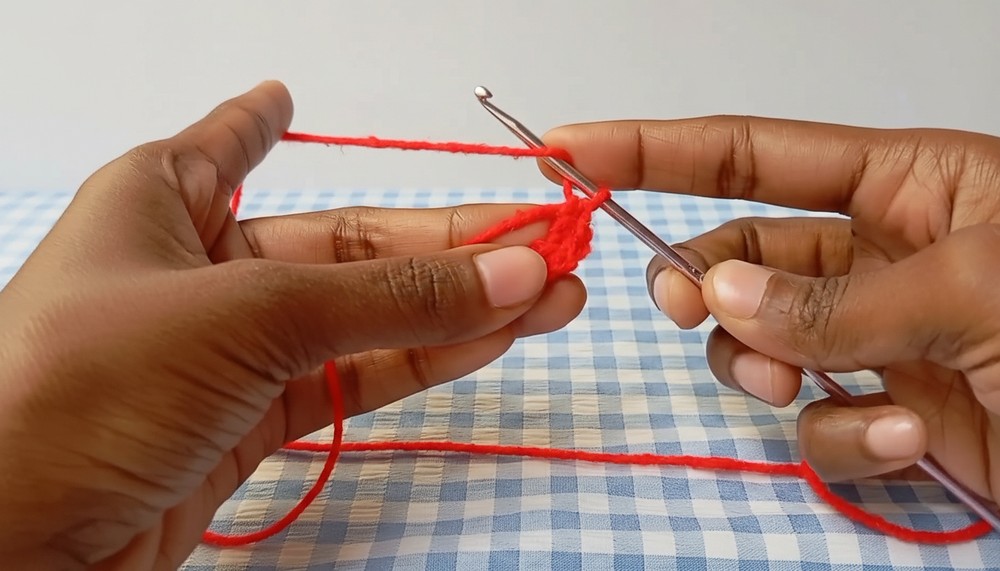
Step 2: Crochet the Heart Shape
- Into the MC, work the following stitches:
- 1 dc
- 2 hdc (one after another)
- 1 dc
- 2 hdc
- 1 dc
- Pull the yarn tail of the magic circle tightly to close it. The stitches will naturally form a heart shape.
Step 3: Finishing the Heart
- Ch 2, then work 1 sl st into the magic circle base to complete.
- Gently pull the yarn to tighten and shape the heart if needed.
- Cut the yarn, leaving a small tail.
- Secure the tail by tying 2-3 knots at the back of the heart but don’t cut it yet — this will be used later to secure the stem.
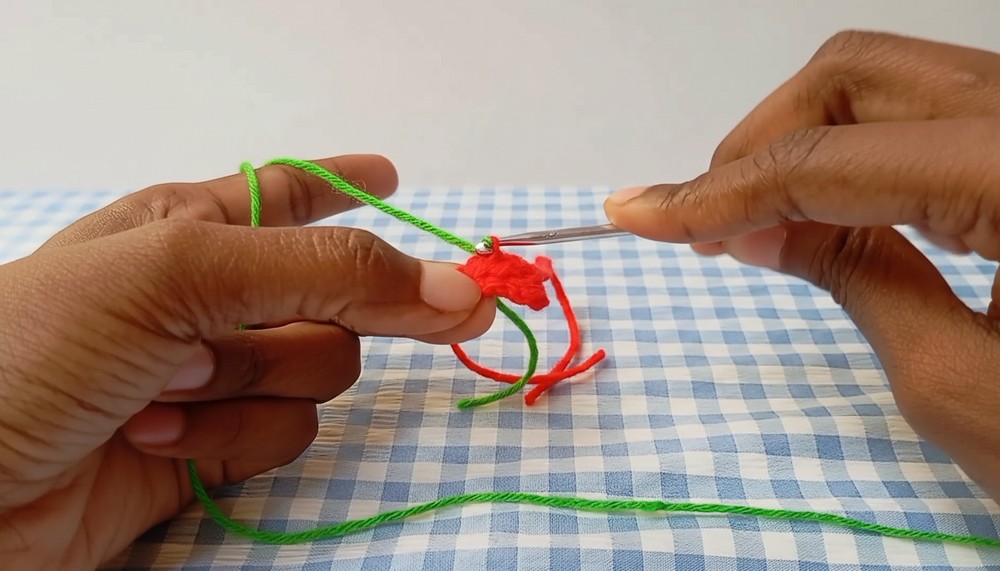
Stem
- Take green yarn and make a slip knot.
- Insert your hook into any stitch at the back of the heart (preferably the center stitch near the bottom point of the heart). Pull up the green yarn.
- Ch 11.
- Skip the first ch, and work sl st into the second chain from the hook. Continue to sl st into each chain until you reach the base of the heart (10 sl sts in total).
- Secure the stem by working a final sl st into any stitch at the back of the heart.
- Cut the yarn, leaving a small tail. Secure with 2-3 knots but avoid cutting the yarn too close to the knot. Leave a small length for neatness.
Making the Wrapping Paper
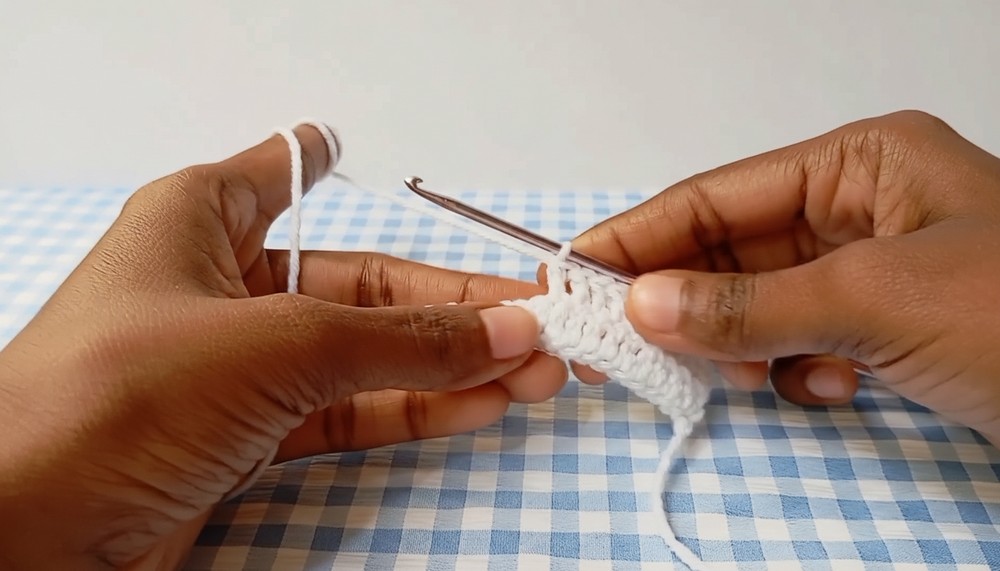
Step 1: Foundation Chain
- Using white yarn, create a slip knot, and ch 21.
Step 2: First Row
- Skip the first chain and work:
- 10 sc into the next 10 stitches.
- 10 dc into the remaining 10 stitches.
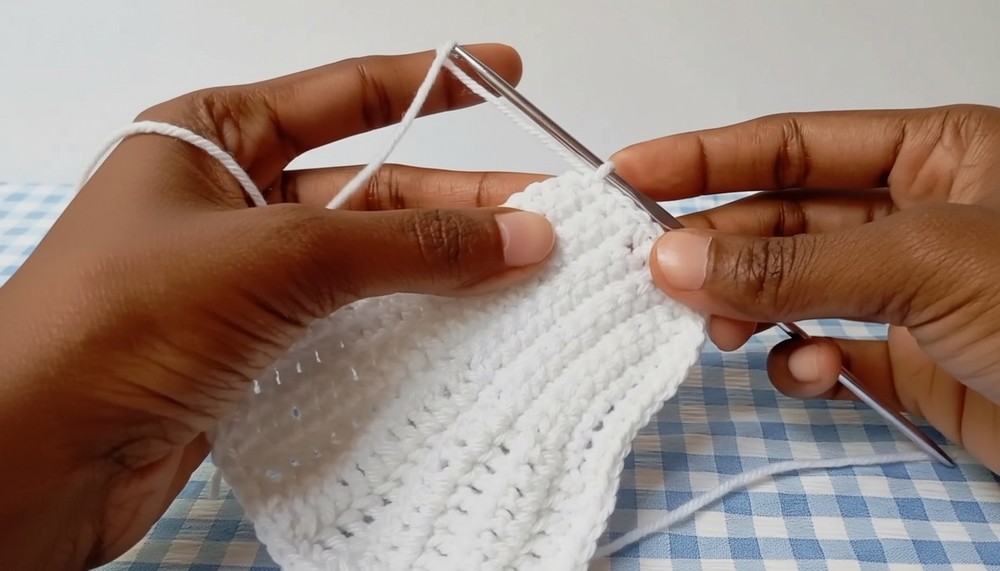
Step 3: Repeating Rows
- For the second row:
- Ch 2 if the row ends with dc, or ch 1 if the row ends with sc, then turn your work.
- On top of each dc, work dc.
- On top of each sc, work sc.
- Repeat this sequence until the rectangle has 10 rows total.
Step 4: Adding Finishing Border
- Ch 1, then work one sc in each stitch along all sides of the rectangle.
- For uneven edges (such as the sides of the rows), insert your hook into any available space or gap, and work a sc to ensure an even edge.
- Sl st to the first stitch to join, then cut the yarn, leaving a tail for weaving in.
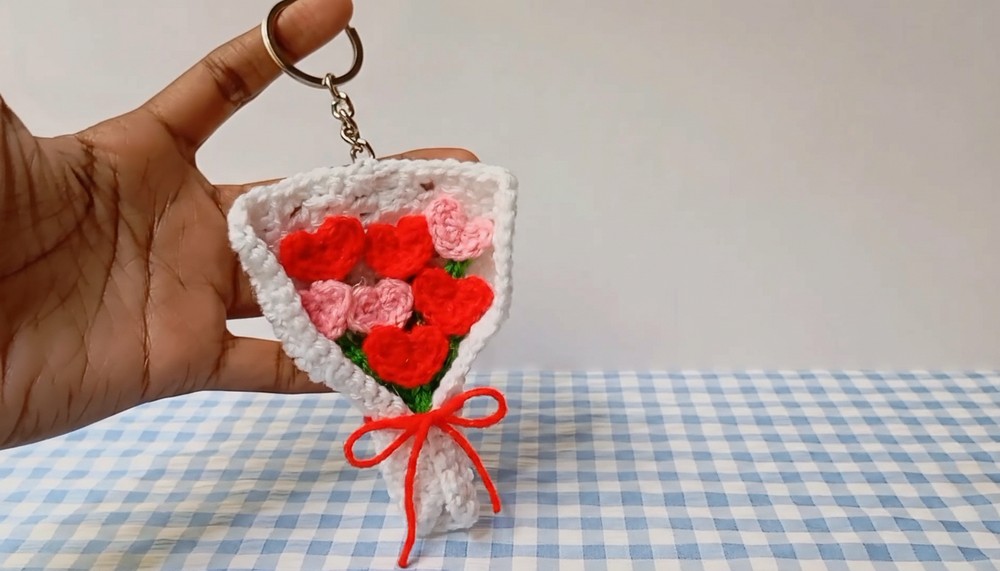
Assembling the Bouquet
- Arrange 6-7 completed heart flowers on the wrapping paper. Position them any way you like.
- Use the glue gun to attach the hearts securely to the wrapping paper.
- Fold the wrapping paper as shown:
- Wrap the left side slightly over the flower stems.
- Then, fold the right side over the stems and secure both edges with glue.
- Tie a piece of yarn around the bouquet for decoration — create a neat bow and trim any excess yarn.
Adding the Keyring
- Thread a tapestry needle with white yarn, and attach it to the top (center) of the bouquet.
- Insert the needle through the keychain ring, and then secure it by threading back into the same area of the bouquet.
- Repeat this process 2-3 more times for durability.
- Tie 2-3 knots to secure the yarn and hide any remaining tails by weaving them into the bouquet stitches.
Conclusion
Your adorable crocheted heart bouquet keychain is now ready! This pattern creates a lovely gift or charming keepsake that is sure to bring smiles.
Pattern Correction and Notes
- Ensure the heart shape forms evenly by pulling the magic circle tightly and shaping the yarn correctly.
- For beginners, practice the magic circle technique beforehand.
Tips
- Use stitch markers to mark where you’ll attach the stem for uniformity across all hearts.
- If hearts appear loose, block them using light steam to ensure they hold their shape.
- Colors can be customized to match your personal preferences or thematic holidays!


Leave a Reply