

Explore our cozy collection of Crochet Festive Bear Amigurumi! Imagine a group of adorable, cuddly bears, each one dressed up for a different festive occasion. From the twinkling lights of Christmas, with bears in little Santa hats and scarves, to the spooky fun of Halloween, where bears might don tiny witch hats or pumpkin costumes.
Crochet Festive Bear Amigurumi Patterns
There's a bear for every celebration, bringing joy and a sprinkle of festive spirit into your home. Whether you're a crochet beginner or a seasoned expert, these patterns will guide you through creating your very own bear buddies, perfect for decorating, gifting, or just for a special cuddle during the holidays.
Easy Crochet Wedding Bear Pattern
Enjoy the essence of true love with the adorable Crochet Wedding Bear Amigurumi Pattern. Taking your crocheting skills to a heartwarming celebration, this pattern guides you through creating a charming bear couple decked out in their wedding finest.
Whether it's the elegant tuxedo for the groom or the beautiful gown for the bride, this project is perfect for seasoned crocheters looking for a sentimental challenge. Accompanied by step-by-step instructions, this pattern not only lets you craft unique wedding gifts or keepsakes but also allows you to customize accessories for a personal touch.
Materials
- 100% acrylic yarn (200 m / 50 g) - black color
- Mercerized cotton thread (350 m / 100 g) - black color (optional)
- 100% cotton yarn (150 m / 50 g) - ivory and green colors
- 2.0 mm crochet hook
- 1.5 mm crochet hook (for optional thread)
- 1 button for the tuxedo
- 1 button for the wedding dress
- Scissors
- Sewing needle
Abbreviations
- ch = chain
- sc = single crochet
- st = stitch
- inc = increase
- dec = decrease
- sl st = slip stitch
- dc = double crochet
- tr = treble or triple crochet
- (...) = repeat the instructions in brackets the given number of times
- [...] = total number of stitches
Making the Tuxedo
Body:
- Row 1: Start with 49 ch.
- Row 2: sc in the next 48 st, starting from the second chain from the hook. [48]
- Row 3-9: sc in all 48 st. [48]
- Row 10: 1 ch, sc in next 8 st, dec, repeat (sc in next 3 st, dec) 6 times, finish with sc in next 8 st. [41]
- Row 11: 1 ch, sc in next 19 st, dec, sc in next 20 st. [40]
- Row 12-13: Continue decreasing as instructed to shape the tuxedo.
Foreparts and Back:
- For the foreparts, follow the pattern from Row 14 to Row 20, crocheting two mirrored parts.
- Crochet the back of the tuxedo by leaving 5 stitches unworked on both sides for sleeves and continuing with instructed stitches for rows, shaping the back.
Assembly:
- Join the foreparts and the back as detailed, starting from Row 21 to Row 23, adjusting for the fit and adding a button loop.
Finishing Touches:
- Embellish the tuxedo with a contrasting yarn or a different texture, crocheting along the edges and making necessary decreases for a polished look. A buttonhole loop is also added for closure.
This crochet project will help you create a memorable keepsake for wedding celebrations or a sentimental gift. Follow the detailed instructions, and don't hesitate to infuse your personal touch with colors or additional accessories to make each bear uniquely special.
Crochet Mini Wedding Bears
Introduction to Crochet Wedding Mini Bear Amigurumi Pattern
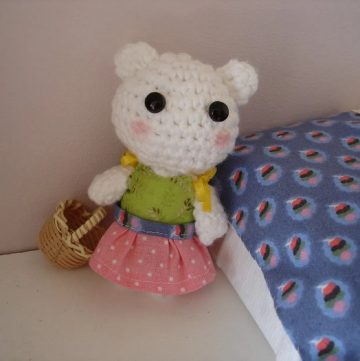
This enchanting Crochet Wedding Mini Bear Amigurumi Pattern is perfect for creating tender mementos; these miniature bears stand at a delightful 4.5 inches from the bottom to the top of their ears, making them ideal for adorning wedding cakes or serving as unique gift tags. The pattern focuses on creating a charming duo, complete with wedding accessories like a top hat, bow tie, bouquet, and veil. Although compact, these bears are rich in detail and offer a heartfelt way to celebrate love and companionship.
Materials
- Small amounts of green worsted-weight yarn
- Various colors of yarn (purple, pink, baby yellow) for the flowers
- Black worsted-weight yarn for the top hat and bow tie
- Crochet hook (size used for making the bear)
- A small amount of crinoline or lace (optional size, the example given is 24" long, 8" wide)
- 3 bobby pins (for attaching the bow tie, flowers, and veil; can sew on instead)
- Sewing needle and regular sewing thread
Abbreviations
- st = stitch
- sc = single crochet
- ch1 = chain one
- sl st = slip stitch
- hdc = half double crochet
- BLO = back loops only
- FLO = front loop only
- 2tog = crochet 2 stitches together
- f/o = finish off
Making Process
Top Hat:
- Start with a magic circle of 6 sc.
- Increase to 12 sc.
- Follow a pattern of 1sc in the next 3rd, then 2sc in the next st to reach 15 stitches.
- Sc in the BLO for one row.
- Continue 1 SC in each stitch for 4 rows.
- Increase in each of the FLO to double the number of stitches to 30, slip stitch in the next st, and finish off, leaving a long tail if sewing to the head is desired.
Bow Tie:
- Chain 11, then 1sc in each ch starting from the 2nd ch from the hook.
- Skip the first ch, 1sc, in each of the remaining stitches.
- Fold the piece in half and slip-stitch the ends together.
- Tighten and wrap the center yarn around the middle tightly, then secure and weave in the ends.
Bouquet:
- Start with a chain of 8.
- Switch between SC and hdc as instructed, creating a base for the flowers.
- Add in about 5 or 6 French knots with the first color, filling in with the other colors as needed.
Veil:
- Begin with a chain of 14, then hdc in each chain starting from the 3rd ch from the hook.
- Add flowers to the top piece if desired, and then prepare the crinoline as specified.
This concise and sweet pattern allows crocheters to cherish the wedding season with a handmade token of love. Whether it’s for adorning the top of a wedding cake or as an addition to wedding decor, these mini bears bring a touch of whimsy and warmth.
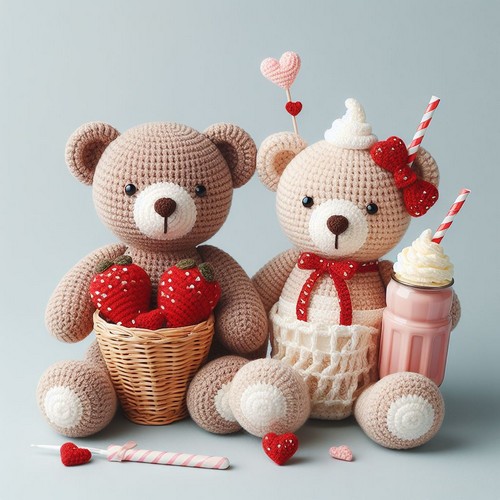
You can also customize these Festive Bear Amigurumi to your desire. You Can Follow These AI-Generated images also.


Leave a Reply