

Put your hands on our cozy collection of Crochet Bear Rattle Amigurumis! These cuddly little bears are the perfect combination of a soft cuddle friend and a fun rattle to shake, making them ideal first toys for babies.
Crochet Bear Rattle Amigurumi Patterns
Each bear is crocheted with love, featuring a gentle rattle sound that delights the little ones and a soft, huggable body that's just right for snuggly moments. With their cute faces and cuddly shapes, these bear rattles are waiting to make playtimes and naptimes extra special. Whether you're looking for a heartfelt gift or a cheerful addition to a nursery, our crochet bear rattles are sure to bring smiles and happiness.
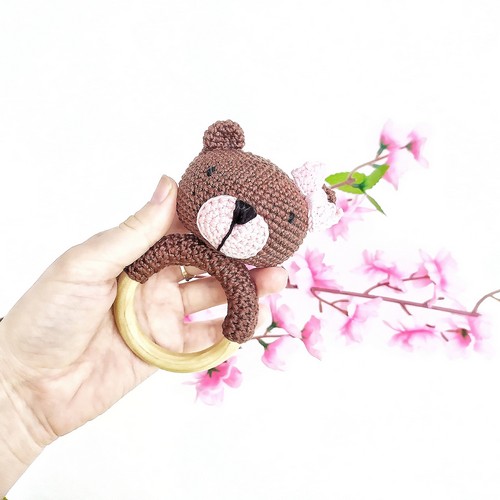
Easy Crochet Little Bear Rattle

Making this crochet bear rattle amigurumi is a delightful project that offers a fusion of coziness and charm, perfect for a handmade gift or a cuddly toy for a little one. The design features a soothing rattle sound encased in a soft, bear-shaped amigurumi. Made with colorful yarns and simple stitch techniques, the bear has an endearing snout, a contrasting head, and a striped rattle handle that's comfortable for tiny hands to grasp. The process involves crocheting in the round using basic amigurumi methods to shape the cuddly bear, ensuring each stitch brings the sweet toy to life.
Materials Needed
- 1 skein Catania 437 (brown)
- 1 skein Catania 402 (green)
- 1 skein Catania 105 (white)
- Leftover brown cotton
- Fibre fill
- Crochet hook size 2.5 mm
- Rattle bead
Abbreviations
- mr = magic ring
- ch = chain
- st = stitch
- sc = single crochet
- sl st = slip stitch
- inc = increase (2 stitches in 1 stitch)
- dec = decrease (2 stitches together)
Making Process
Snout:
- Start with white yarn, form a magic ring (mr), and crochet 6 single crochets (sc) into the ring.
- Increase (inc) by making 2 sc in each st around (12 sts).
- Continue with sc, inc six times (18 sts).
- Single crochet around without increasing (18 sts), then fasten off, leaving a tail for sewing. Embroider a nose and mouth onto the snout.
Head:
- With brown yarn, create a mr, and make 6 sc into the ring.
- Proceed to inc by making 2 sc in each st around (12 sts), followed by a series of rounds increasing at regular intervals until you have 54 sts.
- After several rounds of sc, start decreasing to shape the head, ensuring to sew on the snout between rounds 13 and 21, embroider the eyes, and place the rattle bead inside.
- Continue crocheting, alternating between white, green, and brown yarn to create the striped handle part of the rattle.
- Once you've reached the end of the pattern, cut the yarn and thread it through the remaining sts to close the opening.
Ears:
- With white yarn, make a mr with 3 sc, then ch 1 and turn.
- Perform an increase round (6 sts), then ch 1 and turn.
- Continue with the pattern, then change to brown yarn after increasing to 9 sts.
- Shape the ear with an additional increase round (12 sts), crochet along the bottom edge, and sl st to finish.
- Make a second ear and sew both ears onto the head between rounds 7 and 15.
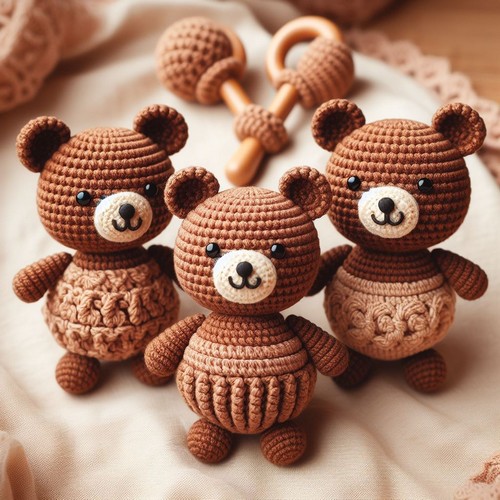
Simple Bear Rattle
This crochet bear rattles Amigurumi pattern is perfect for those looking to craft a handmade and heartfelt gift. The bear rattle combines the soft, huggable features of Amigurumi toys with the playful, sensory stimulation of a baby rattle. Ideal for beginners and seasoned crocheters alike, this project allows you to create a charming and functional toy, complete with a soothing rattle sound that babies are sure to love. With its customizable colors and textures, you can personalize this bear rattle to suit any nursery theme or color palette.
Materials Needed
- Soft cotton yarn in desired colors for the bear body and details (e.g., brown, beige, white)
- Crochet hook suitable for the yarn weight (commonly 2.5 mm to 3.5 mm)
- Polyester fiberfill for stuffing
- A rattle insert or plastic capsule that can be safely enclosed within the toy
- Yarn or tapestry needle
- Stitch marker
- Scissors
Abbreviations
- ch – Chain
- st(s) – Stitch(es)
- sc – Single crochet
- inc – Increase (2 sc in the next st)
- dec – Decrease (sc next 2 sts together)
- sl st – Slip stitch
- MR – Magic Ring
Making Process
- Head and Body: Start by creating the head of the bear with a magic ring and work in rounds, increasing and decreasing as per the pattern to shape the bear's head and body. Remember to fill with polyester fiberfill as you go, and embed the rattle securely inside the body before closing.
- Ears and Facial Features: Crochet small ovals or circles for the ears and sew them onto the head. Use black yarn or embroidery floss to add the eyes, nose, and mouth details. For safety, embroidery or crochet details are recommended over plastic eyes, especially for young children.
- Limbs: Crochet the arms and legs in rounds, attaching them securely to the body. You can opt for a simple cylinder shape or add fingers/toes for more detail.
- Assembly: Once all parts are made and filled as necessary, stitch them together using the yarn or tapestry needle. Ensure all parts are secured tightly to withstand the baby’s play.
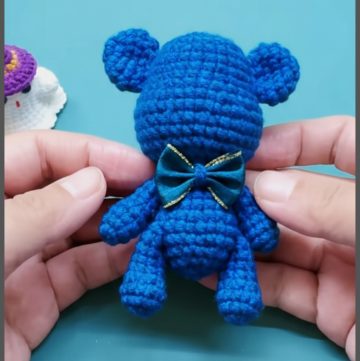
- Final Touches: Add any additional details, such as a bow, a scarf, or belly patch to give your bear rattle character.
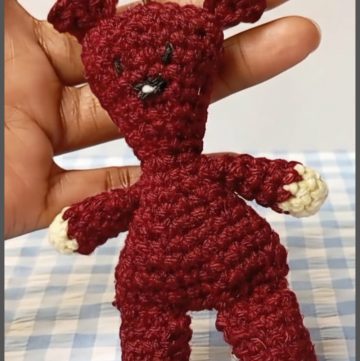
Colorful Crochet Rattle Bear

Craft a delightful bear rattle amigurumi to celebrate a new arrival with a personal touch. This playful creation is not only a charming keepsake but also doubles as an entertaining toy with an easy-grip handle, perfect for little hands. Accentuated with an embroidered cute bear face, this crochet companion is a bundle of joy for babies to enjoy, bringing smiles and giggles to their day. Following simple crochet techniques and incorporating a cheerful design, create a rattle bear that delivers comfort, charm, and fun to any nursery.
Materials Needed
- DK weight yarn (100% Acrylic suggested)
- Crochet hook size 3.5 mm (E)
- Polyester fiberfill stuffing
- Embroidery floss for the face
- A rattle insert for noise
- Yarn needle
- Scissors
Abbreviations (UK Terminology)
- st(s) – Stitch(es)
- ch – Chain
- dc – Double crochet (single crochet in US terms)
- inc – Increase (2 dc in one st)
- dec – Decrease (join two sts together)
- sl st – Slip stitch
- MR – Magic Ring
Making Process
- Head & Body: Begin with the head using a magic ring and dc to form the spherical shape, following sequence rounds to increase and then decrease to shape it. Stuff firmly and add the rattle insert before closing.
- Embroidery: Once the head is shaped, use embroidery floss to create the bear's face—eyes, nose, and kind smile.
- Handle: Crochet the handle, allowing for an easy grip. This will require cylindrical shaping that is comfortable for a baby to hold.
- Assembly: Attach the handle securely to the body of the bear, ensuring a strong bond suitable for rigorous baby play.
- Finishing: As the final step, make sure all elements are securely stitched in place and that there are no loose parts or yarn ends.
This amigurumi bear rattle is perfect for beginners and is a quick project for experienced crocheters. The end product is both functional and endearing—a perfect homemade gift to welcome little ones!
You can also customize these Bear Rattle Amigurumi to your desire. You Can Follow These AI-Generated images also.


Leave a Reply