

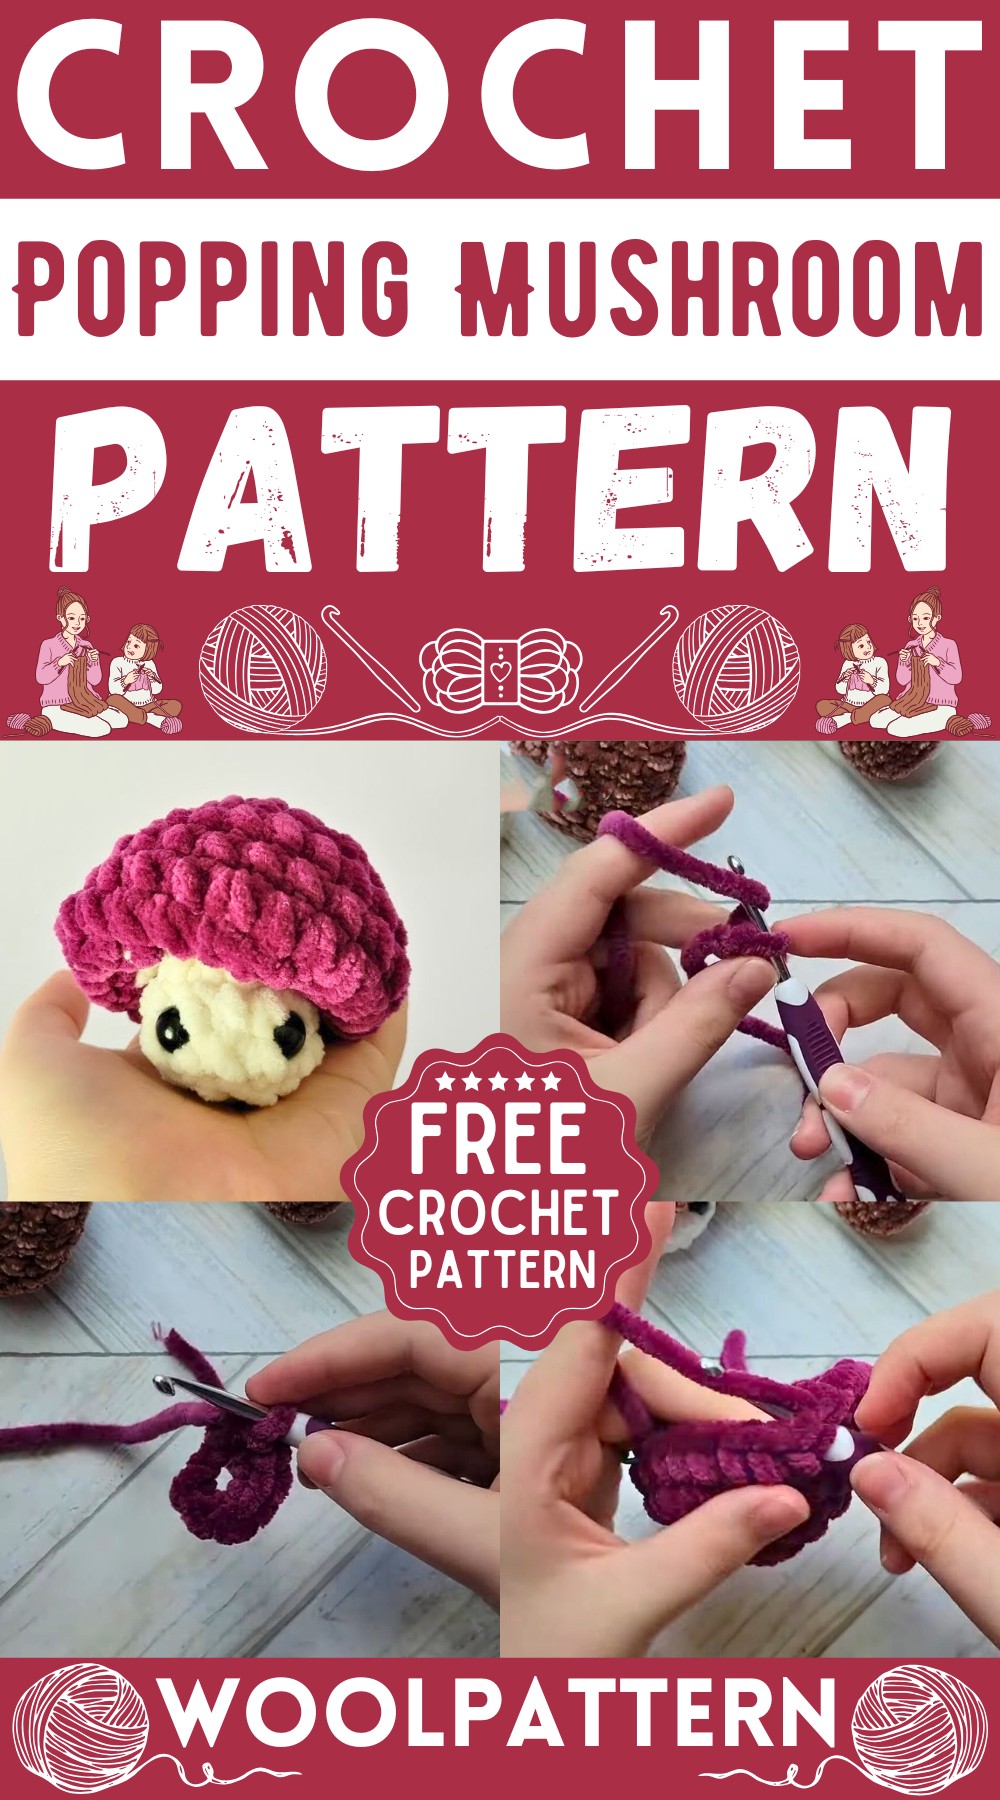
Let's talk about the charming crochet popping mushroom amigurumi! Imagine having a tiny, soft mushroom that not only looks cute on your shelf but also pops right in your hand. This little handmade treasure is made by looping yarn with a crochet hook, resulting in a delightful toy that's both squishy and interactive.
Crochet Popping Mushroom Amigurumi
Materials Needed:
- Yarn (Size 4 for the body, plushy size 6 for the cap)
- Crochet hook (5mm recommended)
- Scissors
- A couple of sewing needles
- A stitch marker
- Safety eyes (size to be determined based on yarn used)
- Stuffing or yarn scraps
Crochet Pattern:
Start with Cap Color:
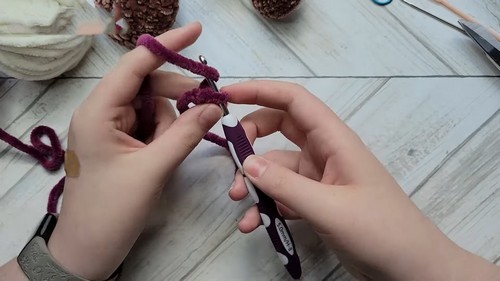
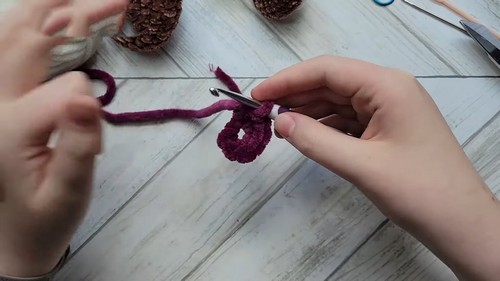
Create a Magic Ring/Chain 2 Method:
- Start with a slip knot, then chain 2. Into the ring or first chain, crochet 6 single crochets.
First Round Increment:
- Increase in each stitch around to have a total of 12 stitches.
Second Round (18 stitches):
- Increase, then single crochet in the next stitch. Repeat this sequence 6 times for a total of 18 stitches.
Third Round (24 stitches):
- Increase, then single crochet in the next two stitches. Repeat 6 times to have 24 stitches total.
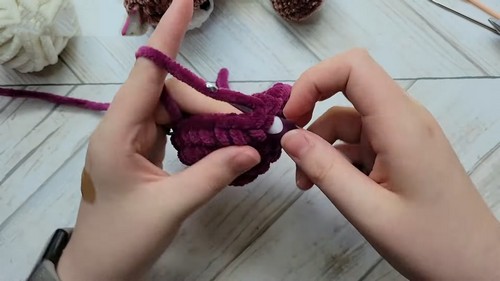
Next Four Rounds:
- Single crochet all around these rounds to form both the outside and inside of the mushroom cap.
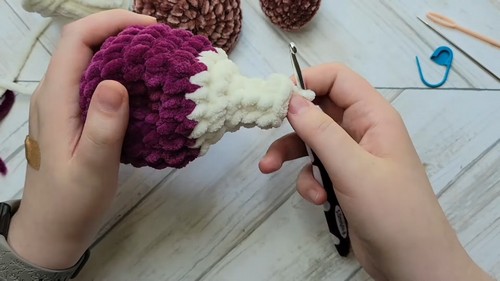
Color Change to Head Color:
- If changing colors, now would be the time to slip stitch, fasten off the cap color, and attach the head color yarn. Secure ends inside for durability.
Continuing with Head Color:
Decrease and Single Crochet Rounds:
- Begin decrease rounds by doing a decrease followed by single crocheting in the next two stitches around the round. For
- the next round, decrease followed by a single crochet and repeat all the way around.
Forming the Mushroom Cap:
- Continue with decrease stitches around (six times in a row) without stuffing the cap.
Creating the Head:
- For the next two rounds, single crochet six stitches around. Then, increase six times in the next round to start forming the head.
Final Steps for Head:
- Continue with two rounds of single crocheting 12 to form the head. Lastly, insert safety eyes, decrease three times, stuff the head (excluding
- the neck and cap), finish decreasing, and then slip stitch, chain one, and fasten off leaving a medium-length tail to close the hole.
Finishing Touches:
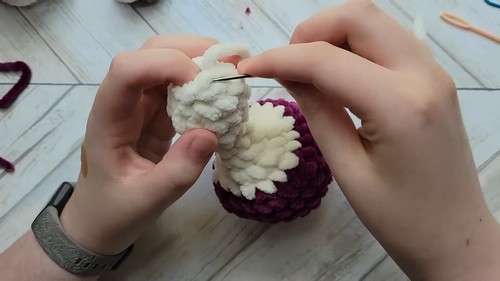
- Using a needle, weave through front loops of the remaining 6 stitches and pull tight to close the hole. Secure by knotting and hiding the tail inside.
- Cut the excess tail ensuring it doesn't poke out for a neat finish.


Leave a Reply