

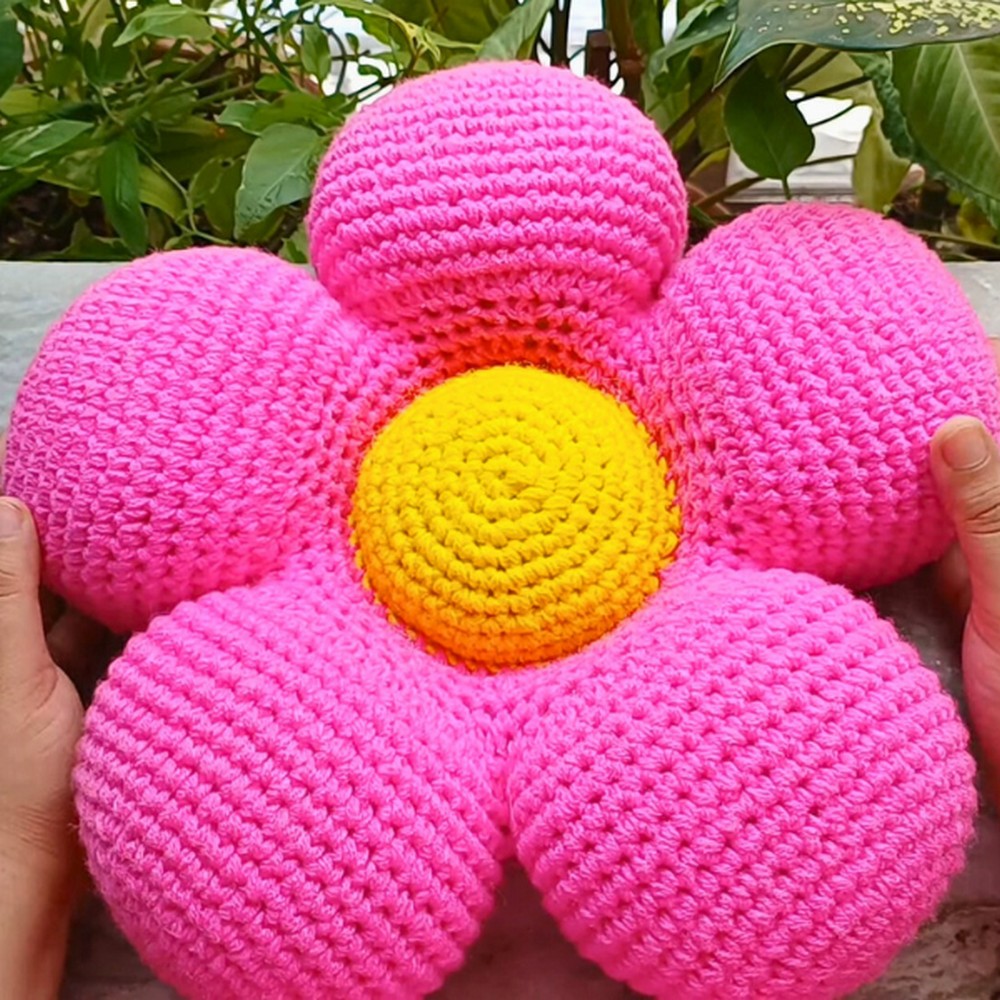
Brighten up any room with a homemade Crochet Daisy Flower Shaped Cushion! This charming project lets you hook together soft petals and a cozy center, turning simple yarn into a delightful floral display. Perfect for beginners and seasoned crocheters alike, this pattern provides a fun way to add a splash of color and homemade touch to your home.

How To Crochet Daisy Flower Shaped Cushion
Materials:
- Chunky yarn (or thinner 4-ply yarn doubled up for eight-ply consistency)
- 6 mm crochet hook
- Stitch markers or paper clips
- Yarn needle for sewing
- Stuffing material
Pattern Overview:
- Begin with making the petals (5 total) using an amigurumi style of crochet, working in continuous rounds.
- Join the petals to form the flower's shape.
- Create and sew the center of the flower.
Petal Pattern (Make 5):
Magic Circle:
- Start with making a magic circle.
- Chain 1 (this does not count as a stitch).
- Make 6 single crochets (sc) into the magic circle.
- Pull the circle tight by pulling on the tail.


Rounds Description:
Round 1:
- You begin with 6 sc within the magic circle.
Round 2 (Increase Round):
- Increase in every stitch around (12 sc).
In Round 3:
- Sc in 1 stitch, increase in the next repeat around (18 sc).
Round 4 (Staggered Increase):
- Sc in next 2 stitches, increase in the next repeat five times around (24 sc).
Round 5:
- Sc in the next 3 stitches, increase in the next repeat around (30 sc).

After Round 6 (Staggered Increase):
- Begin with sc in the first two stitches, then sc in next 4 stitches, increase in the next until the last two stitches, sc in these (36 sc).
Round 7:
- Sc in next 5 stitches, increase in the next repeat around (42 sc).
Round 8:
- Sc in each stitch around (42 sc).
For Round 9:
- Sc in the next 13 stitches, increase in the 14th repeat three times total (45 sc).
Round 10:
- Sc in each stitch around (45 sc).
In Round 11:
- Only two increases this round; Sc in the first 11 stitches, increase in the 12th, then sc in the next 21 stitches, increase, and sc in the remaining stitches (47 sc).
Rounds 12-15:
- Sc in each stitch around for four rounds (47 sc).
Petal Assembly:
- After Round 15, cut the yarn and fasten off on 4 petals, leaving a tail. Keep the yarn attached on the fifth petal to connect them.
- Connect the petals by working 24 sc on one petal's edge, then continue to the next petal without cutting the yarn, connecting all five.

Flower Center:
Rounds 1-7:
- Follow the same instructions as the petal rounds (1-7). Finish two centers.
Rounds 8-9 for Center:
- Sc in each stitch around (42 sc).
- Sew the two centers together, back-to-back, leaving an opening to stuff, then close.

Final Assembly:
- Stuff the petals generously.
- Sew the flower center inside the petal ring using the yarn tail left from connecting the petals, ensuring the stitch count aligns.
- Securely weave in all ends.
https://youtu.be/c49bwA3Fu9M

Leave a Reply