

Wrap yourself up in a cozy knit cable sweater, like a warm hug on a chilly day. Picture the twisted patterns, like little roads and paths woven together in soft yarn, making every sweater unique and full of personality. Knitting one of these sweaters is like putting together a puzzle, where each stitch connects to the next in a beautiful dance.
Knit Cable Sweater

It's not just about staying warm; it's about adding a piece of art to your wardrobe, something made by you, for you. Whether you're new to knitting or have been doing it for years, making a cable sweater is a fun and rewarding project that adds a touch of charm to any outfit.
Step 1: Planning and Swatching
Yarn Selection: A lightweight, woolly fingering weight yarn was chosen, suitable for the standard gauge knitting machine (compatible with lace, fingering, and sometimes sport weight yarns).
Swatching: Different swatches were made to decide on the pattern (cables vs plain knitting):
- Several swatches were knitted to determine the exact design, alternating between cables and plain knitting.
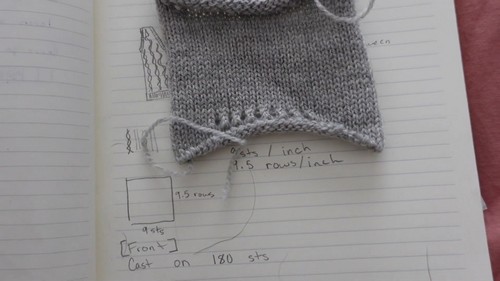
Step 2: Design and Math
- Sketching: A basic drawing of the desired sweater vest was made.
- Math Calculations: Measurements from the most liked swatch were used to compute the dimensions and design of the vest.
Blueprint Creation: A diagram was drawn to solidify the design plans, focusing on ensuring proper fit, particularly around the V-neck shaping.

For Step 3: Knitting the Main Pieces
- Front and Back Panels: The front and back of the vest were knitted according to the planned design.
- Cable Knitting: Cables were incorporated into the design as per the final swatch decided upon.
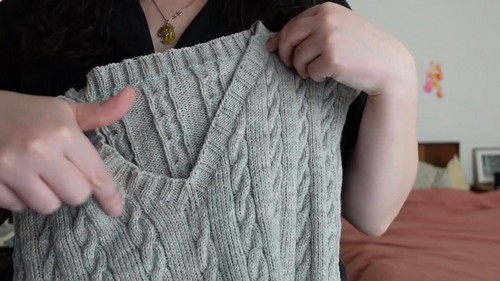
Step 4: Detailed Work on Edges
- Neckline: After seaming one shoulder, stitches were picked up along the neckline to work a 2x2 rib. This included some decreases to fit the neckline properly.
- Armholes: Stitches were picked up around the armholes to knit the ribbing.
- Ribbing: The bottom ribbing was left until after the main body was assembled to adjust the length based on fitting.
Step 5: Assembling and Finishing Touches
Seaming: The side seams of the vest were sewn.
- Blocking: The entire vest was blocked (a process to even out the knitting and ensure it holds its shape). This was done on top of a dryer due to space constraints.
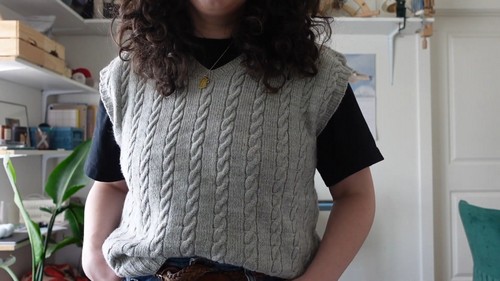
For Step 6: Final Adjustments and Completion
- Ends Weaving: Loose ends were woven in.
- Final Evaluation: The fit and comfort of the completed vest were evaluated, considering making another version with adjustments based on this experience.


Leave a Reply