

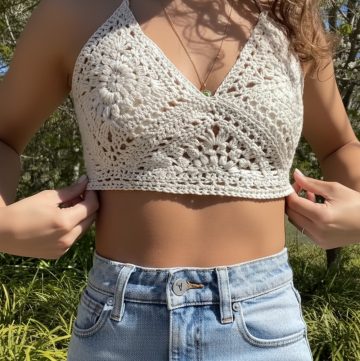
Lift your style with the Free Crochet Boho Chic Backpack Pattern, offering a stylish, lightweight, and functional accessory perfect for everyday adventures.
Soft textures and relaxed shapes can turn an everyday accessory into something quietly expressive, offering both style and comfort without excess effort. The Free Crochet Boho Chic Backpack Pattern introduces a charming accessory that feels natural, airy, and suited to moments that call for easy movement and subtle character.
Calm Crochet Boho Chic Backpack Pattern ideal for relaxed looks

Its spacious form holds essentials with ease, making it ideal for errands, campus days, park walks, or light outings where convenience matters as much as appearance. Gentle detailing gives the bag a laid-back personality that pairs well with casual outfits, flowing fabrics, or simple staples, allowing it to match a wide range of wardrobes. The lightweight structure sits comfortably on the shoulders, while the sturdy build keeps belongings secure without adding unnecessary weight.

Its practical shape supports books, small devices, and personal items, making it a dependable choice for those who appreciate comfort with a hint of style. With the option to choose colors and textures that reflect personal taste, the backpack gains a signature look that feels special and unique. Whether used daily or gifted thoughtfully, this boho-inspired bag offers charm, usefulness, and gentle visual appeal that suit every season and setting.

Crochet Leather Backpack Pattern
Materials Needed
- Leather Backpack Kit (Lu Machado's kit):
- Leather base and flap (black).
- Leather straps.
- Crochet Thread: 6 mm yarn (color: chocolate).
- Crochet Hooks:
- 4 mm crochet hook (for the base).
- 7 mm crochet hook (to easily work thicker stitches).
- Markers: For marking areas of increase and alignment.
- Tapestry Needle: For sewing straps and flap.
- Scissors: For trimming thread.
- Hot Glue: To temporarily fix buttons before sewing.
Step-by-Step Instructions
1. Create the Base
a. Mark the Increase Points
- Divide the leather base into four corners using markers. These points will serve as increase points for shaping the rectangular foundation.
b. First Row
- Insert the 4 mm crochet hook into the leather holes and start creating single crochet stitches.
- Use the second leg of each stitch to pull the yarn and proceed to the next.
- At each marked corner, make two stitches in the same hole to form the increase.
- Work loosely since the needle will be changed later to 7 mm for ease.

c. Switch to 7 mm Hook
- After completing the row, switch to the larger crochet hook to make the work smoother while maintaining loose stitches.
2. Work Additional Rows
a. Begin the Second Row
- Start with a single crochet in the first stitch and pick up loops under three legs of each stitch for a sturdy finish.
- Ensure stitches are neat and evenly stretched.
b. Continue Working in Circular Rows
- Transition into circular work after the second row, moving seamlessly from one row to the next without finishing individual rows.
- Place a marker on the first stitch of each row and move the marker as you advance.
c. Crochet Until the Desired Height
- Work rows in the same circular manner until the backpack base measures 20 cm in height.
- Carol completes 17 rows for her backpack.
3. Finish the Base
a. End the Final Row
- After reaching 17 rows, cut the thread and finalize by tucking the loose ends into the stitches. Use glue to secure them.
4. Crochet the Backpack Flap
a. Make a Chain Foundation
- Start with 6 chain stitches to form the base.
- Work into the back knots of the chain stitches to keep the flap neat.
b. Increase Rows
- Use markers to mark increase points.
- Gradually increase stitches at specific gaps (e.g., every 6th stitch, 7th stitch) on each row.
- Work rows until you complete 8 rows for the flap.

c. Add a Slip Stitch Row
- Create a final row of slip stitches across the flap to allow for easy sewing later.
5. Attach the Flap to the Backpack
a. Mark Stitch Alignment
- Fold the backpack to locate the precise middle of the back. Divide the leather base into two equal halves using markers.
b. Position the Flap
- Place the flap over the marked centers and align it correctly.
- Sew the flap onto the backpack using a tapestry needle, working through the loops created by the slip stitches.

6. Prepare and Attach the Backpack Straps
a. Cut the Straps
- Cut 34 leather strips, each 57 cm long.
- Burn the ends lightly to prevent unraveling.
b. Position and Secure Straps
- Attach the straps from the 4th stitch on the back of the flap.
- Use invisible thread to sew the straps onto the backpack for a clean finish.

7. Add Button Closures
a. Position Buttons
- Use a marker to determine the positions for large buttons (on the sides) and small buttons (on the flap for closure).
- Apply hot glue to keep the buttons temporarily fixed.
b. Sew the Buttons
- Secure all buttons with invisible thread for durability and clean attachment.
8. Make and Attach the Handle
a. Crochet the Handle
- Use single crochet stitches to create a 17 cm strap for the handle.
- Pick up both front and back loops to form a textured design.
b. Attach the Handle
- Position the handle at the top of the flap and secure it using a tapestry needle.
- Fasten securely by sewing through multiple points for stability.
Special Features
- Leather and Crochet Combination: The leather materials provide durability, while the crochet adds a handmade, decorative touch.
- Functional Design: Built-in straps, buttons, and flap make this backpack practical for everyday use.
- Clean Finish: Slip stitches and invisible sewing techniques ensure a professional look.
Level of Difficulty
Intermediate:
The project involves basic crochet stitches (single crochet, slip stitch), but combining crochet with leather components, marking increases, and attention to precision during sewing requires intermediate skill and patience.
Tutor’s Suggestions
- Work Stitch Markers: Place markers carefully for increase points and alignment while sewing to avoid mistakes.
- Stretch Stitches Neatly: Ensure all stitches are evenly stretched for a polished finish.
- Secure Buttons Properly: Use hot glue first for accurate placement, then reinforce with sewing.
- Use Quality Materials: Opt for sturdy leather and durable thread for long-lasting results.
Uses and Applications
- Versatile Accessory: Perfect for casual outings, carrying small essentials, or even gifting.
- Customizable Design: Adjust strap lengths and colors to suit your preferences.
- Skill Expansion: A great opportunity to practice combining crochet with sewing and leather.
Final Tip
When handling leather and crochet, use a larger needle for thick stitches to avoid breaking threads and ensure a smooth finish.
Conclusion
Carol Costa’s crochet leather backpack tutorial is a creative and practical project that showcases the blend of different mediums. With its detailed design and elegant finish, this backpack is both functional and stylish. Whether you’re looking to refine your skills or craft a unique piece for your wardrobe, this tutorial offers the guidance you need for a successful result.
Leave a Reply