

Add a touch of whimsy and seasonal charm to your space with a handmade decor item that’s as fun to make as it is to display. This free crochet Halloween pumpkin pattern offers endless possibilities for turning a few simple materials into festive decorations that brighten up any room. Whether used as table centerpieces, strung together as garlands, or added to gift tags for a unique Halloween touch, these pumpkins are both versatile and practical.
Crochet Halloween Pumpkin Pattern That Adds Charm to Your Home
Perfect for beginners and pros alike, the pattern uses basic stitches and gives you room to experiment with sizes, colors, and embellishments. Crocheting your own pumpkin is not only rewarding but also a sustainable way to enhance your seasonal decor while reducing waste from store-bought alternatives. This cozy, handmade pattern is also great as a thoughtful gift that adds a personal touch, making it even more special for friends and family.
Lightweight and easy to store, they can be reused year after year without losing their charm. Plus, working on this project is an excellent way to de-stress while celebrating Halloween creativity. Bring warmth and personality to your autumn vibe with this cheerful and satisfying crochet project that everyone will admire!
Materials Needed
Before starting, gather the following materials:
- Yarn in orange, black, and green (or your preferred pumpkin colors).
- A 0.6mm crochet hook (or a size suitable for your yarn type).
- A tapestry needle.
- Safety eyes for decoration.
- Stitch markers to keep track of rows.
- Fiberfill for stuffing.
- A keyring or loop for hanging.
- Scissors.
https://youtu.be/onTMwP21SX8
Step-by-Step Instructions
Start with a Magic Ring
Begin by creating a magic ring, which will serve as the base for your pumpkin. If you're a complete beginner and unsure about how to make a magic ring, refer to Sonali’s recommended tutorial from her channel (mentioned in the video).
- Work 6 single crochets (SC) into the magic ring.
- Pull the yarn tightly to close the center of the ring.
Increasing Stitches
- Row 2: Work 2 SC in each of the 6 stitches from the previous row. This gives you 12 stitches.
- Row 3: Alternate between 1 SC in the stitch and 2 SC in the next stitch (pattern: 1, 2...). Repeat this pattern six times, ending with 18 stitches.
- Row 4: Follow a pattern of 1 SC in the first two stitches, then 2 SC in the third one. Repeat this six times, ending with 24 stitches.
- Row 5: Continue increasing with a pattern of 3 single SC (one in each stitch), followed by 2 SC in the fourth stitch. This row ends with 30 stitches.
- Row 6: Work 4 SC (one in each consecutive stitch) and then make 2 SC in the fifth stitch. By the end of this row, you’ll have 36 stitches.
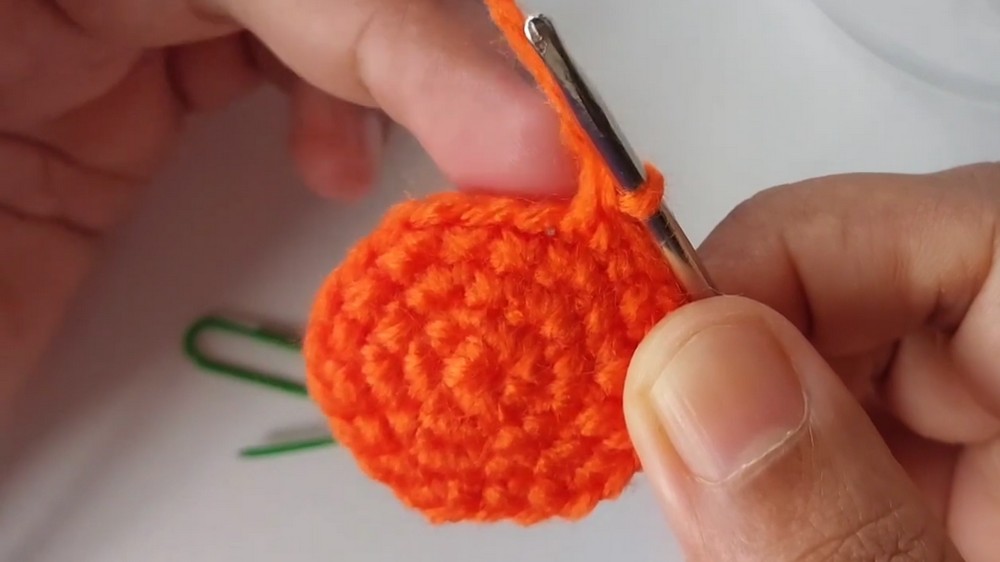
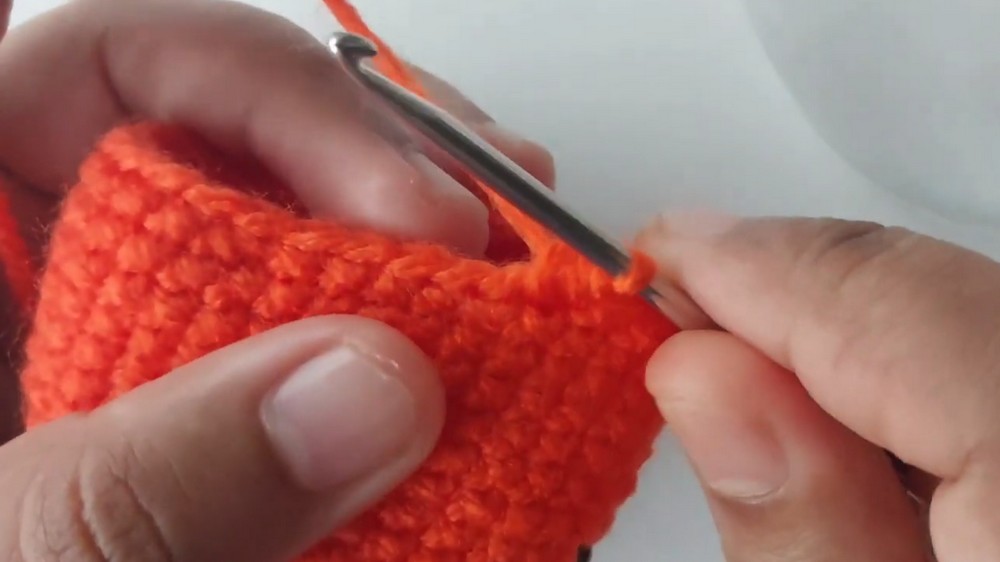
Build the Body (Rows 7-16)
For the next several rows (7–16), work 1 SC in each stitch without increasing. Maintain 36 stitches for a rounded pumpkin shape. Remember to use a stitch marker to track the starting stitch of each row. The tutor also suggests marking your progress on a notepad after finishing each row.
Start Decreasing (Rows 17-21)
Begin shaping the pumpkin by gradually reducing stitch counts:
- Row 17: 4 SC followed by a decrease (crochet two stitches together). Repeat this pattern six times, ending with 30 stitches.
- Row 18: 3 SC followed by a decrease. Repeat six times, ending with 24 stitches.
- Row 19: 2 SC followed by a decrease. Repeat six times, ending with 18 stitches.
- Row 20: 1 SC followed by a decrease. Repeat six times, leaving you with 12 stitches.
- Row 21: Work decreases only, crocheting two stitches together in each pair. At the end of this row, you’ll have 6 stitches left.
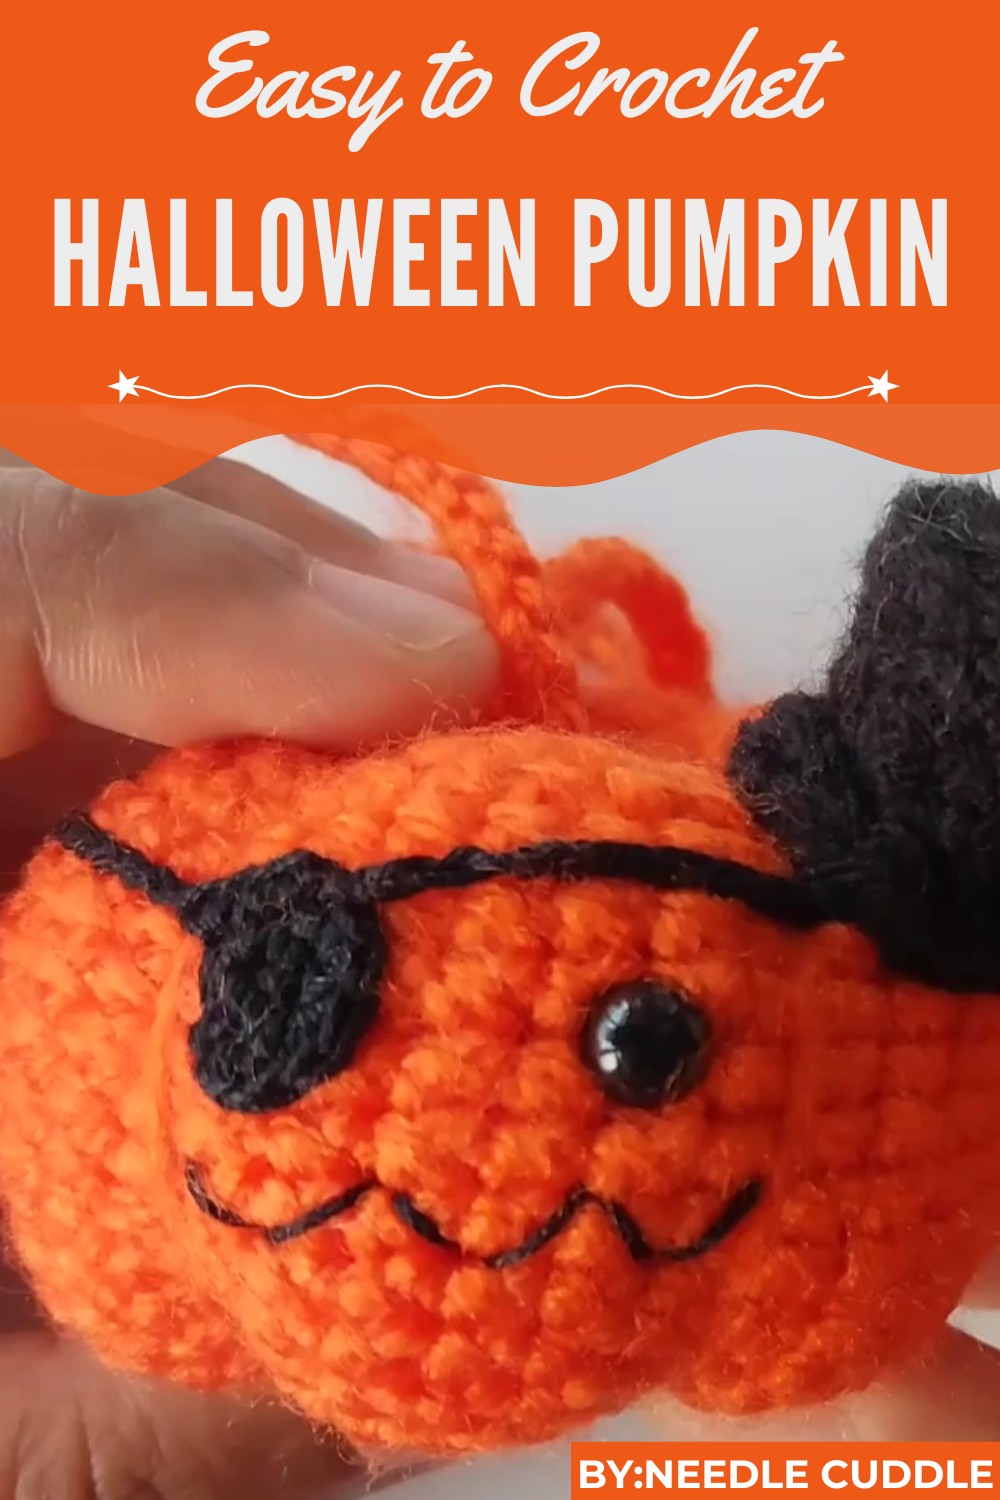
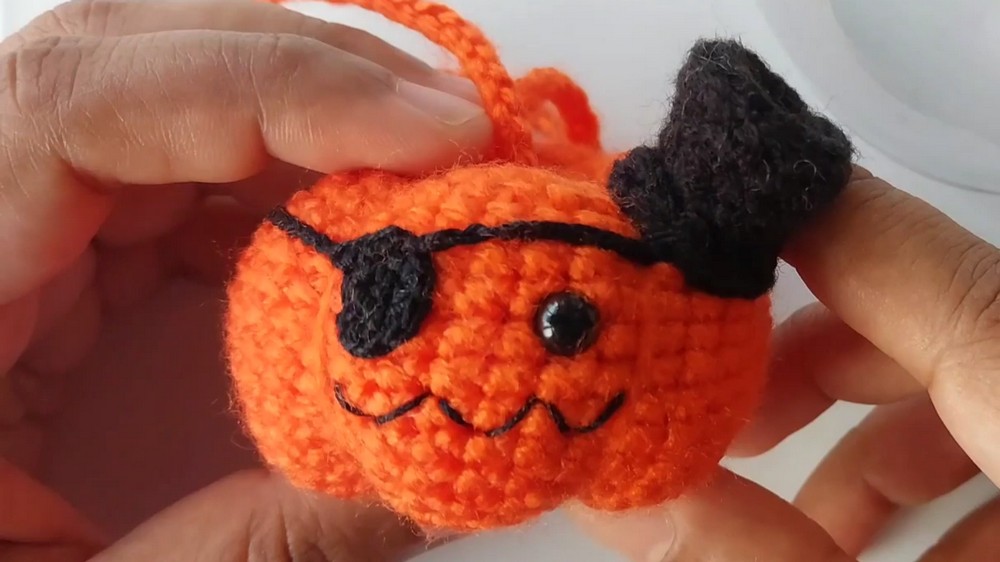
Add Safety Eyes and Stuff the Pumpkin
- Insert safety eyes between rows 9 and 10. Count rows from top to bottom with your last row on the left-hand side to accurately place them.
- Fill the pumpkin with fiberfill to give it a plump and round shape.
Close and Shape the Pumpkin
- Cut the yarn, leaving a long tail of about 1 foot for stitching. Use a tapestry needle to sew the top of the pumpkin closed. Pull the thread securely while evenly spacing bumps to form the pumpkin's ridges. Repeat this process six times to achieve the signature pumpkin shape.
Adding Details
Eye Covers
- To make eye covers for the pumpkin, use black thread (or any color you prefer) and a 0.6mm hook.
- Create a magic ring and work 6 SC into the circle, then close it.
- In the second row, work 2 SC in each previous stitch, ending with 12 stitches. Cut the yarn and leave a long tail for sewing.
- Ensure the chain loop fits over the pumpkin when draped.
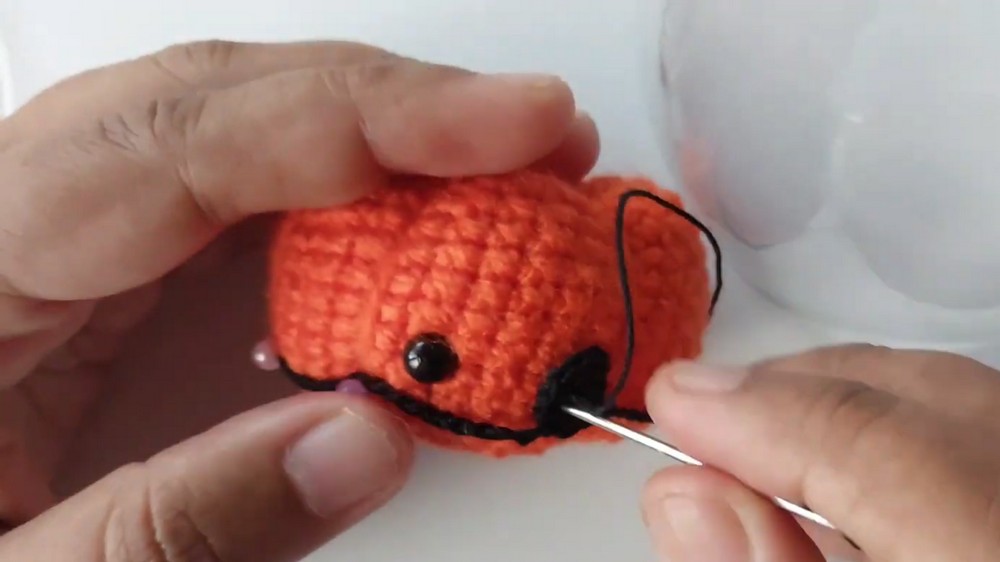
Adding the Smile
- Use black yarn to crochet or sew a zigzag design for the pumpkin’s mouth. Secure the yarn securely and hide the tail inside the body.
Adding a Hat
- Attach a small crochet hat to the top of the pumpkin for extra flair. You can add stuffing to the hat for a structured look.
Attach a Loop
- Take a long piece of orange yarn and insert it from the bottom center of the pumpkin to the upper center.
- Create 70 chains for a bag charm or fewer chains (around 20) for a keychain. Secure the loop at the bottom and fasten off.
Special Features
- Beginner Friendly: The project uses basic stitches like single crochet and increases/decreases, making it suitable for newbies.
- Customizable: You can switch up the colors, design, and embellishments to suit your preference.
- Versatile Uses: Perfect for Halloween decor, keychains, bag charms, or as a thoughtful handmade gift.
Tutor’s Suggestions
- Check whether the chain length is adequate before cutting the yarn for loops. Adjust accordingly.
- Use a stitch marker or notepad to track row progress.
- Ensure the placement of safety eyes and facial features is aligned before sewing.
Tip for Success
Always use high-quality yarn and keep your tension consistent throughout the project to ensure the pumpkin retains its shape and structure.
Conclusion
This crochet pumpkin is the perfect addition to your Halloween decorations and everyday accessories. Following the detailed tutorial not only helps develop your crochet skills but also ensures you crochet something charming, practical, and truly handmade. Whether you gift it to loved ones or keep it as part of your festive decor, this delightful pumpkin project is sure to impress everyone around you.


Leave a Reply