

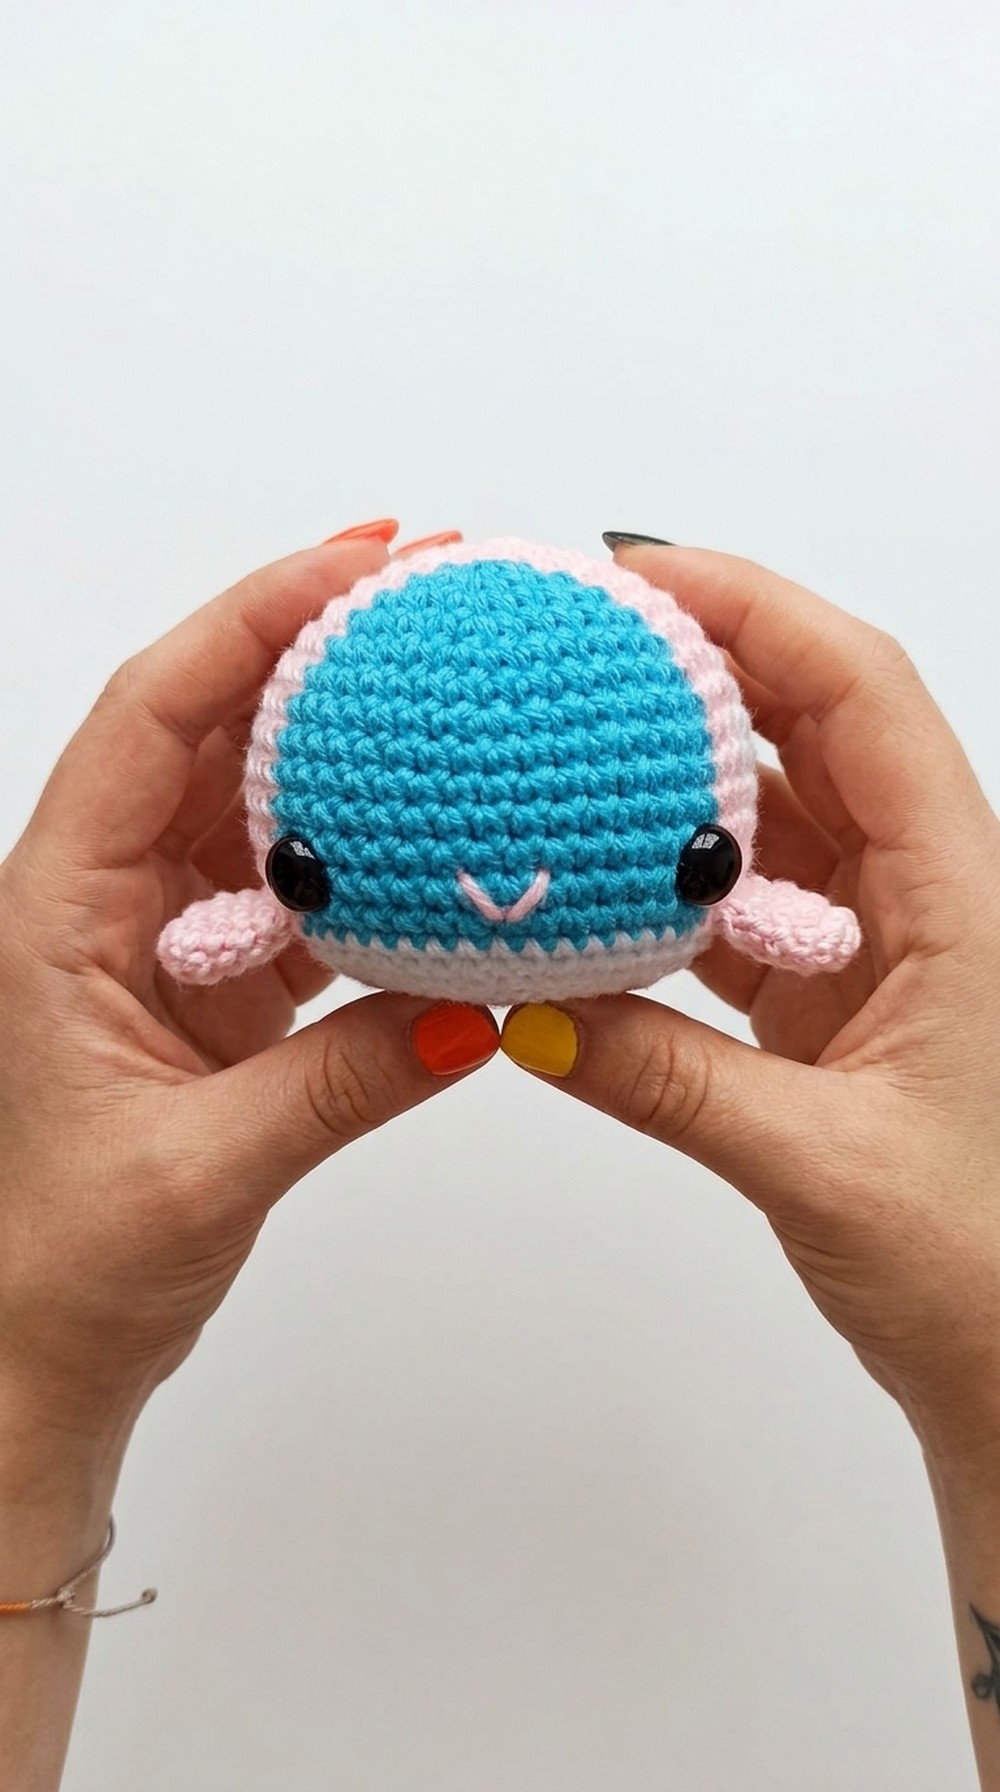
Cute Crochet Pride Whale Amigurumi Pattern to Celebrate Colors
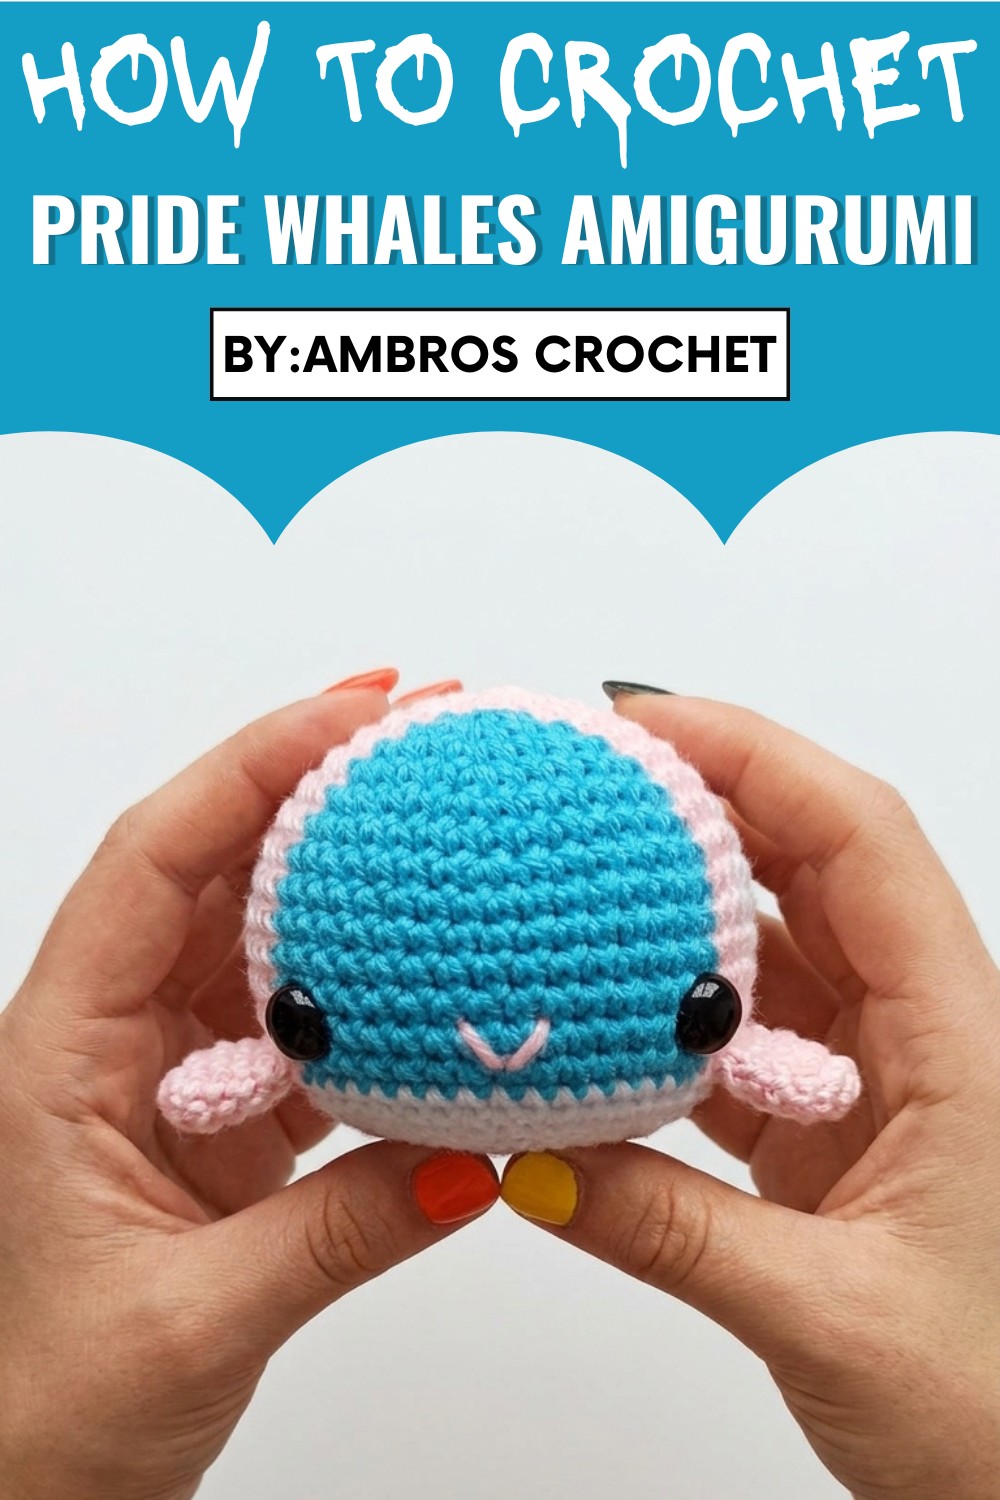
The Pride whale amigurumi pattern includes detailed instructions to shape the whale's smooth body, playful fins, and angled tail while incorporating bold stripes that can be customized with any colors of your choice. By following the easy-to-understand steps, even beginners with basic crochet skills can complete this heartwarming piece.
Each stitch comes together not only to crochet a charming project but also to celebrate individuality and self-expression through color. Plus, with minimal materials and portability, you can enjoy crocheting this joyful whale on the go or in cozy moments at home. Lightweight and adorable, it’s perfect for gifting during celebrations or as a year-round reminder of unity and diversity.
Skill Level
- Beginner to Intermediate.
- Requires basic knowledge of stitches such as single crochet, increases, decreases, chains, and working in rounds.
Materials You’ll Need
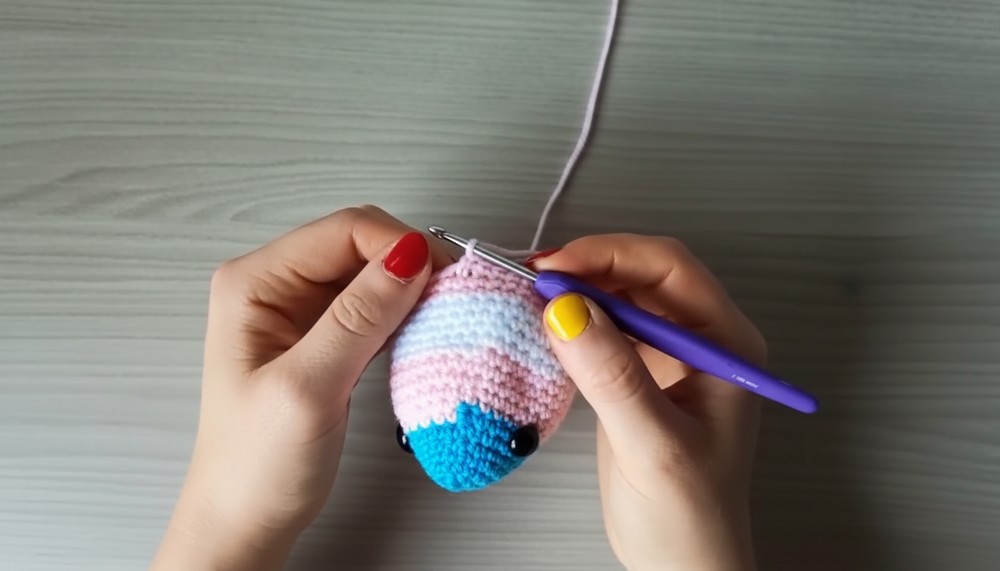
- Yarn: Light blue, white, and pink (or colors of choice).
- Crochet Hook: 3mm or appropriately sized for your yarn.
- Safety Eyes: 10mm or 12mm (alternatively, black thread for embroidered eyes).
- Toy Stuffing.
- Tapestry Needle.
- Scissors.
- Pins (to help position pieces before sewing).
Stitches Used
- Magic Ring (MR): Seamless base for starting rounds.
- Single Crochet (sc): Primary stitch used throughout.
- Single Crochet Increase (inc): Two single crochets worked into one stitch.
- Single Crochet Decrease (dec): Combine two stitches into one.
- Chain (ch): Foundation, and optional decorative use.
Pattern Instructions
Whale Body:
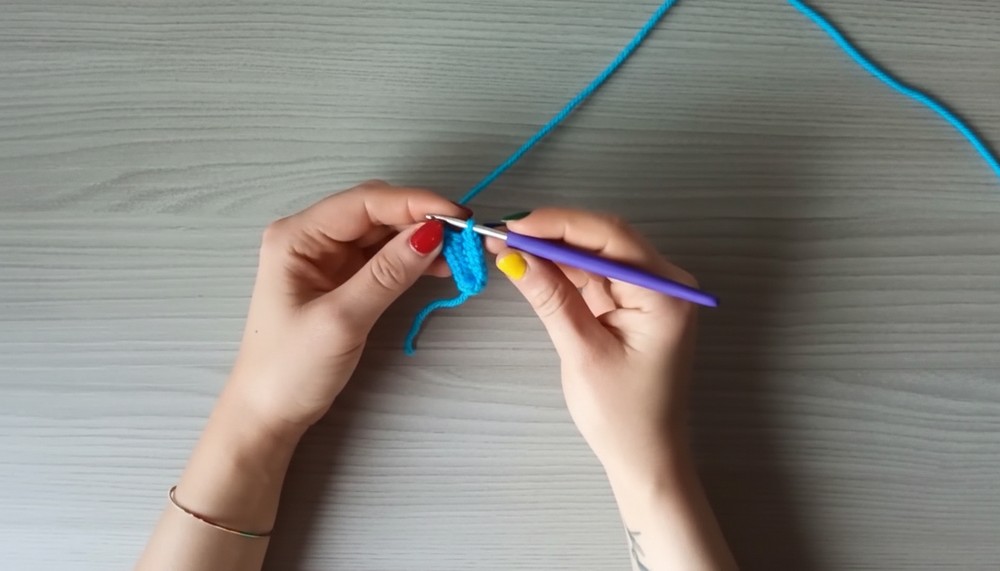
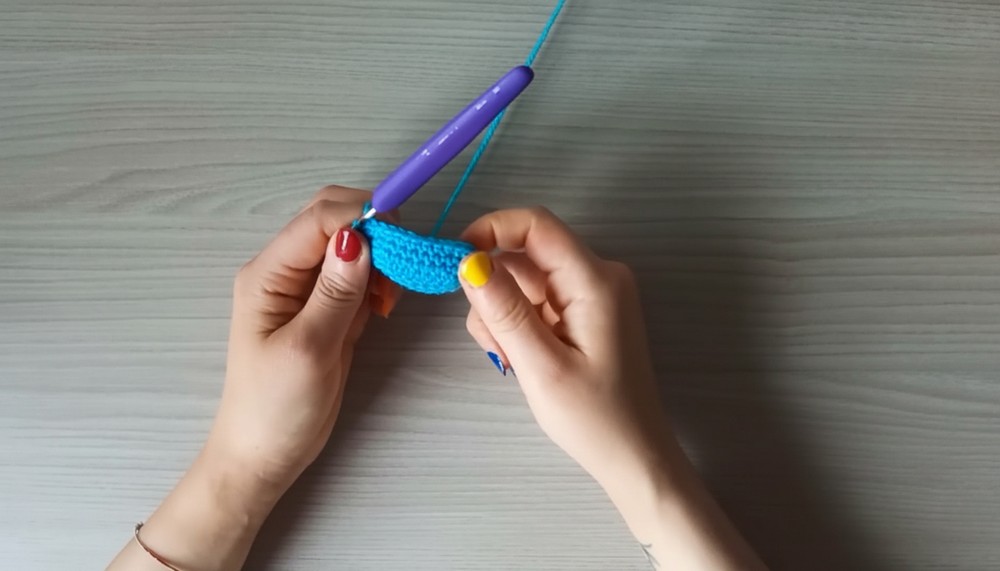
Round 1
- Start with a magic ring, and chain 9 ch.
- Start from the 2nd chain from the hook and make 1 sc into each of the next 7 chains.
- Into the last chain, work 3 sc to turn around slightly.
- Close the magic ring and move to the underside of the starting chain.
- Make 1 sc into each of the next 6 chains.
- Into the last chain, make 2 sc.
R- 2
- Work 1 inc into the first stitch.
- Make 1 sc into the next 6 stitches.
- Work 1 inc in the next stitch, then 1 sc in the following stitch. Repeat 1 inc, 1 sc for the next 6 stitches.
- Into the last stitch, make 1 inc.
- You’ll now have 22 stitches.
R- 3
- Work 1 sc in each stitch around. (No increases.)
R-4
- Start with 1 sc, followed by 2 inc back-to-back.
- Work 1 sc in the next 6 stitches. Repeat 2 inc, 6 sc around to the last 2 increases.
- You’ll now have 30 sc.
Round 5–6
- Work 1 sc into each stitch around for both rounds (30 stitches).
Color Changes
- Switch colors as desired. For the pride whale, each stripe represents the trans flag colors, with edges expanded to 6 rounds and inner stripes lasting 5 rounds.
- At the start of round 7, introduce the pink yarn.
Rounds 7–13
- Continue working 1 sc in each stitch for 6 or 5 rounds per stripe. Use pins to mark starting and stopping points for color changes to maintain clean transitions.

Decreasing the Body (Tapering to Tail):
Round 14:
- Work as follows:
- 9 sc. 3 sc, 1 dec repeated 6 times.
- Finish the round by making 3 sc to close the loop.
Round 15–16
- Work 1 sc in each stitch around, keeping 36 sc at the end of each round.
Rounds 17–19
- Start decreasing by working 2 sc, 1 dec repeated 6 times.
- Add stuffing to maintain the whale’s flat bottom shape.
Rounds 20–28
- Gradually decrease with:
- 2 sc, 1 dec for round 20.
- 1 sc, 1 dec repeated 6 times from rounds 21 to 28, tapering the body neatly to form the base of the tail.
Fins (Make 2):
- Round 1: Begin with a magic ring, make 6 sc into the ring (6 sts total).
- Rounds 2–6: Continue with 1 sc in each stitch for 4 rounds.
- Fold the fin in half and single crochet the two edges together.
Tail Pieces (Make 2 Triangles):
- Round 1: Start with a magic ring, and 6 sc into the ring.
- Round 2: Continue with 1 sc in each stitch for one round.
- Rounds 3–4: Work increases and single crochet rows for odd shapes or points.
- Fold the edges and crochet them together.
Assembly Instructions:
- Attach the Fins:
- Place fins near the eyes, starting one round beneath them. Position perpendicular to the body and gradually angle backward until aligned. Ensure symmetry with pins before sewing.
- Attach Tail Pieces:
- Align the tail triangles with the main body’s final taper. Angle carefully, ensuring they match the direction of the whale's curve.
- Secure the Safety Eyes:
- Place eyes between rounds 6 and 7, counting 6 stitches apart. Mark with pins before securing.
- Stuffing Tips:
- Carefully shape the whale with stuffing to maintain flat bottom surfaces and a tail angle. Adjust stuffing within the tail to ensure smooth transitions.

Special Features:
- Customizable Colors for pride flags or personal art themes.
- Realistic Flat Bottom Design for easy display.
- Detailed Tail Angling and Fin Placement to mimic whale anatomy.
Tutor’s Suggestions:
- Use stitch markers between color changes for clean transitions.
- When decreasing, hold the tail’s structure by frequently reshaping with your hands.
Conclusion
This Crochet Pride Whale Amigurumi Pattern is a heartwarming tribute to creativity and celebration. With simple techniques and freedom for customization, crocheters can enjoy making an expressive and meaningful piece. Whether as a gift or a display item, this project spreads joy, diversity, and the magic of handmade art.
Tip from the Tutor:
For a polished look, finish edges of the tail and fins tightly, adding tiny knots if needed. This prevents yarn fraying and ensures durability for your whale amigurumi masterpiece.


Leave a Reply